
Each connected WordPress site has its own settings in CoSchedule. Use them to match WordPress authors with team members and to choose which categories and custom post types CoSchedule uses. This works on every plan. Owners, Managers and Admins can match authors; Owners and Admins can change categories and custom post types.
Open a site's settings
- Go to Settings > Integrations > WordPress.
- Click Manage Site for the site.
Match WordPress authors to team members
When a WordPress author is matched with their CoSchedule account, they get notifications about their posts and become a contributor on those projects. You don't need to match every author.
- In the site's settings, go to WordPress Authors.
- For each author you want to match, choose a team member in the Team Member list.
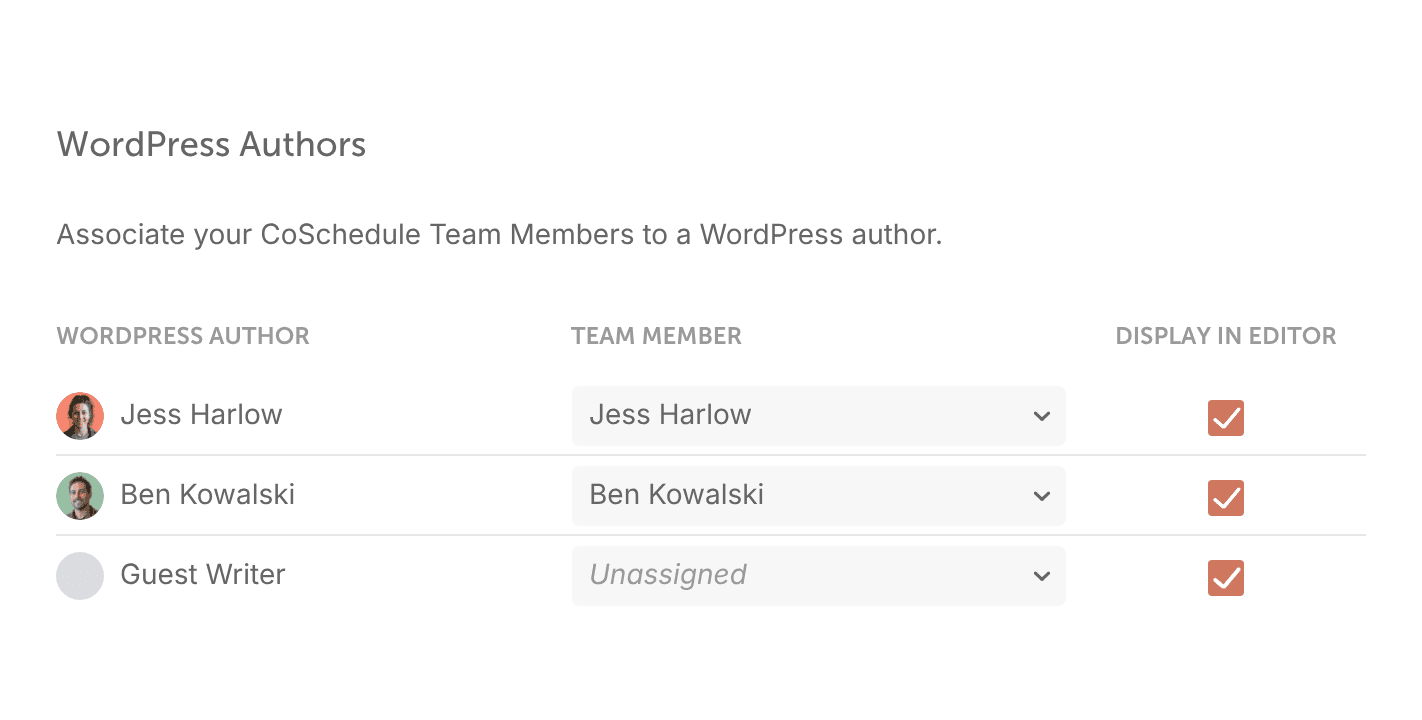
Only WordPress users with the Administrator, Editor, Author or Contributor role sync to CoSchedule. Custom roles, such as roles a membership plugin adds, don't sync. CoSchedule loads up to 200 users per role; contact support if you need more.
If an author is missing, give them one of those roles in WordPress, then refresh the connection. See Connect WordPress to CoSchedule.
Choose which categories show
- In the site's settings, under WordPress Categories, click Enable.
- Under Display In Editor, select the categories you want to choose from in CoSchedule.
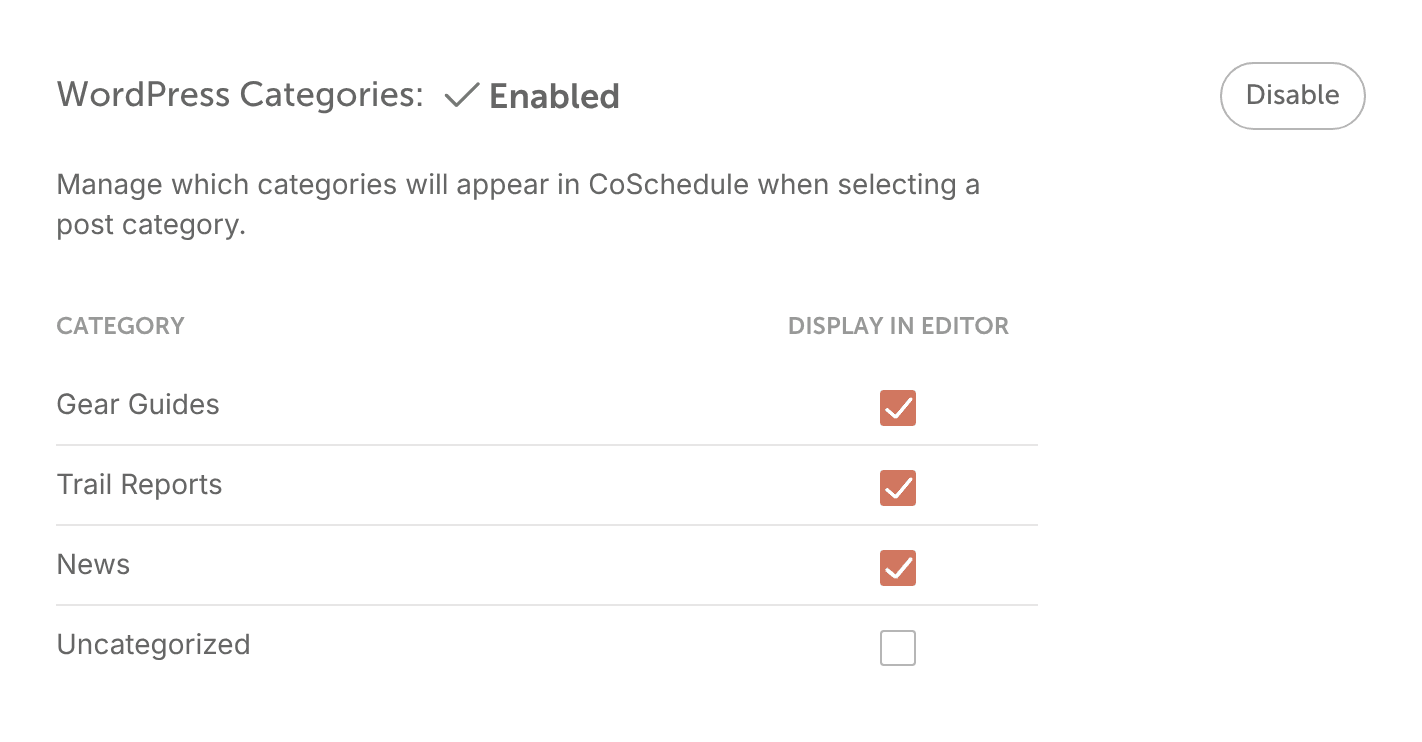
- Click Refresh Connection at the top of the page.
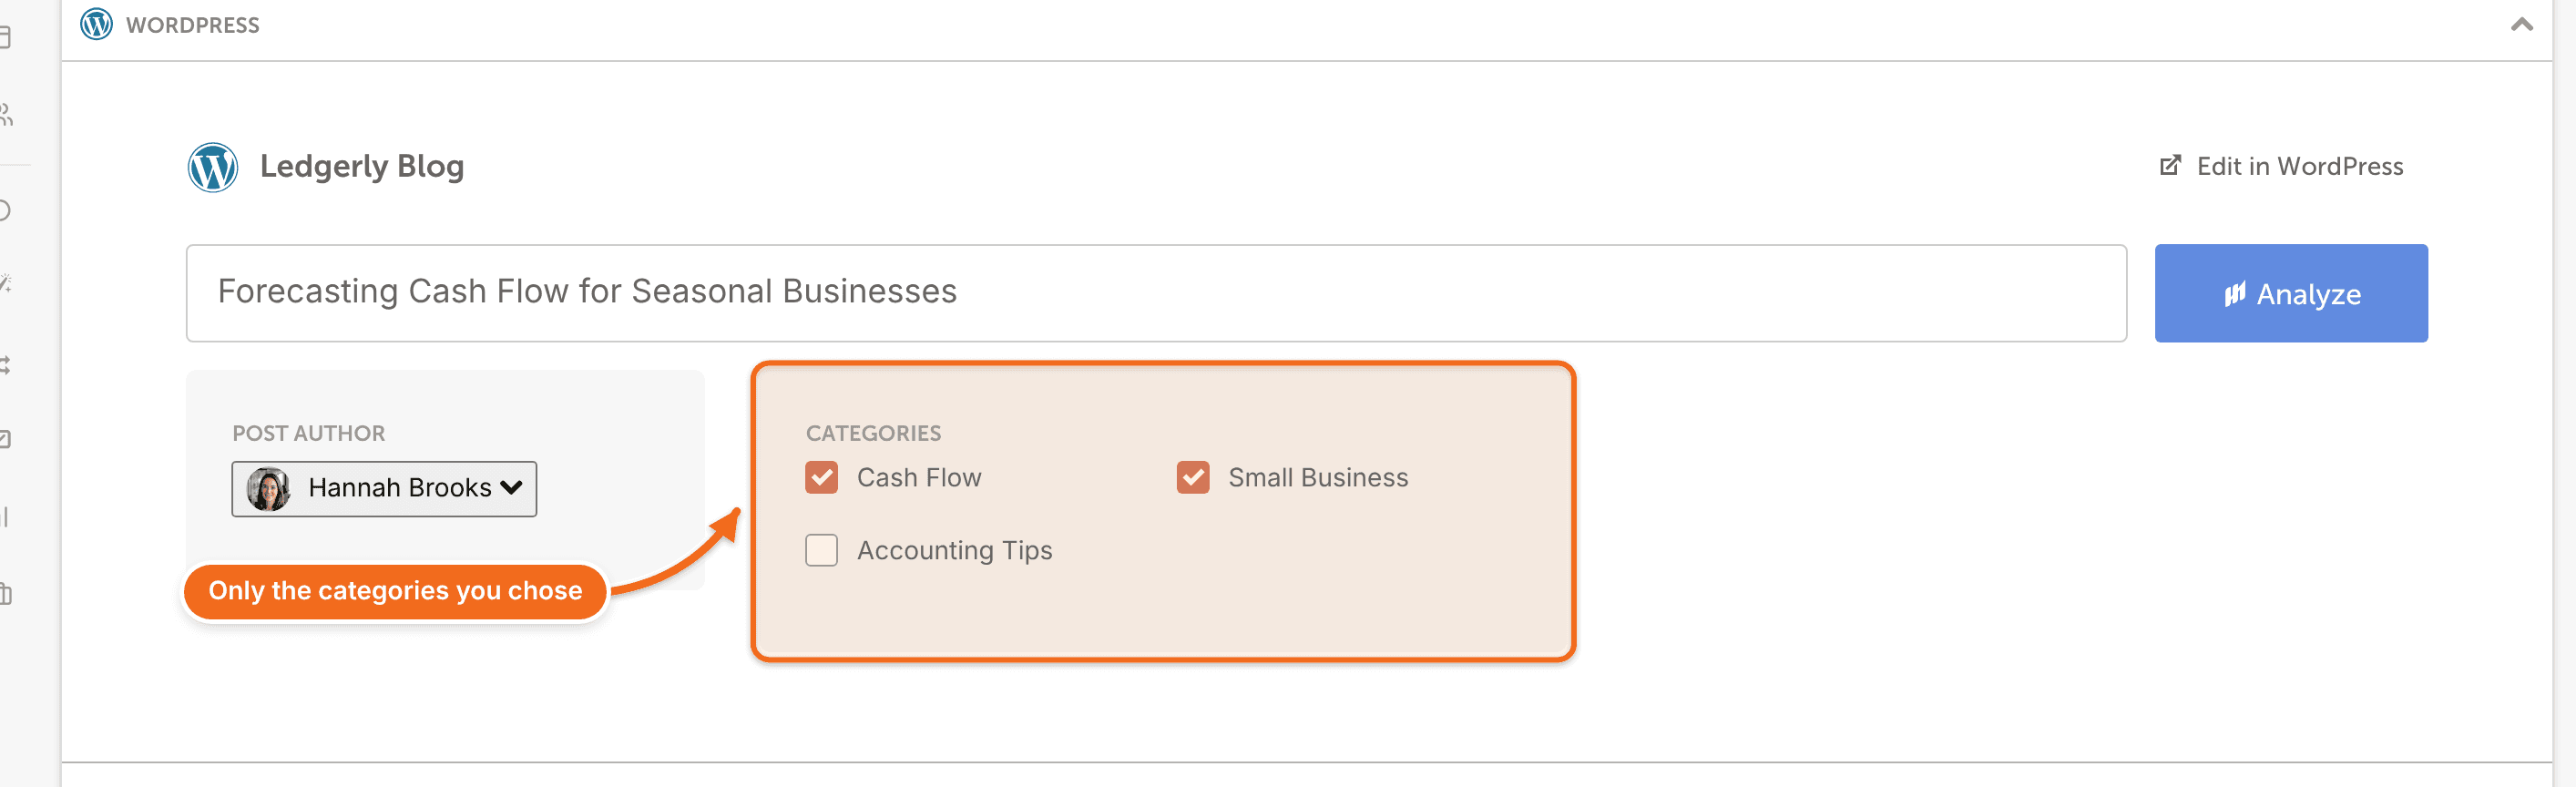
The WordPress section of your projects now lists only the categories you selected. All categories still show as calendar filter and saved view options.
Show custom post types
Custom post types are other kinds of content your theme or plugins add to WordPress, such as products. Posts and pages are post types too. Custom post types sync only after you turn them on and select them here.
- In the site's settings, under WordPress Custom Post Types, click Enable.
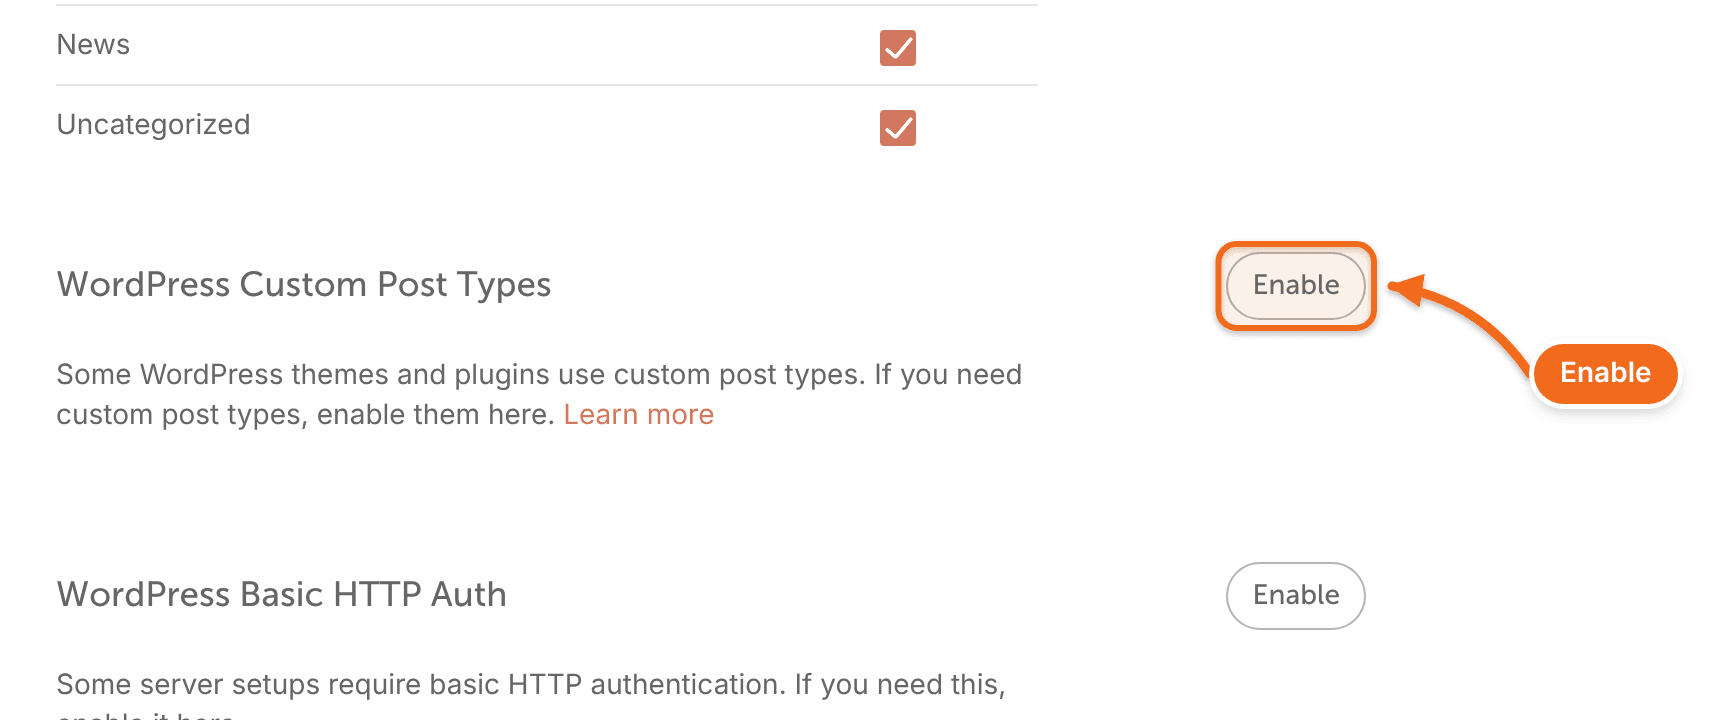
- Under Display On Calendar, select the post types you want on your calendar.
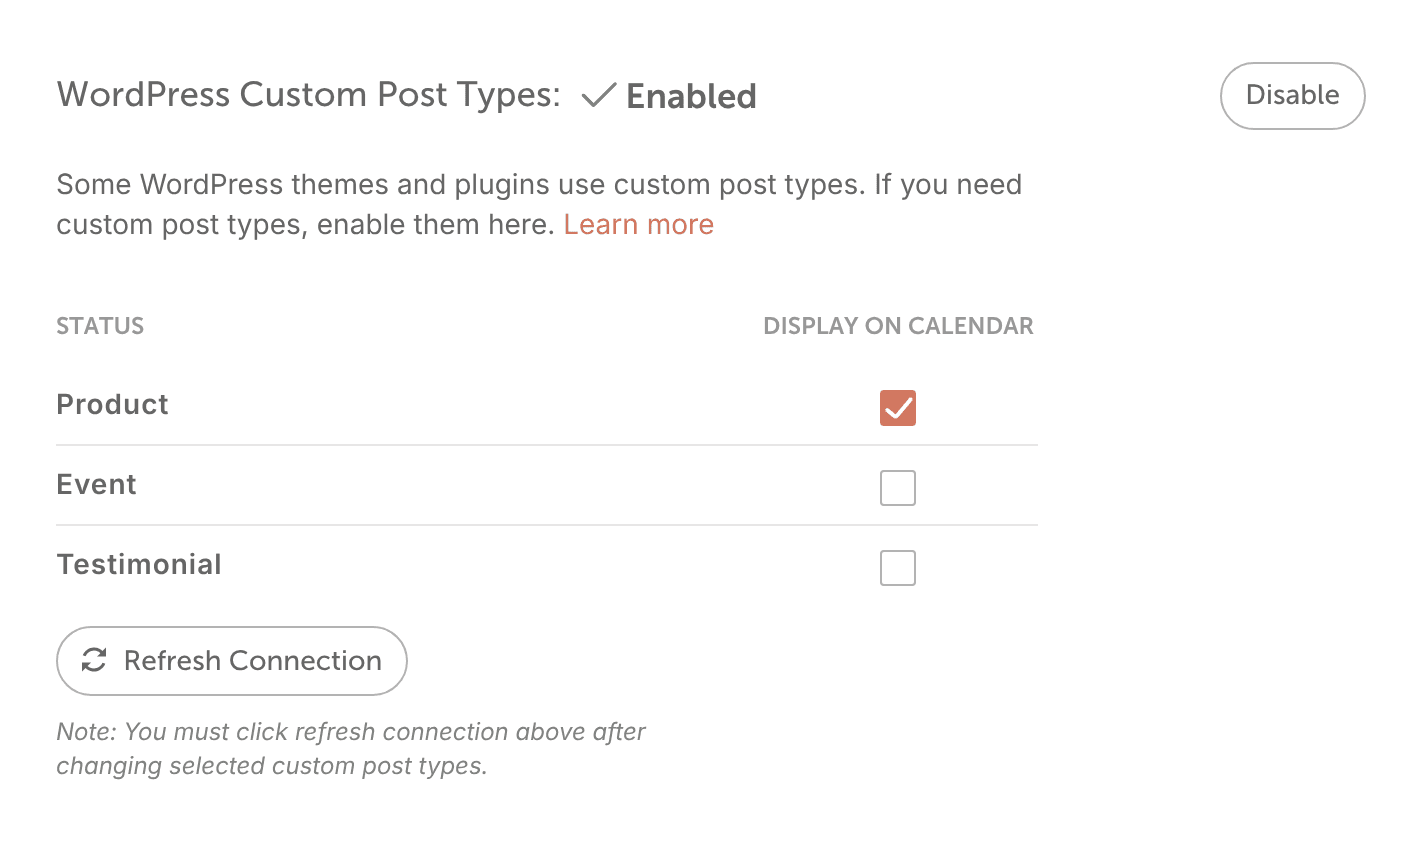
- Click Refresh Connection at the top of the page.
The WordPress section of your projects now has a Post Type list.
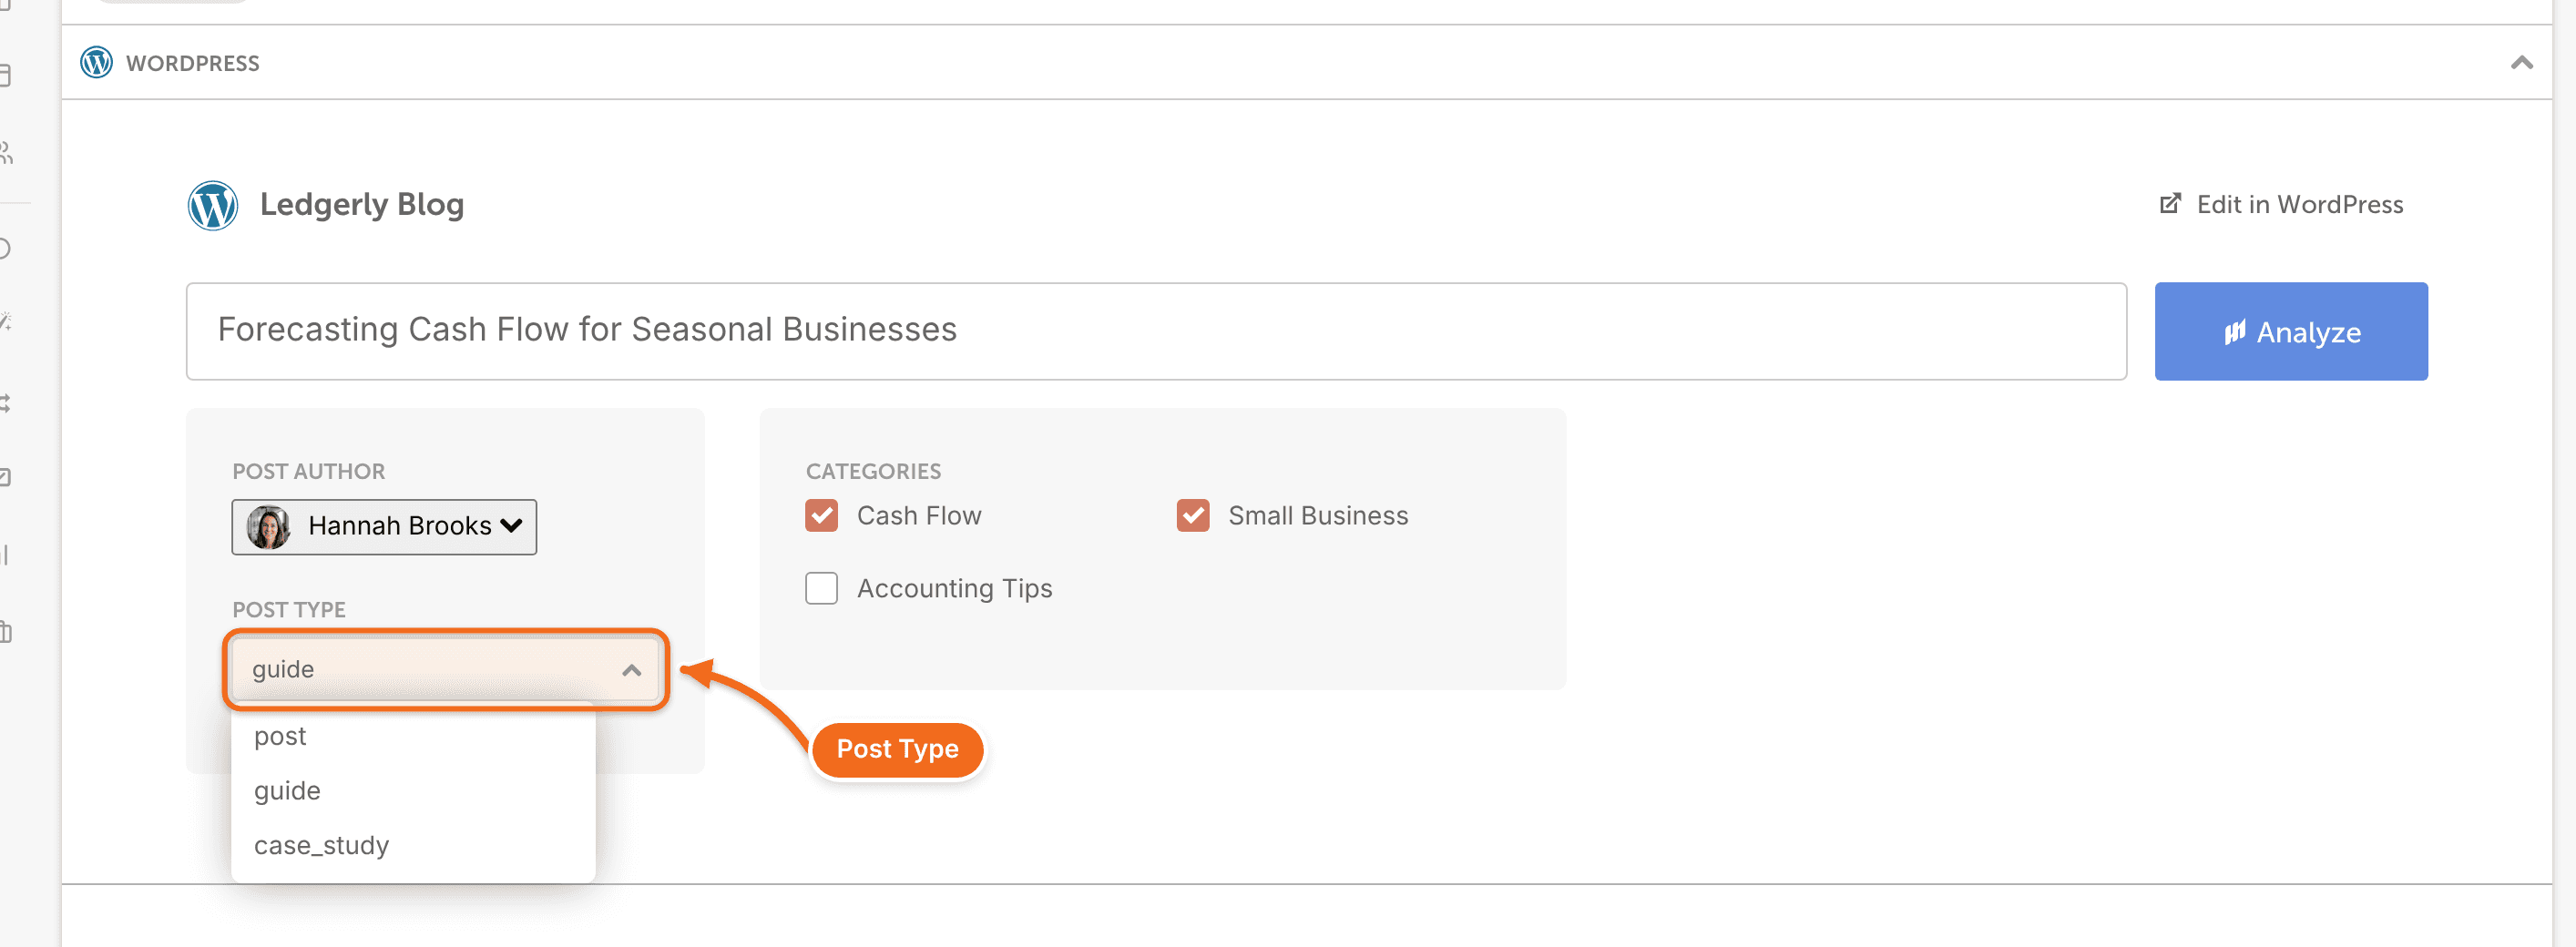
If a post type still doesn't show, refresh the connection again. If it's still missing, contact support.