Having trouble keeping track of assets and creating them on time?
CoSchedule’s Asset Organizer puts an end to all of that wasted time looking for logos, files, and photos that you can’t seem to find.
Introduction
What is this guide? This lesson goes into detail about the best practices for creating assets within CoSchedule with Asset Organizer.
Who’s this guide for? Marketers who want to learn the best way to manage their assets with CoSchedule’s Digital Asset Management solution.
What you’ll learn:
- How to create assets while using functionalities of Asset Organizer
- How to share assets within the creation process with internal and external stakeholders
How Should You Implement Digital Asset Management With CoSchedule?
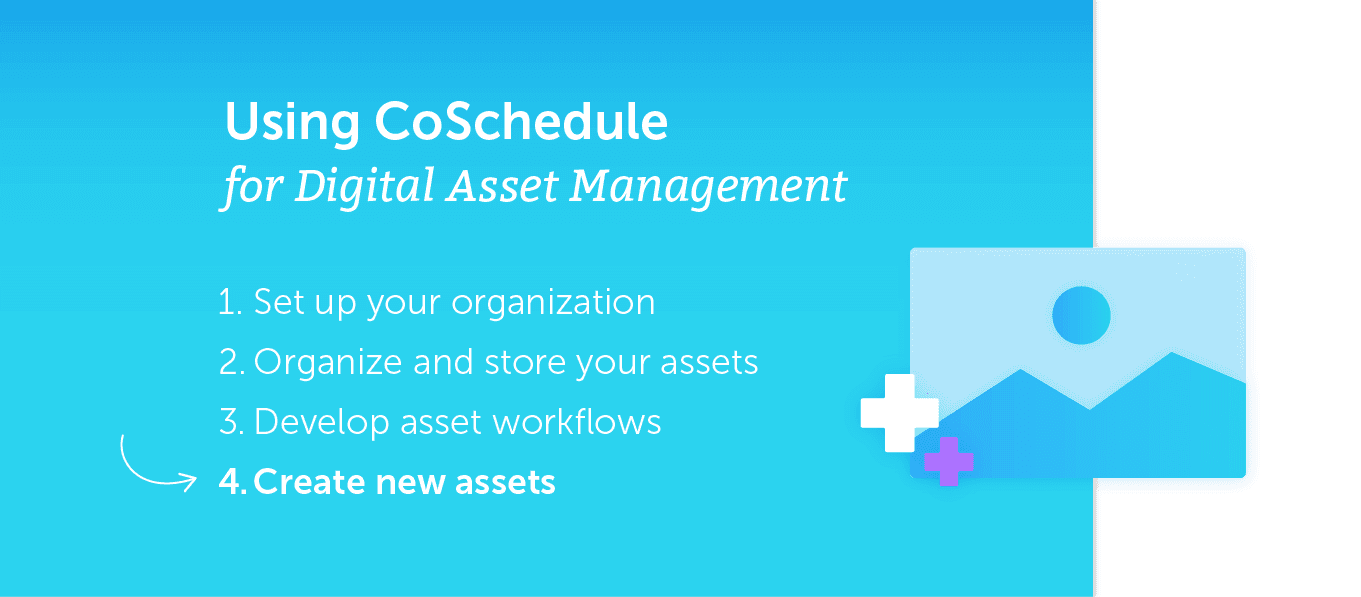
There are four steps you can follow to start implementing Asset Organizer. The last of which is actually creating new assets. If you missed the previous steps, click
here.
Now that your workflows have been put in place, it’s time to create the asset itself. You want to create quality work on time and also prove our value to stakeholders.
This is the defining step of that process. Now, it’s time to use Asset Organizer in its full potential and create quality content.
Creating Assets in CoSchedule
Now that you have gone through the checklist, you can start creating the actual assets.
Creating these assets will include using the structure that has been set up within CoSchedule and using the workflows that have been created in
previous lessons.
Let’s get started.
Creating a Project
First thing that you’ll do is to open up a project and begin creating it, and then assign color labels to the project. Color labels are the first level of organization for categorizing your assets.
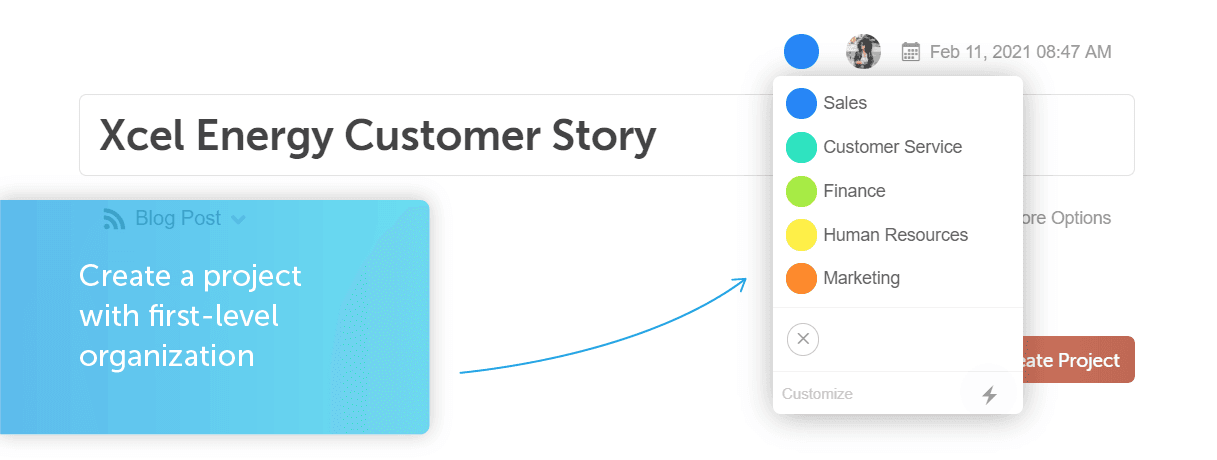
Apply tags to the project to categorize them even further. Tags will add an additional layer of taxonomy, so you can find projects quickly, segment projects more granularly, and make reporting easier.
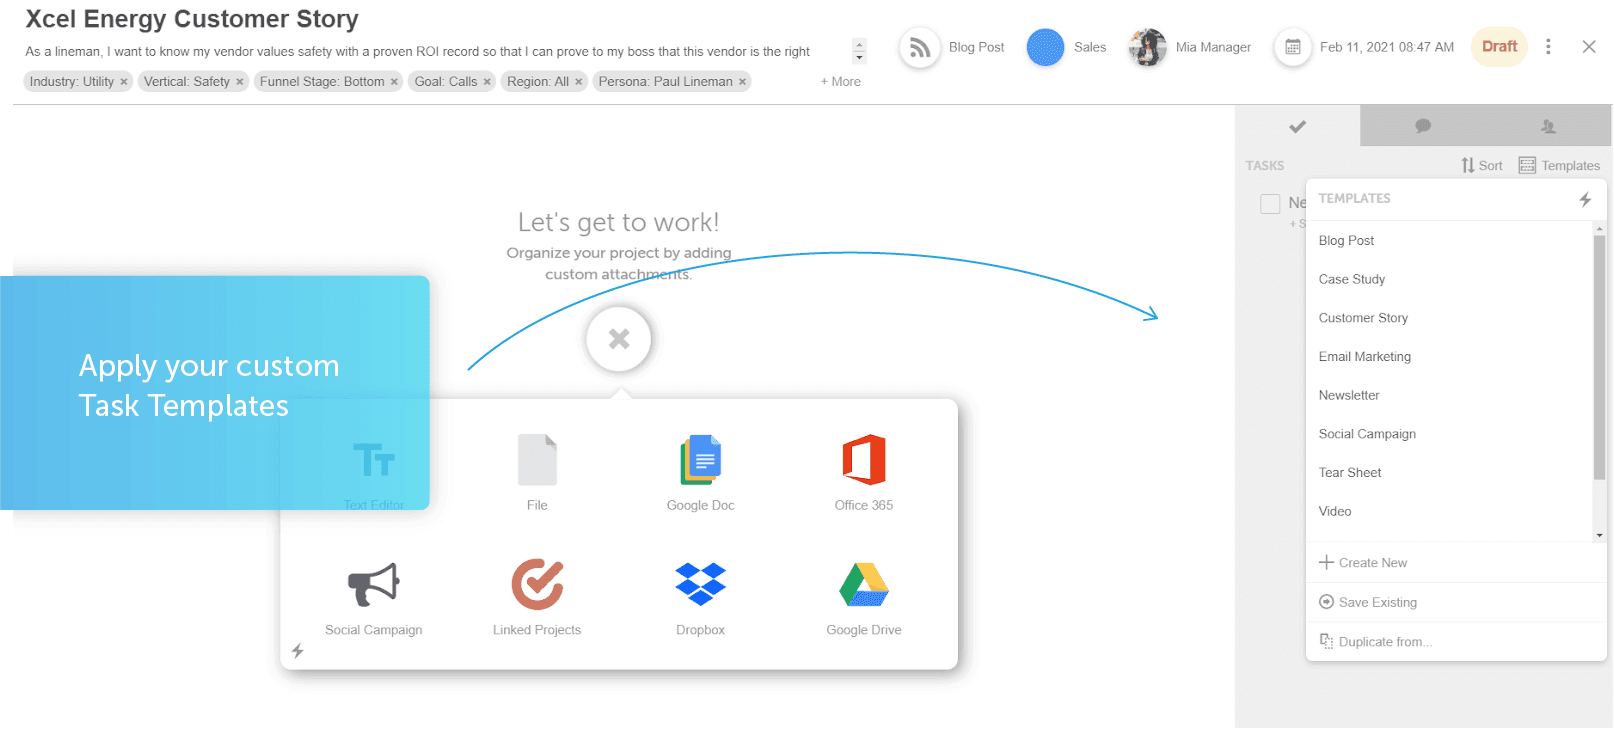
Streamline Your Workflow With Task Templates
Task templates can eliminate mistakes, so projects can move forward in a timely fashion.
Many
projects are recurring. These projects might include blog posts, social campaigns, and product launches. Use task templates for the projects that consistently present themselves.
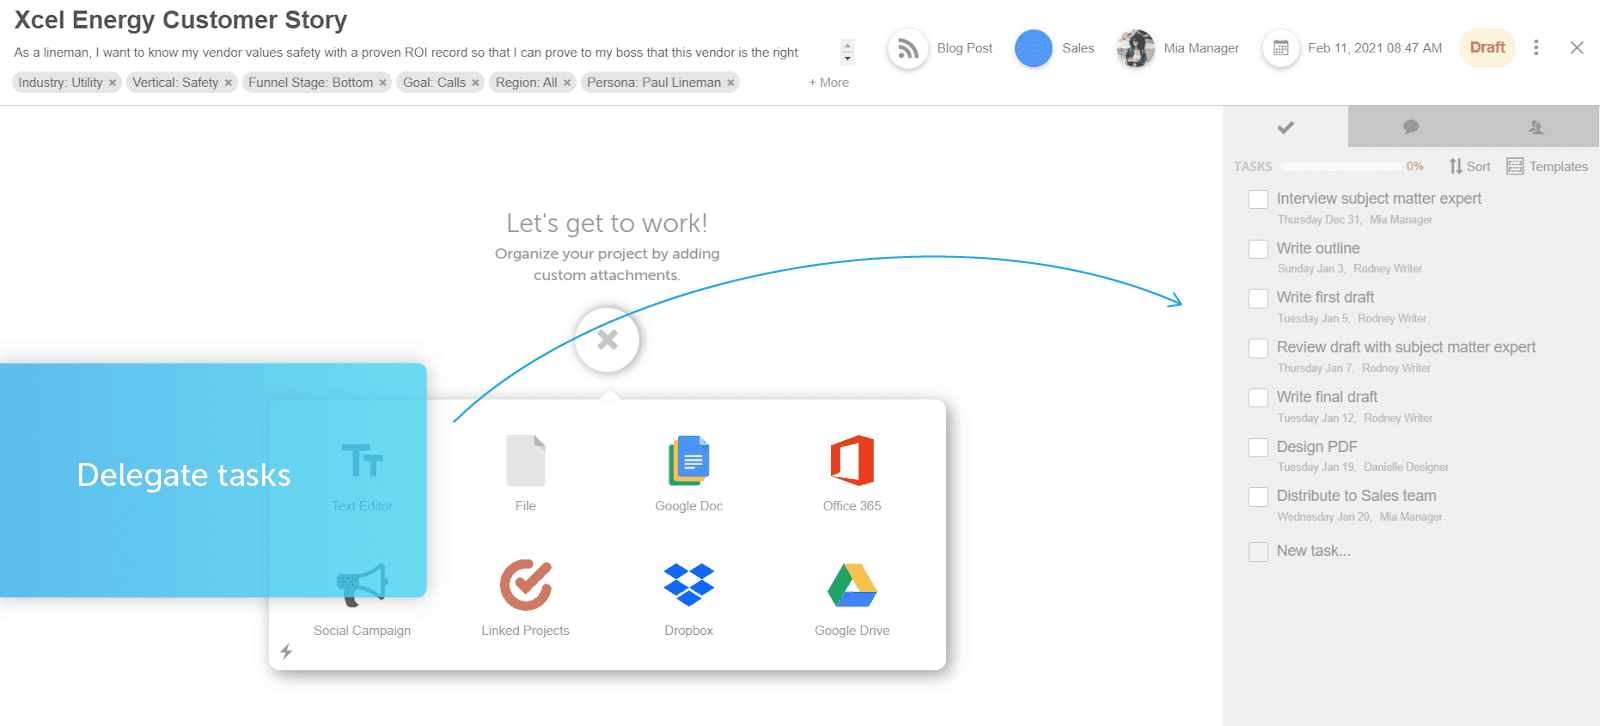
Assign Tasks to Your Team
Set clear expectations by delegating tasks out to your team members. Assigning tasks to your team will automatically notify all participants involved — including internal stakeholders.
Organize Phases of Content
When you can’t rely on being in the same office as each other, a task management system can really help.
As your team is working through tasks, you will have a holistic view of where projects are at any given moment. This will allow you to manage all of the phases throughout the supply chain.

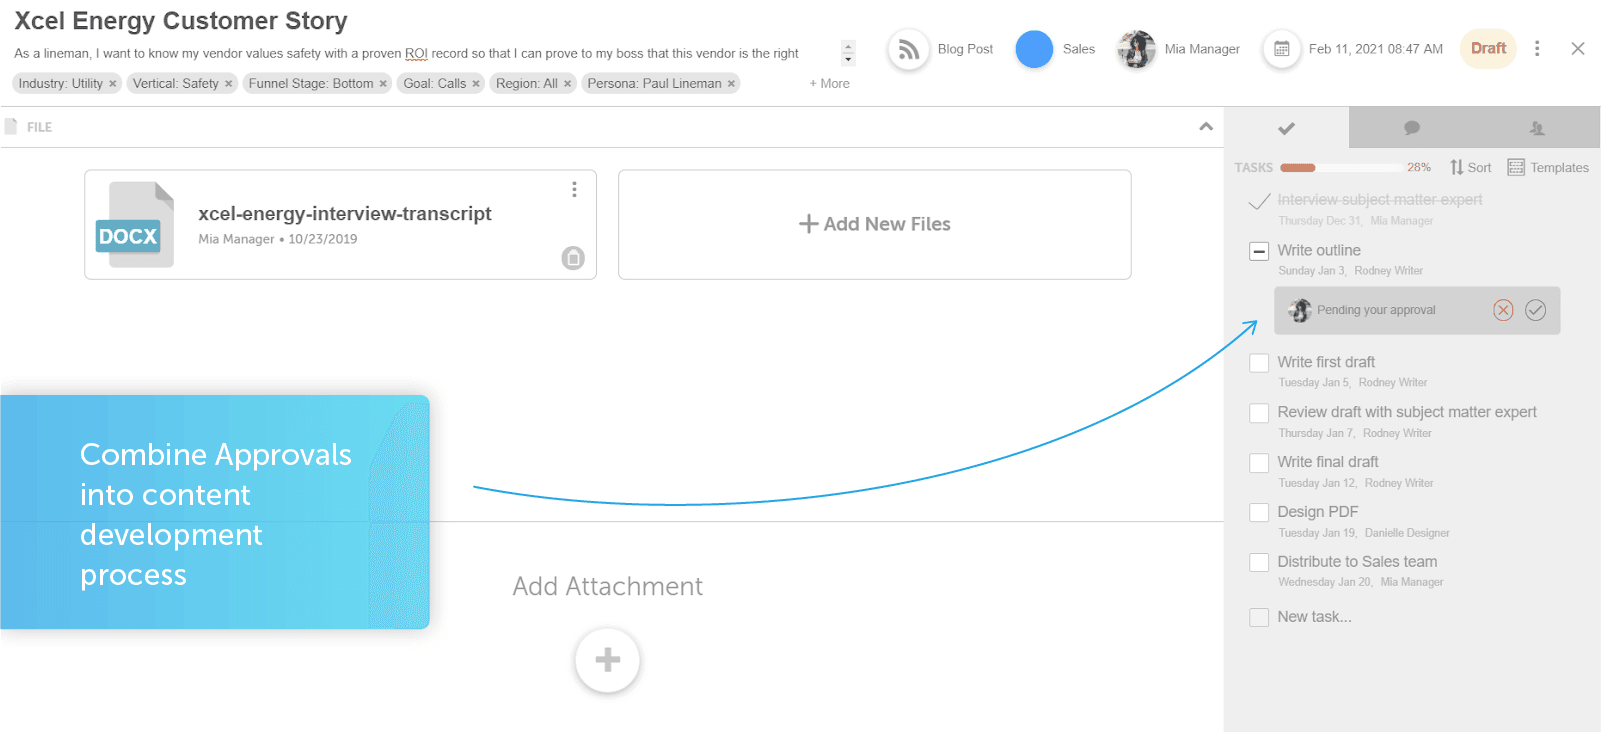
Approvals
Need a client or team member’s confirmation on a task, or want to keep track of your team better? Make sure tasks are completed correctly with approval workflows for tasks.
CoSchedule’s task template approval process helps you easily transition your content workflow straight into your publishing tools — such as WordPress — by adding approvals directly into tasks inside of CoSchedule.
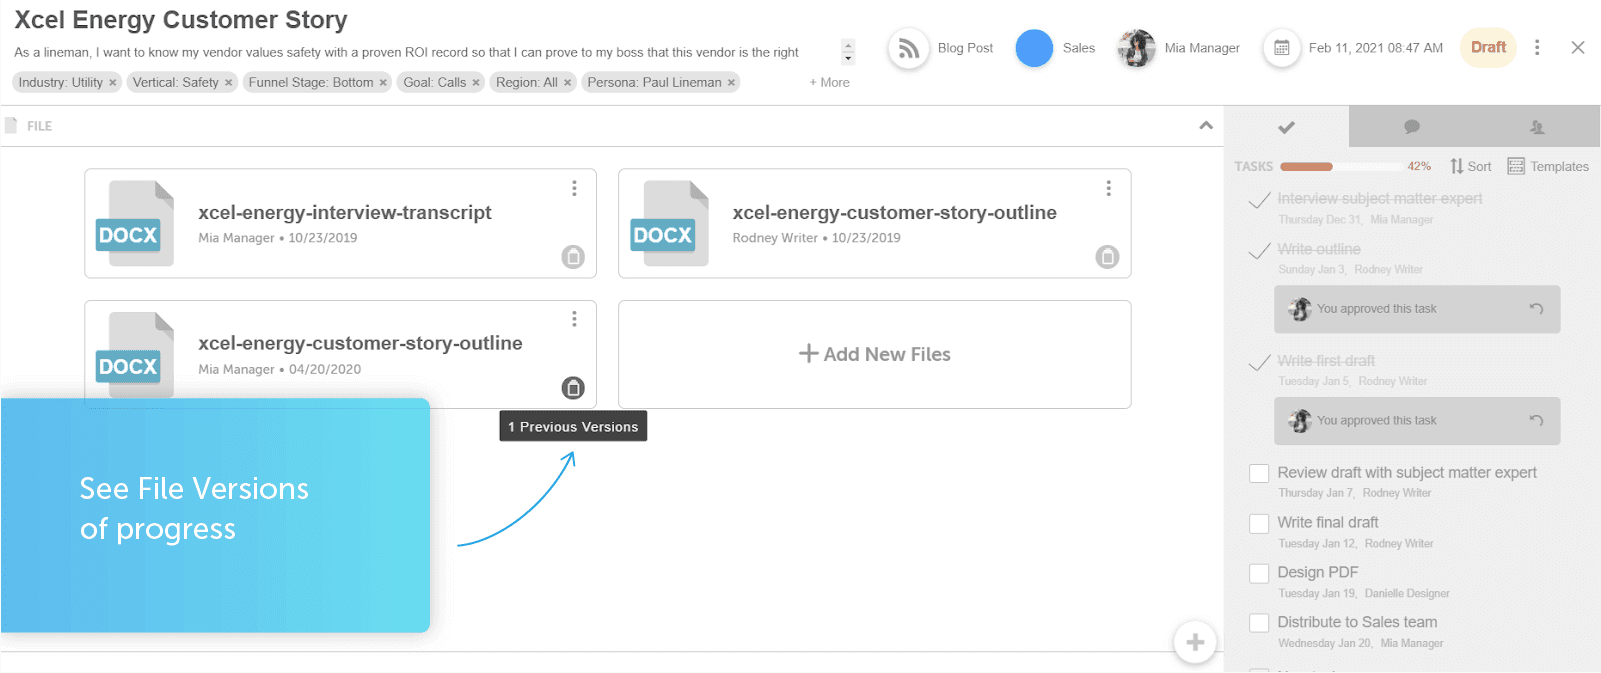
Leave an Audit Trail
Let’s say that the first round of content needs some work. When the second round of content comes through, Asset Organizer will keep prior versions of the draft, so you can see if feedback was taken into consideration.
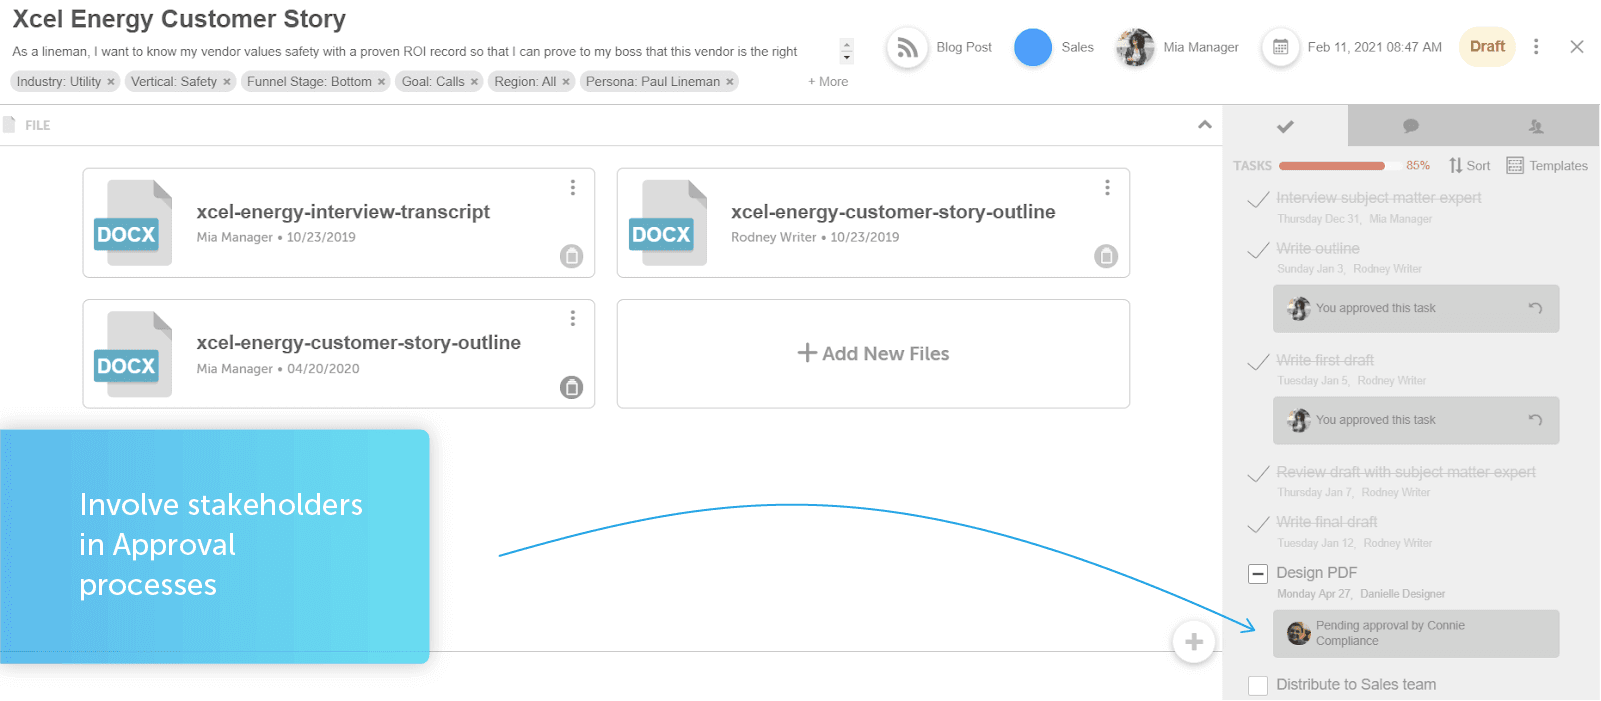
Approved by Stakeholders
Keep stakeholders informed. If compliance is part of the content creation process, add it into the workflow.
By adding compliance approvals, your team will no longer be concerned if the published asset is compliant or not. Having compliance within the workflow will allow content to be delivered on time with compliance in mind.
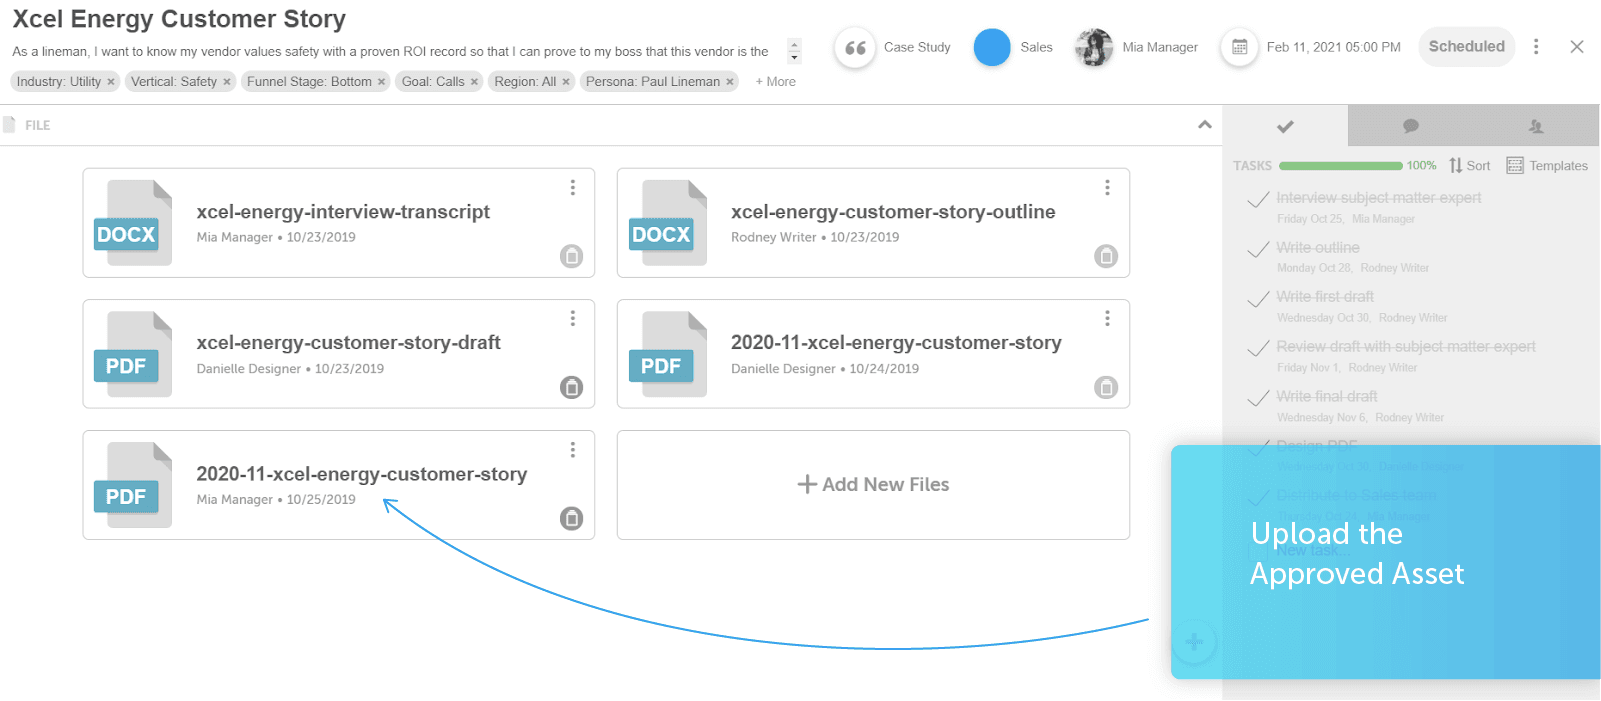
Saved Approved Assets
Now that the content has gone through all the stages of the creation process, it can now be saved into Asset Organizer.
Simply click “Add New Files,” and select the finished asset.
Viewing Assets
Opening assets in Asset Organizer is as simple as clicking on which asset you want to view.
Within this view, you’ll see the metadata ranging from tags, uploader, and when it was added.

If you’re a visual learner who would rather learn this in a how-to video, see below.


