From Spreadsheets to CoSchedule: How to Make the Transition Successfully

 What are you using to manage your marketing right now?
We’d bet spreadsheets. Lots of spreadsheets. Too many spreadsheets.
Sure, they’re great for a lot of things. But, they’re not ideal for organizing everything you team needs to get done.
So, what’s a better solution?
CoSchedule (bet you didn’t see that coming).
It’s true, though. Our marketing calendar platform is built specifically to be your team’s go-to hub for every project. And in this post, we’ll show you how to ditch your spreadsheet-based calendars, schedules, and reporting templates and move onto CoSchedule instead.
Best of all, we’ve got a section just for you, no matter what you do:
What are you using to manage your marketing right now?
We’d bet spreadsheets. Lots of spreadsheets. Too many spreadsheets.
Sure, they’re great for a lot of things. But, they’re not ideal for organizing everything you team needs to get done.
So, what’s a better solution?
CoSchedule (bet you didn’t see that coming).
It’s true, though. Our marketing calendar platform is built specifically to be your team’s go-to hub for every project. And in this post, we’ll show you how to ditch your spreadsheet-based calendars, schedules, and reporting templates and move onto CoSchedule instead.
Best of all, we’ve got a section just for you, no matter what you do:
- Coschedule for Content Management
- CoSchedule for Social Media Scheduling
- CoSchedule for Content + Social Media Marketing Reporting
- Coschedule for Marketing Project Management
Don’t Take Our Word For It: Get Started Free
If you’re like us, you don’t just want to read about what you could do. You want to actually get your hands dirty and start applying the advice in this post right away. Get started free now. Then, come back here to get the 411 on how to move your entire life (or at least all your marketing stuff) out of Excel and into CoSchedule.
From Spreadsheets to CoSchedule: How to Make the Transition Successfully
Click To TweetAdding Your Team To Members Into CoSchedule
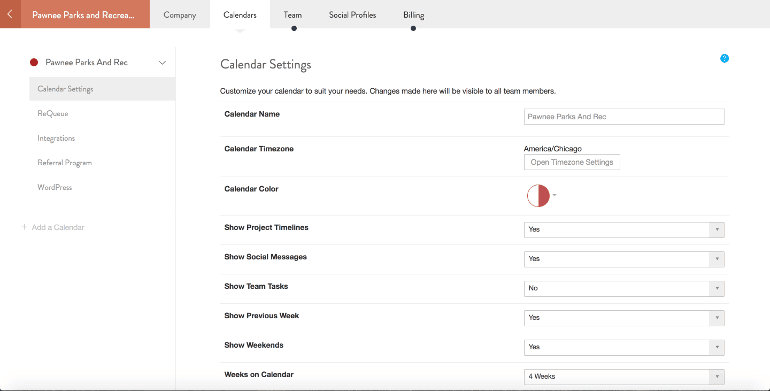
So you’ve gotten started in CoSchedule, your calendar is ready, and your team is on board. (If they aren’t here’s how to convince them). The problem is, your team isn’t in CoSchedule yet. Adding users to CoSchedule is super easy. First, go to your calendar and click on settings in the lower left-hand corner: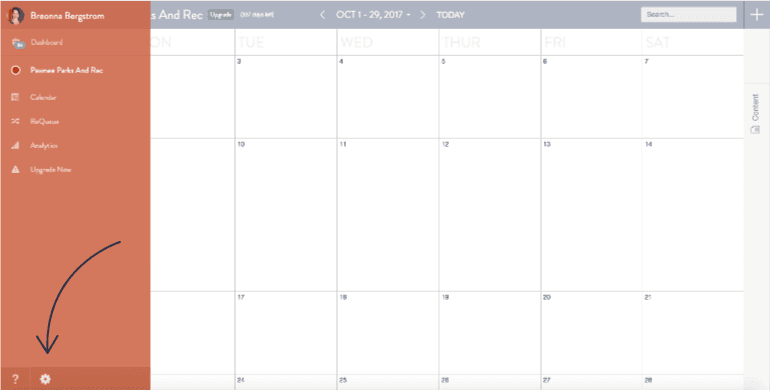 After clicking that gear in the corner, a setting window will appear. Click the top option (your calendar name):
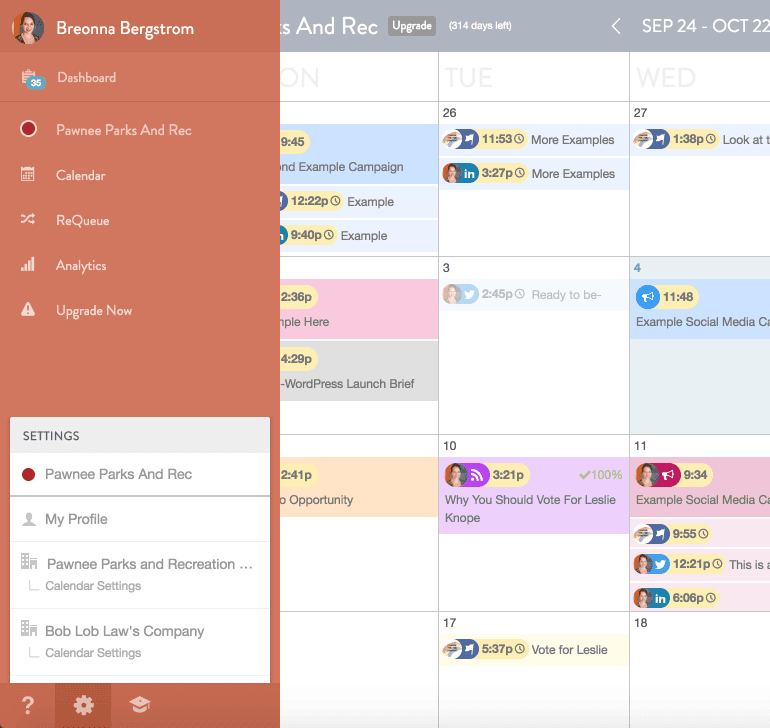 Your setting are located here:
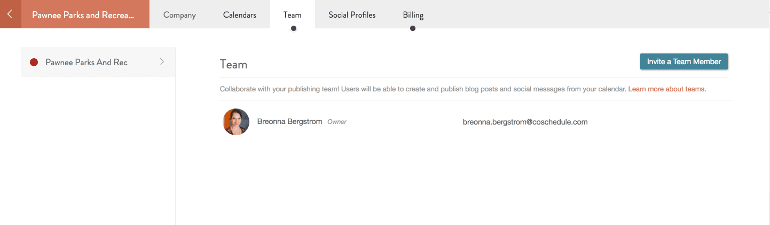
 Click on Team and then Invite a Team Member:
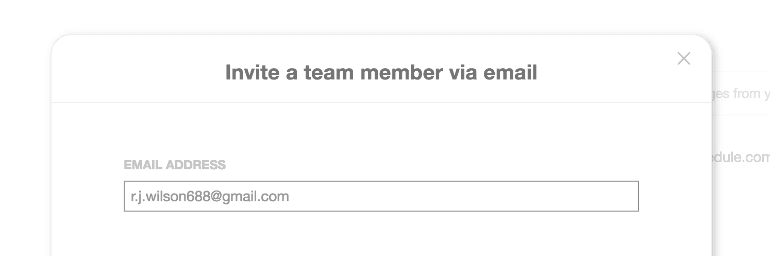
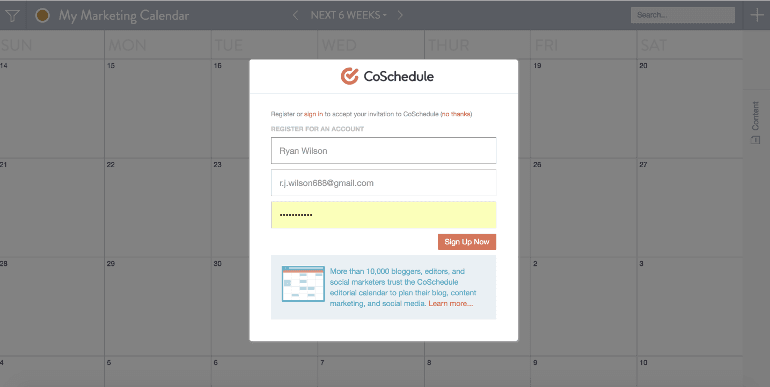
 Type in the new user’s email address:
 Select which type of user they are going to be:
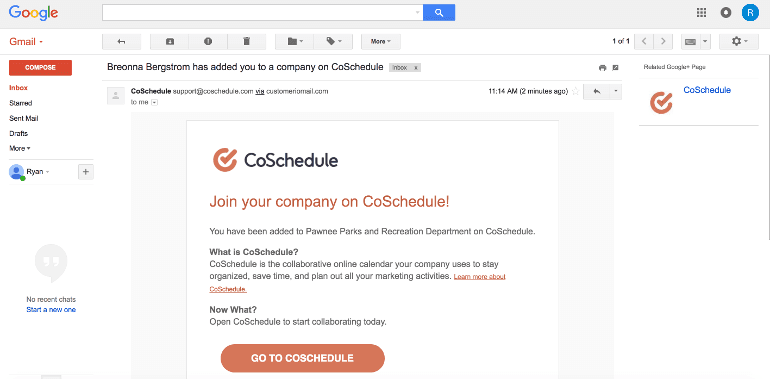
 Have team members check their inbox for an email that looks like this:
 In that email, they should click Go to CoSchedule:
 Your team members will then need to create their account in CoSchedule:
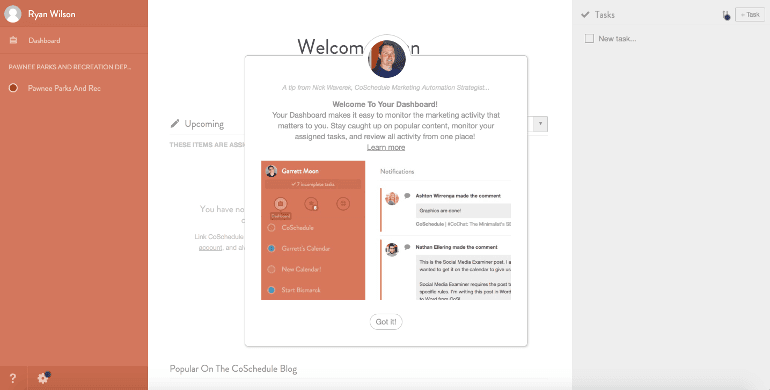
 After creating their account they will be brought to the product screen where they can walk through step by step tutorials on how CoSchedule works:
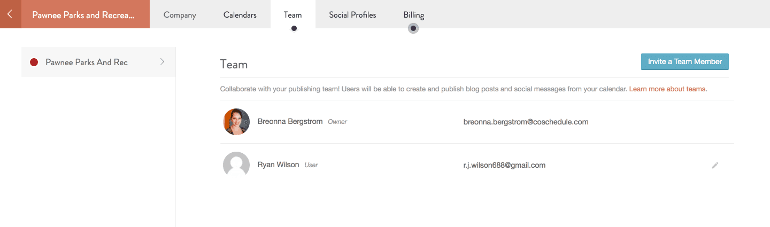
 To see which of your team members have accepted your invite, go back to your team page. If they accepted it should look like this:
 That’s it. Pretty easy to use huh?
Plan Your Content On a Real Calendar (Instead of Excel)
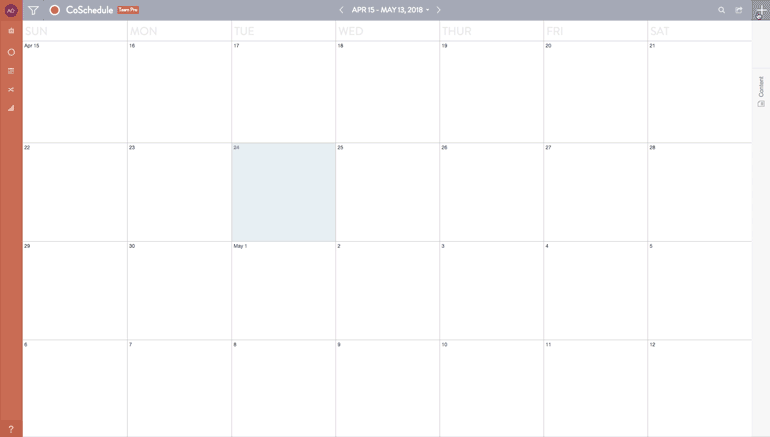
Your team needs to publish a lot of content. Blogs, e-books, white papers, and a whole lot more. That means that it can be super easy to lose track of what is being published when, who’s eyes need to see what, and what is ready to be published. There are two ways you can organize this for your team: with spreadsheets or apps like CoSchedule. Your spreadsheet might (or does) look something like this: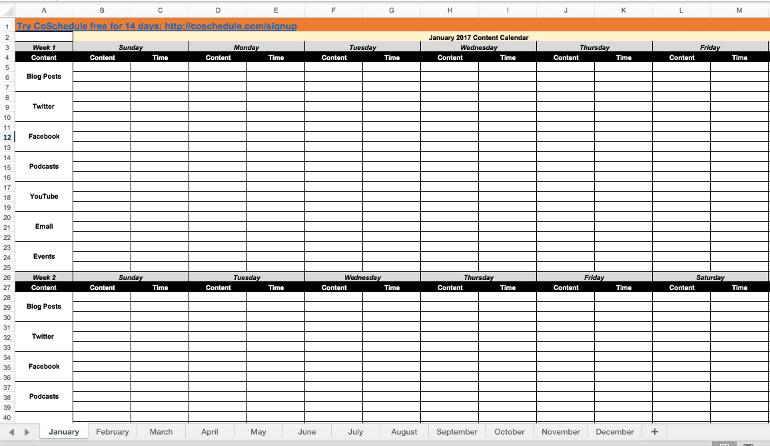 Planning all your content this way makes it easy to see everything you’re working on.
But, it can’t make you remember to actually publish your stuff when it’s due.
It also can’t send you any reminders when tasks are coming up.
And there’s definitely no way to automatically schedule any of your content to publish when you’re relying on a static spreadsheet. If you need to make changes, you can look forward to a lot of awkward copying and pasting, too.
So how does a tool like CoSchedule fix this?
It allows you to create, edit, approve and publish content all from one place. So let’s break down what that looks like in the tool.
Go to your calendar:
Planning all your content this way makes it easy to see everything you’re working on.
But, it can’t make you remember to actually publish your stuff when it’s due.
It also can’t send you any reminders when tasks are coming up.
And there’s definitely no way to automatically schedule any of your content to publish when you’re relying on a static spreadsheet. If you need to make changes, you can look forward to a lot of awkward copying and pasting, too.
So how does a tool like CoSchedule fix this?
It allows you to create, edit, approve and publish content all from one place. So let’s break down what that looks like in the tool.
Go to your calendar:
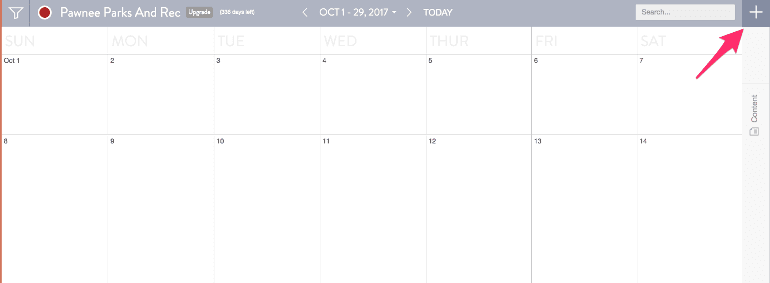
 Click the + sign in the top right-hand corner:
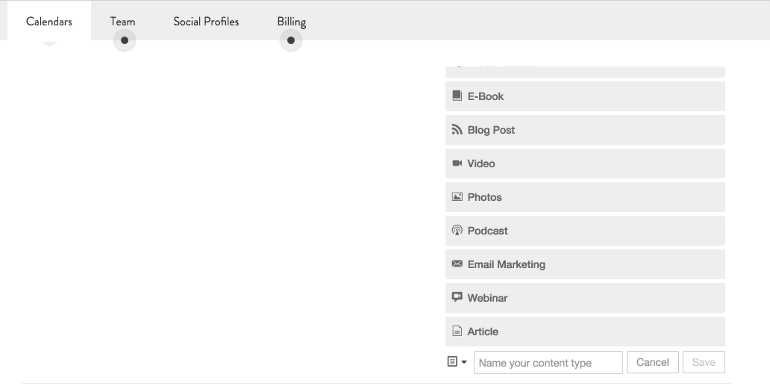
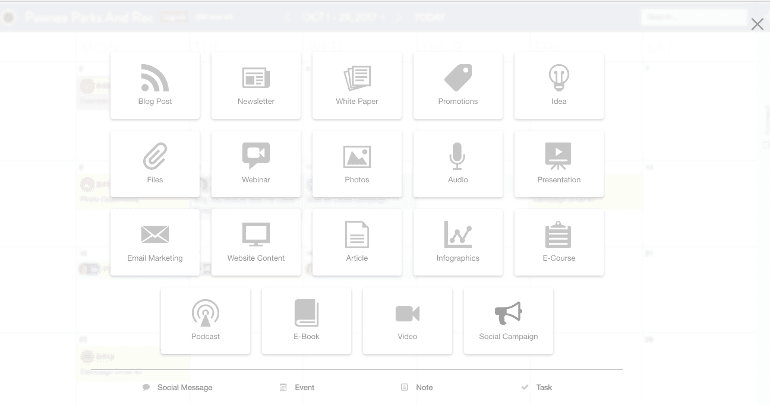
 A window will appear allowing you to select which type of content you’d like to create:
 But what if the content you want to create isn’t in the list? You can create your own!
 First go to the settings gear in the bottom left-hand corner of your screen:
Click on the name of your calendar or the first option in that pop up menu:
First go to the settings gear in the bottom left-hand corner of your screen:
Click on the name of your calendar or the first option in that pop up menu:
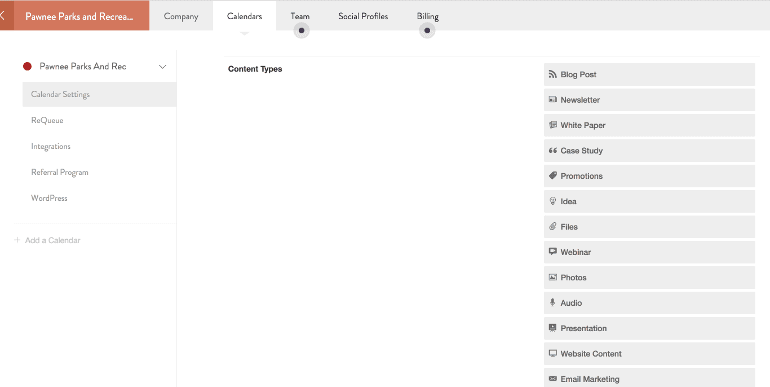
 Scroll down to Content Types:
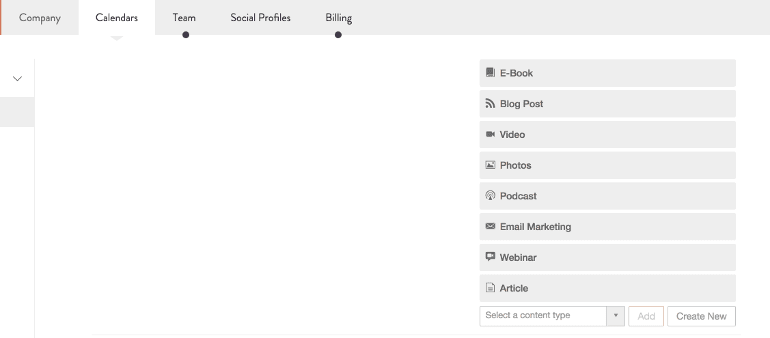
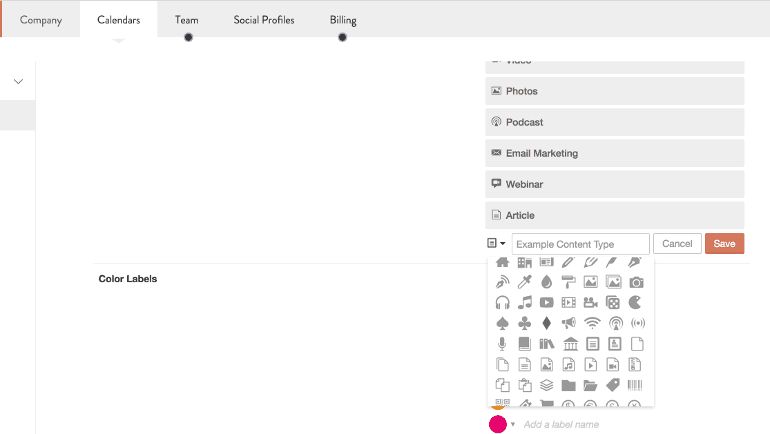
 Keep scrolling until you reach the end of your content list and see Create New:
 Select Create New and then name your new content type:
 Select the icon that will appear when you add your content to your calendar:
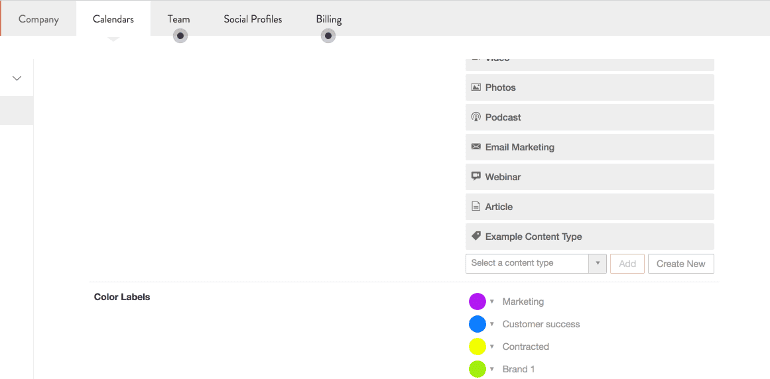
 Click Save and your new content type will appear in the list:
 Then when you click the add content button back in your calendar, your new content type should appear in the selection list:
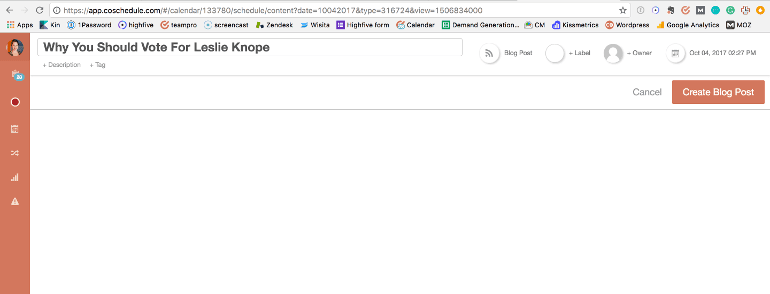
 Ok so let’s go back to adding the content that your team wants to publish. Now you need to select your content type. So let’s say your team wanted to write a blog post, you would select Blog Post and the following window will appear:
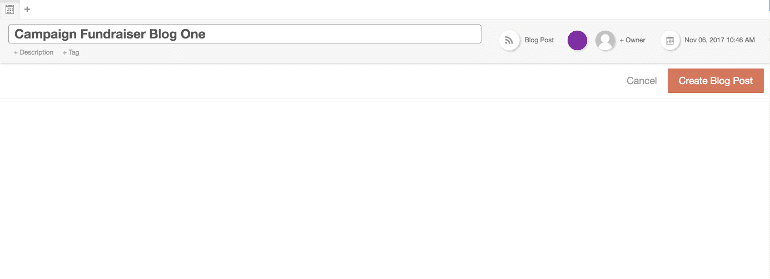
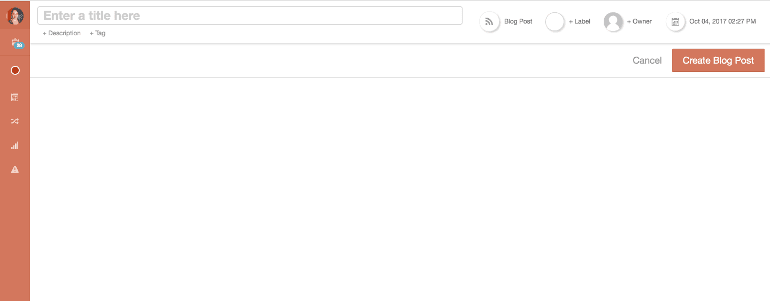 First, you need to title your content:
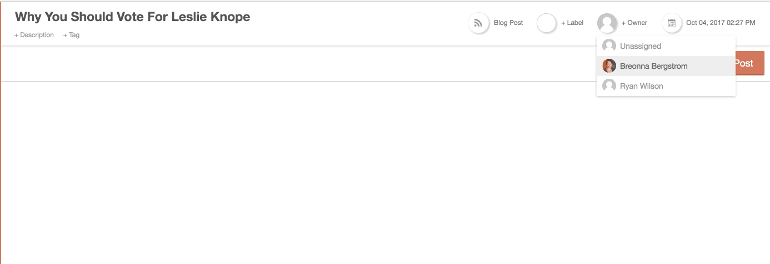
 Then select the owner of the content from the list of team members in CoSchedule:
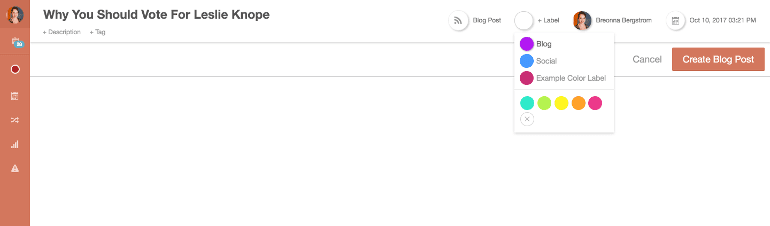
 You can also add in color labels to organize your content even more, like this:
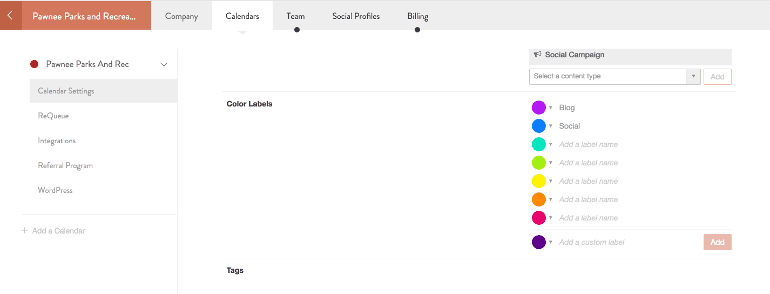
 Our calendars are set with 7 pre-set colors, but if you need more you can create custom colors. To do this you’re going to go back into your settings by clicking the gear icon in the lower left-hand corner:
Select your calendar name from the top of the menu:
Our calendars are set with 7 pre-set colors, but if you need more you can create custom colors. To do this you’re going to go back into your settings by clicking the gear icon in the lower left-hand corner:
Select your calendar name from the top of the menu:
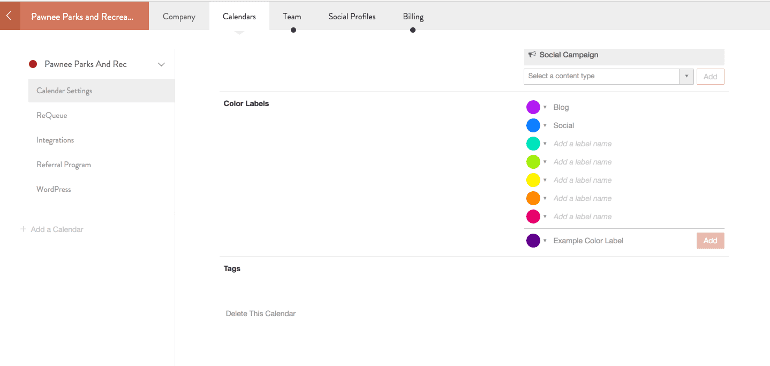
 Scroll down in Calendar Settings until you see Color Labels:
 To create your color label, first click to add a name to your color label:
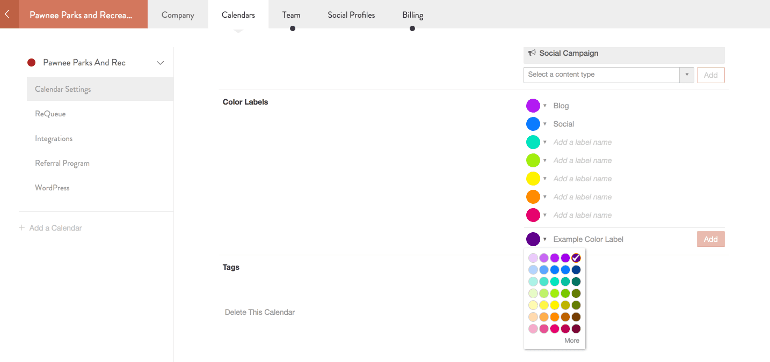
 To change the color, click the arrow to reveal more color options:
 If you want an even bigger selection, click more to create your own color code:
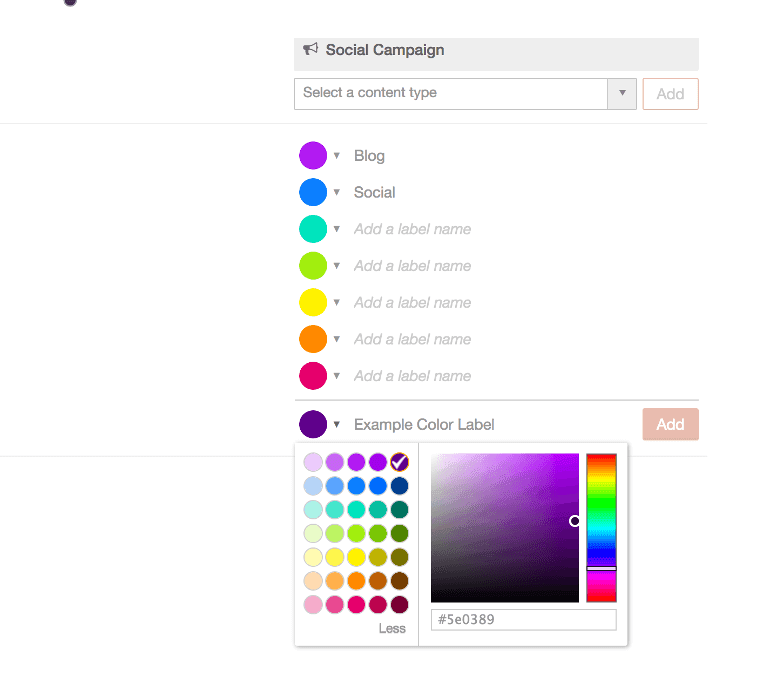 Click Add to add the color selection to your list:
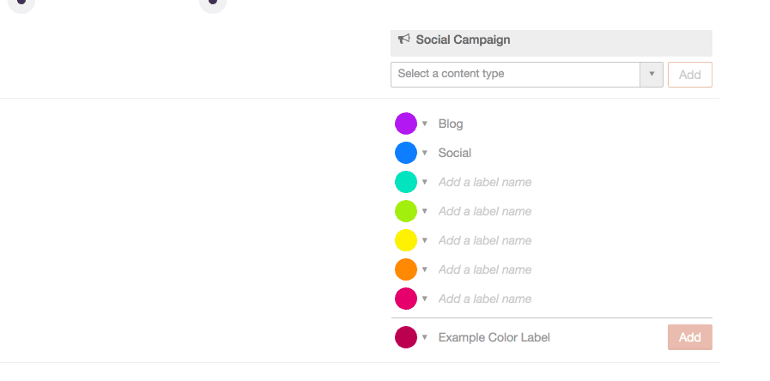 So now that you know how to add your own custom color labels, you can finally choose the color for the blog content you were developing earlier:
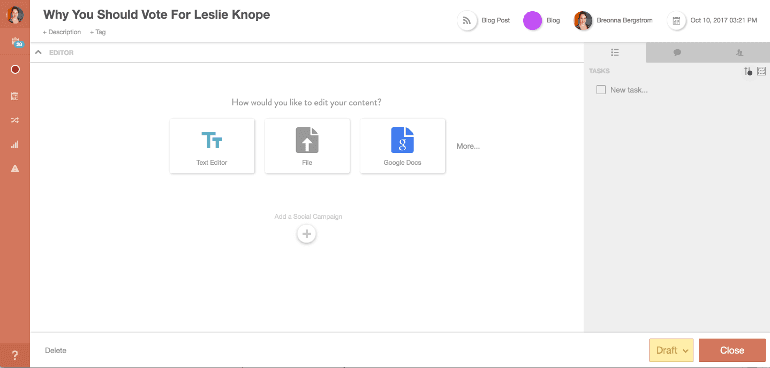
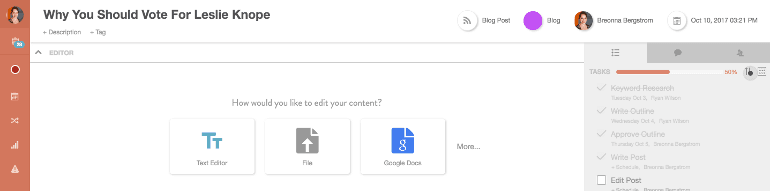
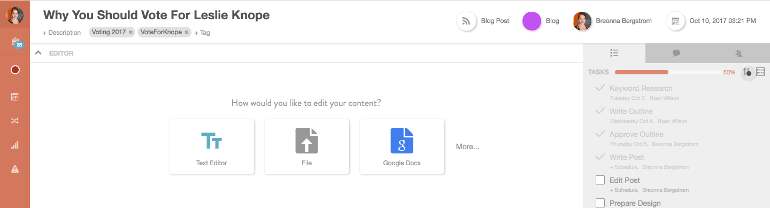
 From there your team can either upload content via Google Docs, Wordpress, Evernote or Text Editor and or a different file upload:
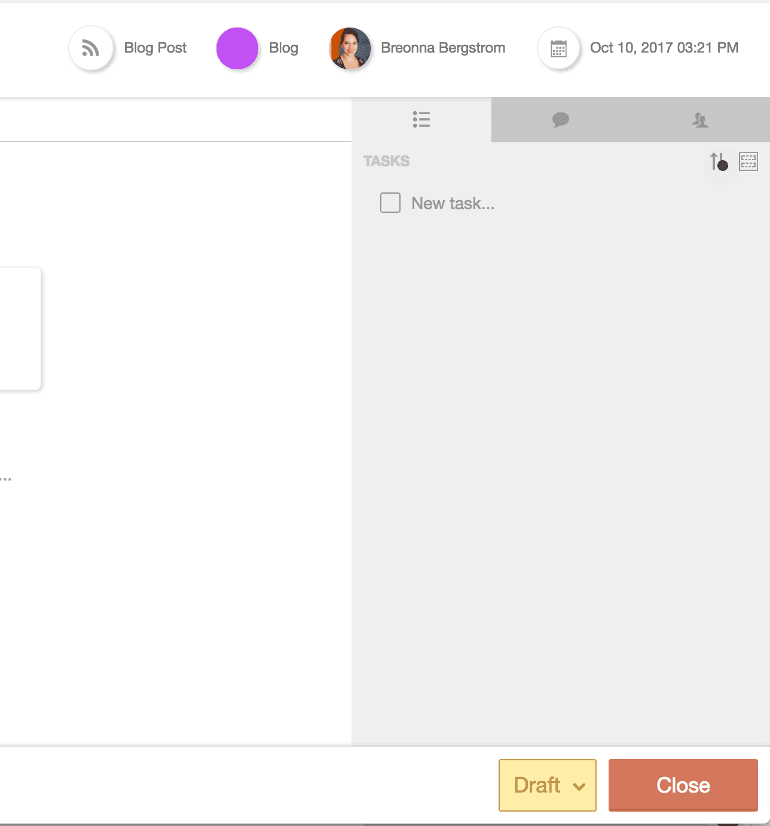
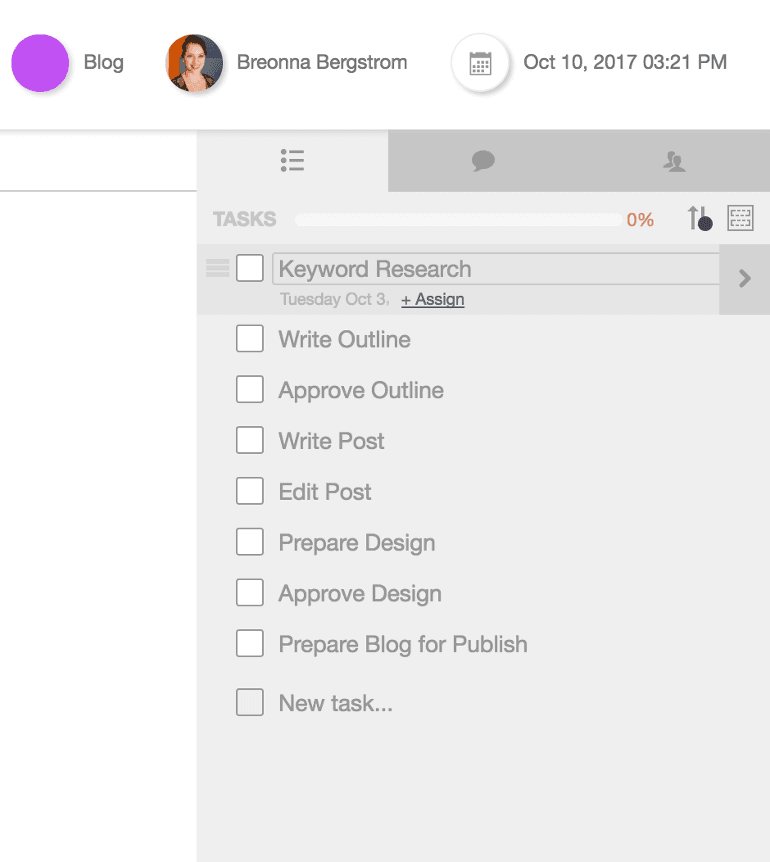
 You’ll notice that there is a side bar labelled tasks in each piece of content that you create. Here you can create a series of tasks that includes everything from researching keywords to preparing the post for publish. To create tasks scroll over to the right-hand side of your screen:
 Start listing out every task that will need to be completed by your team before it publishes. Tasks will move down in the order that they are created:
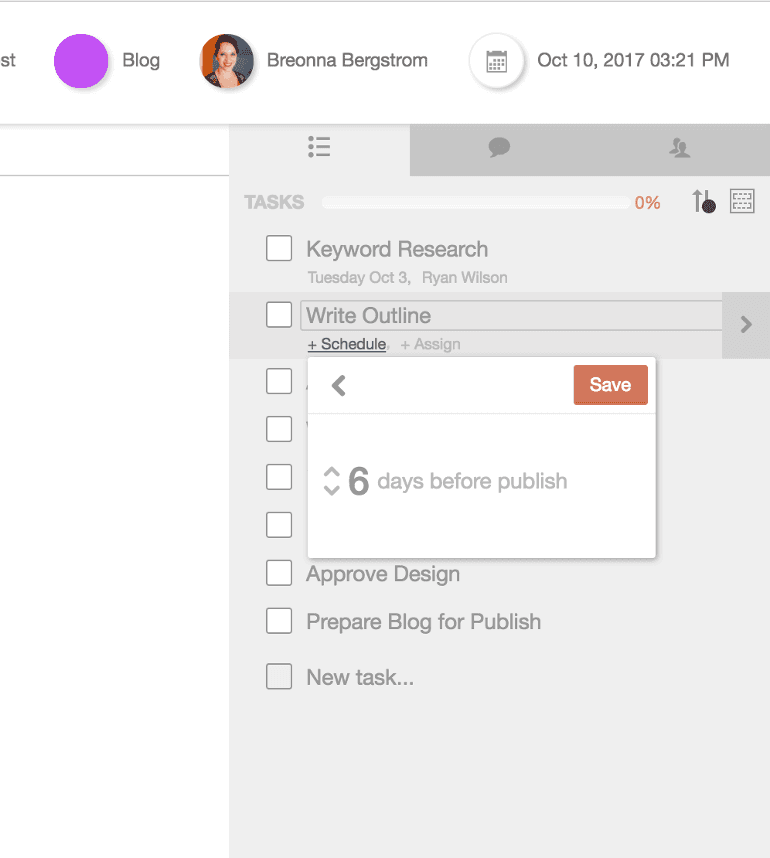
 Now obviously tasks need to be completed a certain number of days before a project is due. You can now let team members know the deadline of their tasks by selecting +Schedule:
 After that you can choose from a pre-set number of days:
 Or you can customize the number of days by choose _ days before publish:
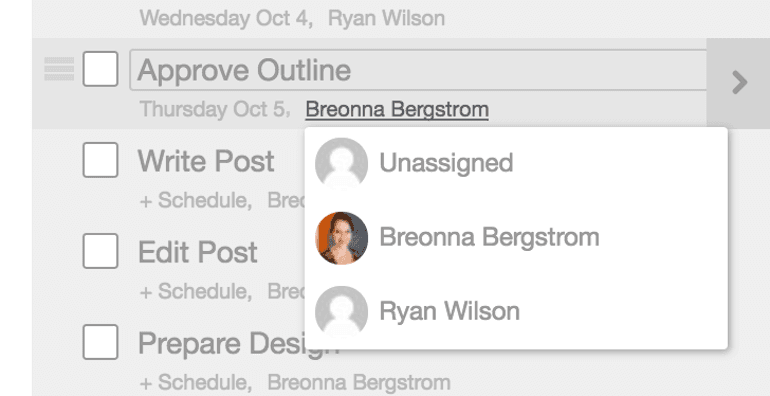
 You can also assign team members to complete tasks by selecting +Assign:
 A drop down menu will appear allowing you to choose which team member you want to assign the task to:
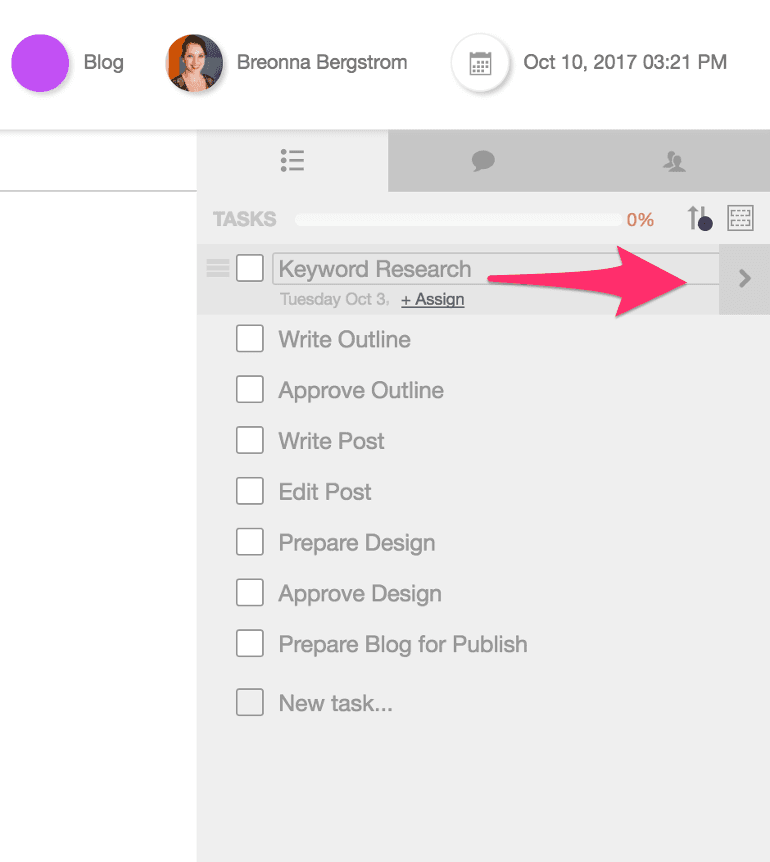
 Now this seems pretty great right? What if we made it even better by telling you that you can set approvals for tasks so team members know exactly when a manager has reviewed content?
With Task Approvals, they can. To use them click the right arrow that appears after each task:
Now this seems pretty great right? What if we made it even better by telling you that you can set approvals for tasks so team members know exactly when a manager has reviewed content?
With Task Approvals, they can. To use them click the right arrow that appears after each task:
 Another window will appear allowing you to choose who the task is assigned to and who the approver is:
 Then when your team goes to check off the completed task a second window will appear beneath it:
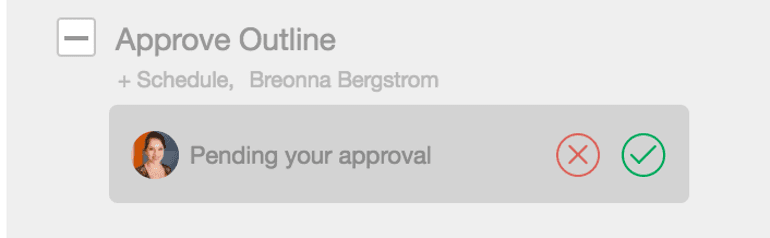 The approver will be notified to check the content, and once they approve the content the task will disappear:
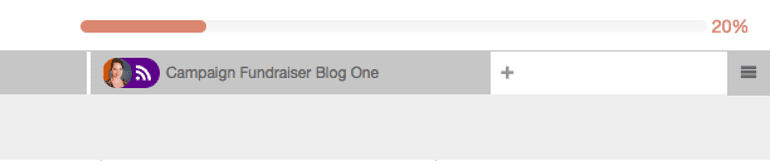
 You may have noticed a bar appear above the tasks as you added them to your content. This is a progress bar and let’s the team know at a glance if content is ready for publish:
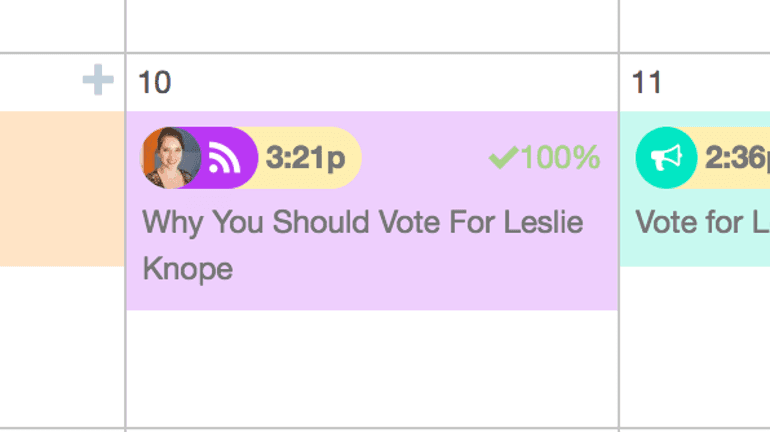
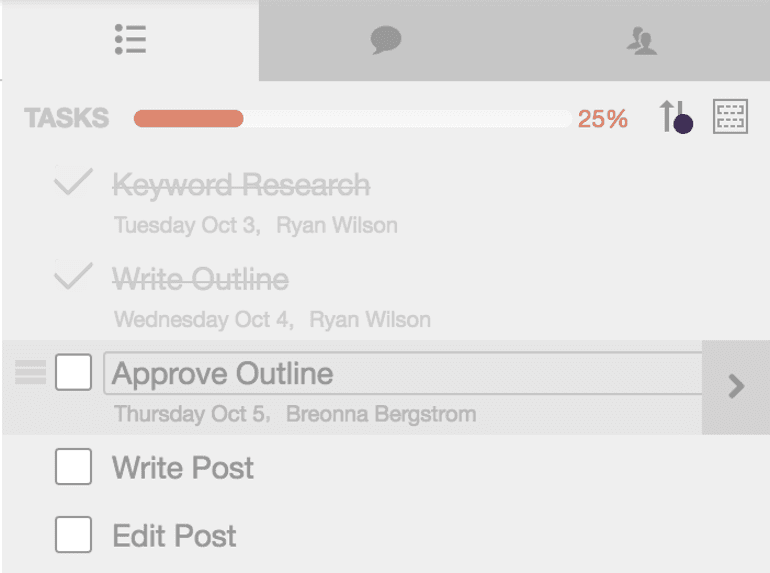 The more tasks your team checks off the more the bar will fill. It’s also visible from the calendar view:
 Once your tasks are completed the bar will turn green:
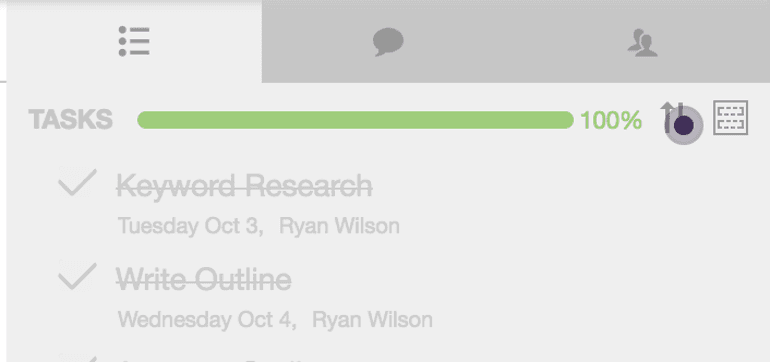 And it will show 100% complete in your calendar view:
 Did we mention there’s one more way to organize your content?
You also have the option to tag your content which will then allow you to filter your view based on content type.
To use tags, let’s go back to that example blog post from earlier:
Did we mention there’s one more way to organize your content?
You also have the option to tag your content which will then allow you to filter your view based on content type.
To use tags, let’s go back to that example blog post from earlier:
 In the upper left-hand corner underneath the title of your content you’ll see +Tag. You can start typing any sort of tag you want to sort your content by and then hit enter:
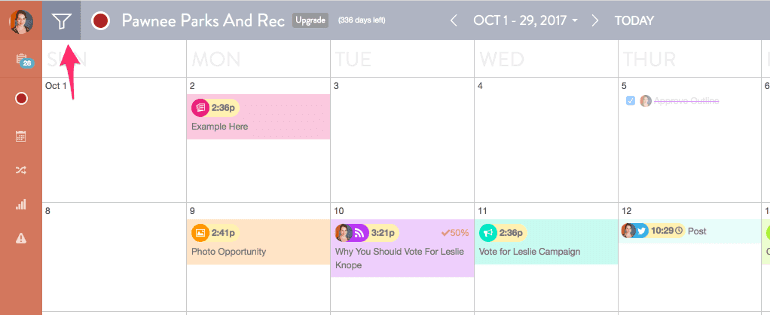
 It’s that easy! To sort your content by tag, go back to your calendar and click the funnel in top left-hand corner:
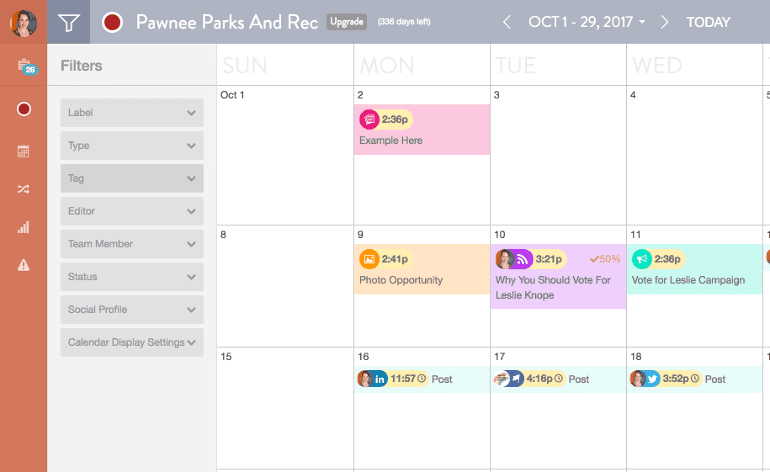
 A menu will appear on the left-hand side of your screen:
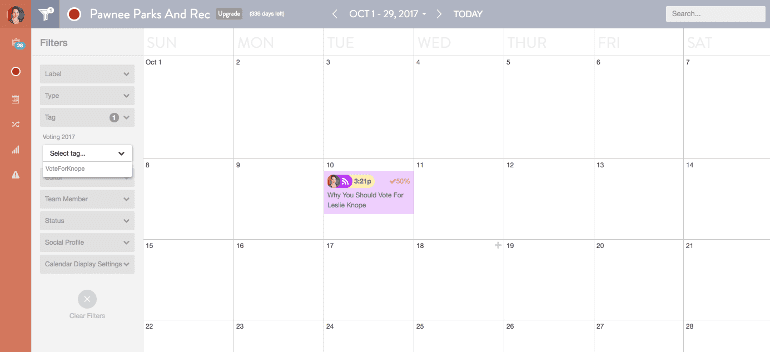
 Scroll down to Tags and the drop down menu will allow you to choose the tags you want to sort your content by:
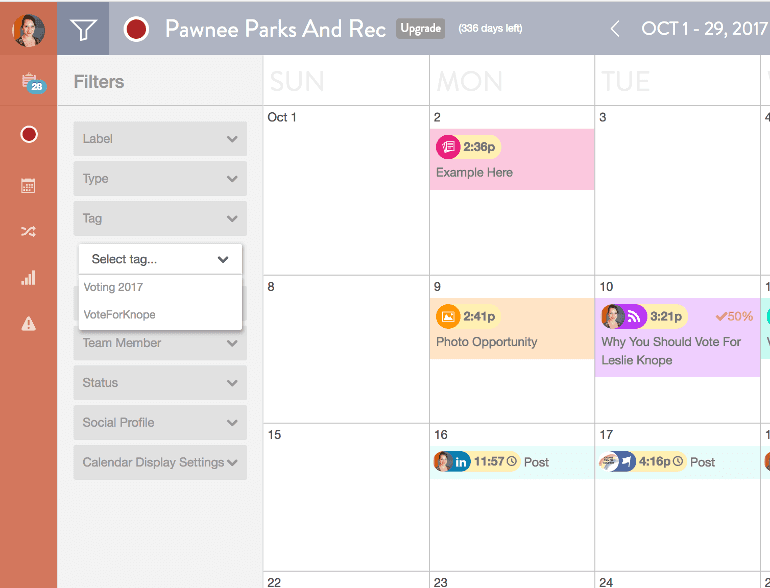 Select a tag, and CoSchedule will filter out all the content into one calendar view:
Do Social Smarter, Not Harder With CoSchedule
Social media takes a lot of work. Creating content. Scheduling posts. Making sure they go out at the right time. And doing it all consistently. That’s tough enough to maintain on one channel. If you’re managing multiple networks, it only gets tougher. Chaos. Absolute chaos. Using a spreadsheet can help organize some of that chaos because your team will be able to pre-write posts and keep track of what needs to be posted on each network: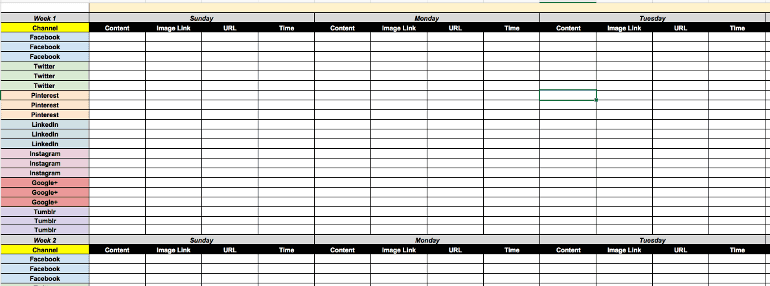 Now spreadsheets like the one above are great. However, it’s easy for them to fall out of date and it’s really easy to lose attachments and more that need to be published with each post.
Not to mention, your spreadsheet can't post to social media for you.
So how does CoSchedule fix that issue?
By allowing you to compose, approve, design and publish your social media posts all in one place.
Once again, you’re going to start in your calendar view:
Now spreadsheets like the one above are great. However, it’s easy for them to fall out of date and it’s really easy to lose attachments and more that need to be published with each post.
Not to mention, your spreadsheet can't post to social media for you.
So how does CoSchedule fix that issue?
By allowing you to compose, approve, design and publish your social media posts all in one place.
Once again, you’re going to start in your calendar view:
 Click the + in the upper right-hand corner:
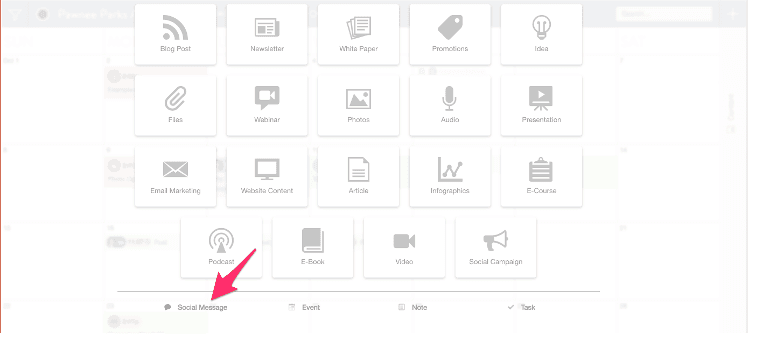
 If your team decides to schedule a stand alone message, scroll to the bottom of your content page and select Social Message:
 A window will appear allowing you to start crafting your message:
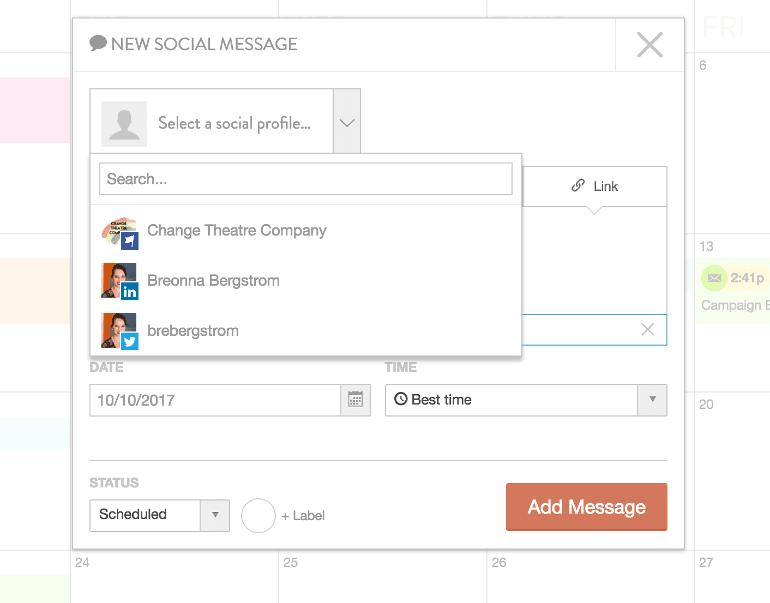
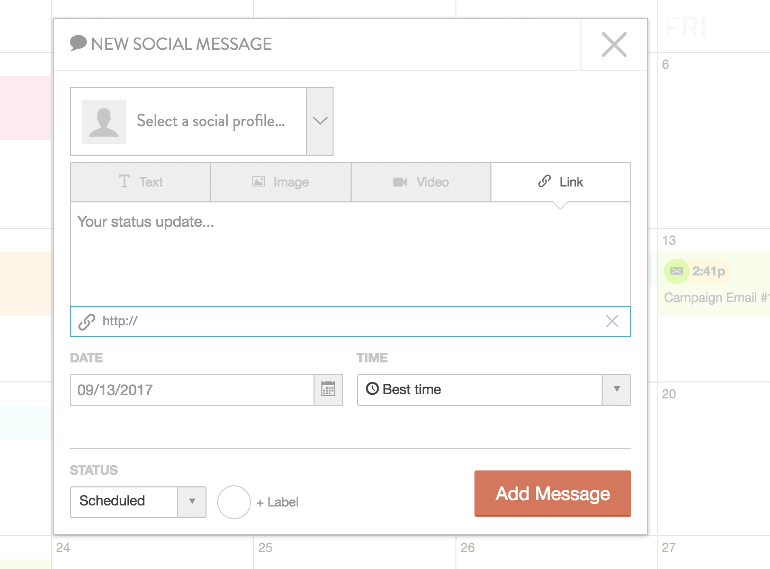 To start you need to select your social profile:
 What if your social profiles aren’t in CoSchedule yet? Go to your settings by selecting the gear icon in the lower left-hand corner of your screen:
In the settings screen, select Social Profiles and then click Connect a Social Profile:
What if your social profiles aren’t in CoSchedule yet? Go to your settings by selecting the gear icon in the lower left-hand corner of your screen:
In the settings screen, select Social Profiles and then click Connect a Social Profile:
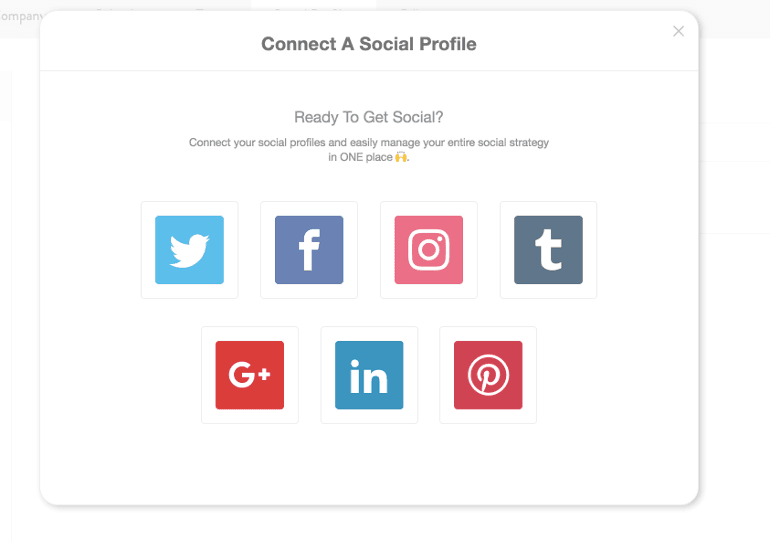
 A window will appear allowing you to choose what type of social profile you want to connect:
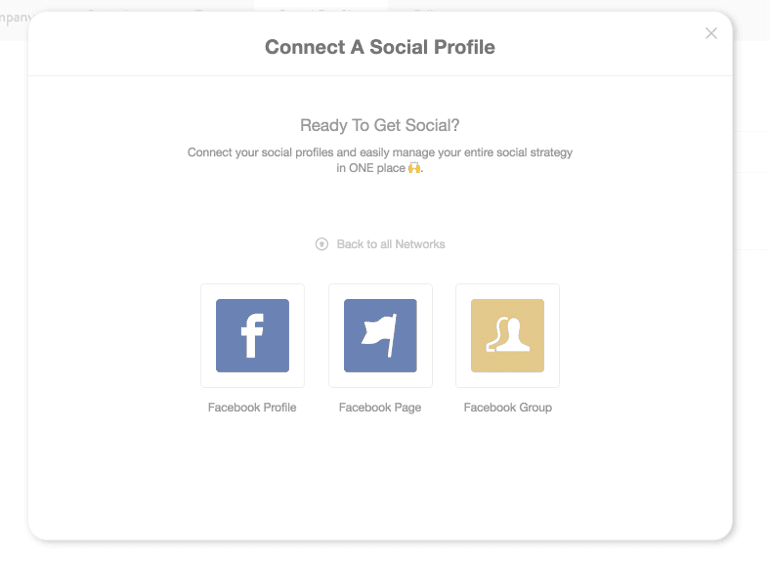
 For this example, we are going to connect a Facebook page. You have the option to connect three different types of Facebook pages:
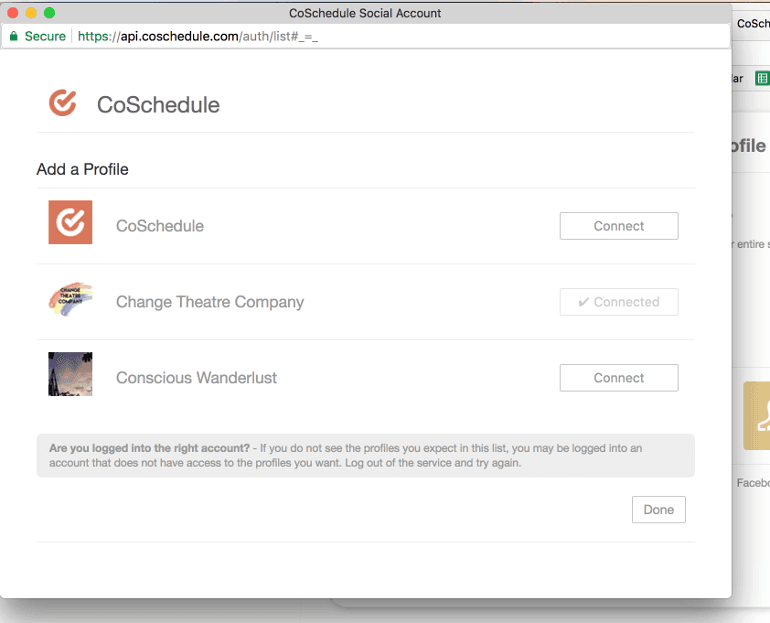
 Once you select your page, CoSchedule will pull all of the possible pages that you can connect to your calendar:
 Hit the Connect button which should change to Connected once it’s completed:
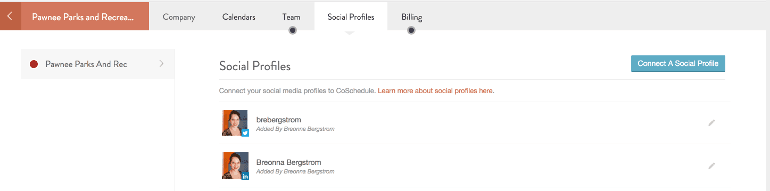
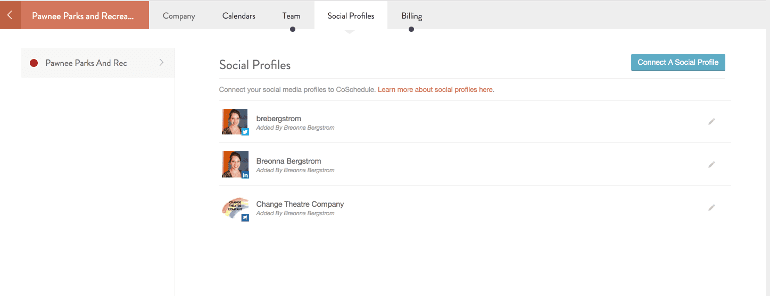
 Afterwards your connected social profiles should show up in the Social Profiles:
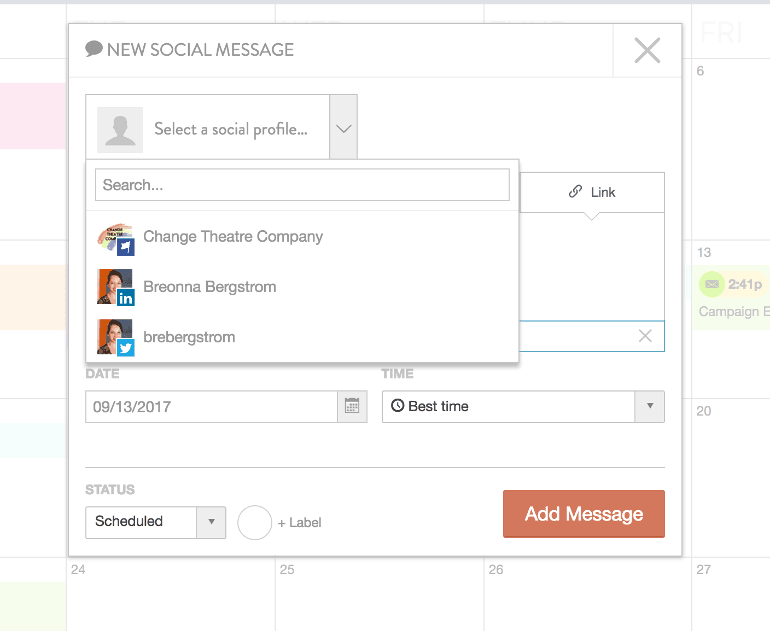
 Okay, so back to scheduling your social posts. Choose the profile that you want to send your message from. (You can choose more than one):
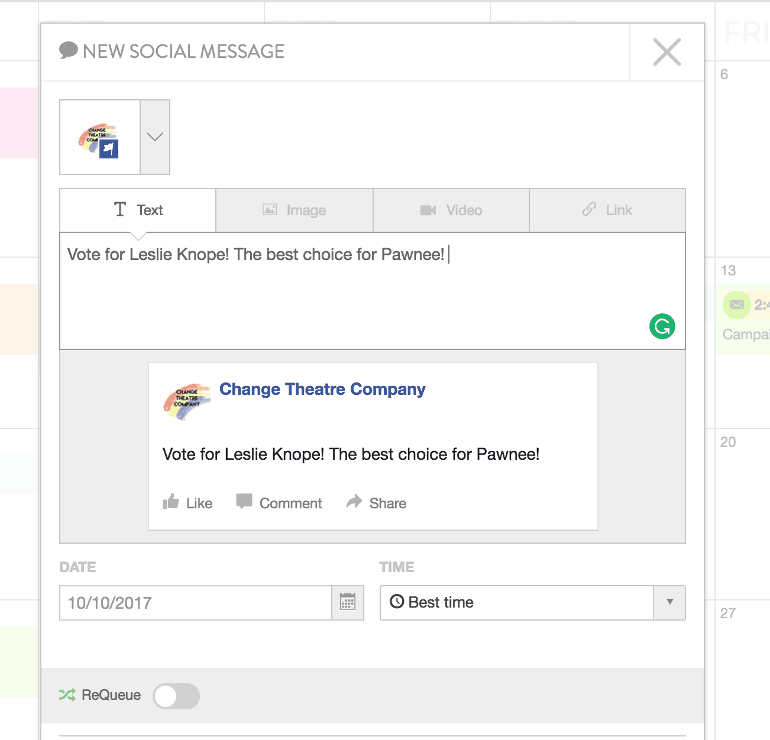
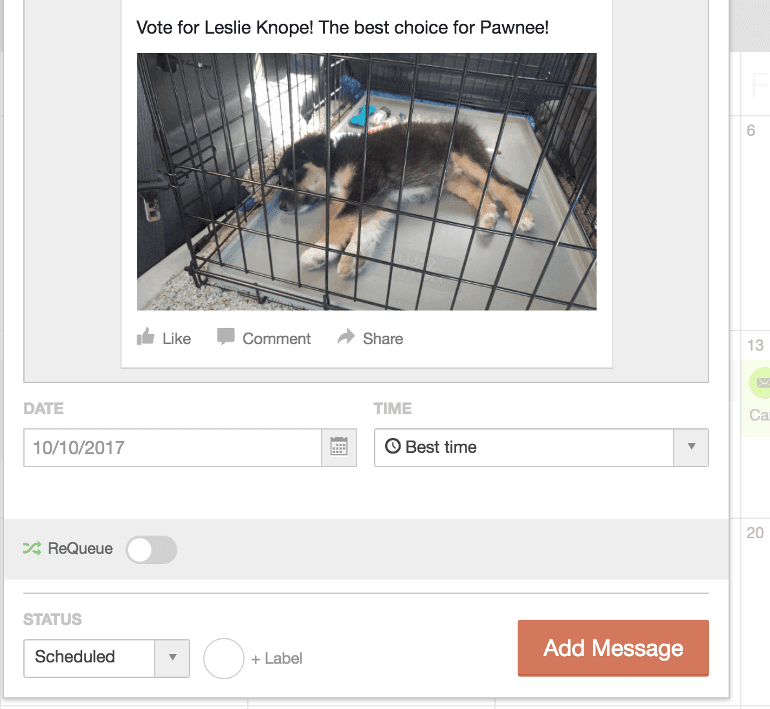
 Create your text:
 Choose between adding images, videos and links to your post by selecting the +(icon):
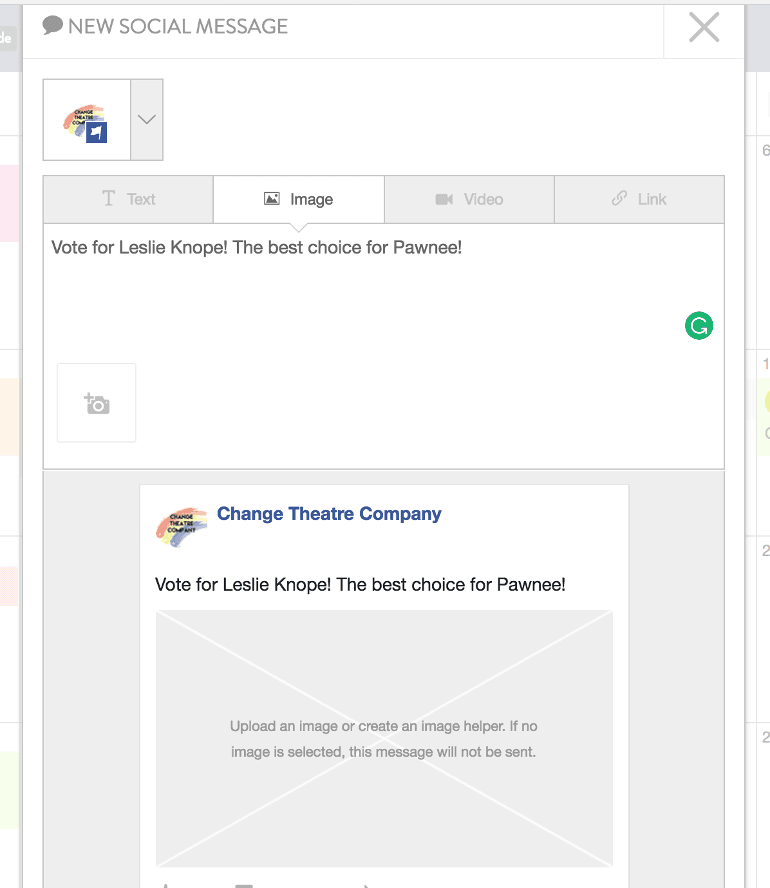 There you can upload a photo or video or insert the link you want to share:
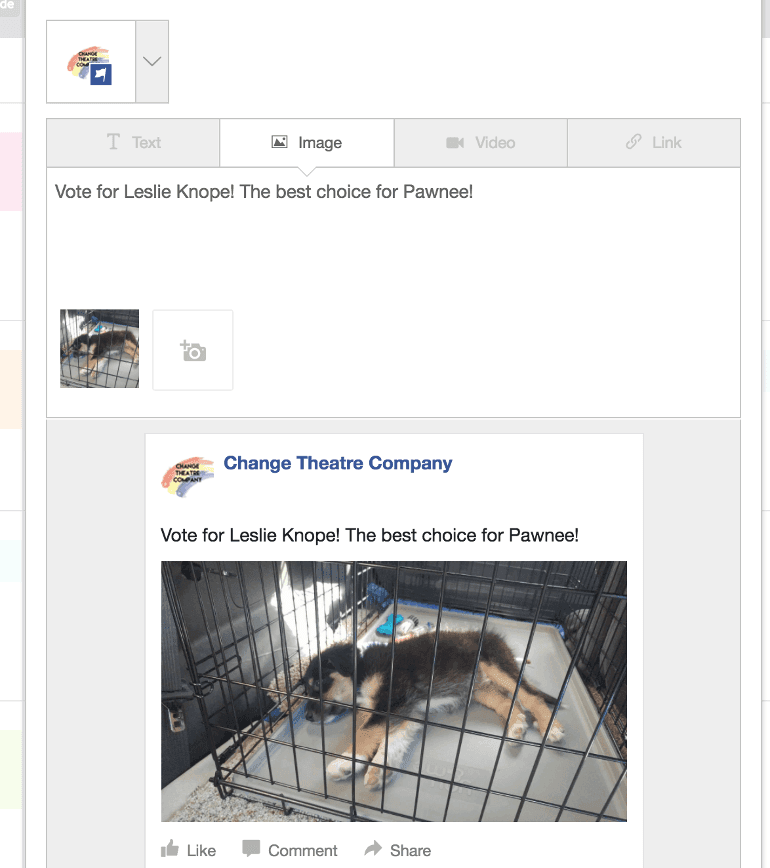
 Once the media is added, your post preview will update:
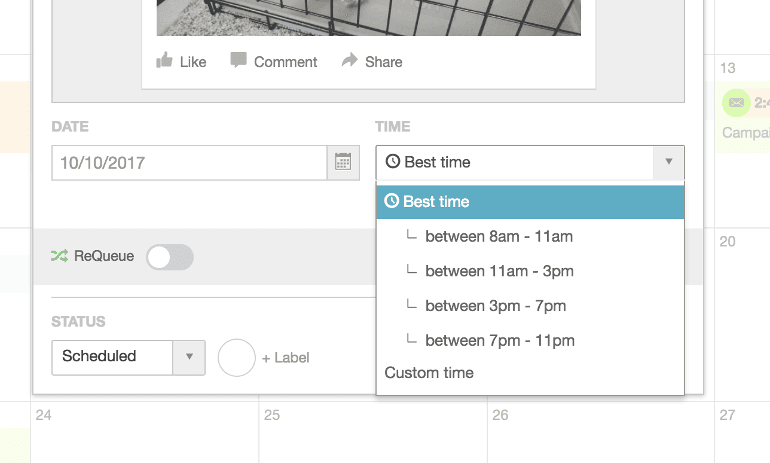
 Scroll down to set the time and date you want your post to publish. CoSchedule has a built in feature that will automatically send your posts at the best time:
 You can however, manually schedule your posts by selecting the dropdown menu where it says Best Time:
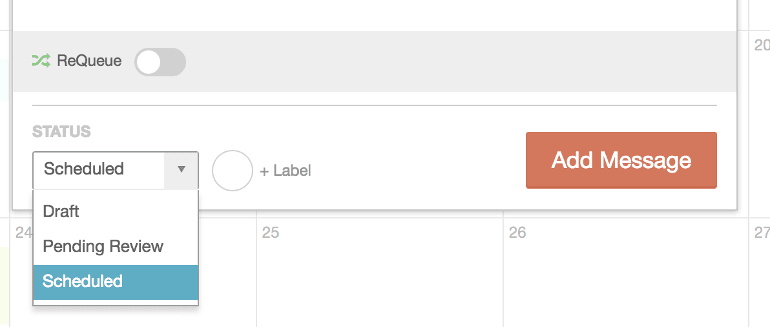
 You can control when your message published or if it stays in draft mode by toggling the status on the lower left-hand corner of your post:
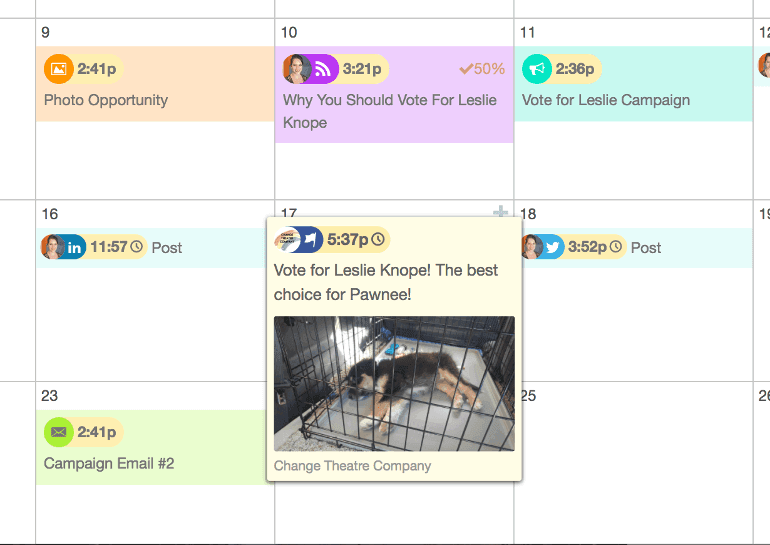
 Click add message and your message will be added to your calendar. You can see a full preview if you scroll over the post in your calendar:
 Now you may have noticed a button on your social posts that says ReQueue. You might be thinking “What the heck is ReQueue?”
ReQueue makes it easy to reshare your evergreen content automatically on an on-going basis.
Sounds pretty good right?
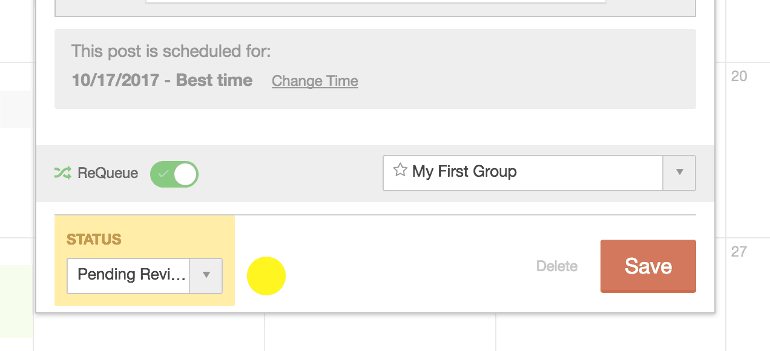
To enable ReQueue for a post, toggle the switch to on:
Now you may have noticed a button on your social posts that says ReQueue. You might be thinking “What the heck is ReQueue?”
ReQueue makes it easy to reshare your evergreen content automatically on an on-going basis.
Sounds pretty good right?
To enable ReQueue for a post, toggle the switch to on:
 If you’ve worked with ReQueue before then you should be good to go. If this is your first time using ReQueue, we’ll run through how to set it up.
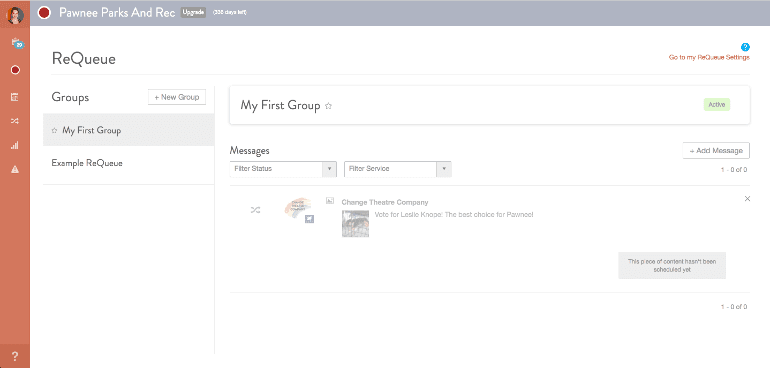
First go to the menu on the left-hand side of your calendar and click ReQueue:
If you’ve worked with ReQueue before then you should be good to go. If this is your first time using ReQueue, we’ll run through how to set it up.
First go to the menu on the left-hand side of your calendar and click ReQueue:
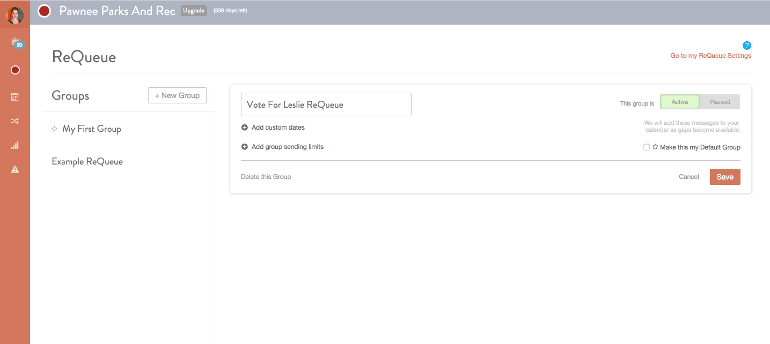
 The first thing you need to do is create a ReQueue group or edit the existing example group. For simplicity's sake we’re going to create a new group so click +New Group:
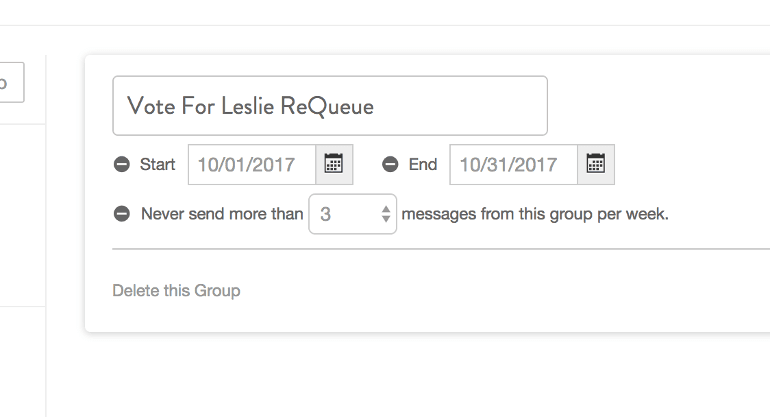
 Title your new group:
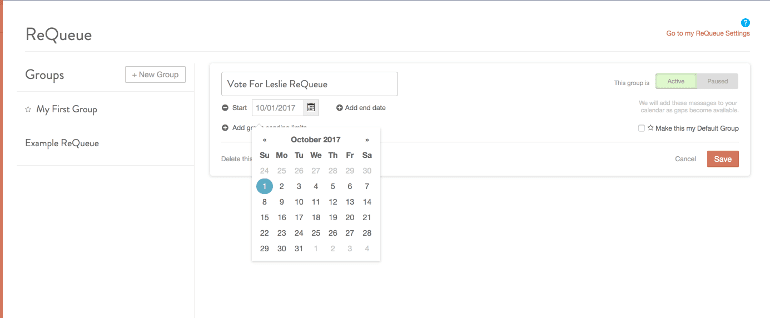
 Set the start and end dates for your campaign:
 Choose how many messages you want this group to send per week:
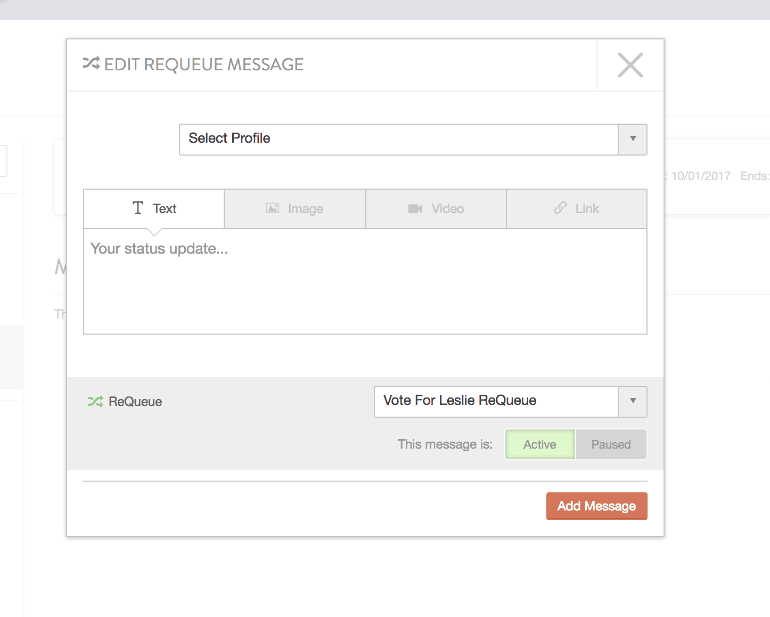
 There are two different ways that you can add messages to your ReQueue group. The first you saw earlier when you toggled the ReQueue switch to on in the specific social media message. The other is to craft a message that you want ReQueue to share.
To do this, click +Add Message:
There are two different ways that you can add messages to your ReQueue group. The first you saw earlier when you toggled the ReQueue switch to on in the specific social media message. The other is to craft a message that you want ReQueue to share.
To do this, click +Add Message:
 A window will appear and you’ll create your message like you usually do:
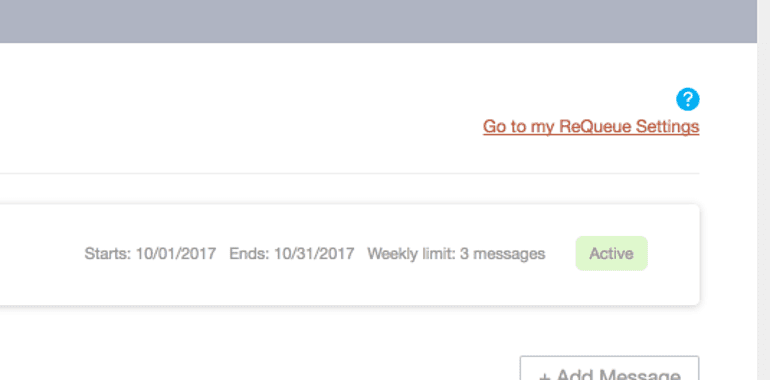
 After you’ve crafted all of your social messages there are some final settings that you need to set up for ReQueue to work properly. To do this, click Go to my ReQueue settings in the top right-hand corner:
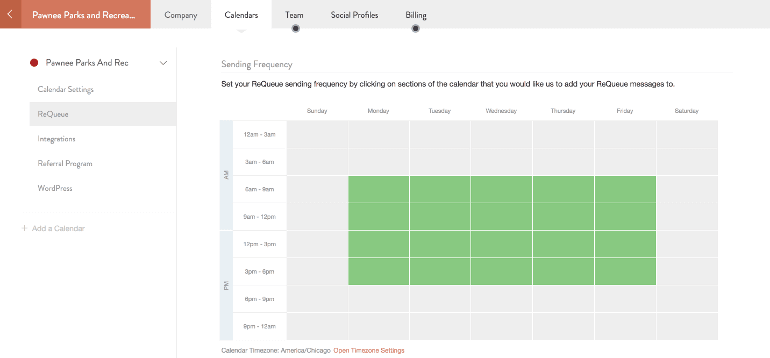
 The first thing you need to set is the time and day that you want ReQueue to send your messages at. Click the boxes to adjust your schedule:
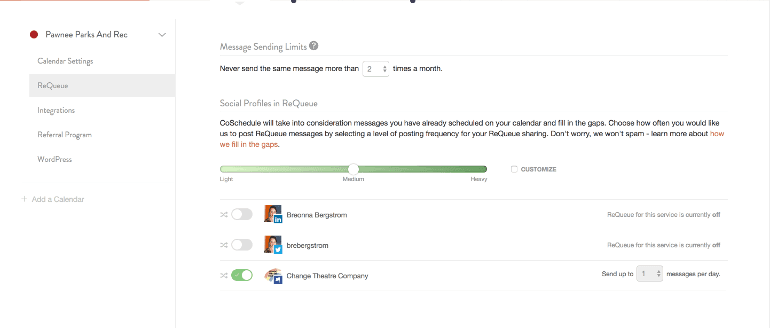
 Scroll down to set your message sending limits. These can be set at high medium or low depending on your preferences:
 Scheduling one message doesn’t seem so bad, right? But what if your team needs to schedule multiple messages for a campaign? Suddenly scheduling messages one at a time sounds like a nightmare.
Don’t worry CoSchedule has a fix for that too with Social Campaigns. This time instead of selecting social message you’re going to select Social Campaign:
Scheduling one message doesn’t seem so bad, right? But what if your team needs to schedule multiple messages for a campaign? Suddenly scheduling messages one at a time sounds like a nightmare.
Don’t worry CoSchedule has a fix for that too with Social Campaigns. This time instead of selecting social message you’re going to select Social Campaign:
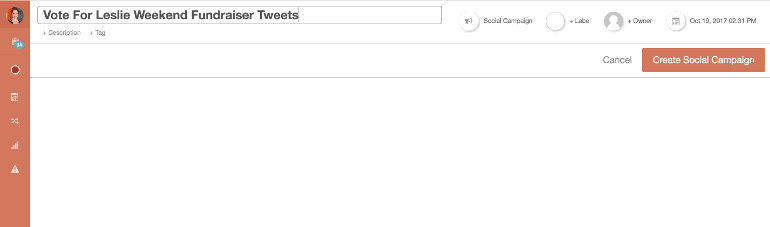
 Name your campaign:
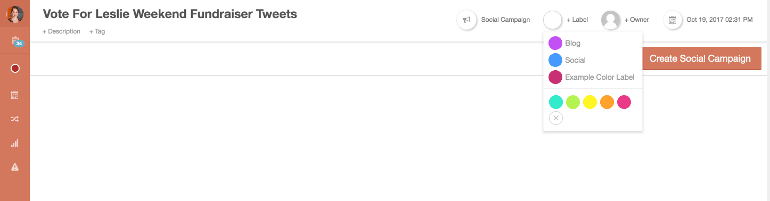
 Assign a color label:
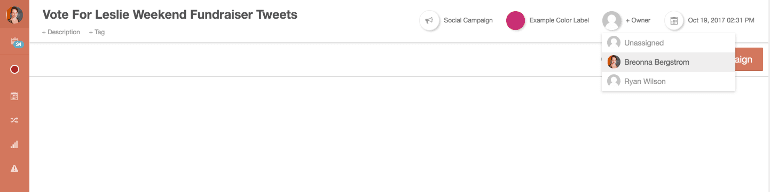
 Assign an owner to the campaign:
 You’ll then be able to start to add messages that start on the day that you scheduled the campaign:
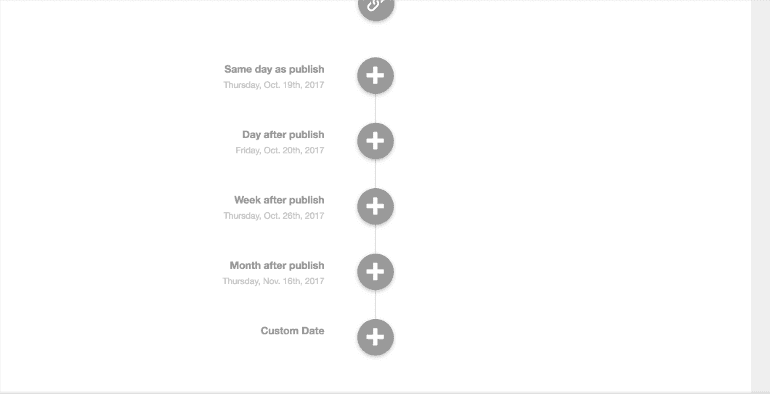 Add messages during the time frames in the campaign:
 If you want to to add posts outside the standard date range scroll down to Custom Date:
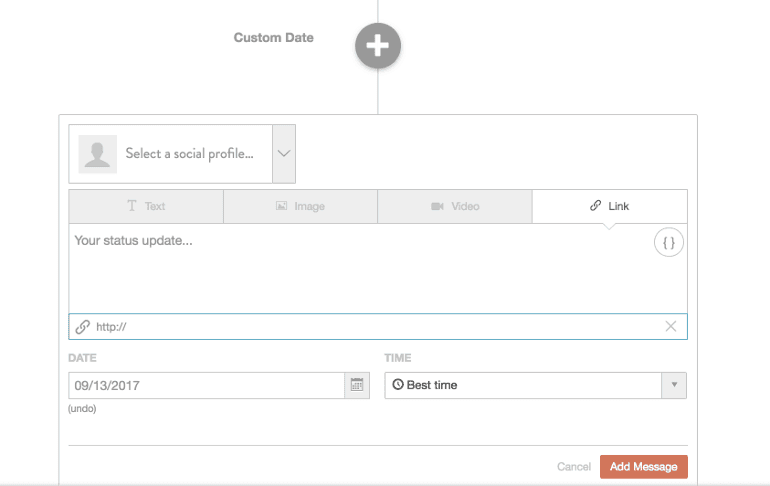 Add your messages like you normally do and choose the date from the drop down calendar:
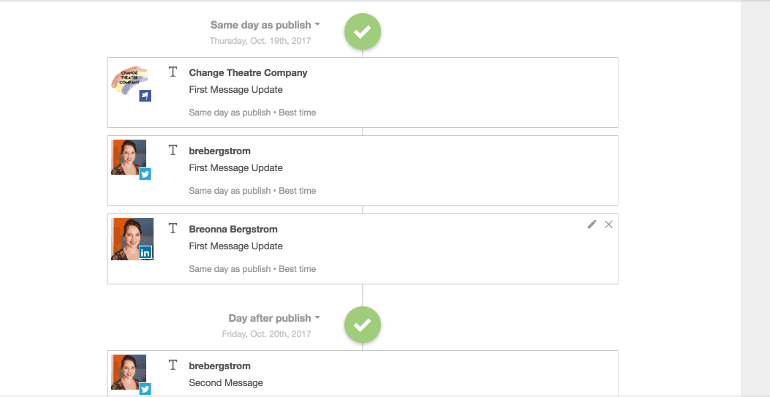
 Once you select your date, the post will fall in line with the order of the others:
 It would make sense that this is where your campaign would stop but CoSchedule has even more features to help keep your social campaigns organized. Unlike single message social posts, social campaigns have tasks attached to them, meaning you can organize and communicate everything your team needs to know about the campaign in one place.
Scroll to the right and add in the tasks that your team will need to complete like you did earlier in this post:
It would make sense that this is where your campaign would stop but CoSchedule has even more features to help keep your social campaigns organized. Unlike single message social posts, social campaigns have tasks attached to them, meaning you can organize and communicate everything your team needs to know about the campaign in one place.
Scroll to the right and add in the tasks that your team will need to complete like you did earlier in this post:
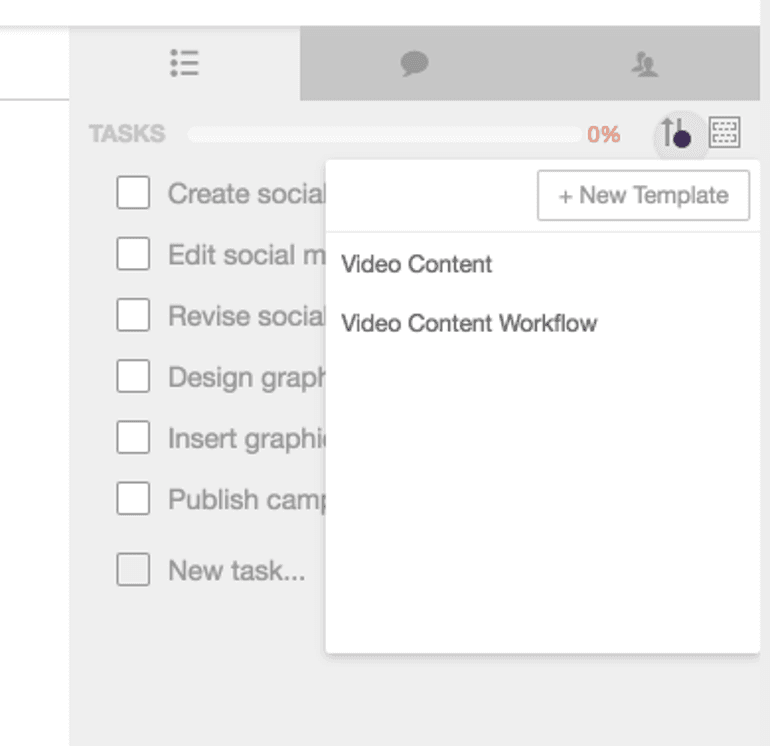
 It will get annoying after a while to enter in tasks for every social campaign that you create. That’s where task templates come in. Task templates allow your team to drag and drop whole sets of tasks without having to re-write them every time.
To create a task template scroll back to your tasks and select the square icon in the corner:
It will get annoying after a while to enter in tasks for every social campaign that you create. That’s where task templates come in. Task templates allow your team to drag and drop whole sets of tasks without having to re-write them every time.
To create a task template scroll back to your tasks and select the square icon in the corner:
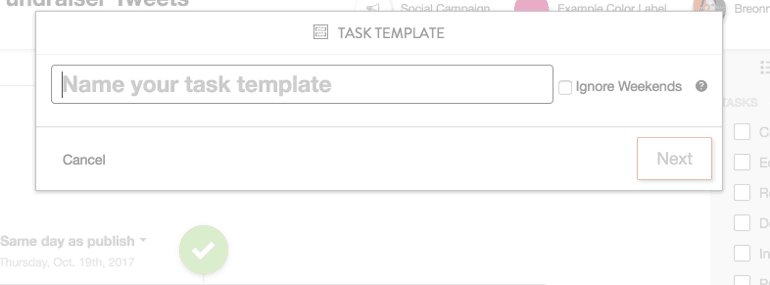
 Select New Template+:
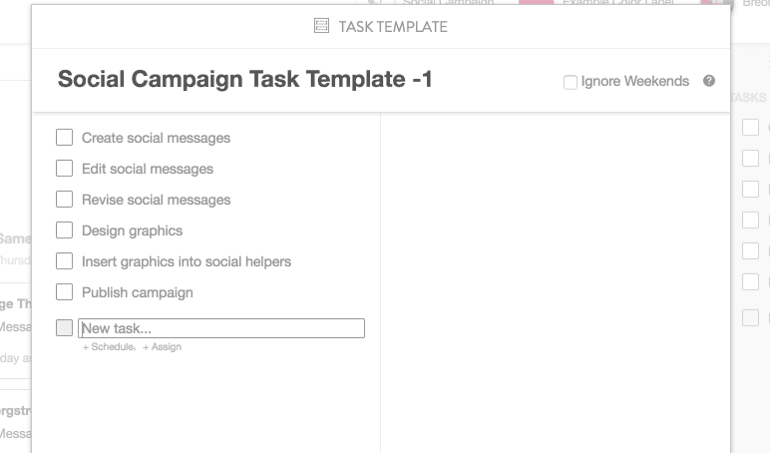
 Name the task template:
 Enter in the tasks and assign them to your team members and set how many days before publish you need to the tasks need to be completed:
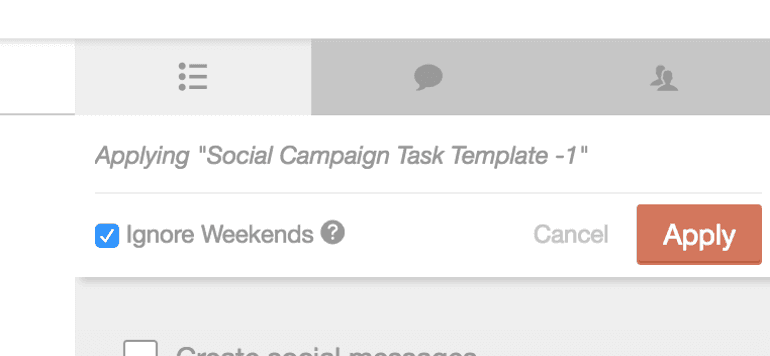
 You can also decide if you want your task due dates to avoid weekends so your team doesn't have something due on a Saturday:
 Click Apply:
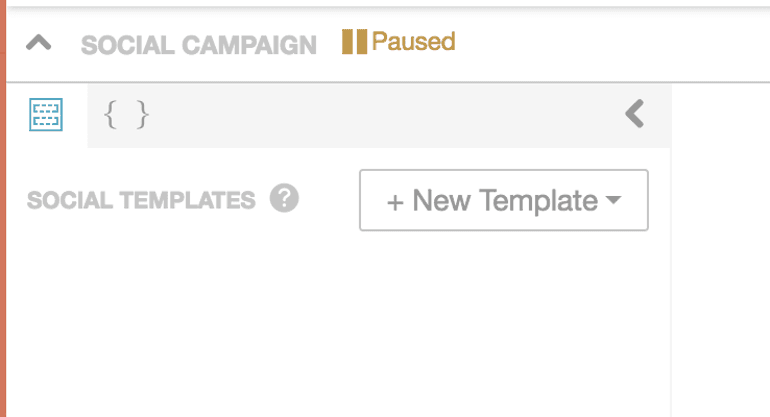
 We’re not done yet. Another way to help organize your social media campaigns is to create Social helpers for your campaigns. These will help fill in photos and more without you having to enter them yourself.
To start, scroll over to the right and select the square icon and click +New Template:
We’re not done yet. Another way to help organize your social media campaigns is to create Social helpers for your campaigns. These will help fill in photos and more without you having to enter them yourself.
To start, scroll over to the right and select the square icon and click +New Template:
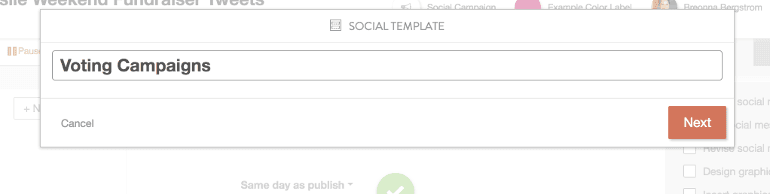
 Title your template:
 Select +New Campaign and in the drop down menu select +Image Helper:
 It will then ask you to name the image helper:

Automate Reporting (With .CSV Exports) Instead Of Building Them Manually
Reporting is a key aspect for marketers because you need to be able to prove that what you’re doing is working and creating a positive effect on the goals that your business has set. But creating and gathering data for those reports manually using spreadsheets is backbreaking and can be hard to justify when you know your already precious time could be spent elsewhere. What if I told you that CoSchedule had features that would gather and build those reports for you, so all you had to do was hit the download button? If you’re going to use a template for your reports it might look something like this: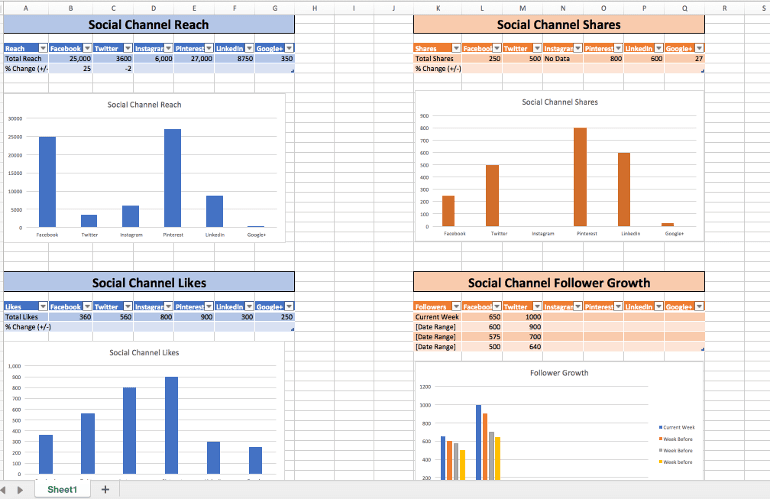 Here’s the problem though. Your team has to take time to gather all of the data for your report. Not only is it annoying, your team has other projects and tasks that they need to be working on, so losing a day once a month or once a week can create a huge problem for your team.
CoSchedule helps solve this problem with our in app reports that allow you to simply adjust the dates, export and download.
That’s it.
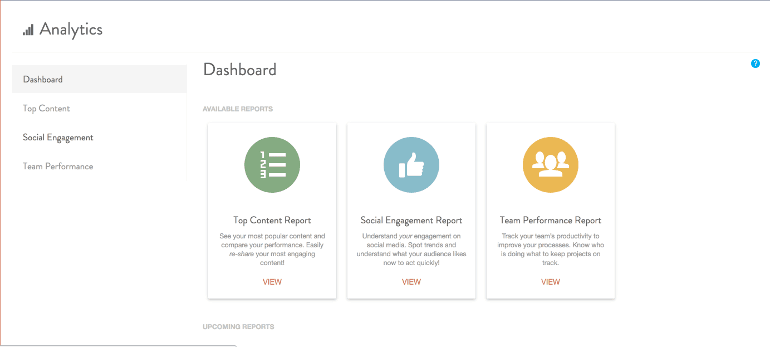
There are two different types of reports that CoSchedule offers. The first is our Social Engagement Report:
[Video embed: Social Engagement Report Video]
The Social Engagement Report contains all the information you need like:
Here’s the problem though. Your team has to take time to gather all of the data for your report. Not only is it annoying, your team has other projects and tasks that they need to be working on, so losing a day once a month or once a week can create a huge problem for your team.
CoSchedule helps solve this problem with our in app reports that allow you to simply adjust the dates, export and download.
That’s it.
There are two different types of reports that CoSchedule offers. The first is our Social Engagement Report:
[Video embed: Social Engagement Report Video]
The Social Engagement Report contains all the information you need like:
- Social likes (per post)
- Social comments (per post)
- Social shares (per post)
- Engagements
- Engagement rates
- Top messages per channel and overall
 Click left side toolbar and select analytics:
 Scroll to Social Engagement Report:
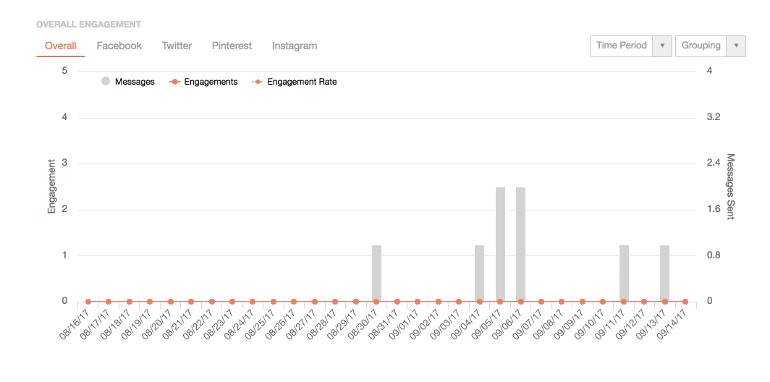
 Click view and you’ll be brought to your dashboard. This gives you an overall view of what your engagement rate total is as well as the dates that your report is pulling for:
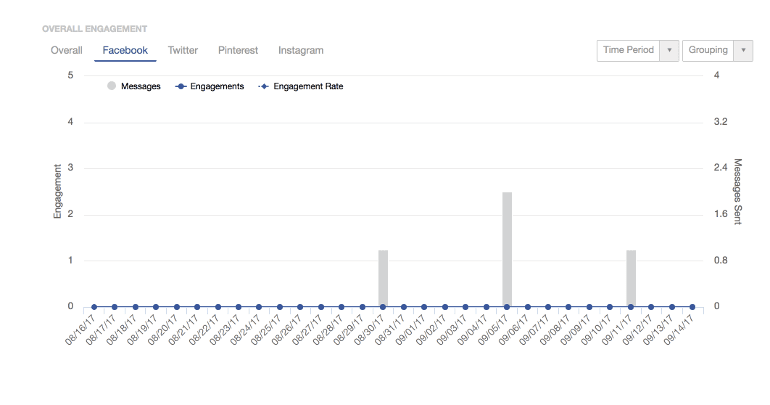
 If you scroll down you can see overall engagement for channels which include the number of messages sent, engagements for the day and engagement rates:
 If you scroll over to the channels you can see an individual breakdown of the number of messages sent, engagement rates and engagements per channel:
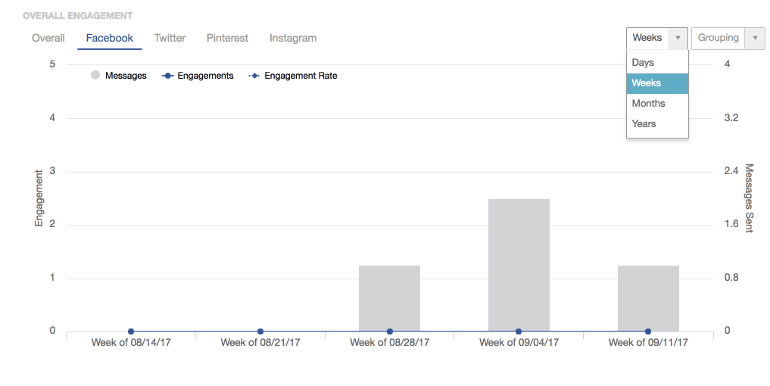
 You can also regroup messages by time period by selecting the drop down menu in the upper-right hand corner:
 If you keep scrolling down your report you’ll see your top messages that have been posted during that time period:
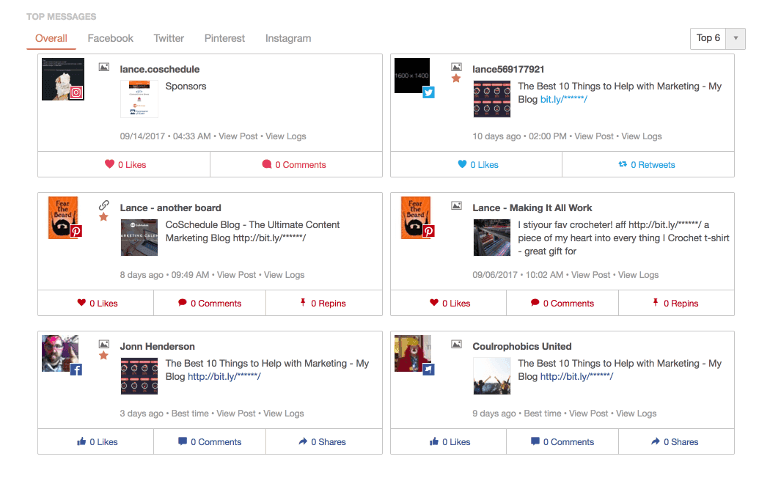 Just like with the earlier report if you scroll to the left you can see a breakdown of top posts per channel:
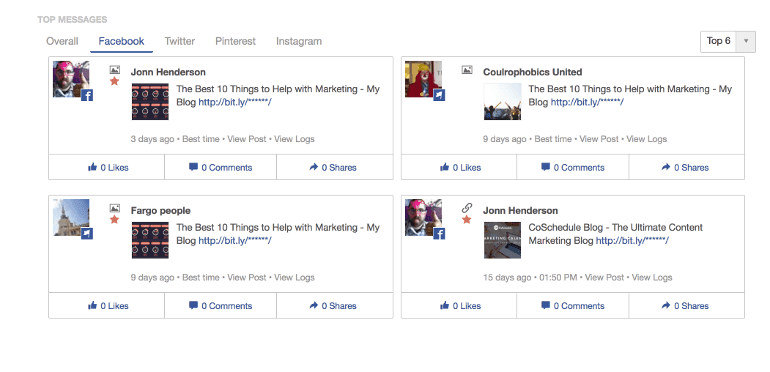 You can change the number of top posts you see through the drop down menu in the top right-hand corner:
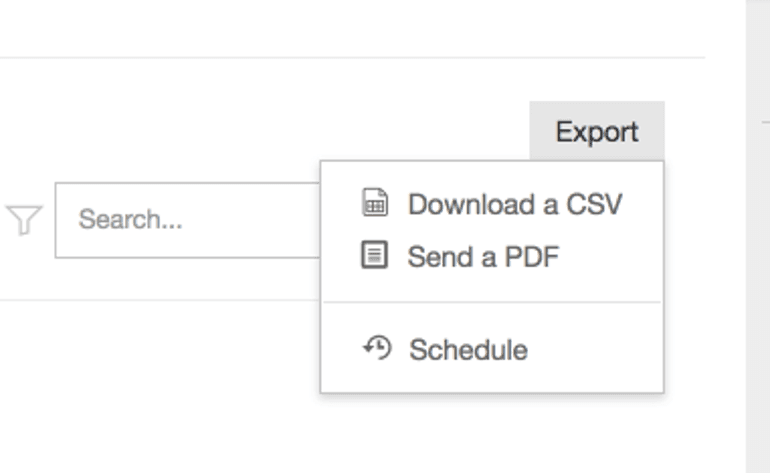
 So now you’ve seen the report but you still need to show your boss. Scroll back to the top of the report and click Export:
 You’ll then be able to choose whether you want the report to be exported as an .CSV file or as a PDF:
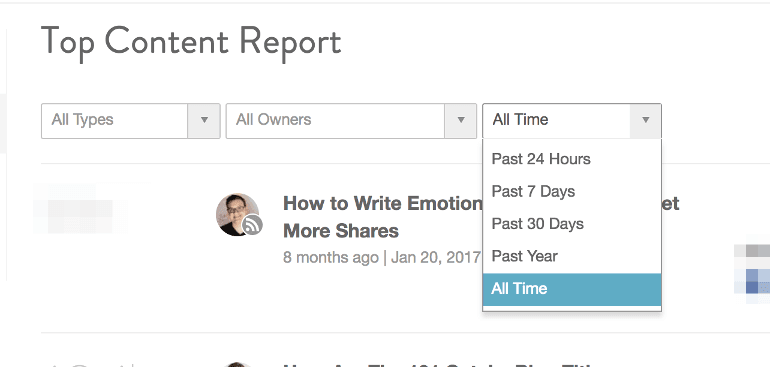
 The report will then be sent to the email connected to your CoSchedule account. The other report that your team is going to love is the Top Content Report. The top content report pulls the top content pieces that your team published within a specific time period.
To find this report go back to your analytics home page and select Top Content Report:
The report will then be sent to the email connected to your CoSchedule account. The other report that your team is going to love is the Top Content Report. The top content report pulls the top content pieces that your team published within a specific time period.
To find this report go back to your analytics home page and select Top Content Report:
 The home screen of your report will now show your top content of all time:
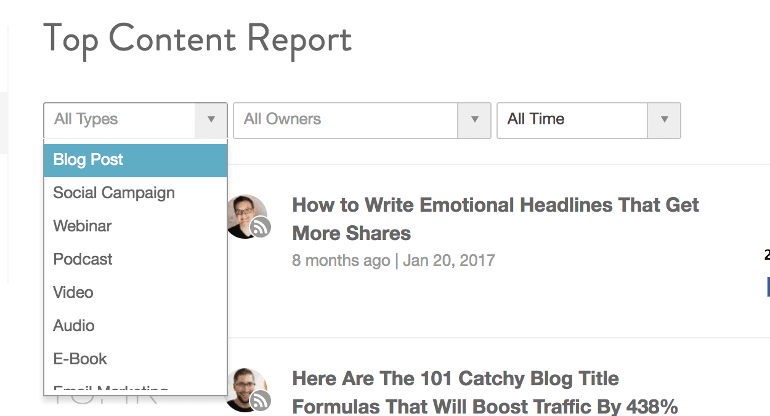
 To see a better breakdown you can change the tabs above. To see different types of content select the first drop down menu and choose what you would like to see:
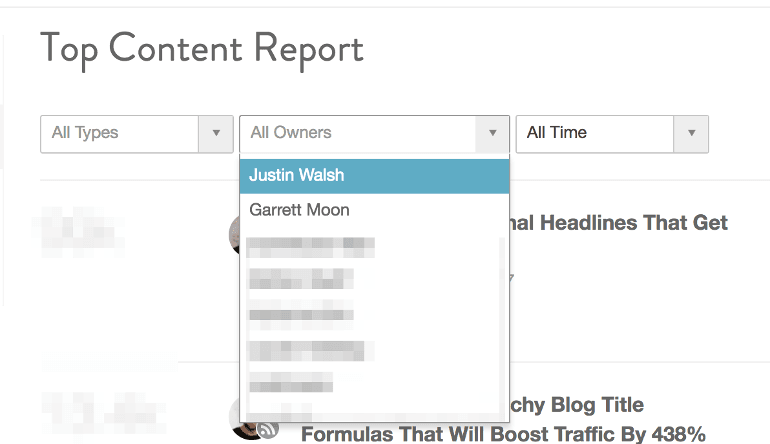
 To see a top content breakdown per CoSchedule user:
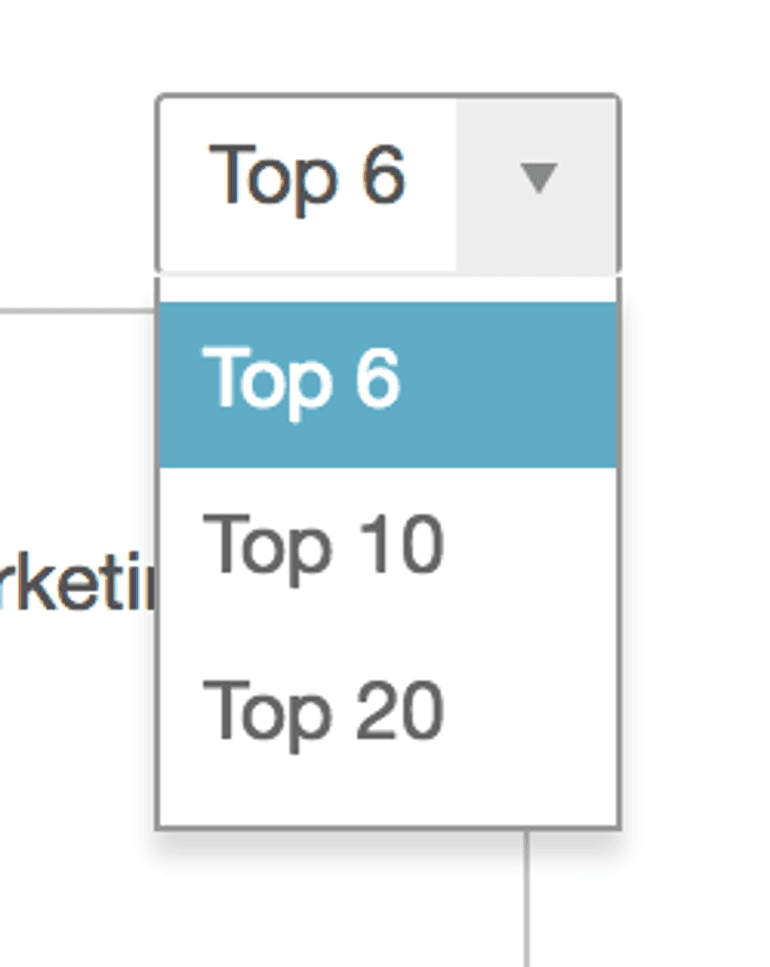
 Finally you can break down your top content based on time periods by selecting it in the fall drop down menu:
 Unlike the Social Engagement Report, the Top Content Report cannot be exported and will be more of a at a glance report then one that can be consistency viewed for your team.
But now your team is out of your spreadsheets and you can move on to your next project that much faster!
Unlike the Social Engagement Report, the Top Content Report cannot be exported and will be more of a at a glance report then one that can be consistency viewed for your team.
But now your team is out of your spreadsheets and you can move on to your next project that much faster!
Project Management With CoSchedule: Stop Herding Cats (And Start Getting More Stuff Done)
Your marketing team is constantly working on projects meaning that you have another ten spreadsheets for each project, with drafts thrown all over your inbox. Basically no one knows what’s going on. Concentrating your efforts into one marketing project management tool will not only save your team’s time, it will save your sanity. If your team is working in a spreadsheet it might look a little like this: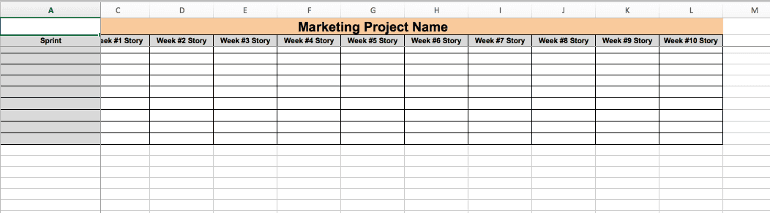 It’s easy to use spreadsheets to create a backlog of projects that need to be completed but it’s incredibly easy for the template to become outdated. It’s also hard for your team to keep track of what has been done and what needs to be done for each project.
So how do you move your project backlog into CoSchedule?
With Marketing Campaigns:
[GRAPHIC: Marketing Projects Video]
Marketing Campaigns allows you to move every project and its components into one place allowing you to create, organize and publish all of your pieces.
To start, click the add content button:
It’s easy to use spreadsheets to create a backlog of projects that need to be completed but it’s incredibly easy for the template to become outdated. It’s also hard for your team to keep track of what has been done and what needs to be done for each project.
So how do you move your project backlog into CoSchedule?
With Marketing Campaigns:
[GRAPHIC: Marketing Projects Video]
Marketing Campaigns allows you to move every project and its components into one place allowing you to create, organize and publish all of your pieces.
To start, click the add content button:
 Select Marketing Campaigns:
Title your project. You can usually use the title that is in your backlog:
Select Marketing Campaigns:
Title your project. You can usually use the title that is in your backlog:
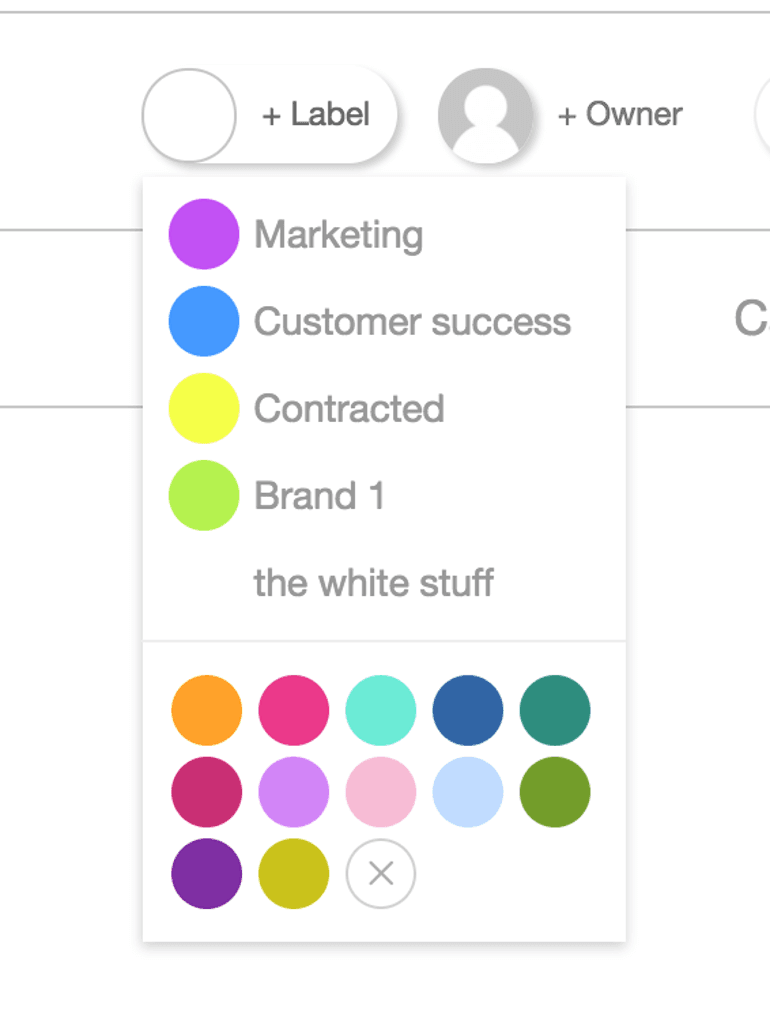
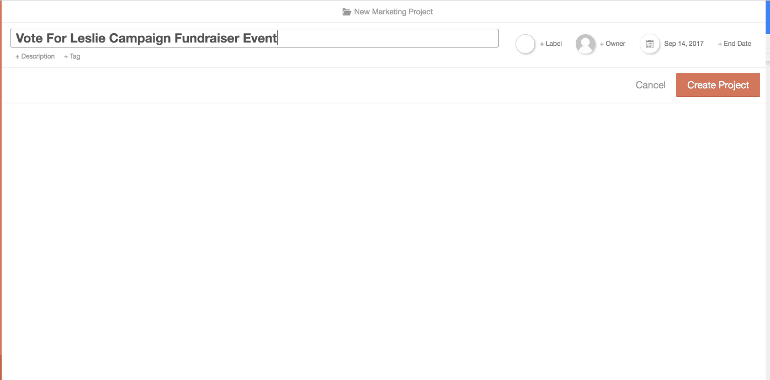 Add a color label:
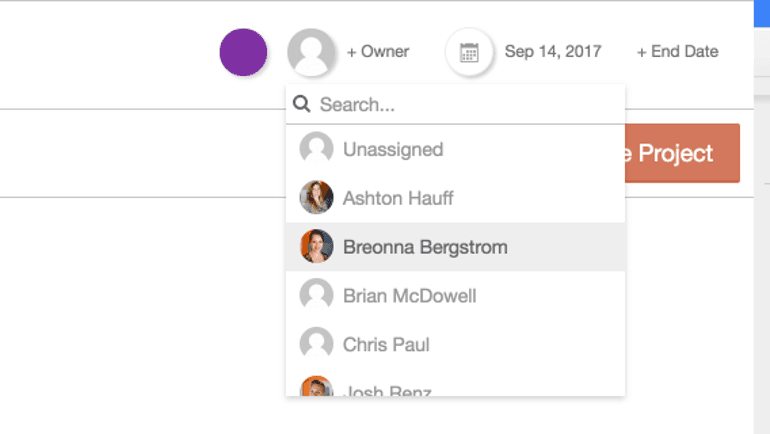
 Assign an owner to the project:
 Finally you need to set the start and end date of your project. Your project timeline should include all the time you need to create different parts of your project as well as its final publish date:
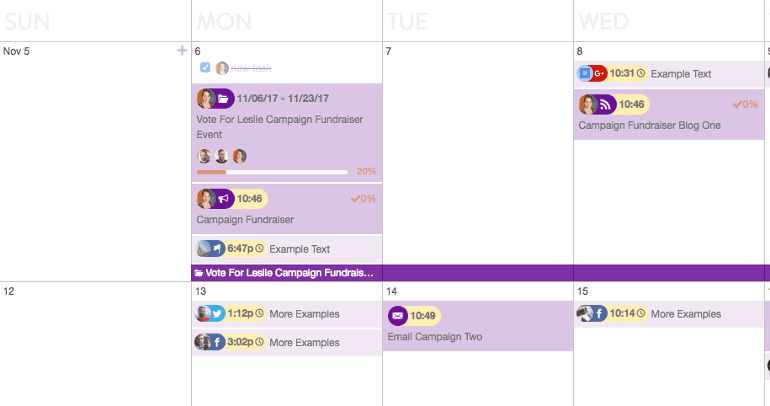
 You will then see an adjusted calendar view that expands the length of your project:
 You can then begin to add in different parts of your project by clicking the + in the upper left-hand corner:
 The same content selection screen will appear, for this example we’re going to create a blog post. Title, select the owner and the publish date as your normally would:
 In the right-hand corner, you can add in task templates that we showed you how to create earlier:
 You can continue to add projects, which will form a tab along the top of the calendar:
 You’ll notice a status bar at the top of the your marketing project. The more task templates that you add to each of your mini projects the more it will add to the progress bar. The more tasks you complete the more the progress bar will move:
 You can go back to the main calendar view and see the entire marketing project as well as team members who are a part of the project:
 Remember that as you add projects into your calendar from your backlog, do it one at a time. This will help ensure that you don’t miss a vital part of your project.
While moving your projects and more from your spreadsheets into CoSchedule be prepared for it to take some time, but once everything is ready, your team will move effortlessly from project to project no longer having to worry about a spreadsheet.
Remember that as you add projects into your calendar from your backlog, do it one at a time. This will help ensure that you don’t miss a vital part of your project.
While moving your projects and more from your spreadsheets into CoSchedule be prepared for it to take some time, but once everything is ready, your team will move effortlessly from project to project no longer having to worry about a spreadsheet.


