The Best Way to Share Project Timelines and Visibility With External Departments

 If your marketing team is regularly creating assets for other departments (like the sales department) chances are you’re looking for a better way to manage this process.
Endless emails, desk drop bys, and conversations by the coffee pot probably aren’t the best places for such marketing requests to be made.
Luckily, in an earlier blog post, you learned how to triage incoming marketing requests with CoSchedule.
This post takes managing the marketing request process one step further to teach you how you can share project timelines and give visibility to external departments with read-only views.
If your marketing team is regularly creating assets for other departments (like the sales department) chances are you’re looking for a better way to manage this process.
Endless emails, desk drop bys, and conversations by the coffee pot probably aren’t the best places for such marketing requests to be made.
Luckily, in an earlier blog post, you learned how to triage incoming marketing requests with CoSchedule.
This post takes managing the marketing request process one step further to teach you how you can share project timelines and give visibility to external departments with read-only views.
Keep External Departments Updated on Project Planning
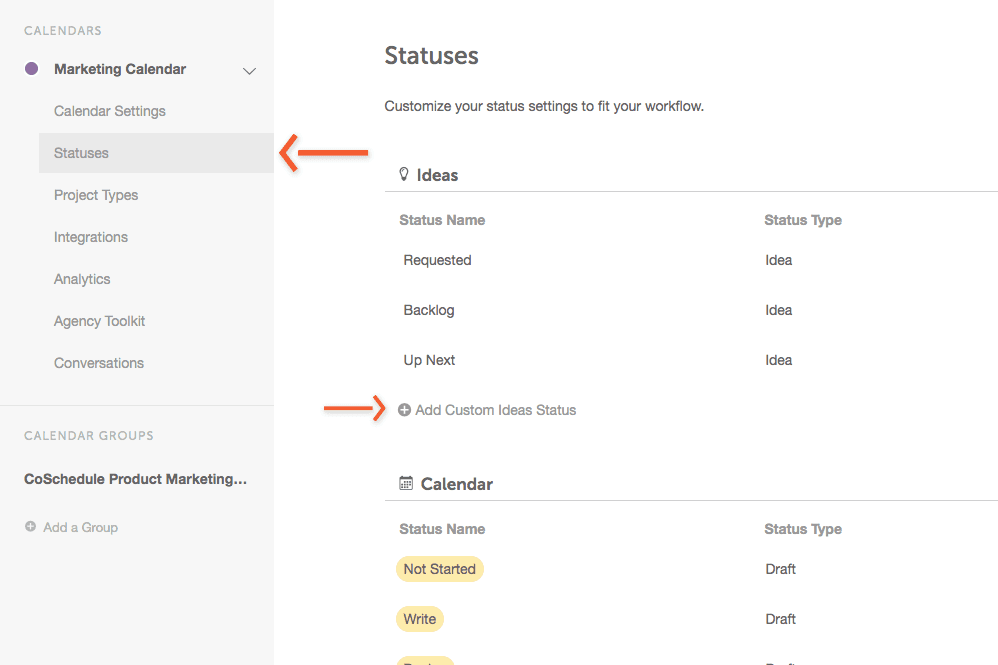
Follow this process to use CoSchedule to keep external departments in-the-know about the status of their project request. This helps them see that their request has been received and is being prioritized.Create Custom Statuses in CoSchedule
Head over to your calendar settings:- Toggle down your name in the top left-hand corner.
- Choose calendar settings.
- Click the “Status” option in the left-hand menu.
- Set up three custom statuses under the “Ideas” area - Requested, Backlog, and Up Next.
Set Up a Sales Requests Saved View
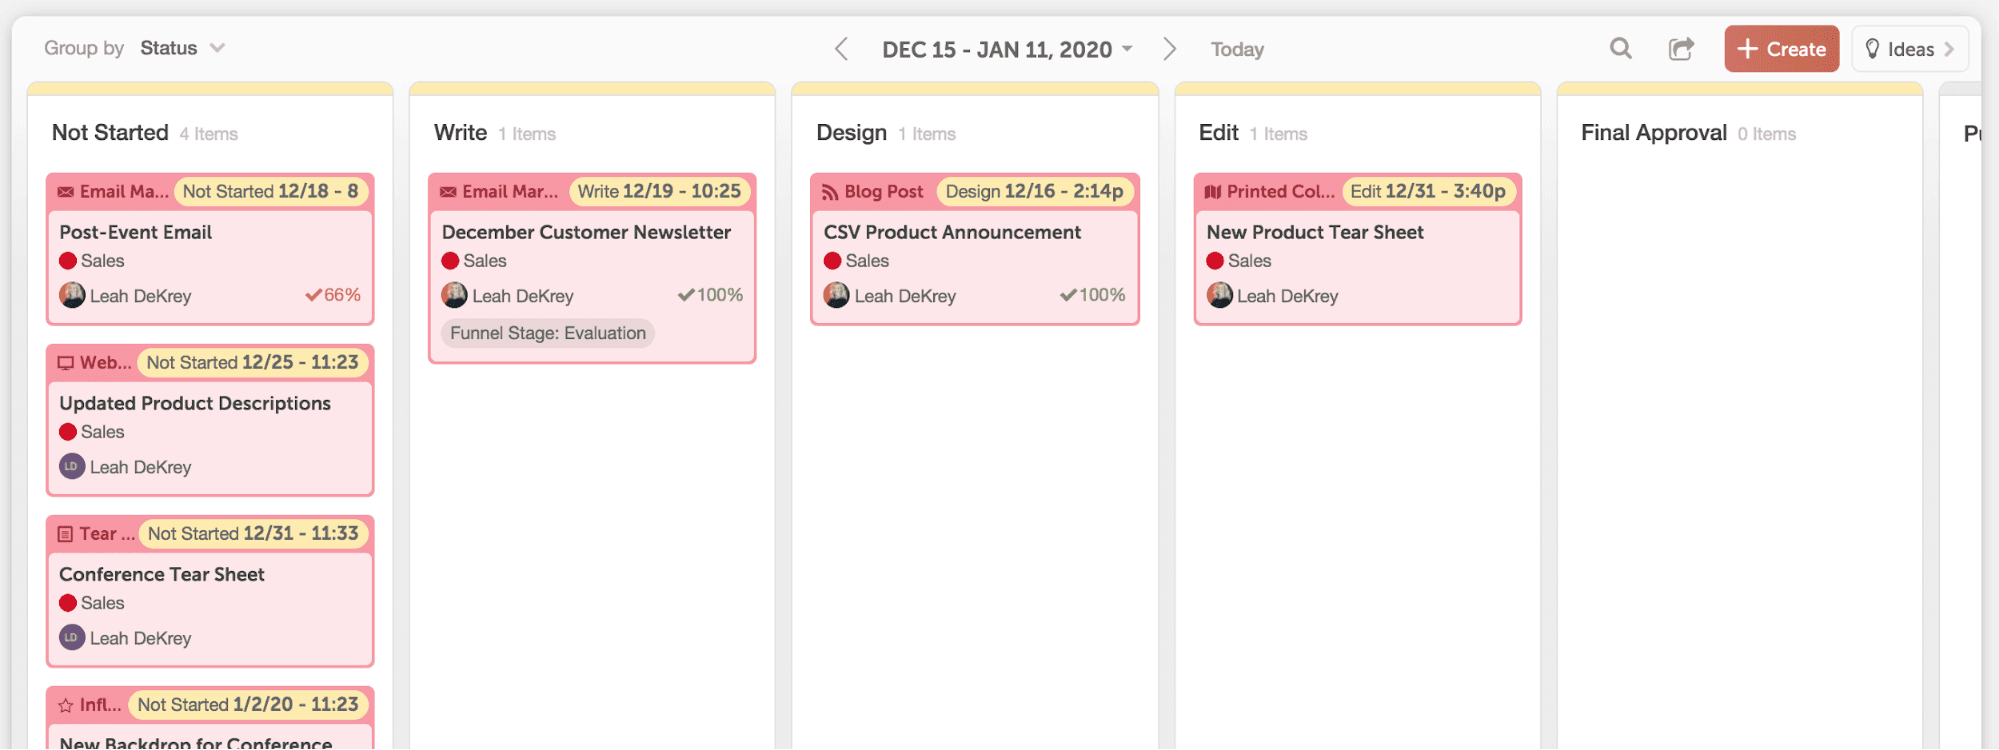
Next, you’ll need to create a new “sales requests” saved view. This creates a focused view of CoSchedule that contains only the projects that have been requested by your sales department. You’ll want to do this for two reasons:- It makes it easy for you to quickly monitor incoming requests.
- It allows your sales department to self-serve and confirms their request has been seen.
- From your calendar, click the last option in the breadcrumb menu and choose “Create New Saved View”.
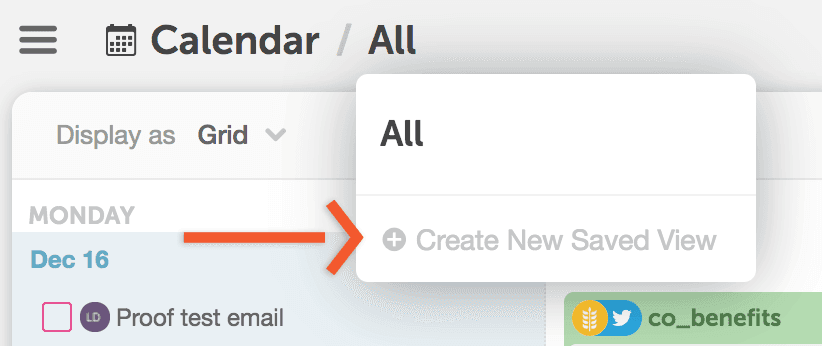
- Name your new saved view, “Sales Requests”.
- Tick the box “Share view with my team” if you’d like your marketing team to see this saved view.
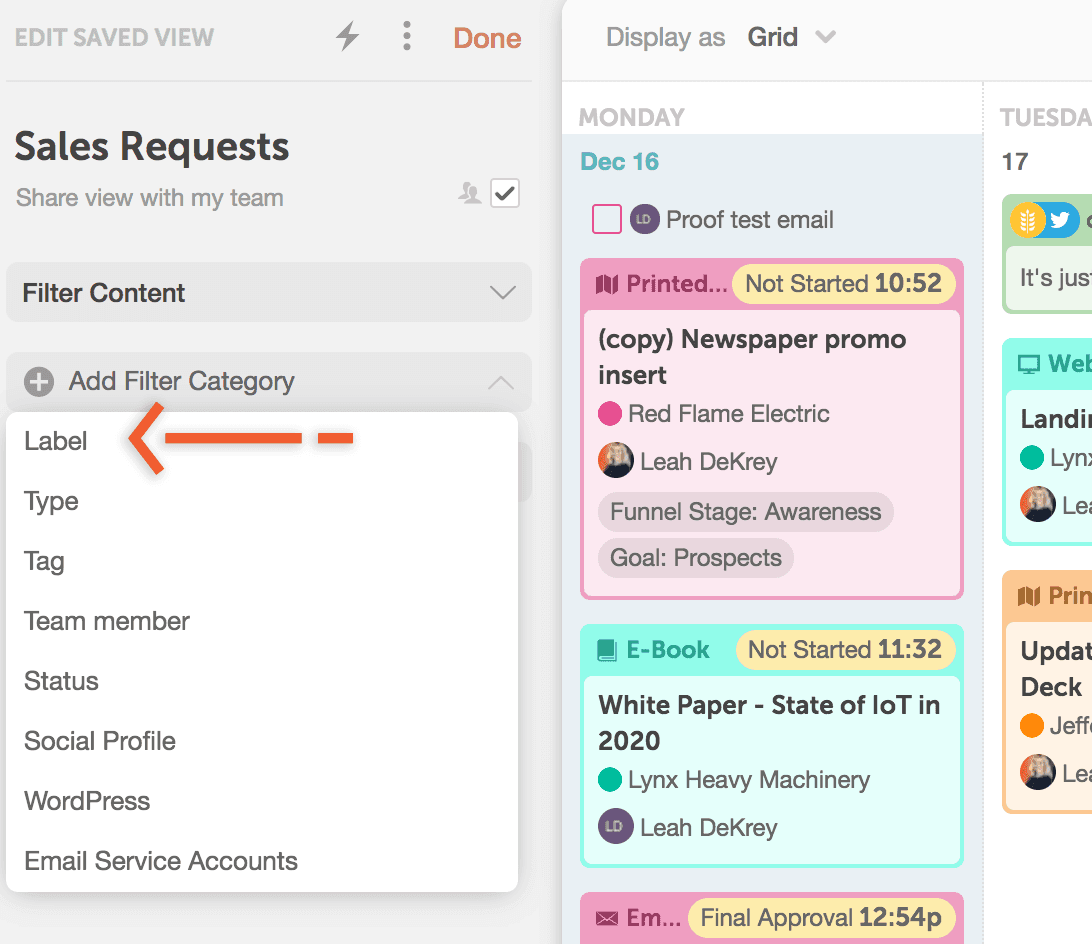
- Next, choose to add a new filter category.
- If your sales team has its own color label, add “Label” as a filter category; if sales has a tag, add “Tag” as a filter category.
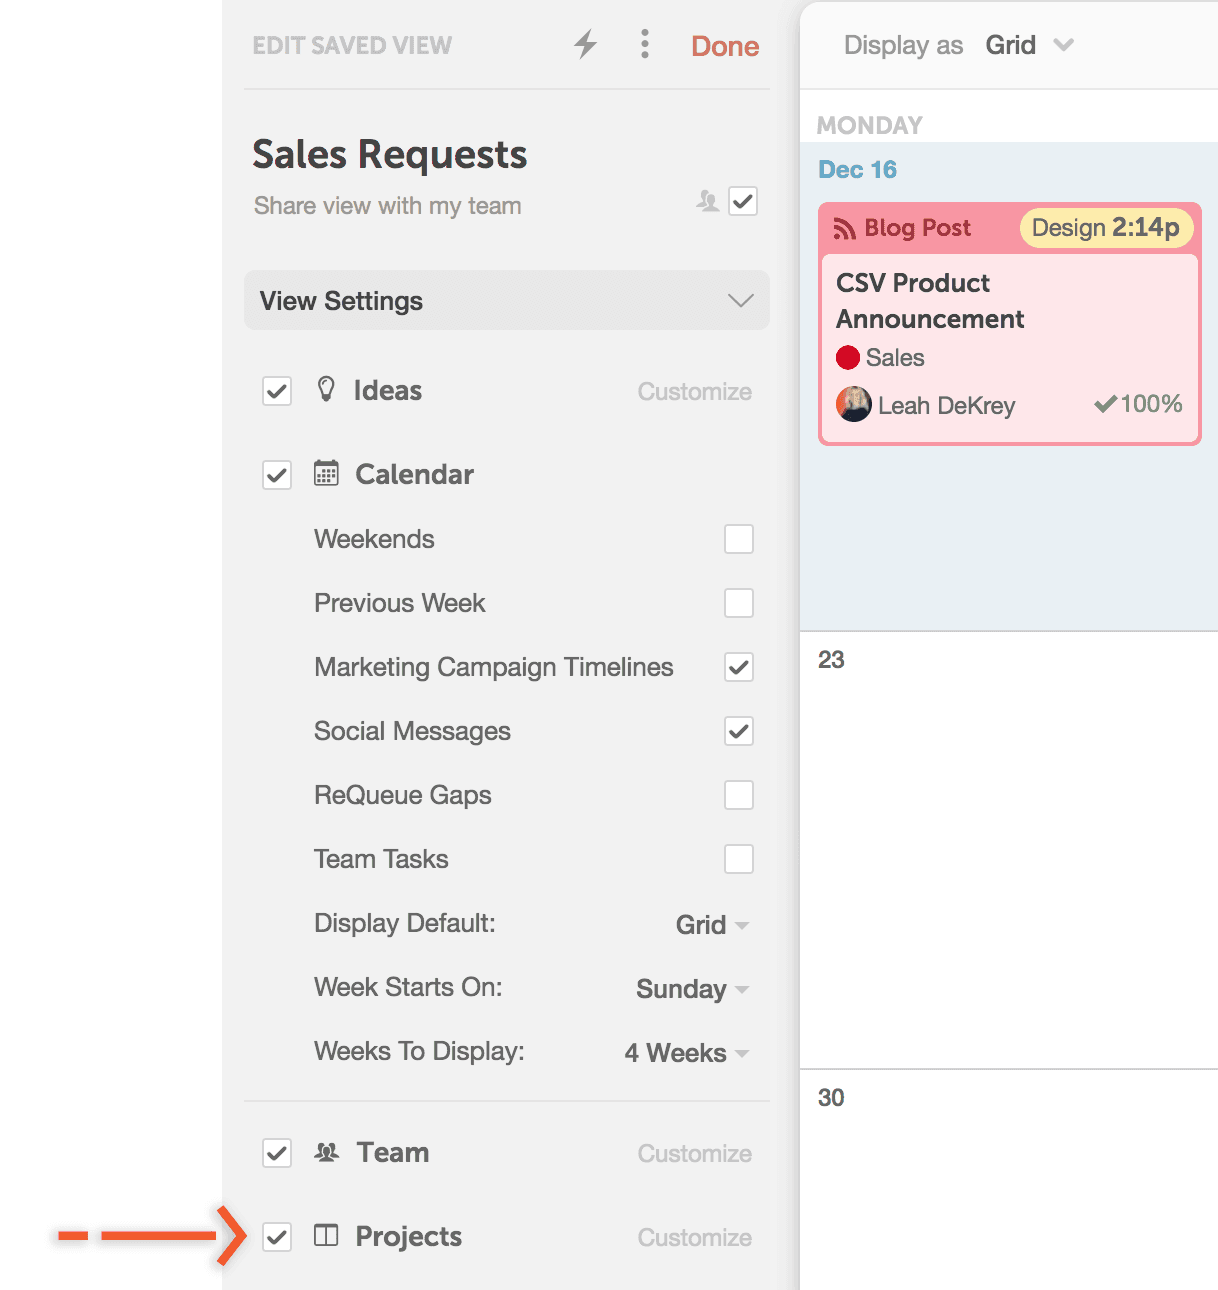
- Under “View Settings” tick the box next to “Ideas”, “Team”, and “Projects”. This will make this saved view available in all areas of CoSchedule.
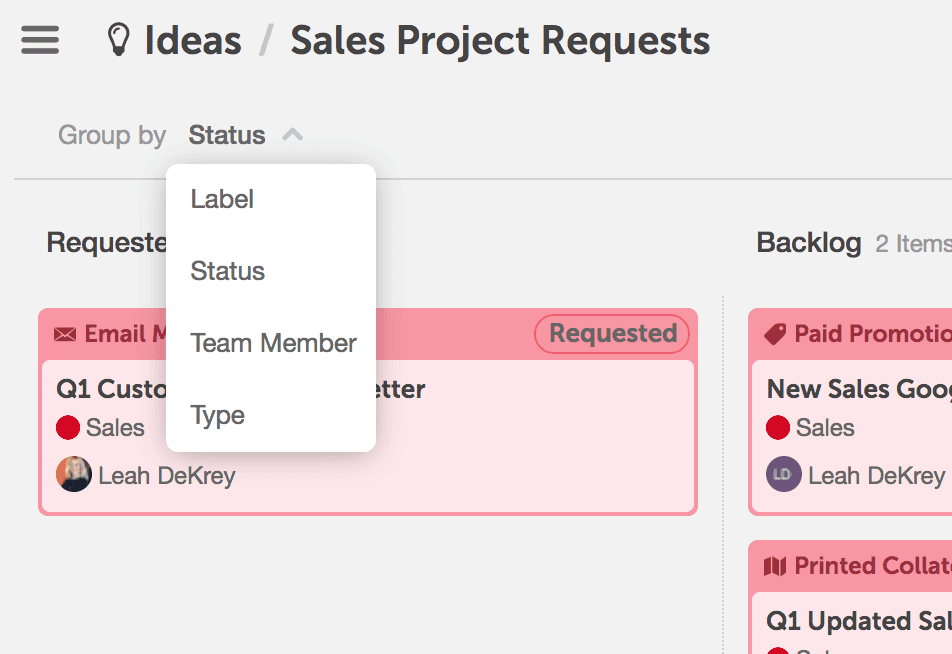
TIP: When you’re in the Idea Board, choose to group the info by “Status”.
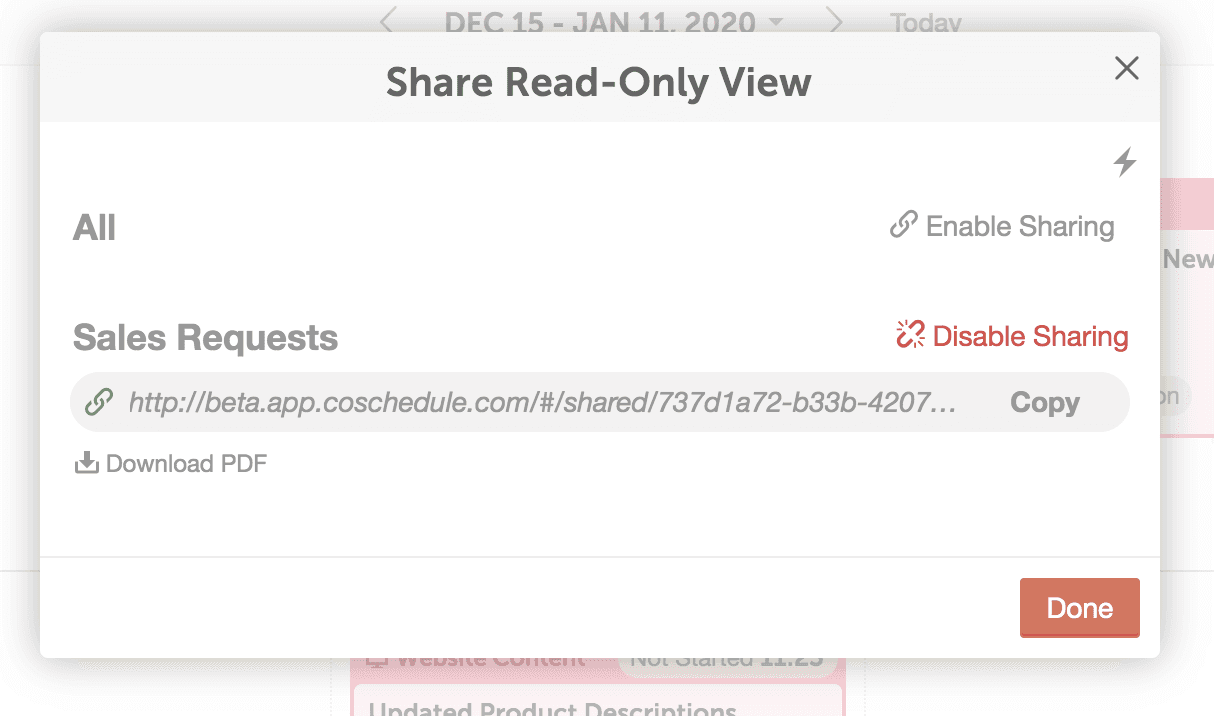
Create an Idea Board Read-Only Link to Share with Your Sales Department
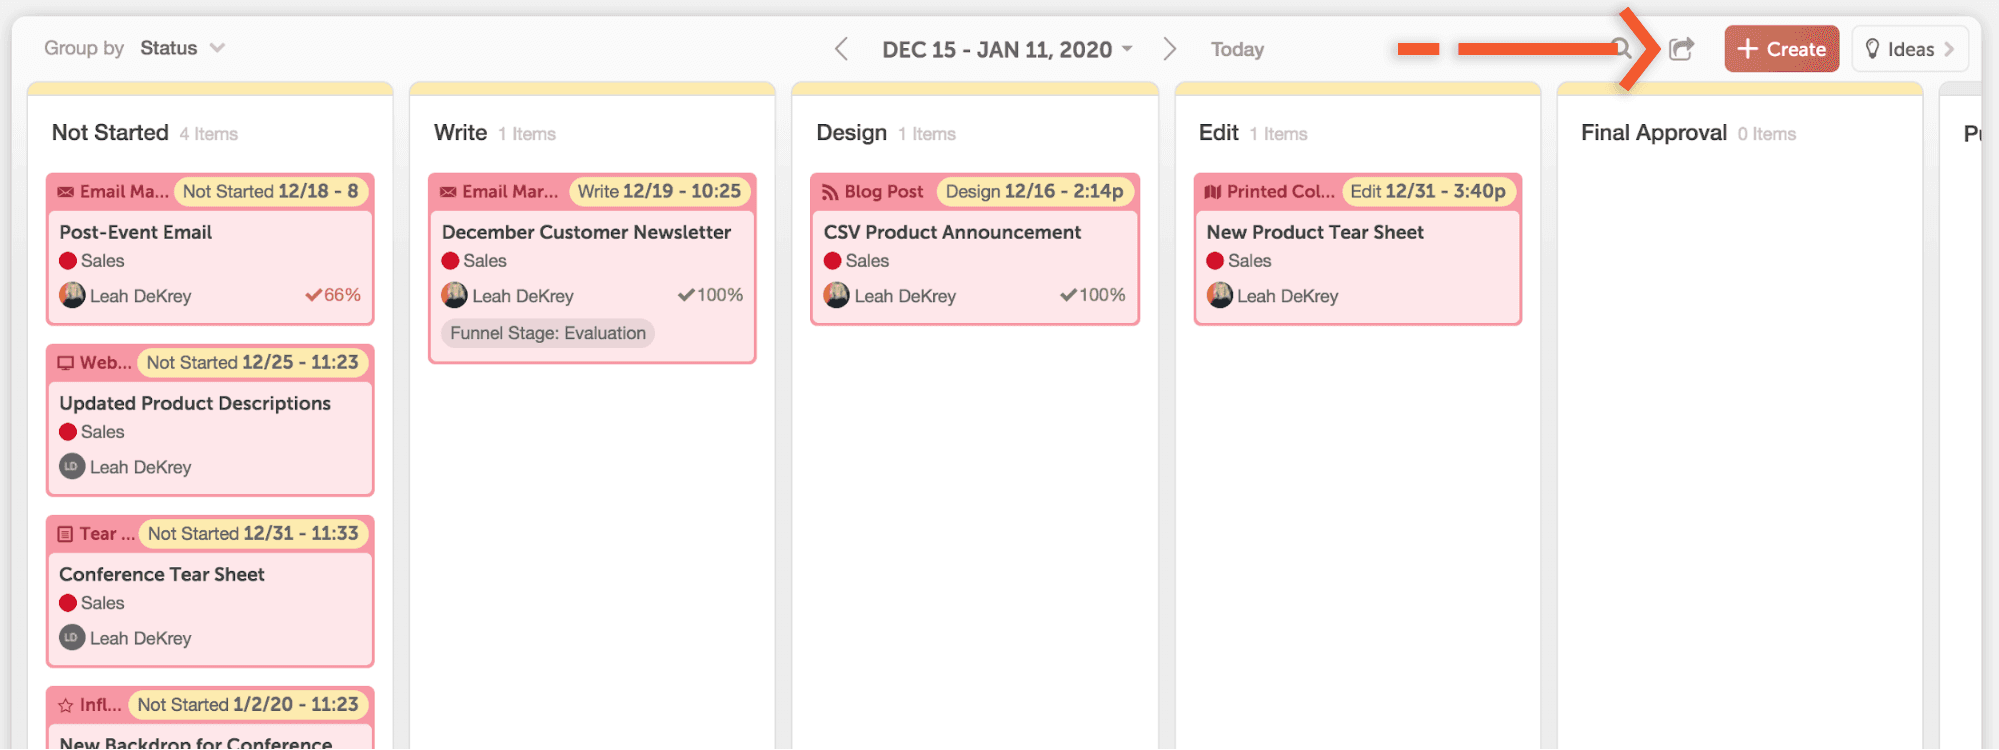
From the Sales Requests view of your Idea Board, click the read-only icon in the corner.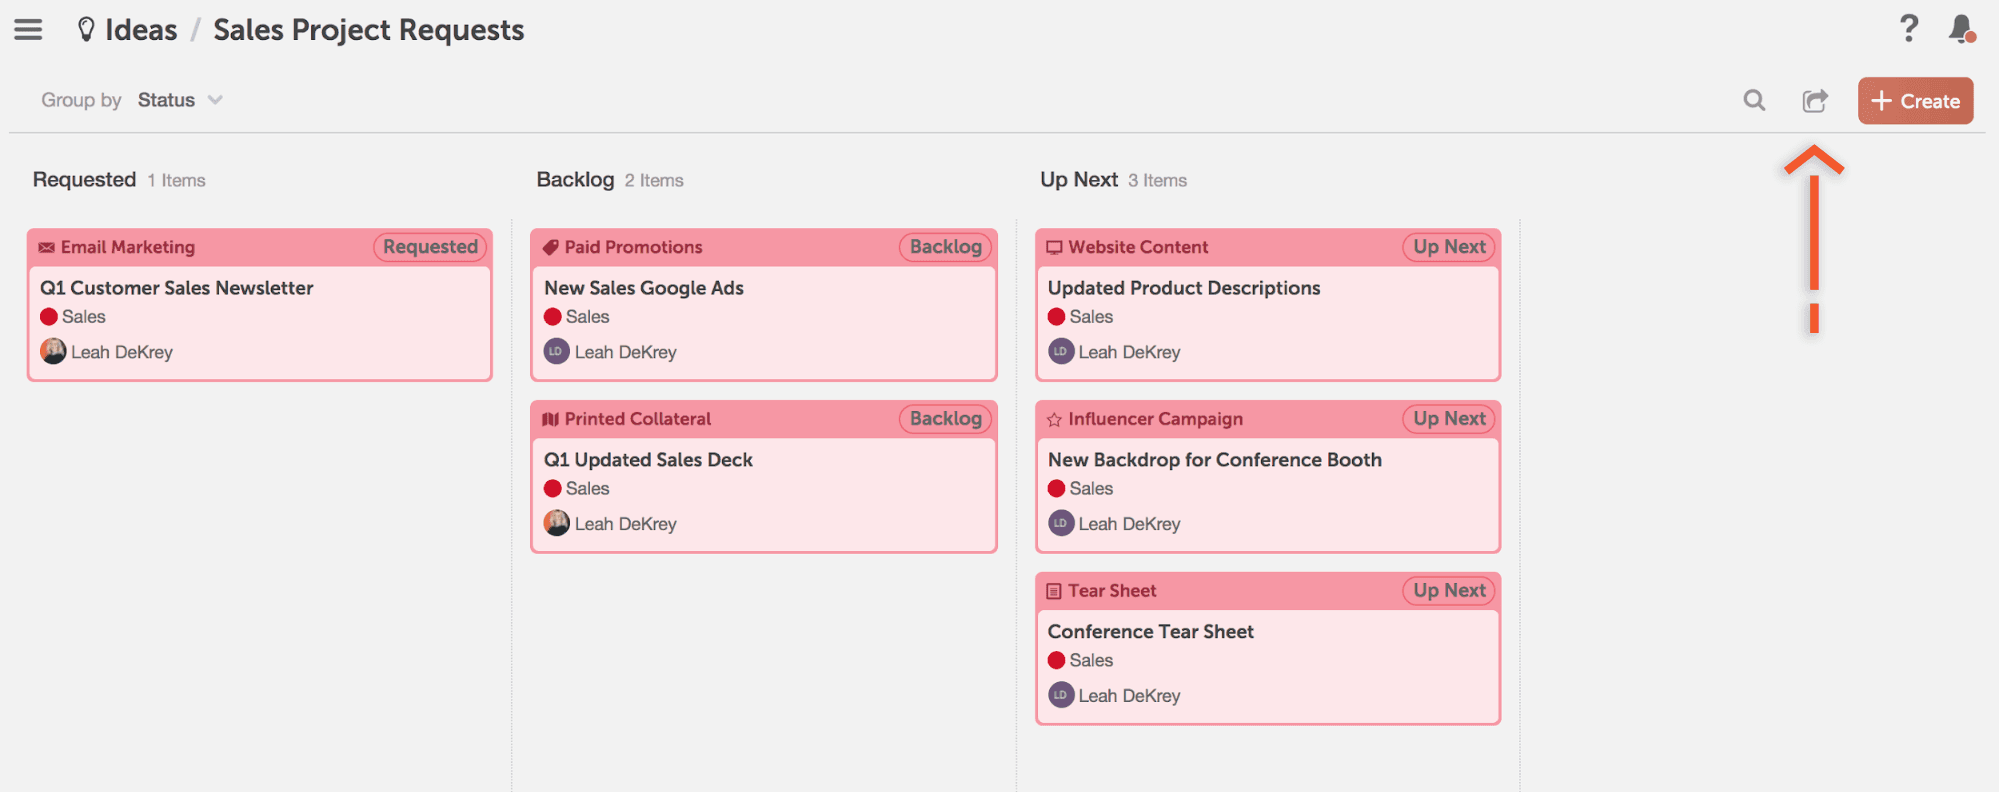 Next, click the “Enable Sharing” link next to the Sales Requests view.
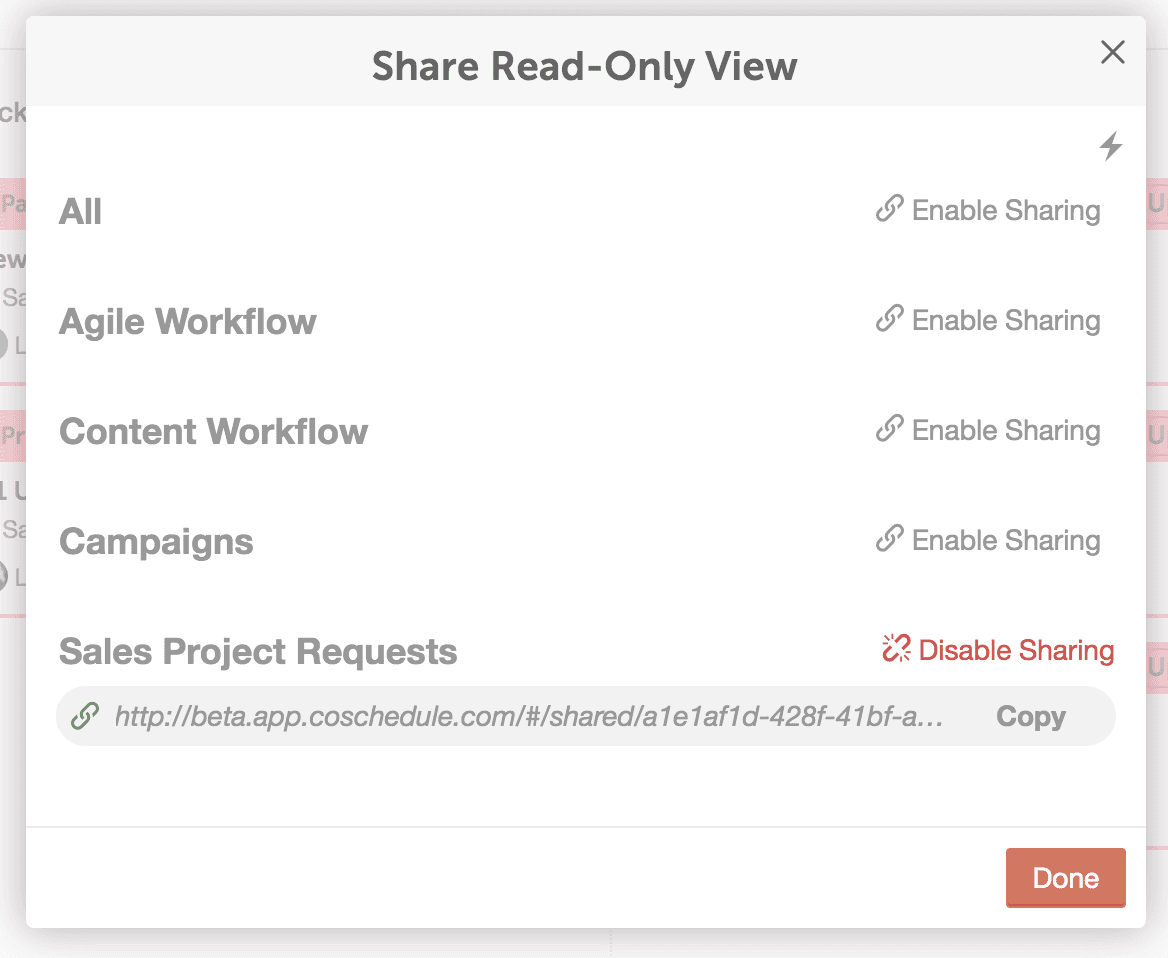 This will create a read-only view of your Sales Requests view on your Idea Board. Read-only views allow coworkers that don’t have access to CoSchedule to stay informed about what your team is working on.
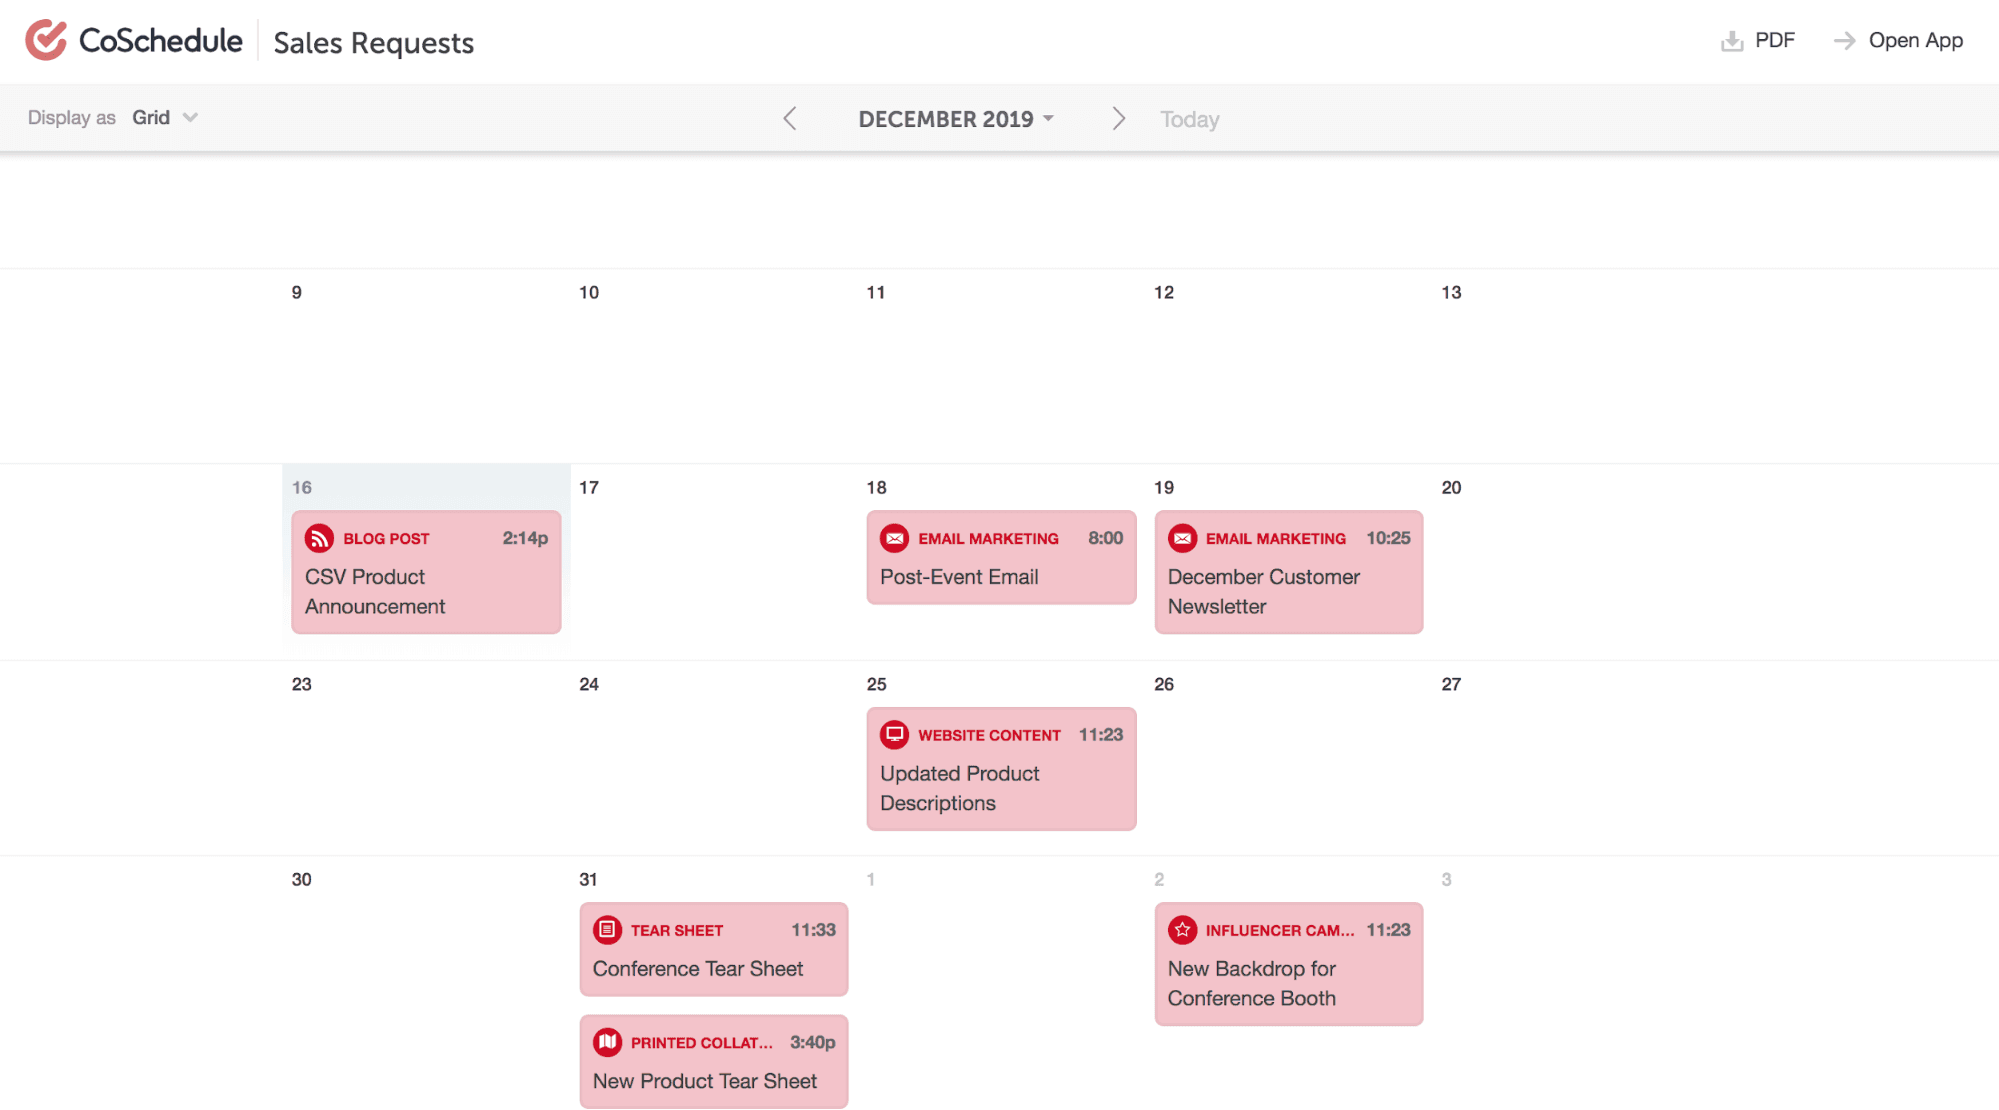
Share the link with anyone on your sales team that might need it. Here’s what the saved view looks like:
It looks very similar to the in-app version, except changes cannot be made.
This will create a read-only view of your Sales Requests view on your Idea Board. Read-only views allow coworkers that don’t have access to CoSchedule to stay informed about what your team is working on.
Share the link with anyone on your sales team that might need it. Here’s what the saved view looks like:
It looks very similar to the in-app version, except changes cannot be made.
 The best part about creating a read-only link is that it is always up-to-date. Whenever you make a change in CoSchedule, it will automatically be reflected on the read-only view.
You can also easily break the link when you don’t want someone to have access any longer.
The best part about creating a read-only link is that it is always up-to-date. Whenever you make a change in CoSchedule, it will automatically be reflected on the read-only view.
You can also easily break the link when you don’t want someone to have access any longer.
Field Incoming Requests With the Idea Board
Now, it’s time to start monitoring all your incoming requests using the Idea Board. After you’ve seen an incoming request appear in the Idea Board, drag and drop the project from the “Requests” tab to the “Backlog” backlog column.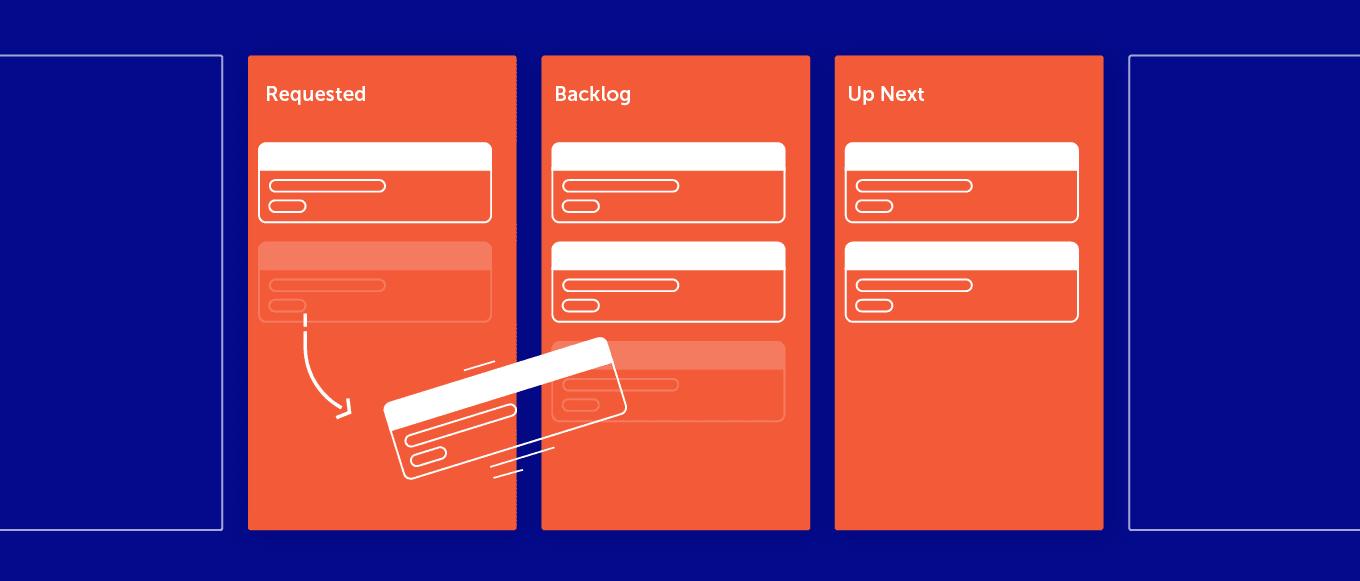 Moving a project from the “Requested” column to the “Backlog” column is a simple way to visually divide the new requests from the ones that you’ve seen.
The requester can use the read-only link you created to easily see that their request has arrived in CoSchedule and it has been moved forward on your prioritization board.
Moving a project from the “Requested” column to the “Backlog” column is a simple way to visually divide the new requests from the ones that you’ve seen.
The requester can use the read-only link you created to easily see that their request has arrived in CoSchedule and it has been moved forward on your prioritization board.
Schedule a Project From the Idea Board
When you’re ready for your team to begin working on one of the sales requests:- Click the ellipsis that appears when you hover over a project.

- Choose the option “Move to Calendar”.
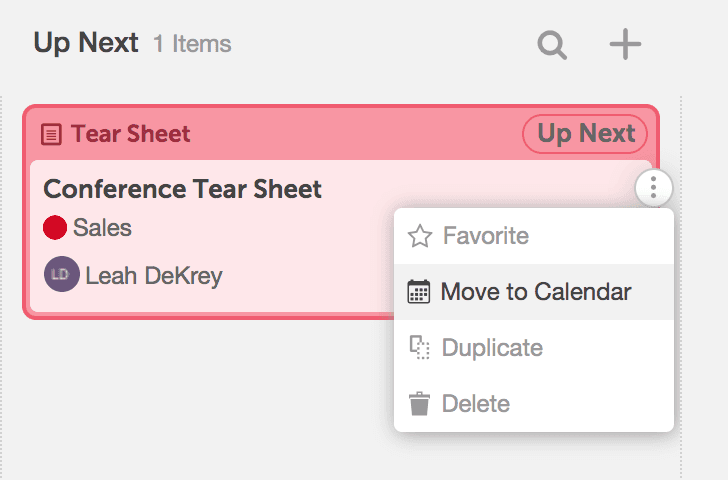
- Select a date on the calendar, then click “Schedule”.
Keep External Departments Updated on Real-Time Project Progress
Now, let’s take it one step further. Once a project has moved off of your Ideas Board and is live on your marketing calendar, you can share a saved view of the calendar with your sales team. This allows them to track the progress of the projects they’ve requested and stay updated on delivery timelines. Click the last item in the breadcrumb menu to navigate to the sales view you created earlier.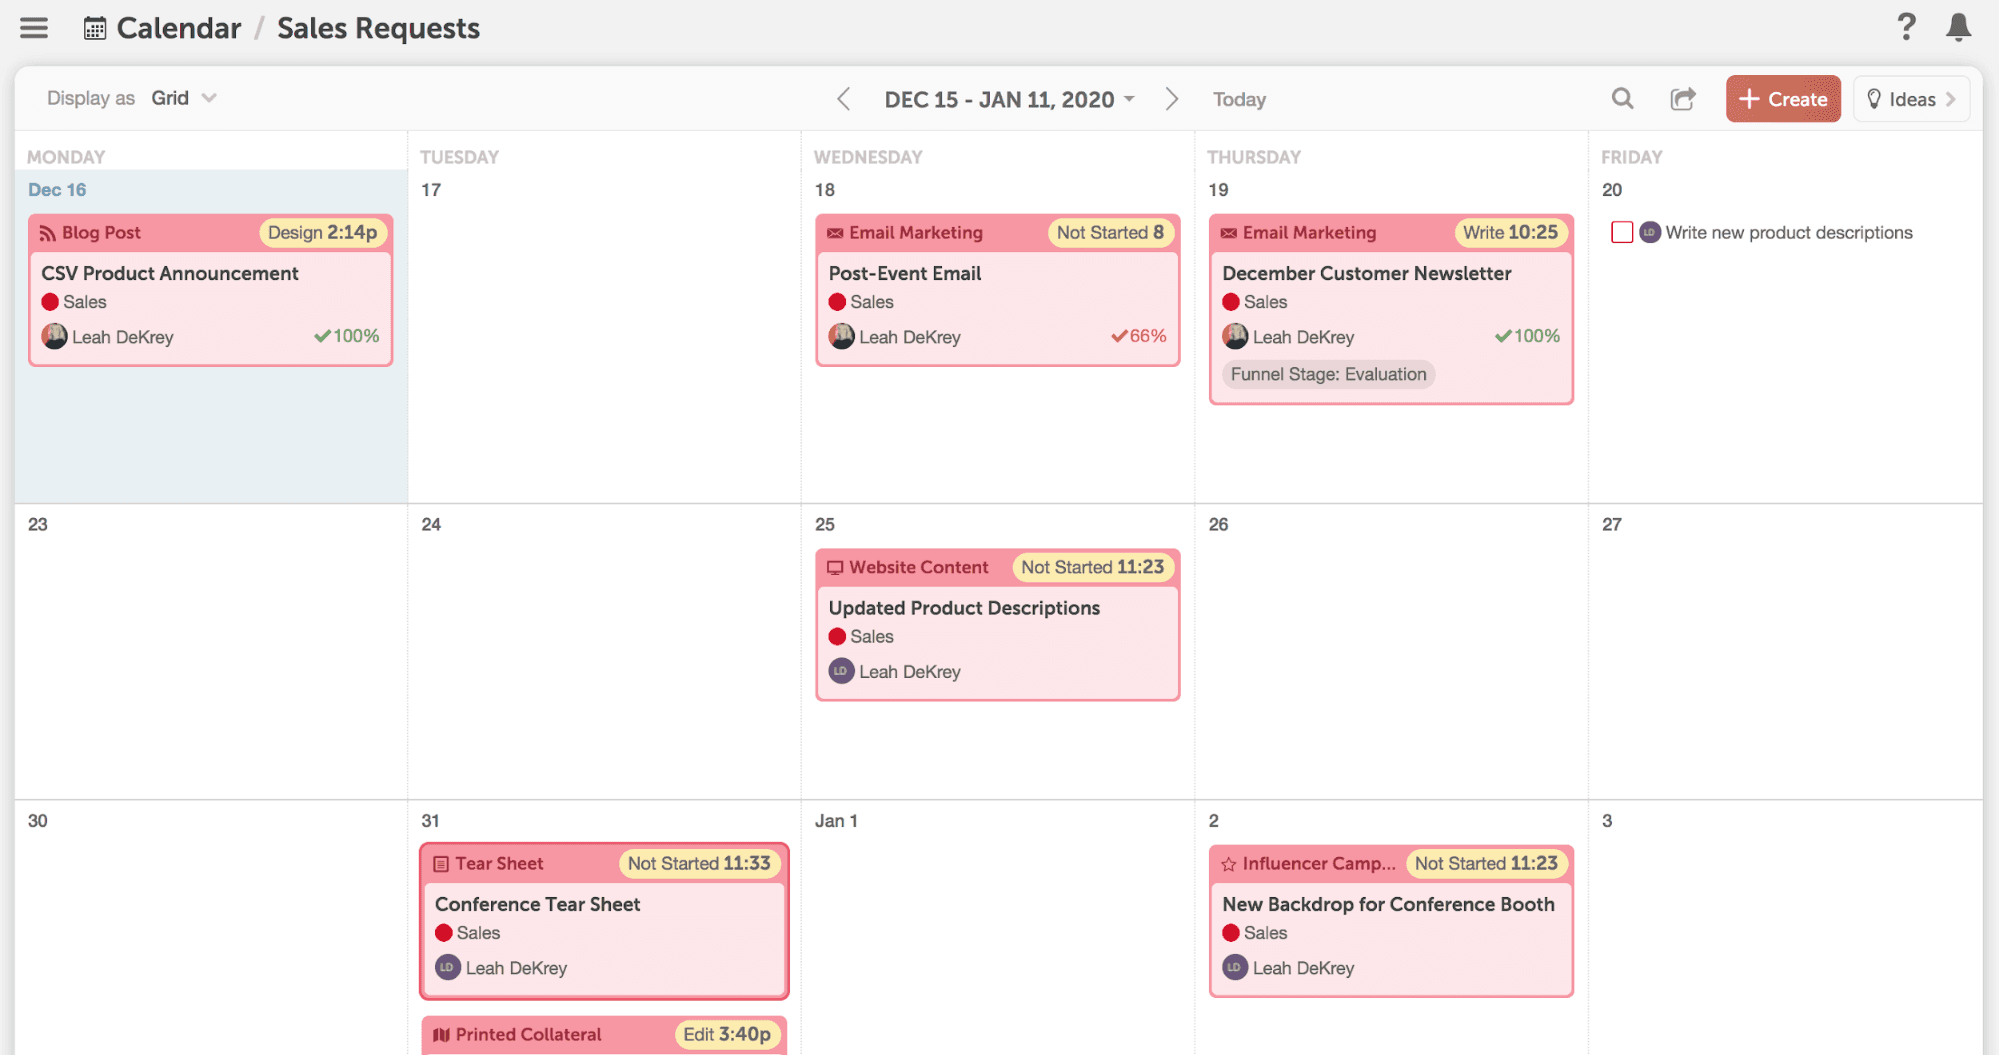
Create a Calendar Read-Only Link to Share with Your Sales Department
From the Sales Requests view of your calendar, click the read-only icon in the corner.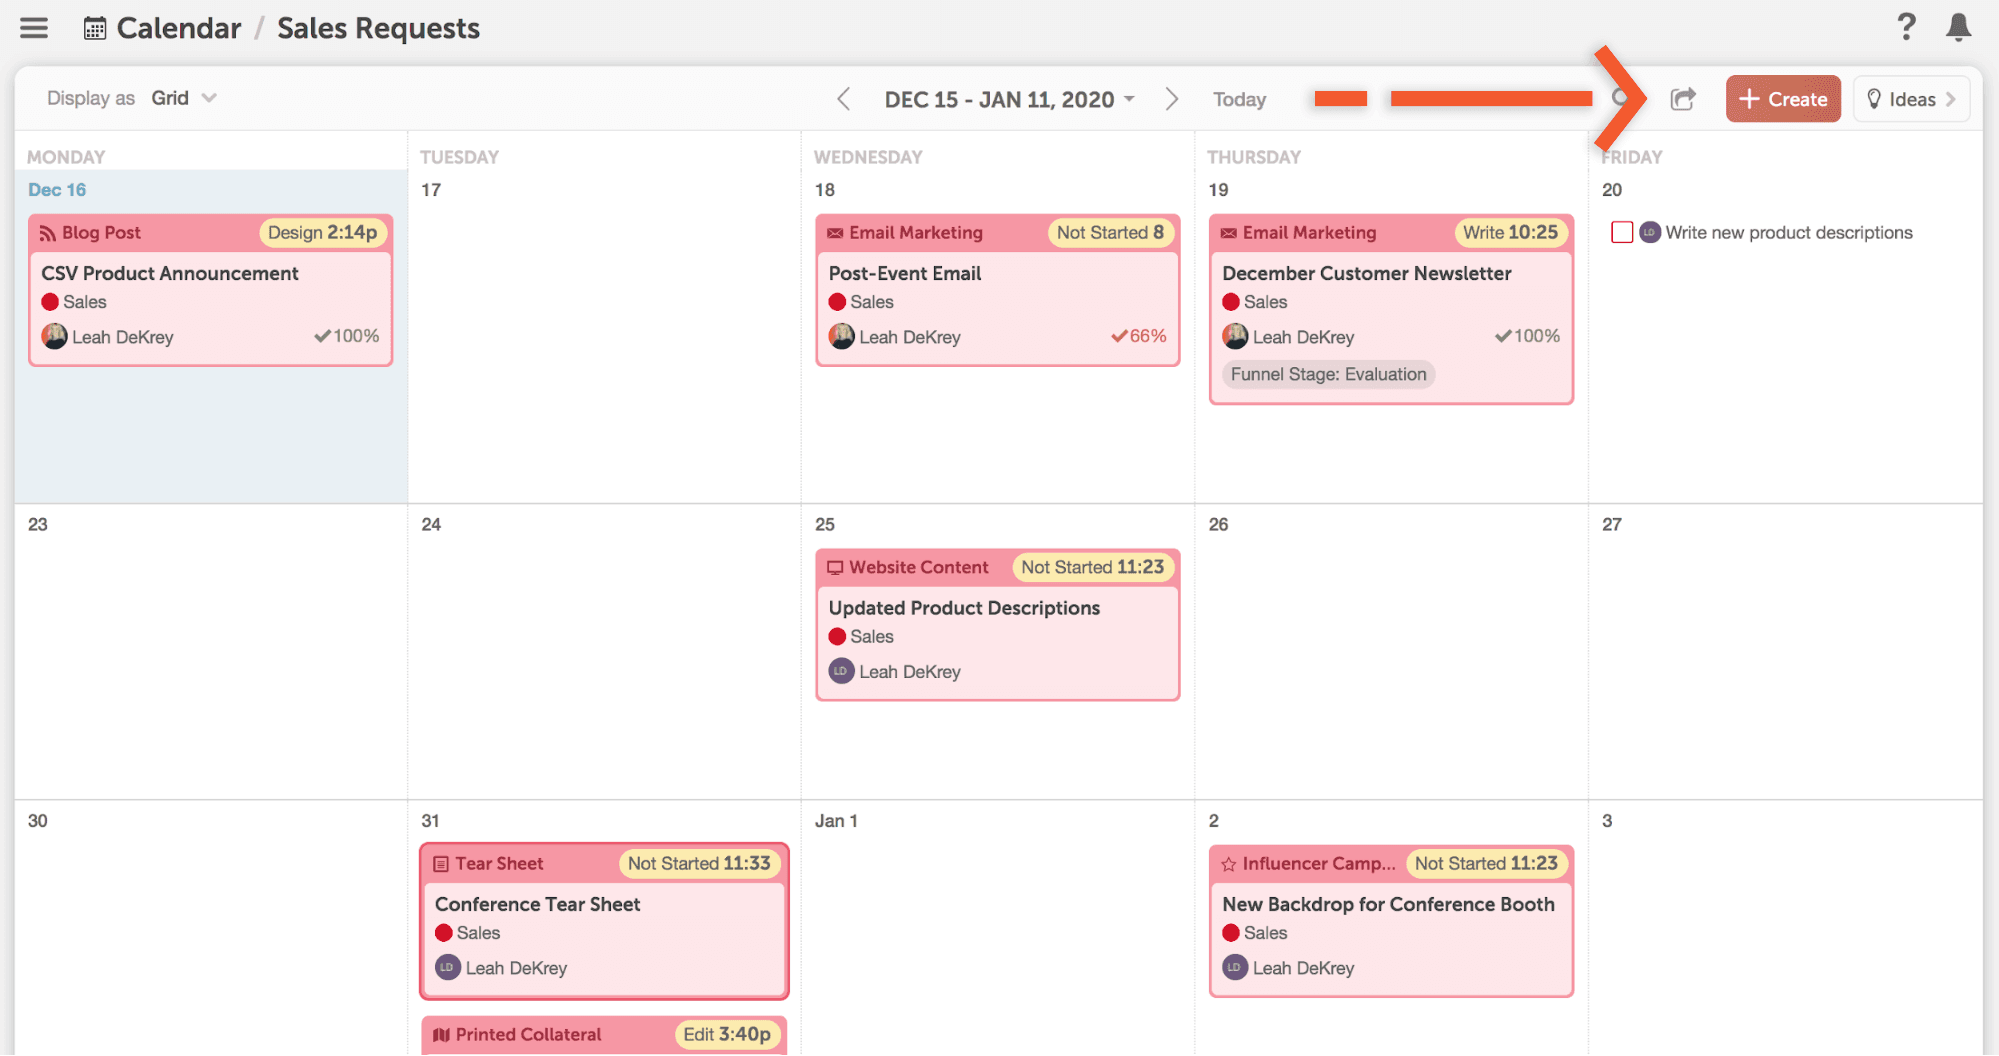 Next, click the “Enable Sharing” link next to the Sales Requests view.
 This will create a read-only view of all the sales projects your team is working on. This means the sales team can easily see their project delivery dates – without you playing the middleman.
Share the link with anyone on your sales team that might need it. Here’s what the saved view looks like:
This will create a read-only view of all the sales projects your team is working on. This means the sales team can easily see their project delivery dates – without you playing the middleman.
Share the link with anyone on your sales team that might need it. Here’s what the saved view looks like:
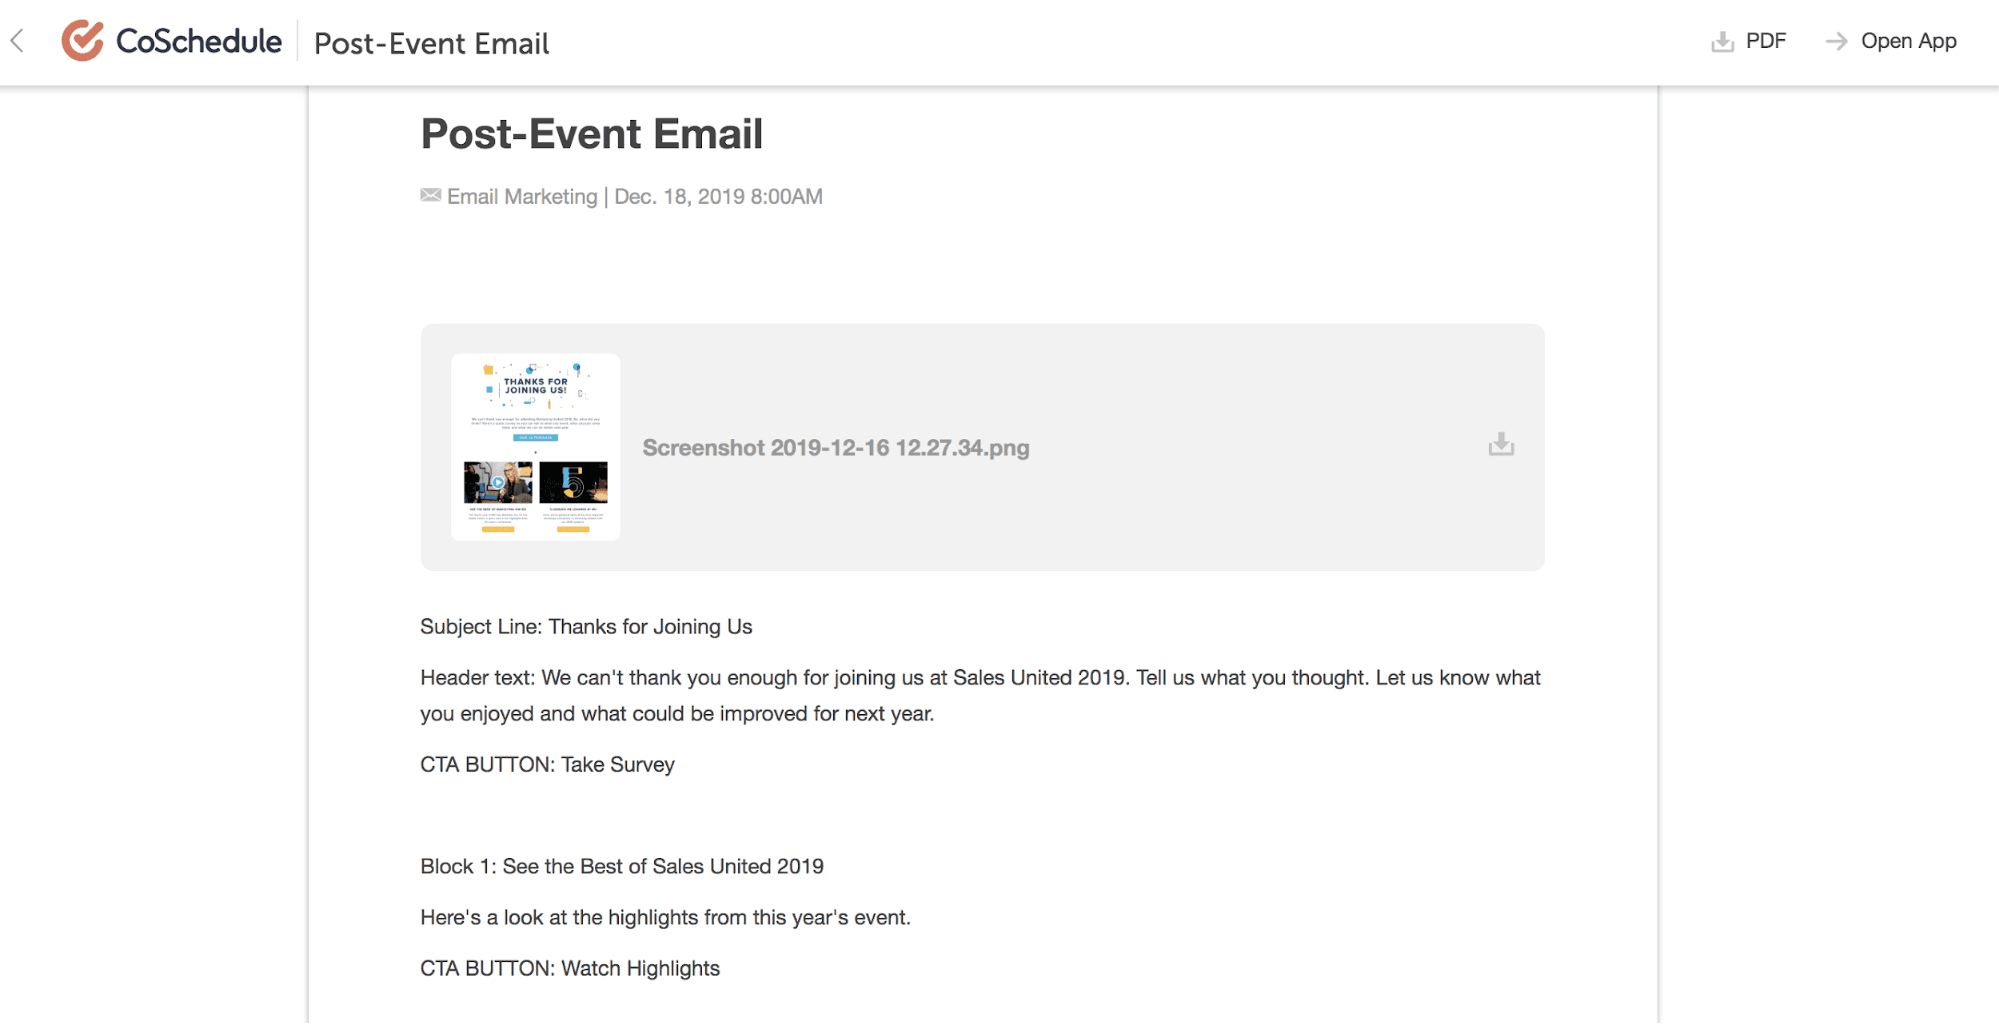
 Individuals can also click into a project to see text, images, and attachments for more details.
 The best part about creating a read-only link is that its always up-to-date. Whenever you make a change in CoSchedule, it will automatically be reflected on the read-only view.
You can also easily break the link when you don’t want someone to have access any longer.
The best part about creating a read-only link is that its always up-to-date. Whenever you make a change in CoSchedule, it will automatically be reflected on the read-only view.
You can also easily break the link when you don’t want someone to have access any longer.
Create a Read-Only Link of the Project View
Next, create a read-only link of the Project Kanban Board so the Sales Team can track which phase their project is in. Choose the “Project” option from the breadcrumb drop-down.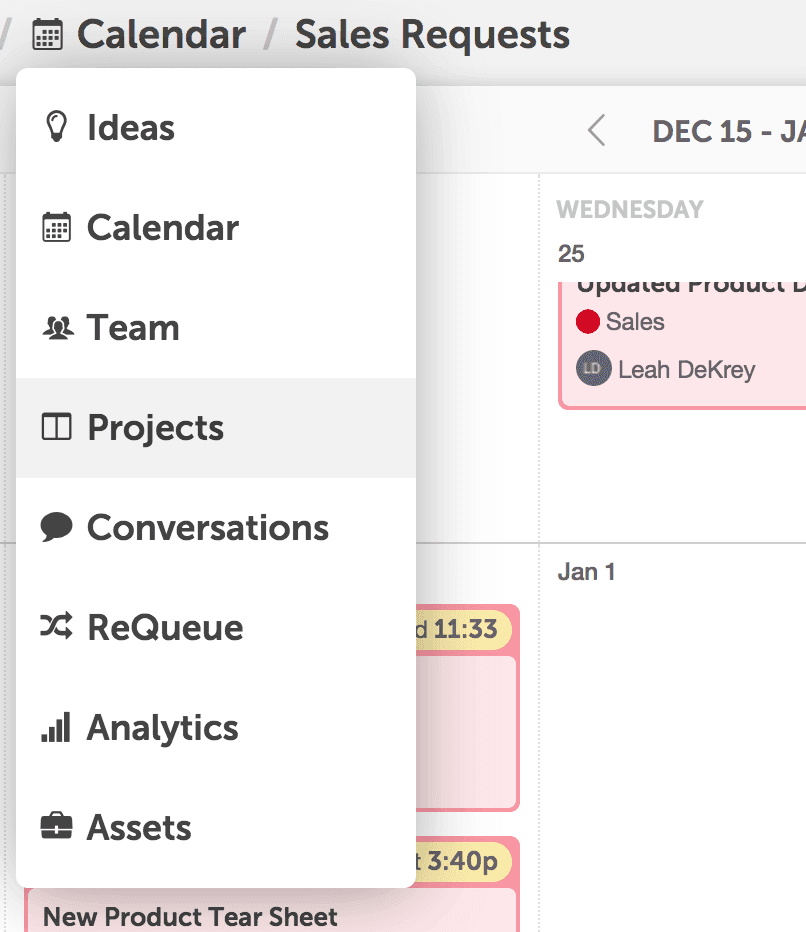 You should see a custom view of all the sales projects and which phase each of them are in.
 Next, create a read-only view of this to share with your sales team. As you did before, click the read-only icon in the corner.
 This means the sales staff will have visibility regarding how far from completion their project is.
Quickly Report on Completed Projects
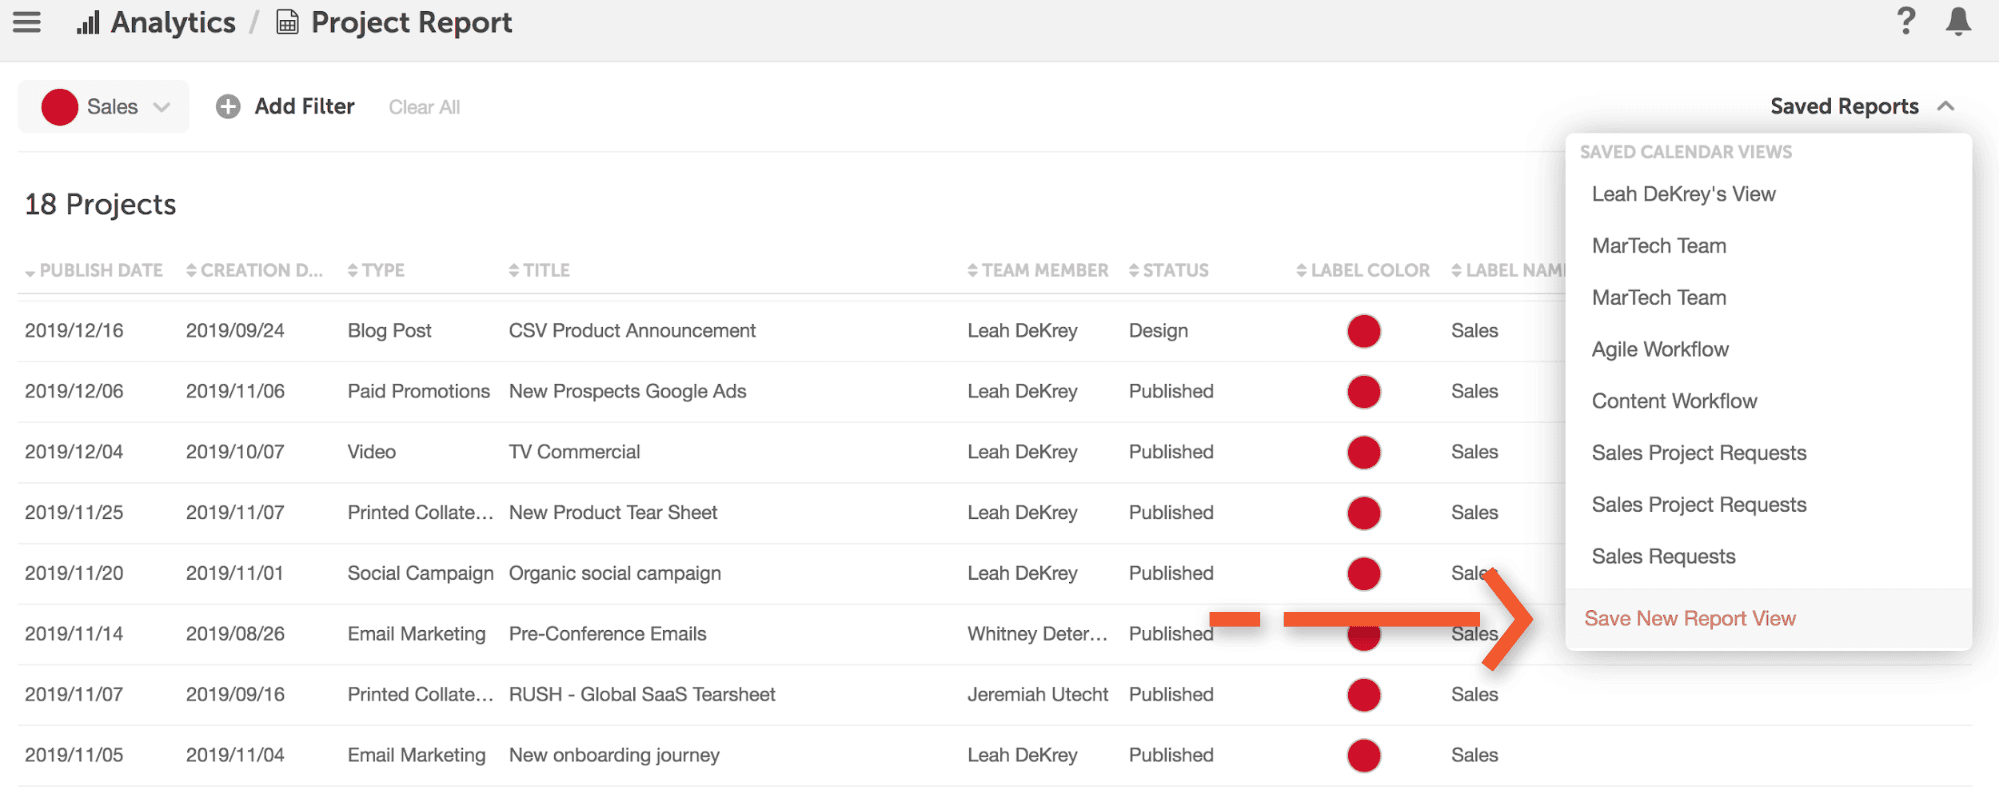
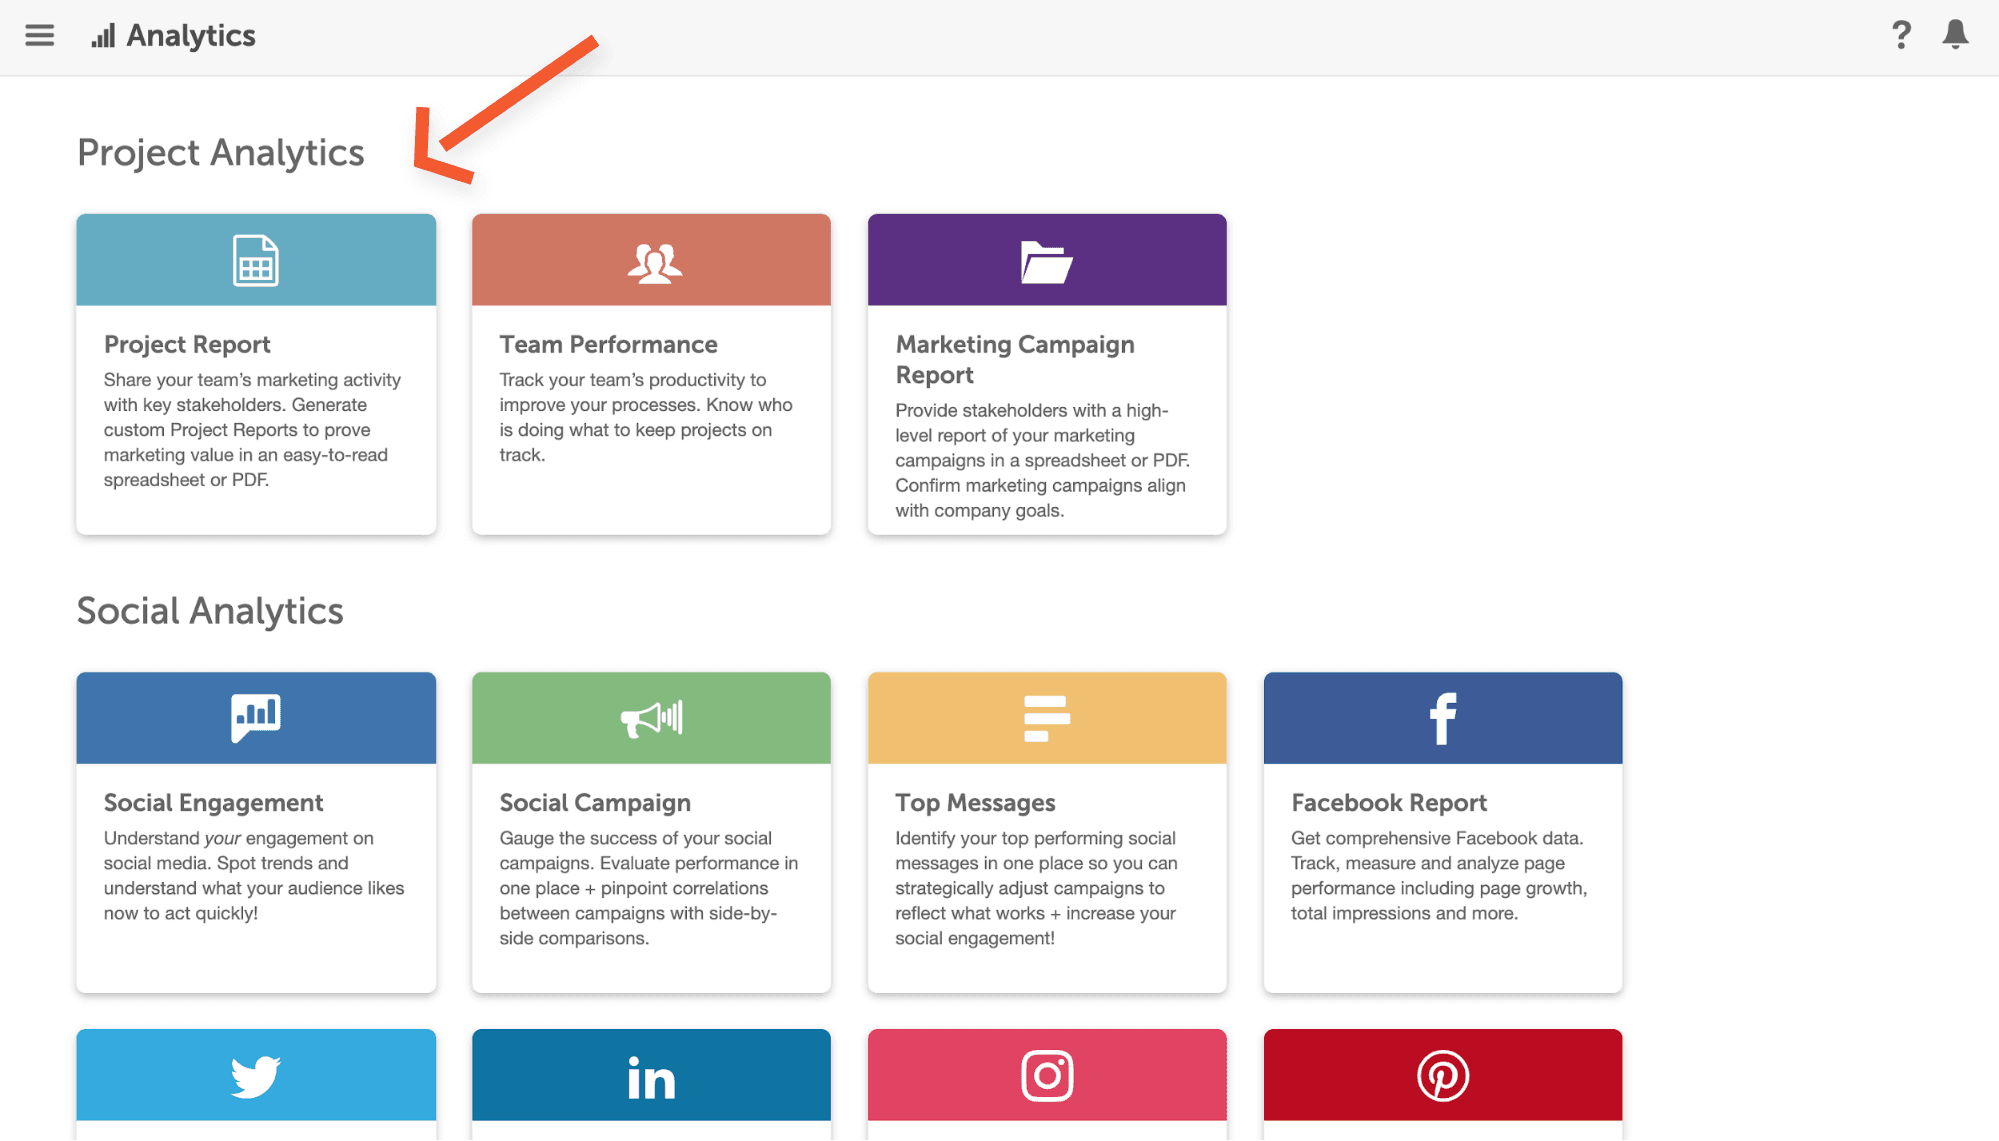
The final step in sharing visibility with external departments is the ability to quickly produce monthly, quarterly, or yearly reports on behalf of other departments. This means you can easily inform stakeholders about all the projects you completed on their behalf throughout the year. To do so, navigate to the analytics are of CoSchedule by clicking the first item in your breadcrumb menu and choosing “Analytics”.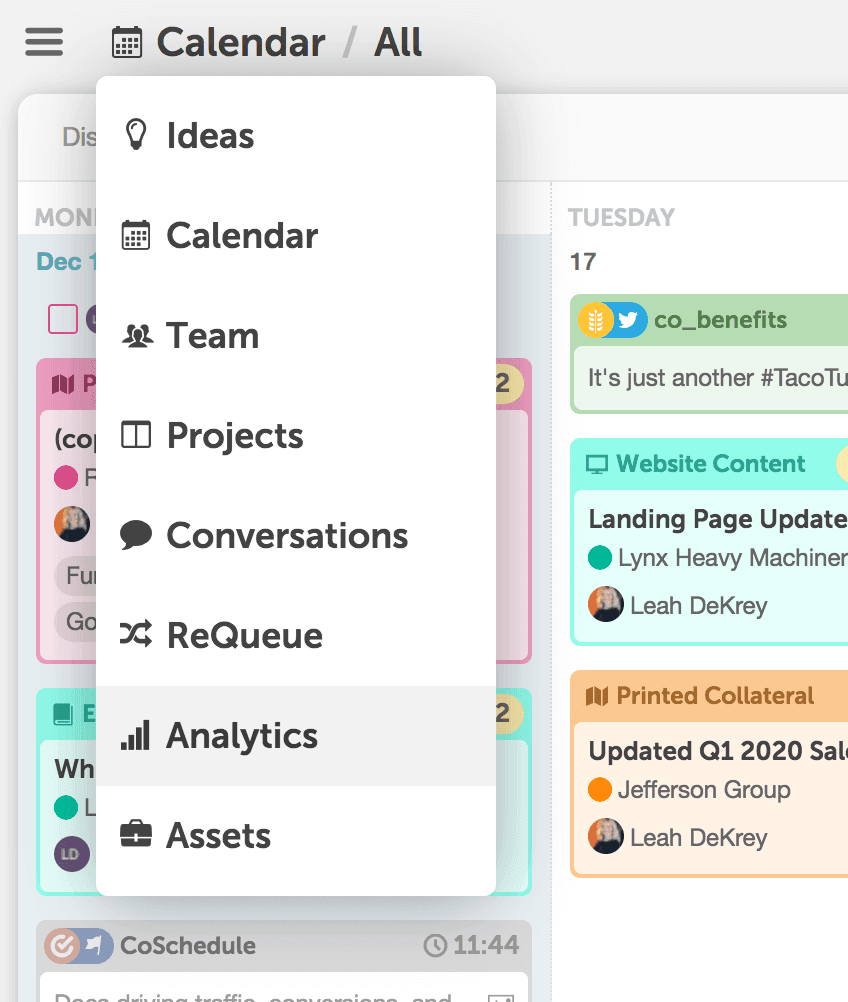 Next, choose the “Project Report” from the list of options.
 From the Project Report,
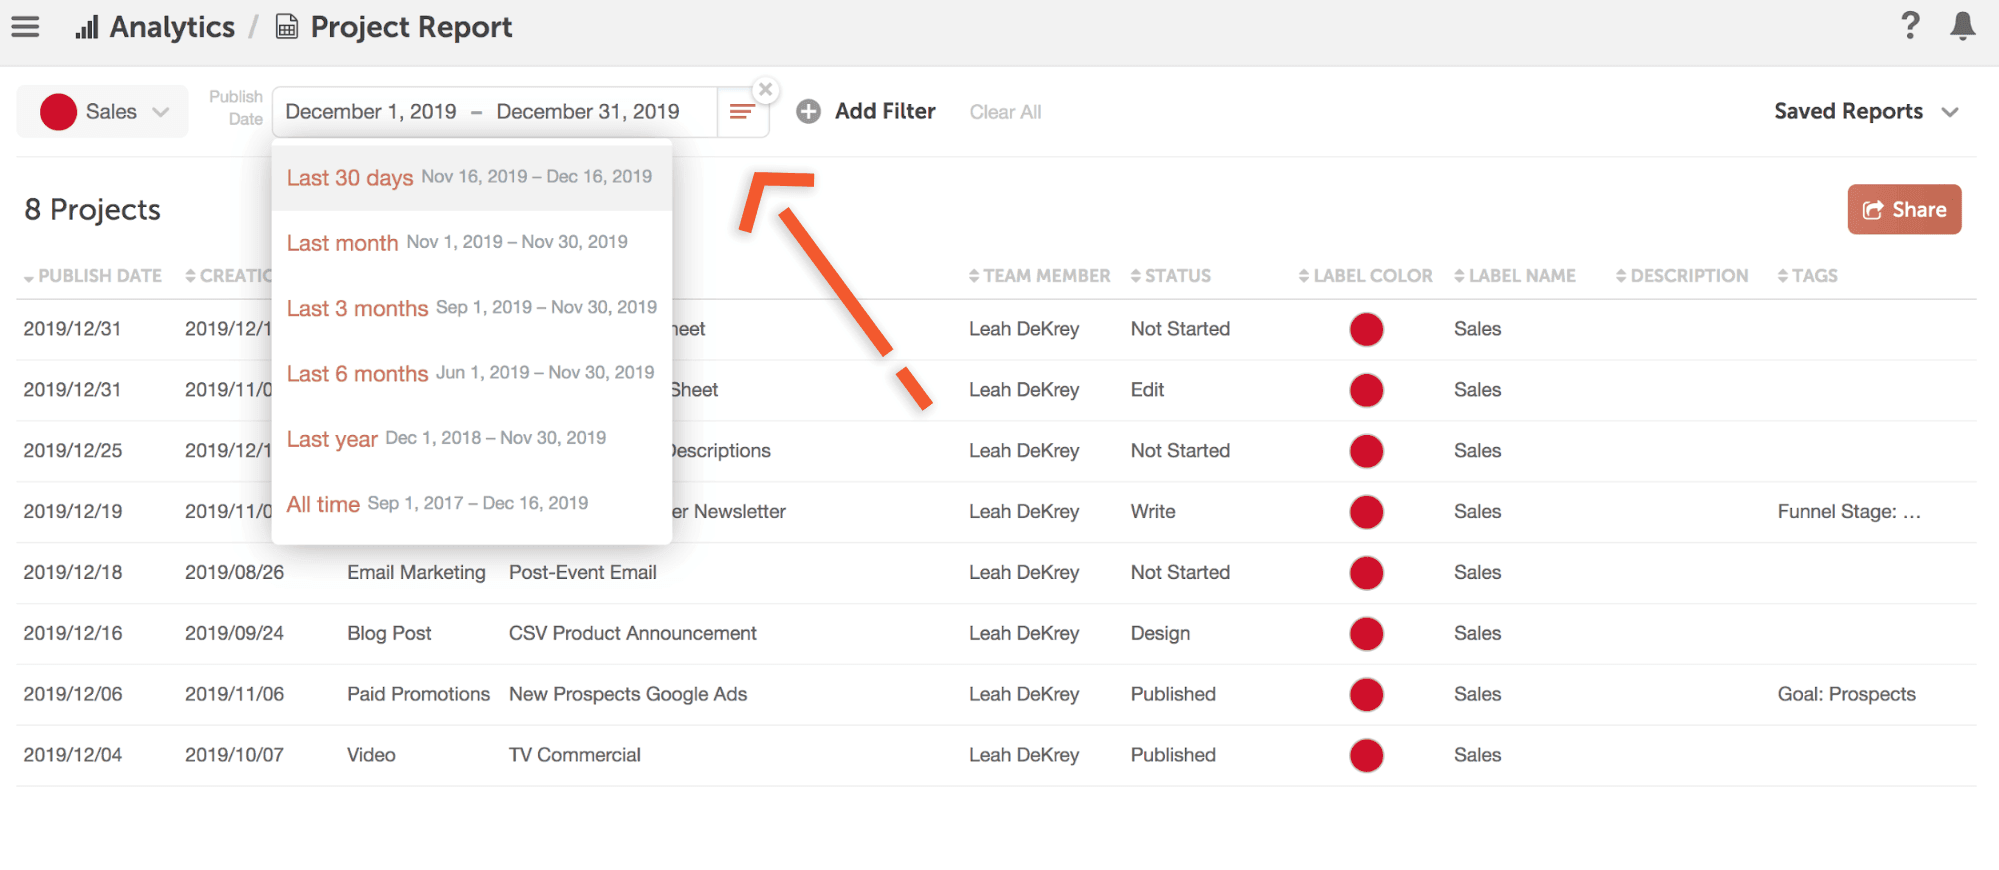
- Add a new filter.
- Choose the “Sales” color label or “Sales” tag.
- Add another filter. This time choose “Publish Date”. Choose the dates you would like to include.
- Finally, click the share button to automatically send this report to stakeholders. This informs the sales department of all the projects your team has completed on their behalf over a specific time period.
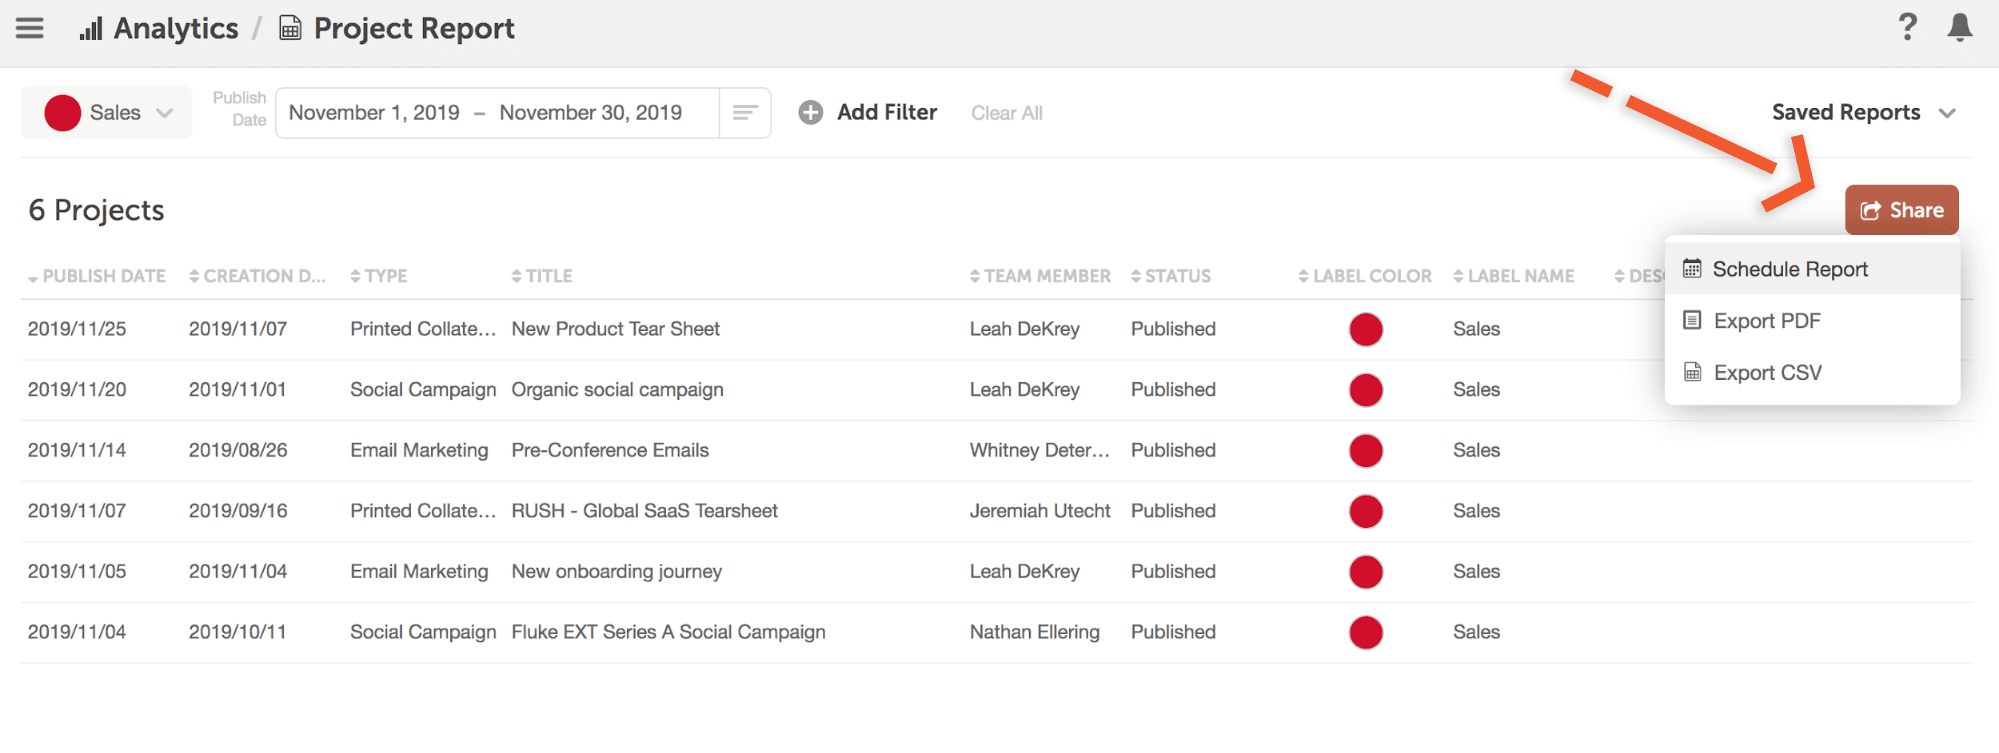
- To save this report for quick access, toggle down the “Saved Reports” option in the top left-hand corner. Scroll down to “Save New Report View”.