
It’s tricky to promote brand consistency when you work with multiple writers, designers and developers.
If you don’t have detailed guidelines for them to follow, you run the risk of content, copy and visuals that don’t line up. Your deliverables don’t feel cohesive when you look at your brand as a whole. As a result, your brand identity suffers.
An in-depth style guide is your solution to coordinating your brand standards among different creators. With everyone following the same guidelines, you’ll have more consistent content and editing standards to follow. Plus, it’ll become easier to catch up new team members and freelancers.
Create Your Own Style Guide With This Template
We know it can feel intimidating to start a style guide from scratch, so we made you a template that you can use to follow the tips in this guide. Feel free to edit, add or remove whatever you like to make it uniquely yours.
What Is a Style Guide and Why Does Your Brand Need One?
A style guide is a document that details your brand’s style guidelines and best practices for your marketing collateral. It can apply to internal and customer-facing content.
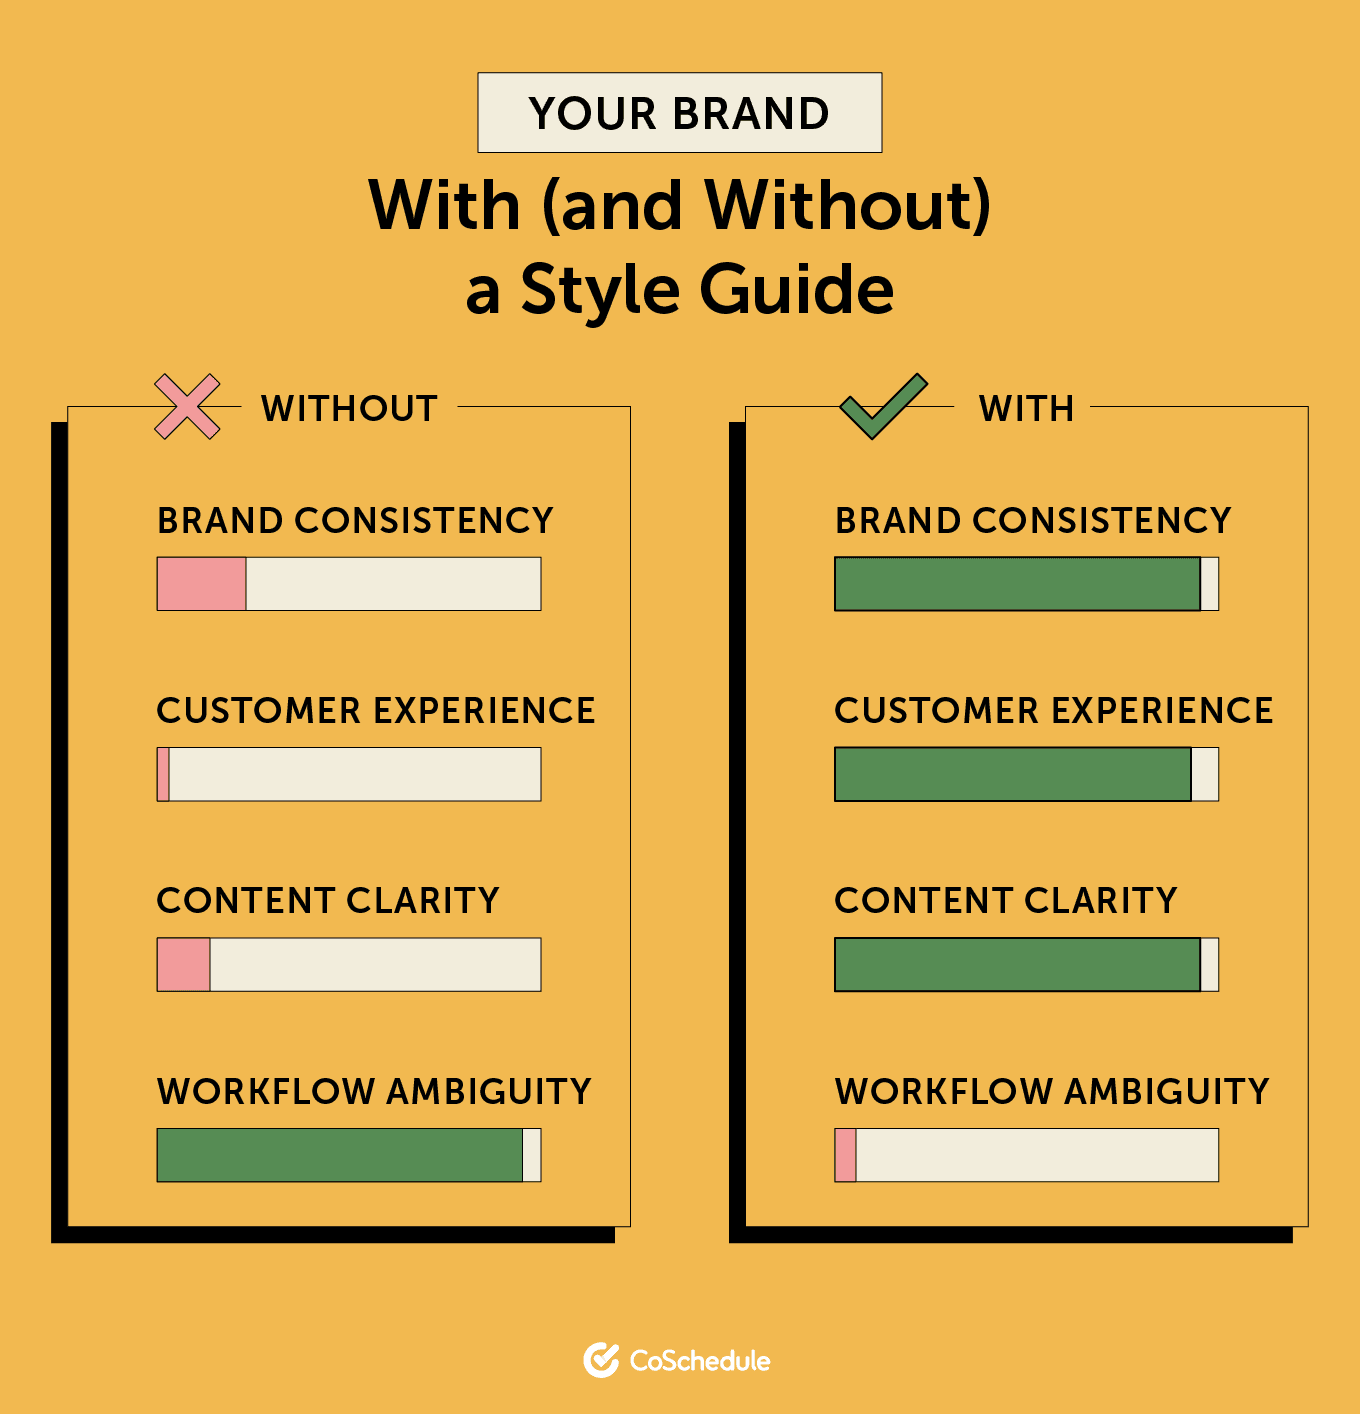
Brands use style guides because they help with:
- Brand consistency: When you keep your marketing deliverables cohesive, your brand — the “personality” your company gives off — feels more consistent. A consistent brand helps customers believe you’ll regularly give them high-quality experiences.
- Content clarity: Style guidelines often include rules for using terminology and formatting. When you keep your terms and formats the same across your content, it’ll become easier to understand your messages.
- Get rid of workflow ambiguity: Your team members and freelancers will understand your style expectations better when they have a guide to reference.
Check Out This Editorial Style Guide Example
Before we explore the processes and elements that go into a style guide, let’s check out a style guide sample that does them right. Marketers often cite
MailChimp’s style guide as an example to follow.
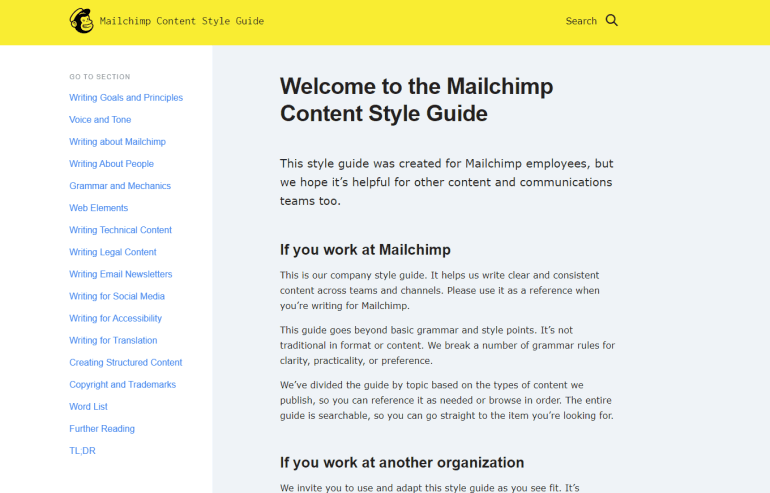
What makes MailChimp’s guidelines a great example of a style guide? It achieves these goals:
- Clear expectations: The Writing Goals and Principles section establishes the objectives a writer should aim for in their content. All of the other sections in the guide provide standards that align with these goals.
- Clean formatting: This guide has clearly defined sections and navigation. It’s easy to find the guidelines you need in a specific situation.
- Comprehensive guidelines: MailChimp includes all of the guidelines a writer needs to stay on-brand across different content types.
Best of all, you’re free to adapt their style guide to create your own, as long as you credit them. While MailChimp makes their guidelines public, you can keep yours private if you prefer.
How Do You Create a Style Guide?
It takes three steps to create an editorial style guide:
- Pick a format: We provided you a style guide template for Word, but you can also share your guidelines as a PowerPoint, PDF, Google Doc or Google Slides presentation. If you have a shared knowledge platform like a wiki or Notion, you can also host it there. Choose a format that’s easy for you to create and simple for your team members to read.
- Decide who will use your style guide: Your style guide’s content will depend on its intended readers. Most companies create their guides for marketers, graphic designers or web designers and developers. This blog post mainly focuses on guidelines for marketers, but remember to include sections for designers and developers if needed.
- Choose what elements your guide will include: Time to get down to business. Include all of the guidelines you think will help your team members create on-brand content, copy and visuals.
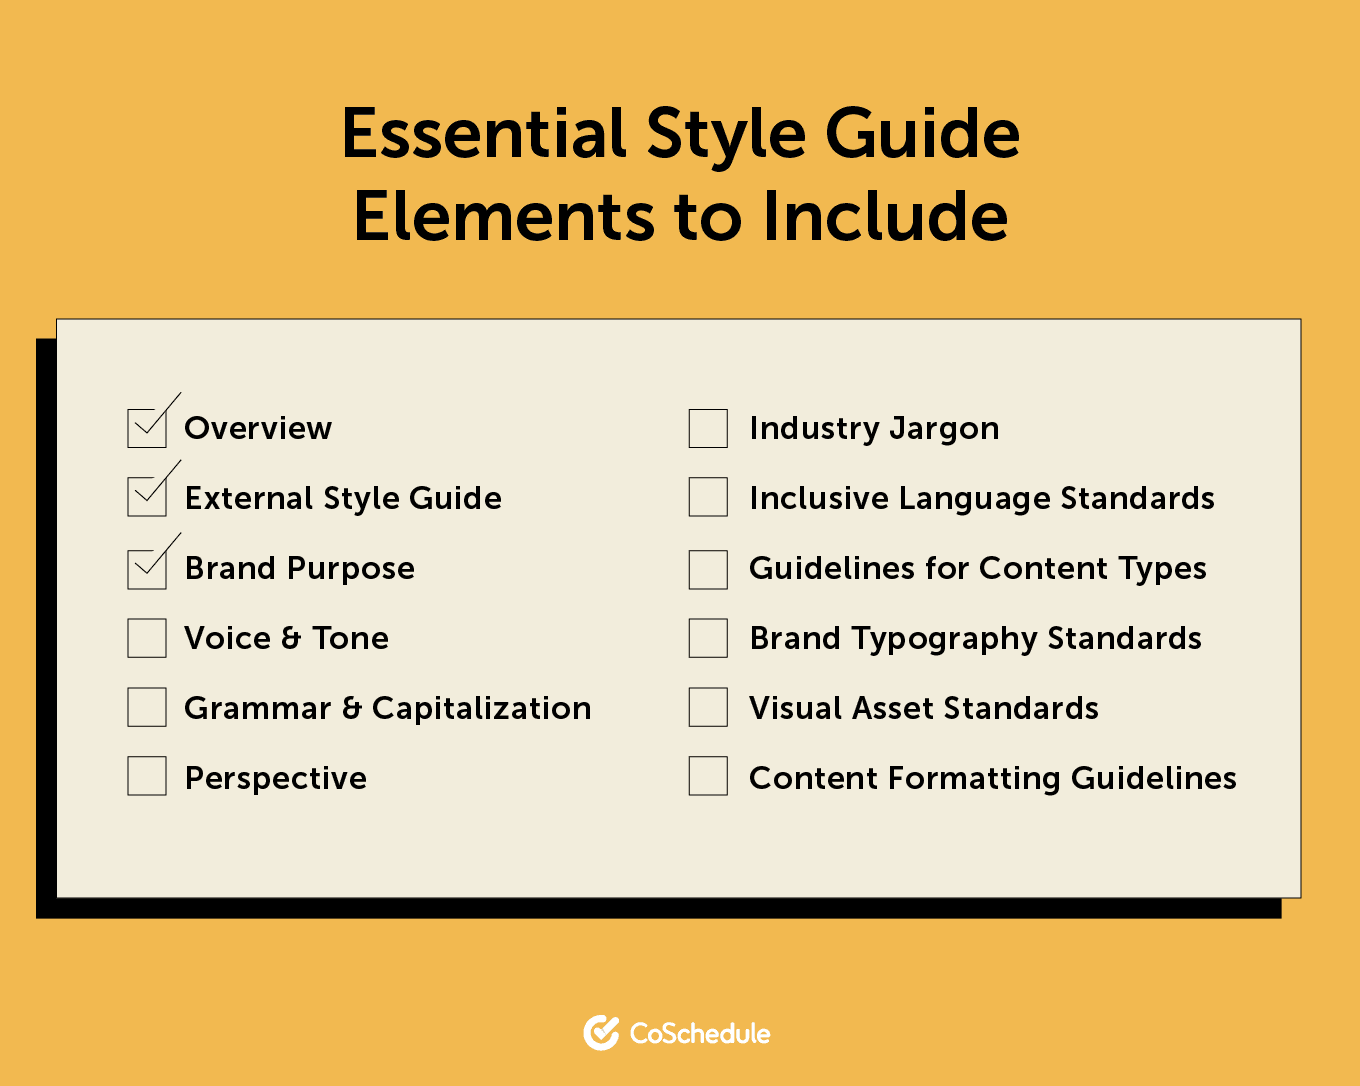
What Elements Should You Include in Your Style Guide?
There are no hard and fast rules for what you should cover in your editorial style guide. Instead, you should include the most relevant topics to your brand and team. Here are sections to consider adding to your style guide:
Overview/TL;DR
Some guides have an overview at the beginning or end that provides an abridged version of the standards covered. At
Buffer, they call it the “TL;DR” (too long, didn’t read). This section comes in handy if the reader doesn’t have much time or they need a quick refresher.

The TL;DR for Buffer’s social media style guide condenses each section of the style guide into a bullet point for easy reading. If you have a longer guide, this approach might not be feasible, so you could also cover just the most important style guidelines in your overview.
External Style Guide (If Desired)
Many brands follow
AP Style and cover any brand-specific standards in their company style guides. The AP Stylebook offers comprehensive guidelines on all sorts of spelling and grammar mechanics, such as
whether to hyphenate “antiviral.” When you have to decide on a niche grammar situation, you can reference this guide to settle the matter.
The AP Stylebook online database and spiral-bound book both cost money. So, if you need a free alternative, you’re welcome to use
our free cheat sheet for basic style rules.
Organizations that work in technical fields may also choose to use discipline-specific style guides. For example, if you work for a psychiatric practice, you might use
APA (American Psychiatric Association) Style instead of AP Style.
If you choose to follow an external style, you can adapt it to your needs or follow its rules to the letter.
Brand Purpose or Content Goals
Consider giving your guidelines a brand purpose or content goals to help creators understand what they want to achieve with their work. A goals or purpose section will help your creators keep their work in line with your business objectives.
By adding your brand’s purpose to the beginning of your style guide, you’ll provide a mindset for creators to take as they perform their work. Check out how the Smithsonian includes their brand vision in their
identity guidelines:

Want to get more specific? Content goals might fit your needs better. If you want to take a page out of MailChimp’s book and make a goals and principles section, answer these questions:
- What purpose do I want to serve with my content?
- What do I want my readers to take away from my content?
- What are the most important standards for my content to meet?
Voice and Tone
Voice and tone are the personality and formality you infuse in your writing. Here’s how to differentiate each term:
- Voice: The characteristics you express in your brand’s writing using vocabulary and sentence structure.
- Tone: The ways you modify your brand voice depending on platform and situation.
So, for example, while your brand might have a casual voice, you could take a more formal tone for crisis management or research reports.
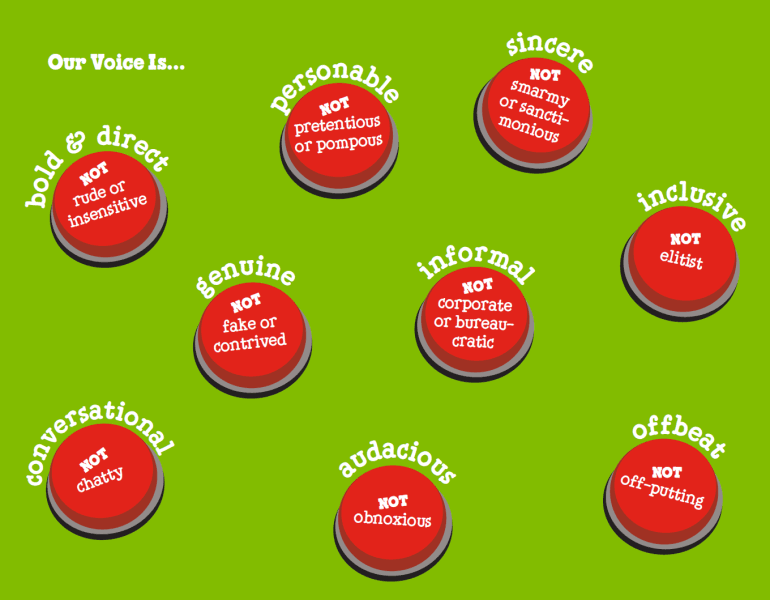
These concepts can be tough to pin down, so some brands use a “we’re ____ but not ____” format to explain them.
Ben & Jerry’s uses this approach in their guidelines:
Grammar and Capitalization
When most folks think of editorial guides, grammar and capitalization come first to mind. An external style guide will cover most grammar and spelling issues, but you might not use one or have specific mistakes to address. Plus, capitalization rules cover more than grammatical standards for many brands.
Microsoft uses an external style guide, but their brand style guide also
highlights grammatical rules in six detailed sections. For anything else, they refer writers to the Chicago Manual of Style.

One popular grammatical rule to cover is Oxford/serial comma usage — whether you use a comma before the last item in a series of three or more items. AP Style doesn’t use the Oxford comma, but some companies prefer to add it back in for clarity.
You may also have specific capitalization rules for brand-specific words or headers. For example, while you typically don’t capitalize the phrase “marketing calendar,” you do when you talk about
CoSchedule’s Marketing Calendar. As for header formatting, some brands use title case or sentence case depending on if it’s a larger or smaller header.
Perspective
Now, here’s an editorial guideline you might not think to add during your first sweep: perspective. This section establishes how you use the first-person, second-person and third-person perspectives. The ways you refer to yourself, the reader and others change your writing’s impact.
Most marketing best practices advise using the second person (“you”) more frequently than the first person (“I”) because it centers the reader over the writer. But, if your content focuses on personal narratives, you might end up using the first person quite often. Think about how much you talk about yourself in your writing and how you want the reader to feel included.
Industry Terminology and Jargon
Every industry has unique terminology and jargon — terms that only people in your business understand. Editorial guidelines related to these words usually recommend keeping jargon to a minimum and defining any industry-specific terms. But, you may make an exception in a heavily technical industry like business-to-business (B2B) manufacturing.
Inclusive Language Standards
Inclusive language guidelines help you promote copy, content and design free from harmful biases. Including them in your editorial style guide also shows your dedication to writing about people equitably.
Every style guide takes a different approach to diversity and inclusion, but here are some references to help you decide what guidelines to include in yours:
Look how
Unbounce has an inclusive language section in their style guide:
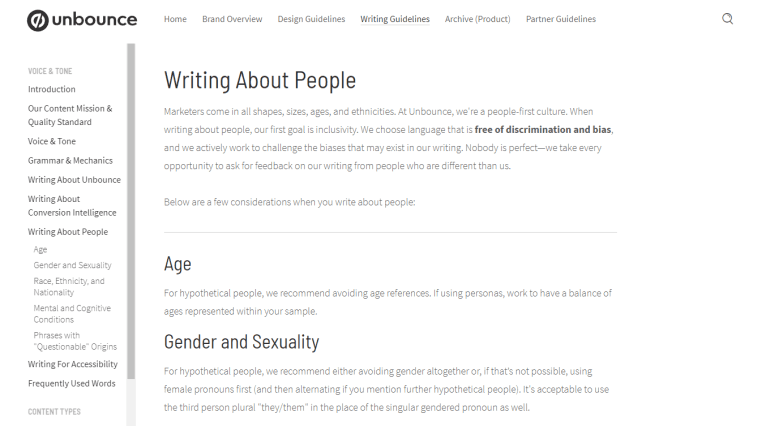
Note how they start the section with their diversity goals to help writers understand the thinking behind their inclusive language choices. It’s also great that they acknowledge that inclusivity is always a work in progress that needs teamwork.
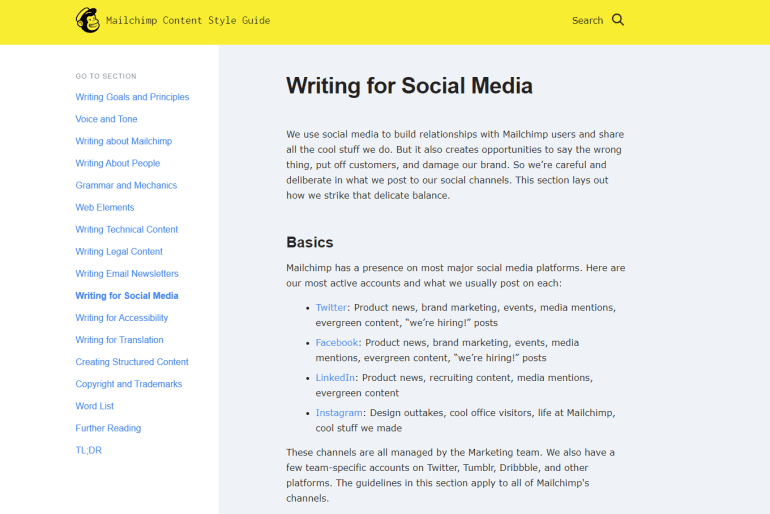
Guidelines for Content Types and Channels
Some organizations have different goals across channels or content types. If you consider yours one of them, you could benefit from adding sections that explain how to modify your style in different contexts.
Examples of content formats and channels you might have extra style notes for include:
- Blog posts
- Web pages
- Press releases
- Social media
- Research reports
- Email newsletters
These sections let you explain your goals for the content type or channel, the subjects you cover and unique formatting and language pointers.
For instance, the
Mailchimp Style Guide has dedicated sections for writing for technical content, legal content, email newsletters, social media and translation. These guidelines include a basic overview of the channel, the types of content posted on each channel and style instructions.
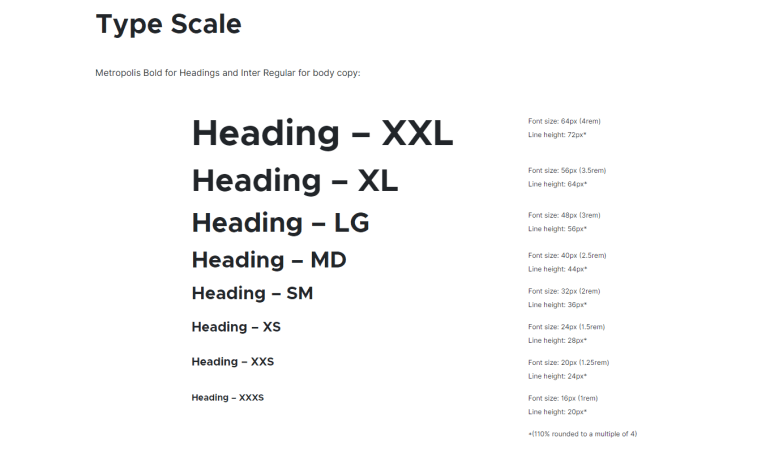
Brand Standards for Typography
It’s time to dig into a few extra sections that overlap writing with design and development. When you want someone to design a web page or make graphics for your content, they’ll need to know your brand’s typography.
Note all the details that someone should know to use your brand’s typefaces in your text and designs, including:
- Font names
- Context that you use each font (logo, graphics, headers, body text, etc.)
- Font sizes for web
Mozilla lists all of these details in its
Firefox style guide, including a wide range of acceptable header sizes:
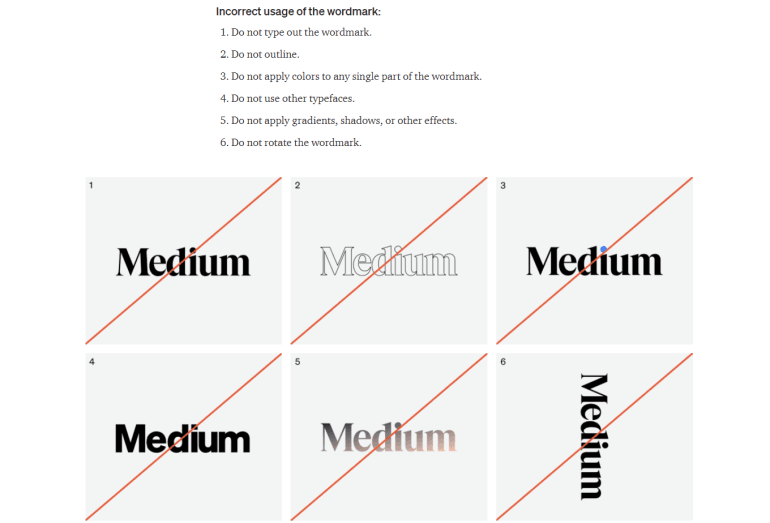
Brand Standards for Visual Assets
Just as your creators should know what to do with your typography, they should also understand what you expect for your visual assets. Your visual asset section can feature instructions on:
- How to make new design assets: Note what colors, fonts, image sizes and visual elements designers can use in new graphics for your marketing.
- What to do with existing design assets: Explain what creators can do with assets like logos, such as sizes, proportions, color schemes and placement.
Medium’s
logo guidelines show how you can instruct others to use existing assets. They break the logo down into two parts — the logo and the wordmark — and provide detailed rules for each. This guide also shows clear examples of what not to do when using the logo elements:
Content Formatting Guidelines
Content formatting guidelines teach writers and developers how to format writing for web pages, blog posts and other content types. You can use this section to provide general formatting guidelines for your content or unique pointers for each channel.
In the MailChimp style guide’s case, the
Web Elements section covers how to format certain elements across content styles. Its heading and link guidelines, for instance, work in any context.
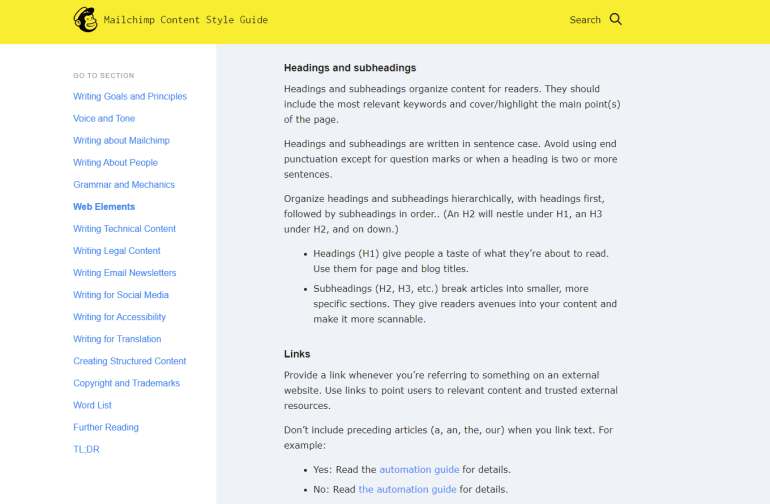
But, you could also use a section like this to note how you use headings and links differently in different content styles, such as blog posts and email newsletters.
Cross Your T’s and Dot Your I’s
Your editorial guidelines will set your team up for success as they create marketing materials. But, you can take one more step to help creators add some polish to their creations.
Create a checklist of actions for your writers, designers and developers to take before they finish a project. These final touches will help them catch common mistakes and improve their work’s overall quality. Try starting with a
proofreading and editing checklist for your writers!


