Getting Started With CoSchedule for Bloggers and Individuals
5 Steps To Better Understand CoSchedule
The TL;DR Version
- Connecting a social profile: allows you to promote your blog posts and plan your content strategy side-by-side to grow your audience.
- Adding a project: holds you accountable for publishing consistently and hitting the deadlines you impose on yourself.
- Adding a social message: Saves you time decreasing the number of tools needed to manage your blog.
- Adding a task: Visualizes what you need to get accomplished every day to grow your business and reach your goals.
- Drag and drop projects: Saves you time by putting an end to unproductive work like manual scheduling.
Introduction
What Is This Guide? It’s a concise guide to the 5 most basic parts of CoSchedule. We will walk you through the first steps to setting yourself up for success with CoSchedule. Who’s This Guide For?: New CoSchedule Editorial Calendar users. What You Will Learn: How CoSchedule will help you…- Save time
- Publish more often
- Grow your audience
Step 1: Connect a Social Profile
To get started on the right foot, we recommend connecting a social profile. This simple feature packs a big punch in terms of value and sets CoSchedule apart from other tools on the market. What Value Does This Provide? You’ve got to promote your content to grow traffic and build your audience. We make it simple. In other words, you can schedule your social messages AND write your blog posts in CoSchedule. Why Does this Matter? It saves you time—you don’t have to use different tools to schedule your blog posts and social media.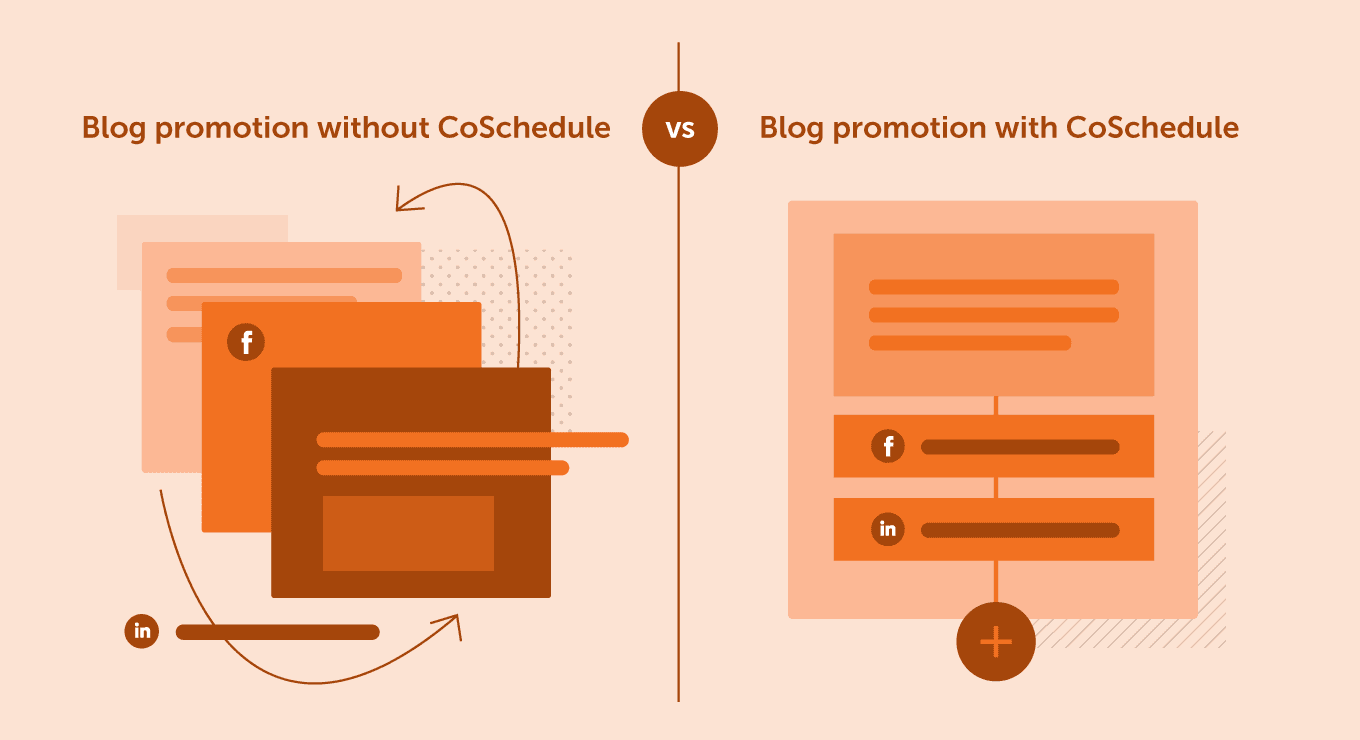
How to Discover The Light Bulb Moment
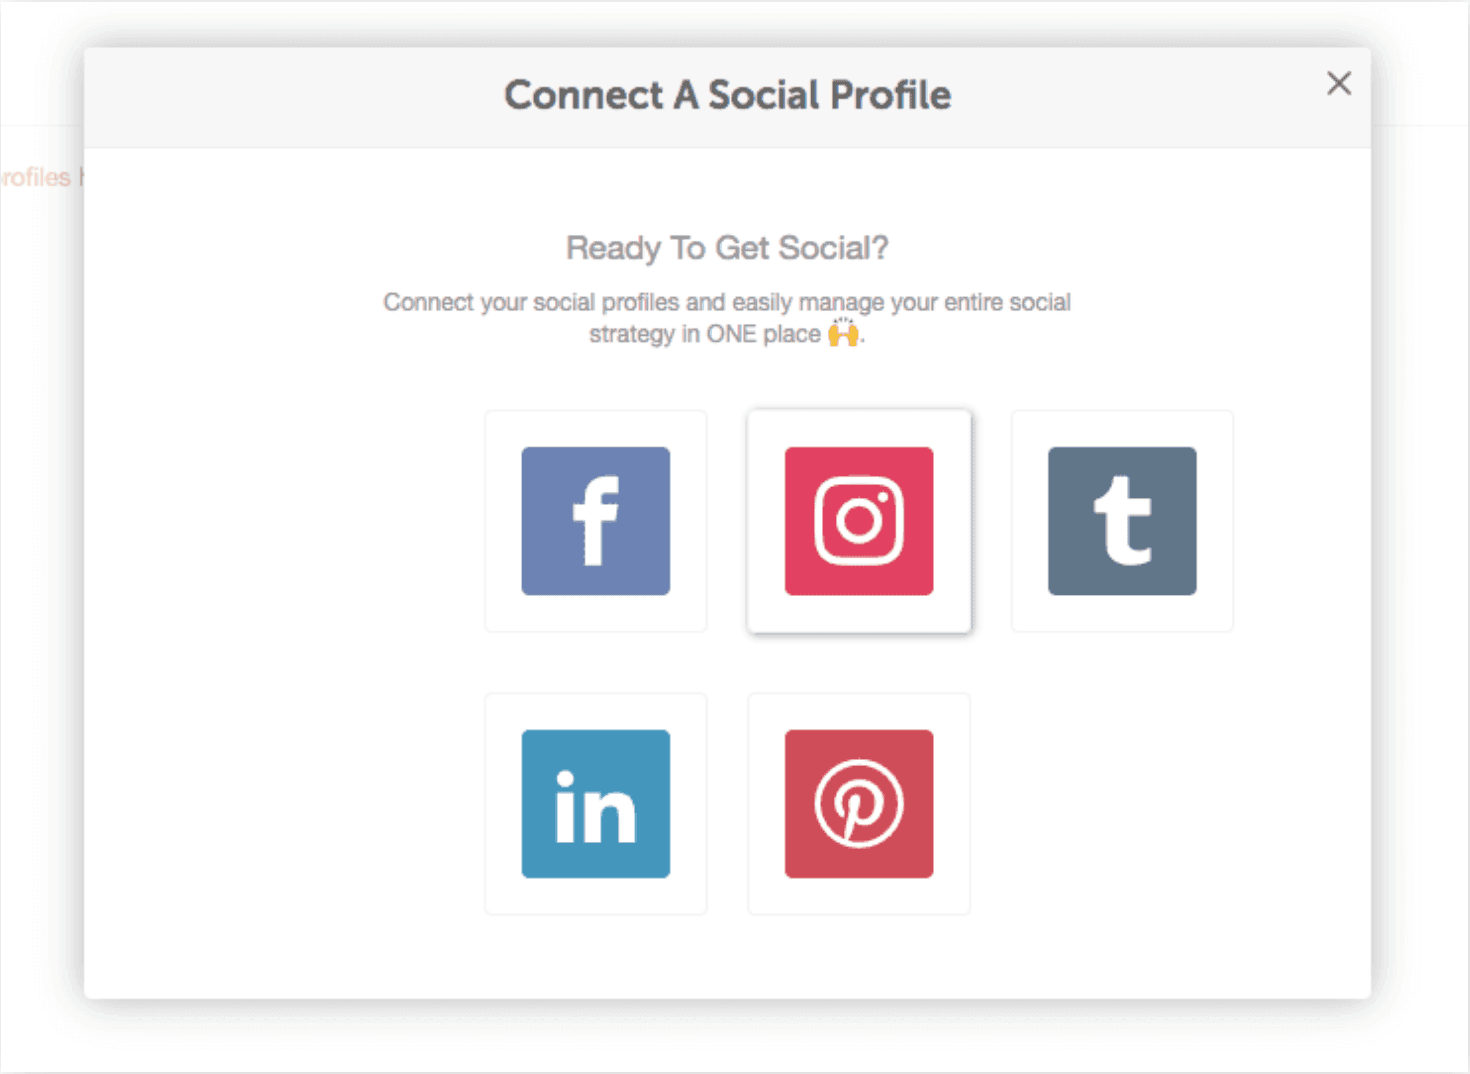
You may have already done this when first setting up your account, but, if you skipped forward, here’s how to do it. Visit Settings > Social Profiles.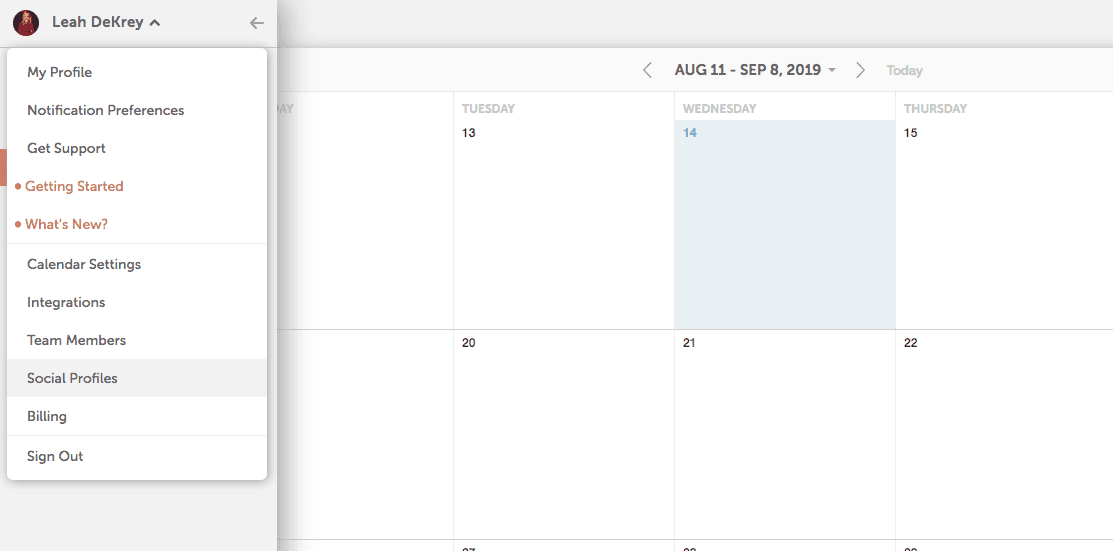 Then choose a social profile to connect. Follow the prompts, and we’ll walk you through the process from there.
Step 2: Add a Blog Post to Your Calendar
Next up, let’s add a blog post to your calendar. This is where things get cool because you can finally gain a clear understanding of what you’re going to publish and when.What Value Does This Provide?
Adding blog posts to your calendar keeps you stay on track and holds you accountable for publishing consistently and hitting the deadlines you impose on yourself.Why Does This Matter?
Content planning has been shown to increase your publishing cadence, and the more you publish, the more traffic you get.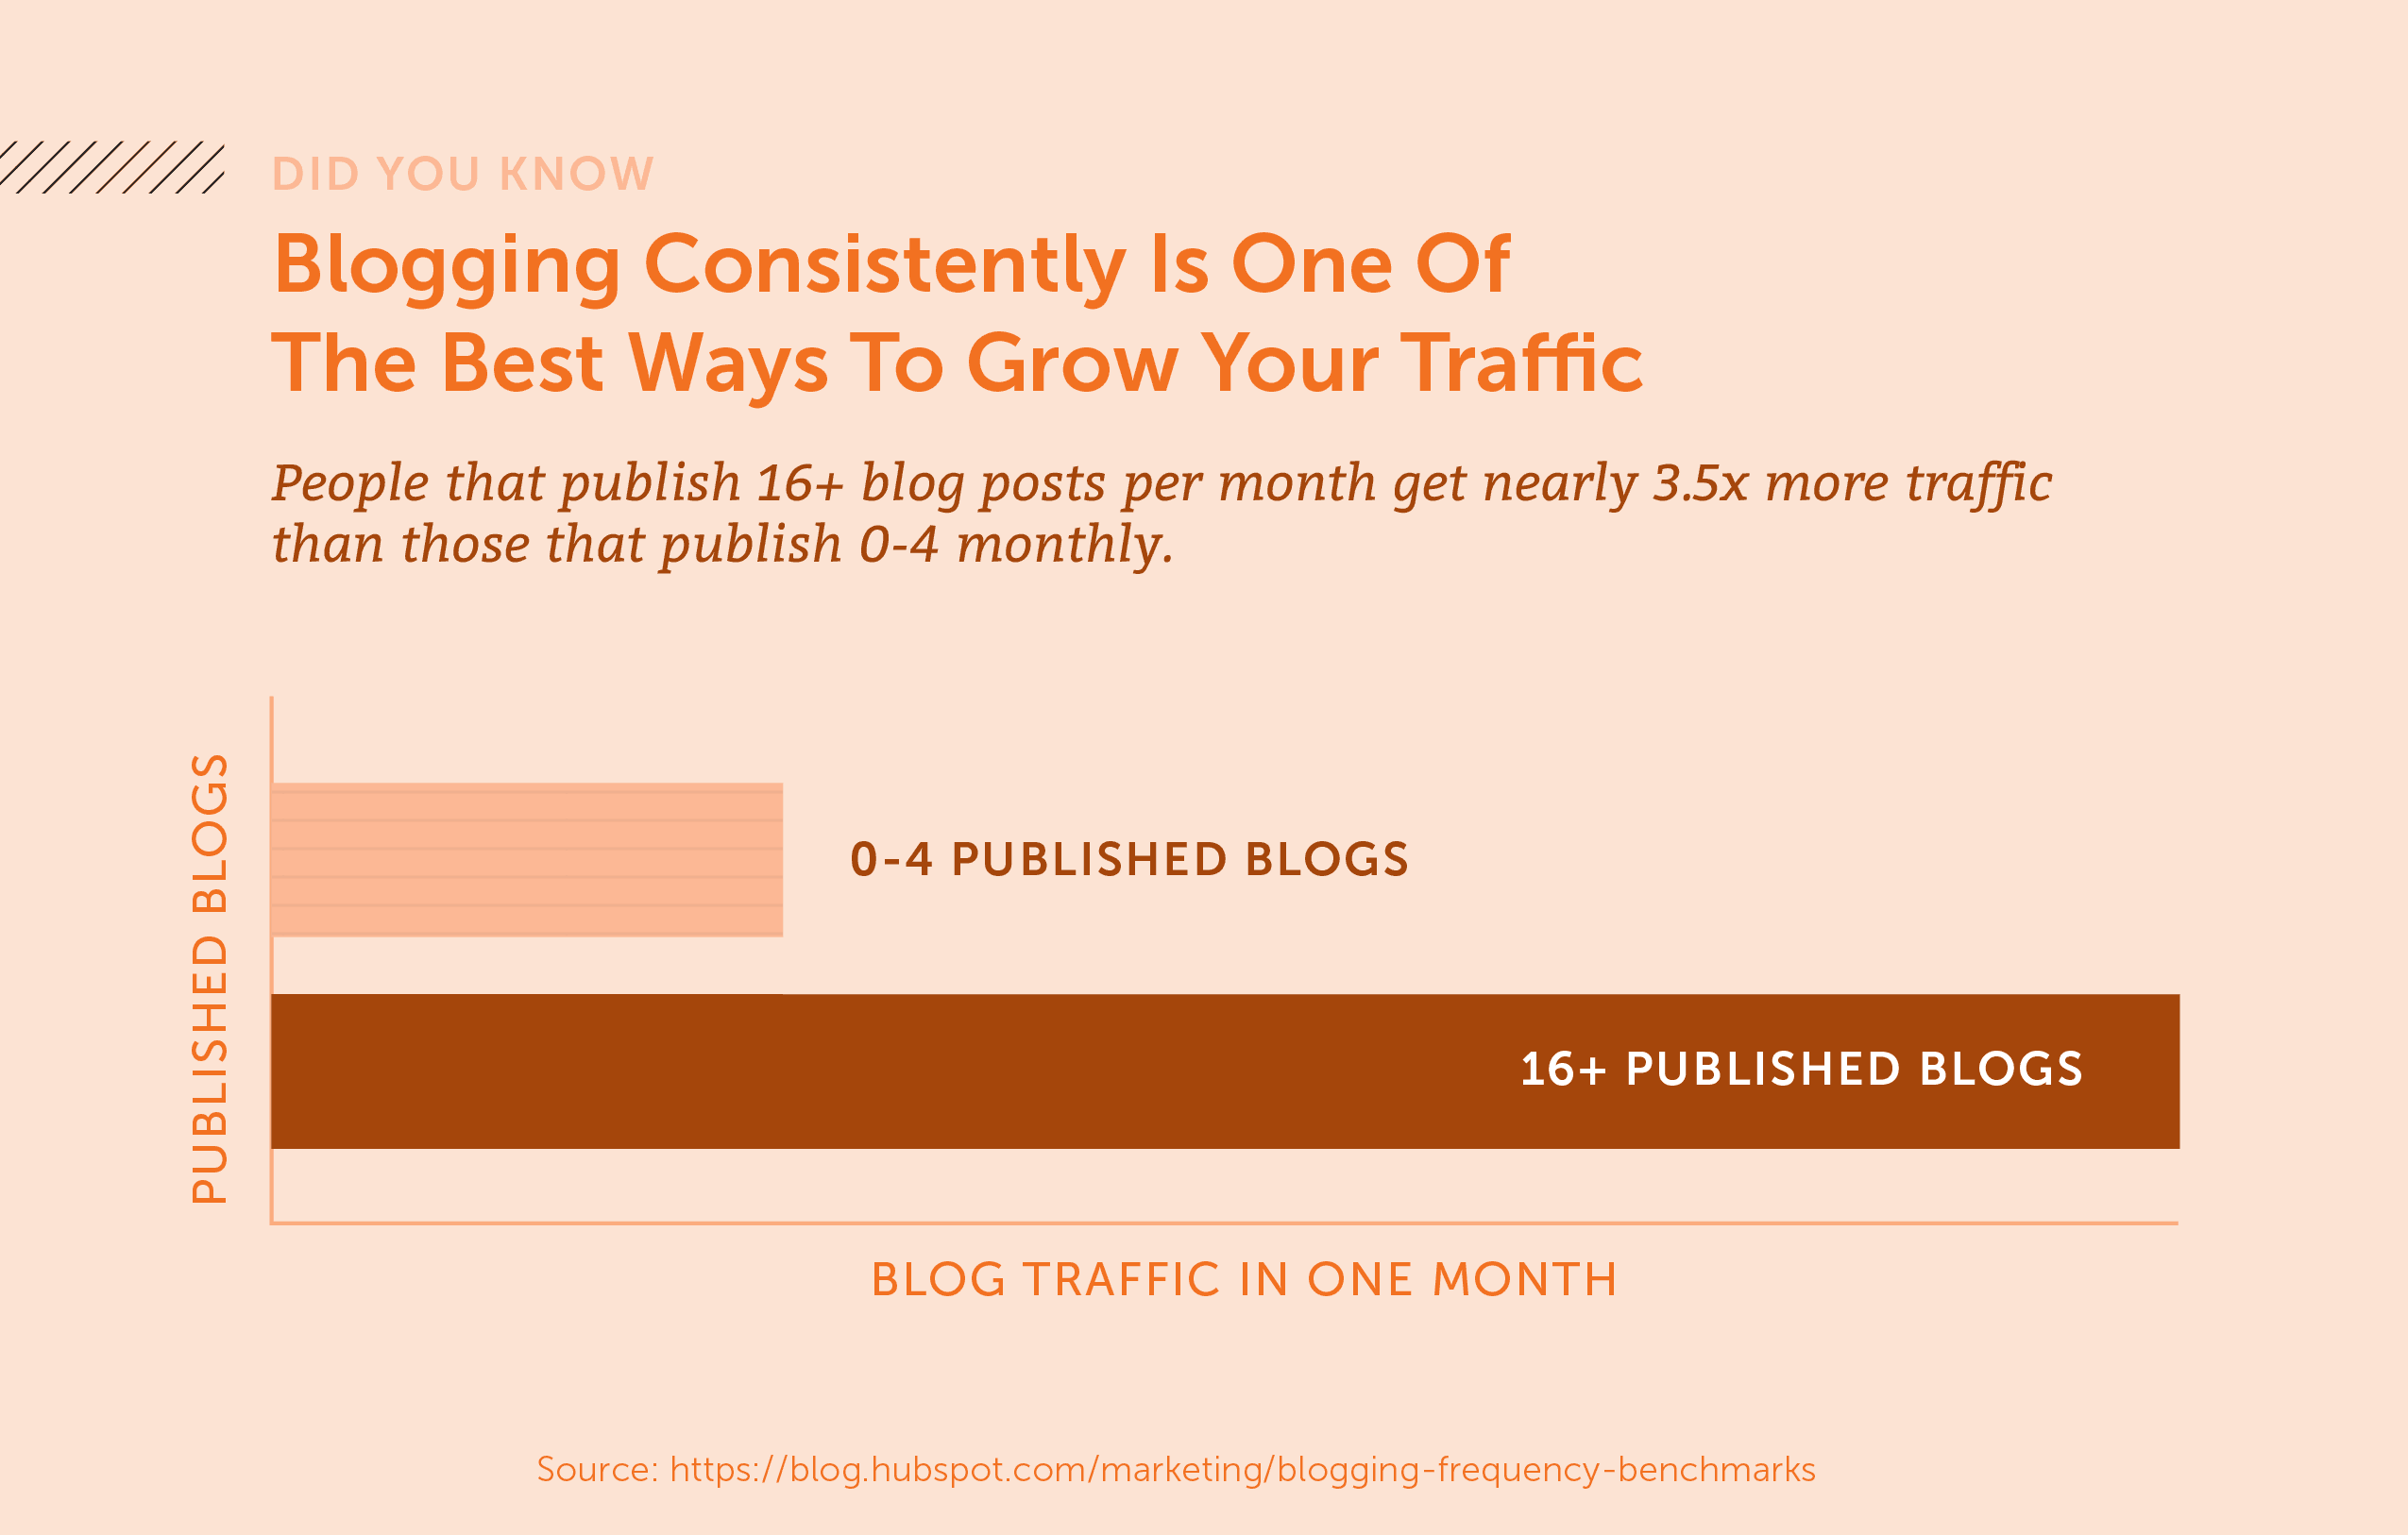
How to Add a Blog Post to Your Calendar
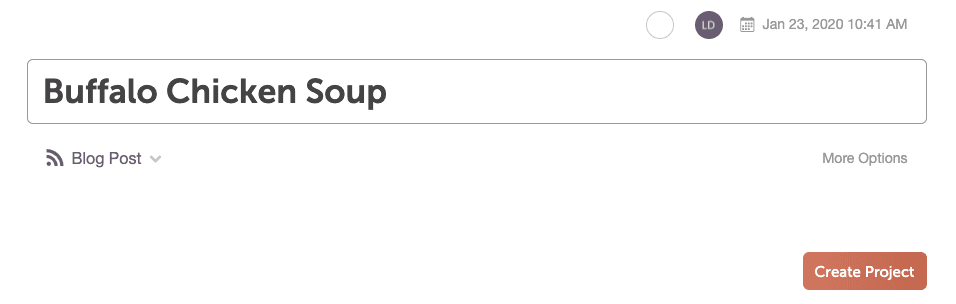
To plan a blog post on your calendar, click the plus sign on the day you want it to be published.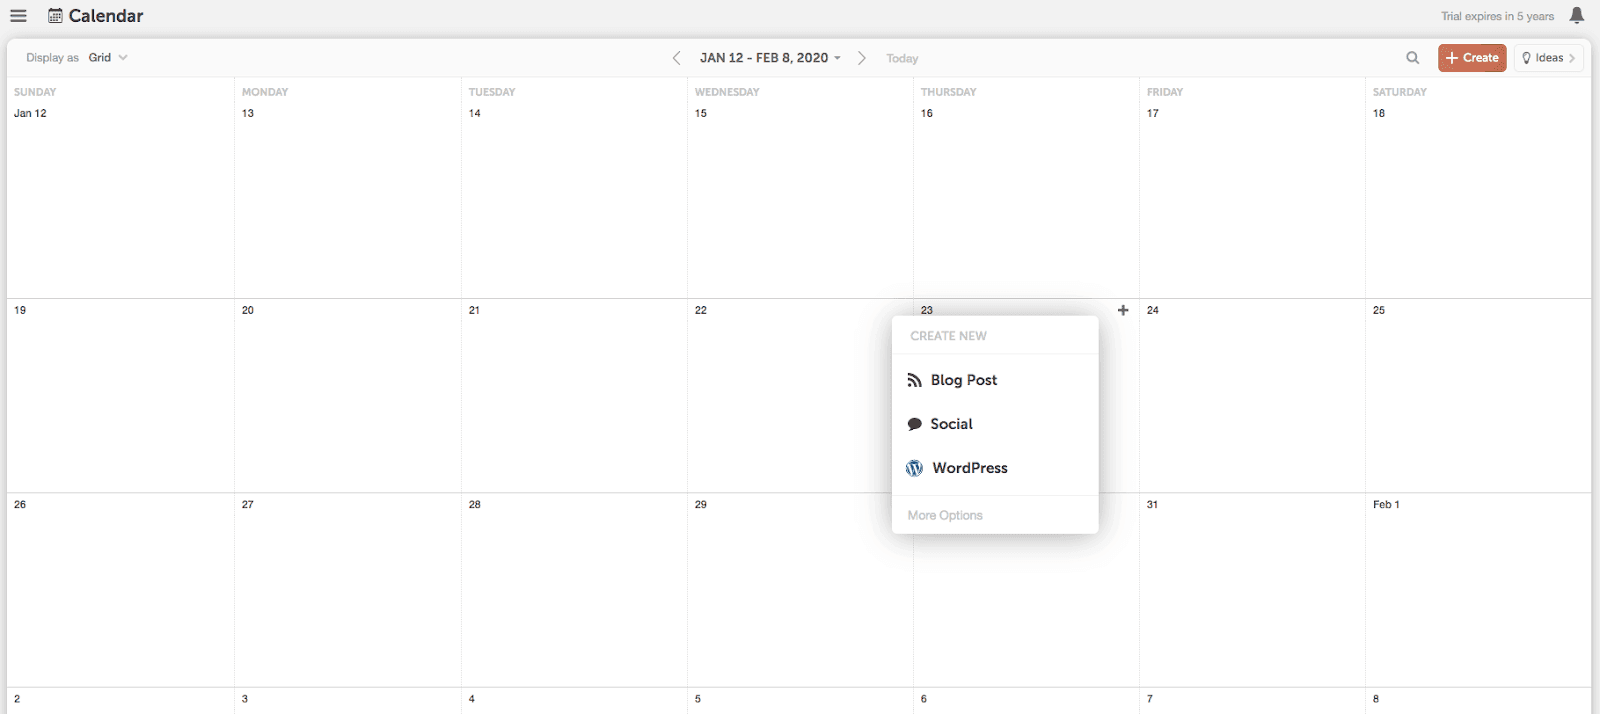 After you’ve chosen “blog” from the list, give your blog post a name and click the orange create project button.
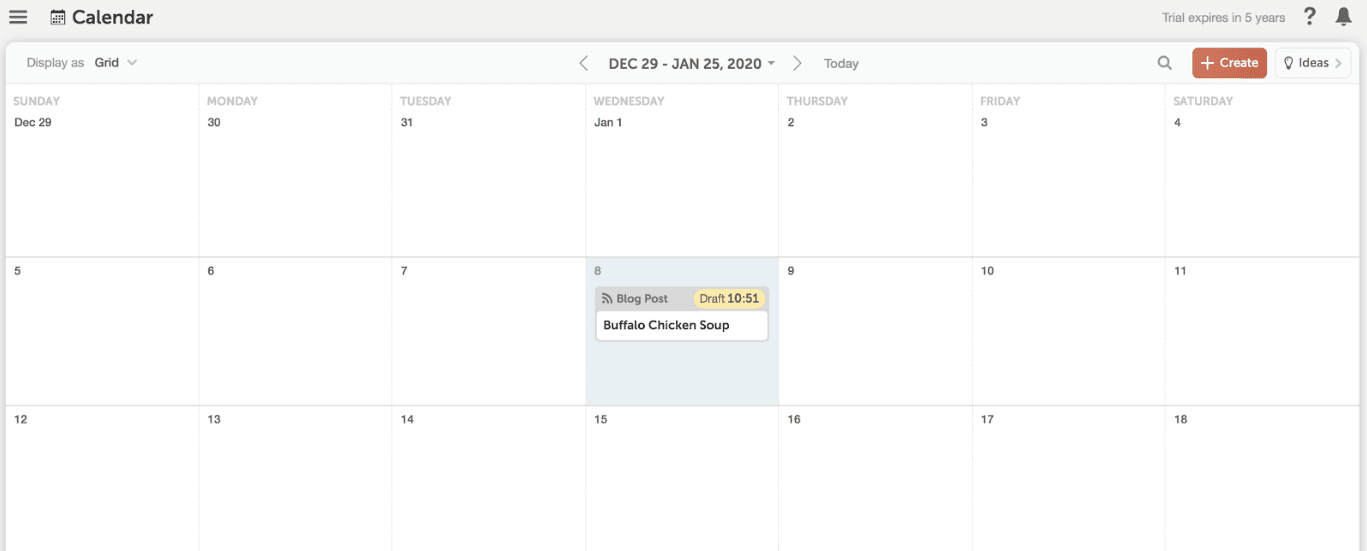
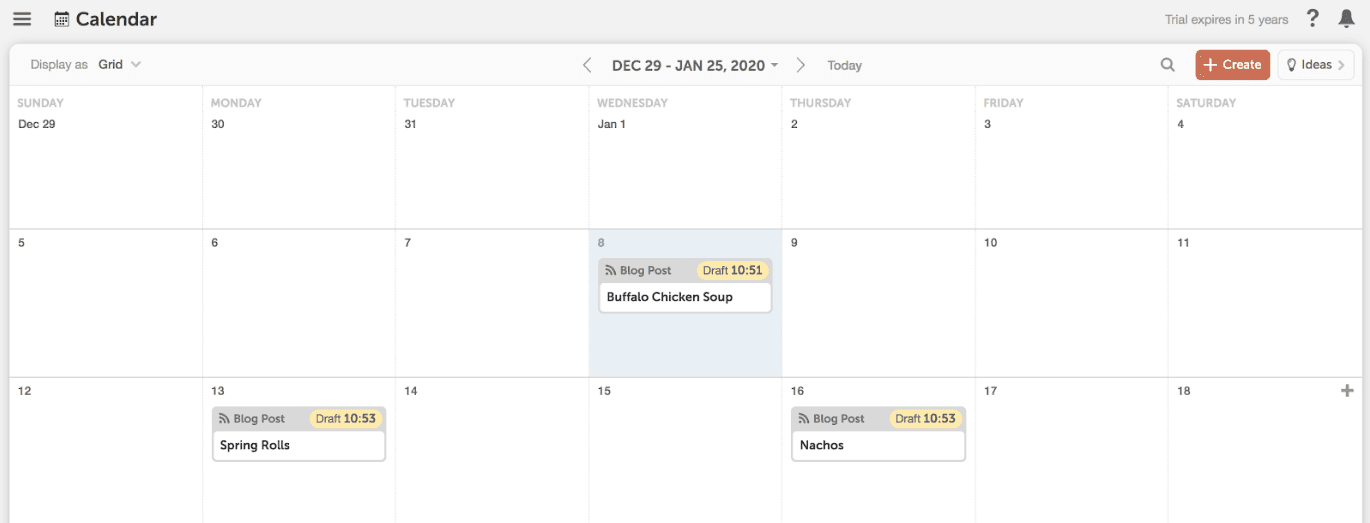
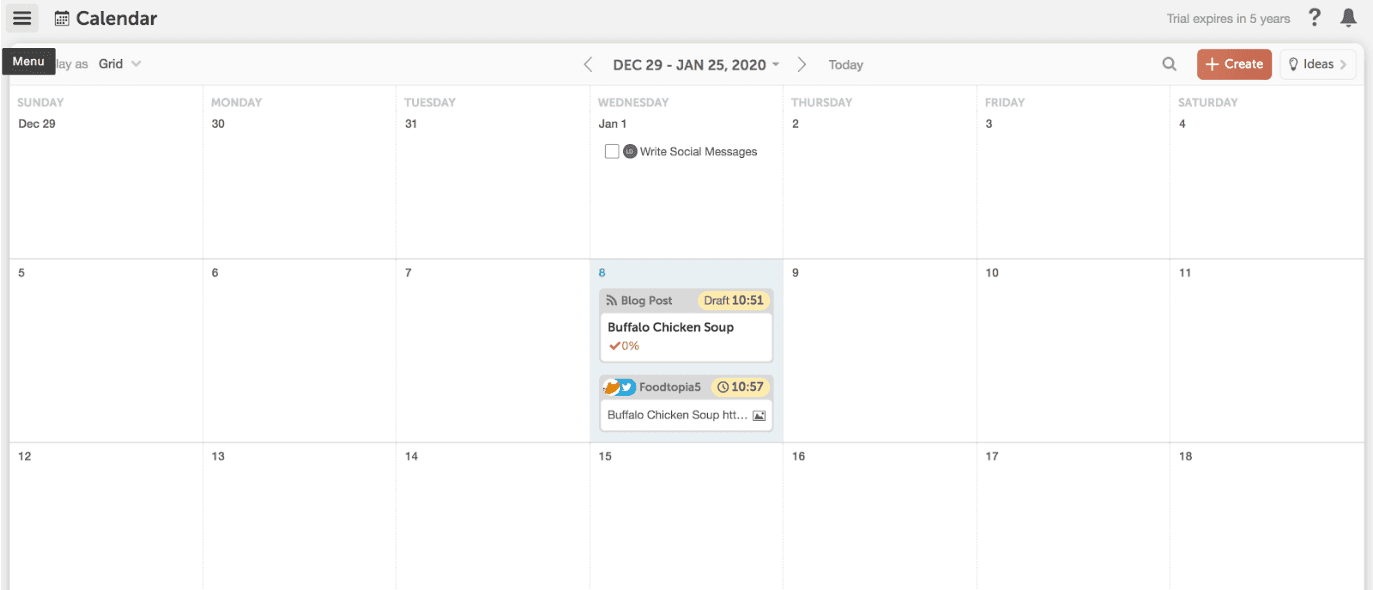
 Here’s what your calendar will look like after you’ve added a blog post.
 Truth is… being a blogger or solopreneur is hard. You’re relying on yourself and no one is there breathing down your neck to make sure you hit your deadlines.
It’s both a blessing and a curse.
The freedom is awesome, but holding yourself accountable can be hard.
We’ve got your back – adding your posts to CoSchedule means your plan is solidified and your blogging cadence is clear.
For example, if you’d like to publish two blog posts a week, CoSchedule will help you visualize your plan and keep yourself on track.
Truth is… being a blogger or solopreneur is hard. You’re relying on yourself and no one is there breathing down your neck to make sure you hit your deadlines.
It’s both a blessing and a curse.
The freedom is awesome, but holding yourself accountable can be hard.
We’ve got your back – adding your posts to CoSchedule means your plan is solidified and your blogging cadence is clear.
For example, if you’d like to publish two blog posts a week, CoSchedule will help you visualize your plan and keep yourself on track.
Step 3: Add a Social Campaign to your Blog Post
Now that you’ve got a blog post planned on your calendar, it’s time to plan how you will promote it with social messages. This is one of the best ways CoSchedule can simplify your life. With CoSchedule, you’ll schedule your social messages in the same place you write your blog post. You’ll attach a social campaign to a blog post and organize multiple social messages in one fell swoop. After all, blogs and social media are so interconnected, why on earth wouldn’t you want to see them side-by-side in the same tool?What Value Does This Provide?
Save time by scheduling your social media messages in the same place you plan and publish your blog posts. Hit publish, and automatically set them all in motion.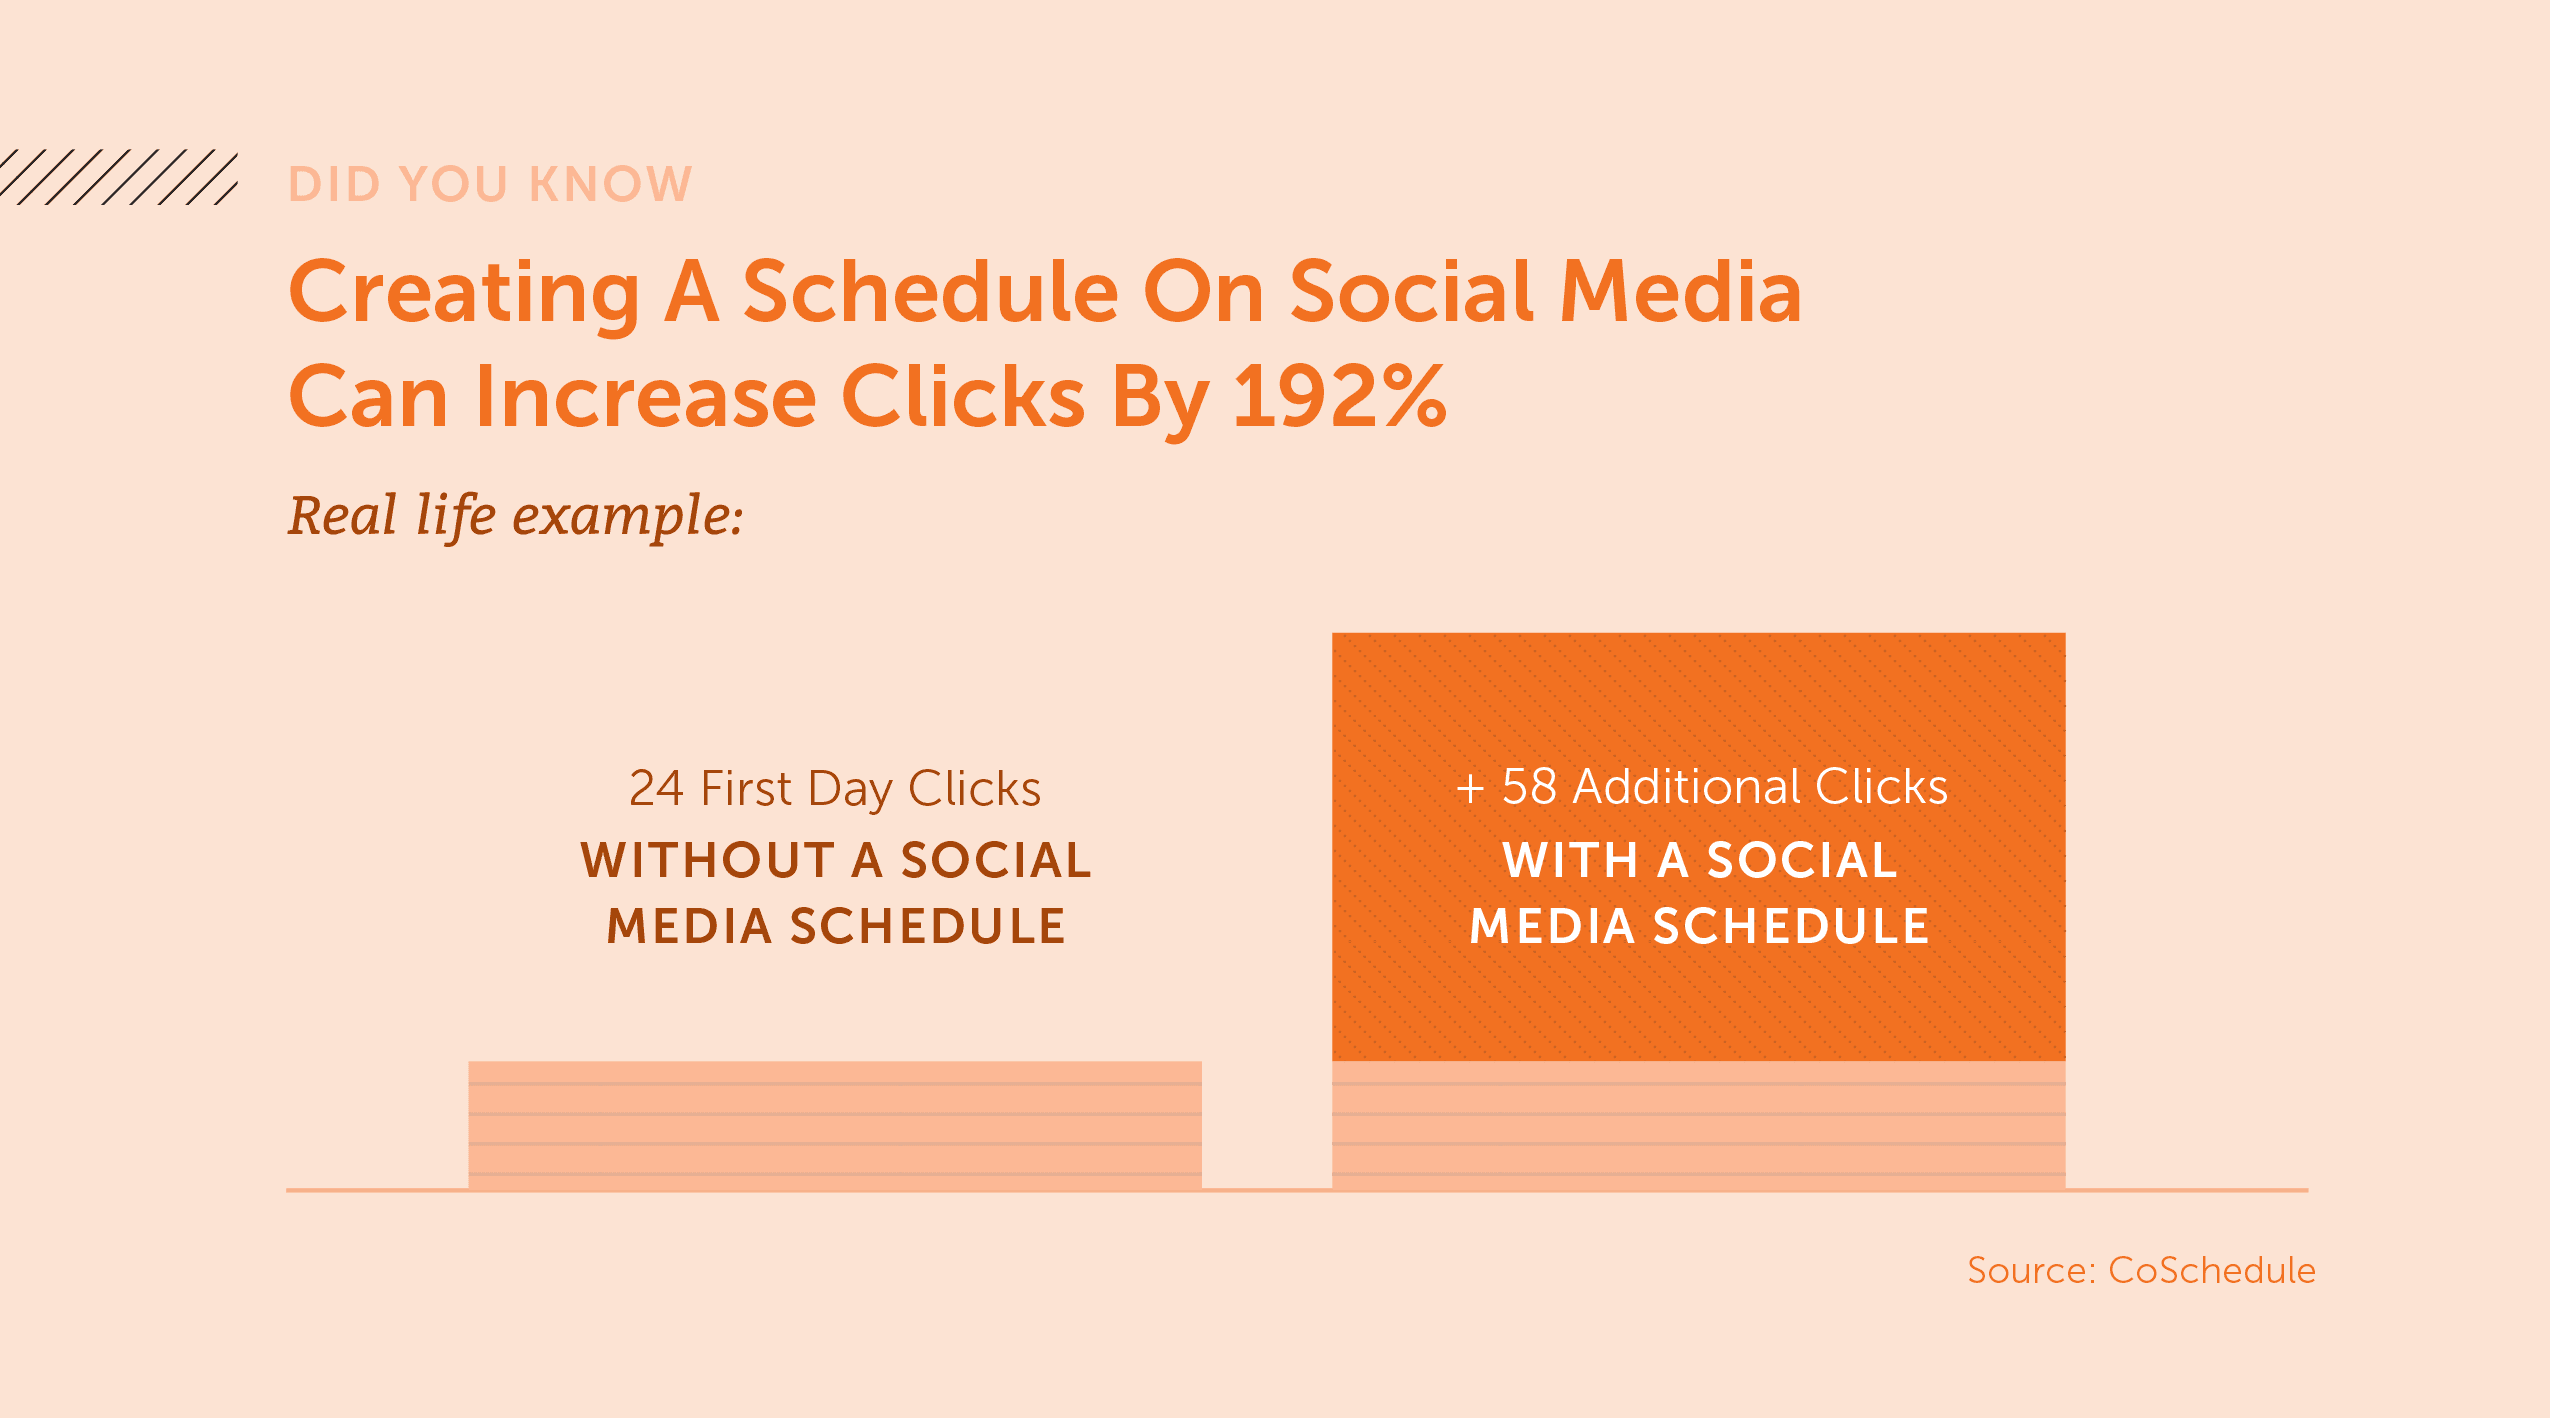
How to Do It
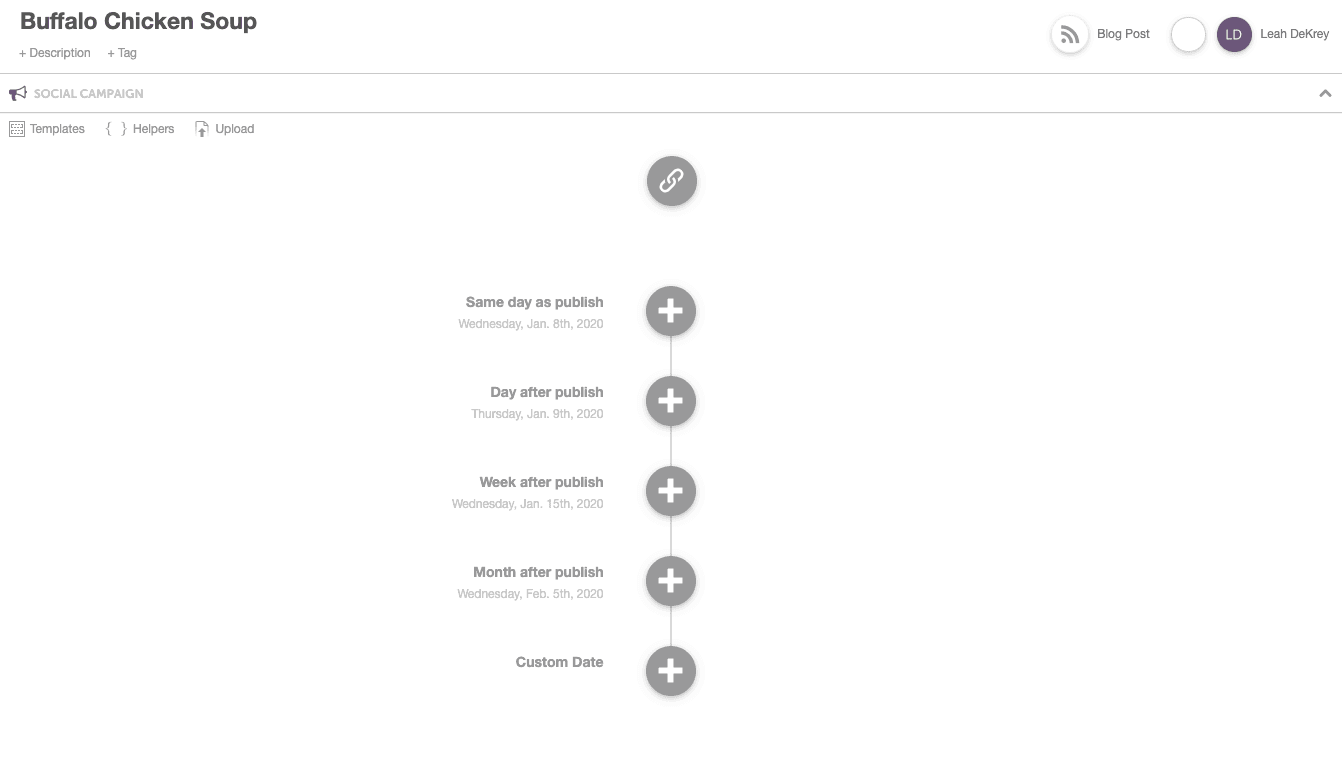
Open the blog post you’ve added on your calendar. Click the plus sign to add an attachment to your post. Then choose the social campaign option.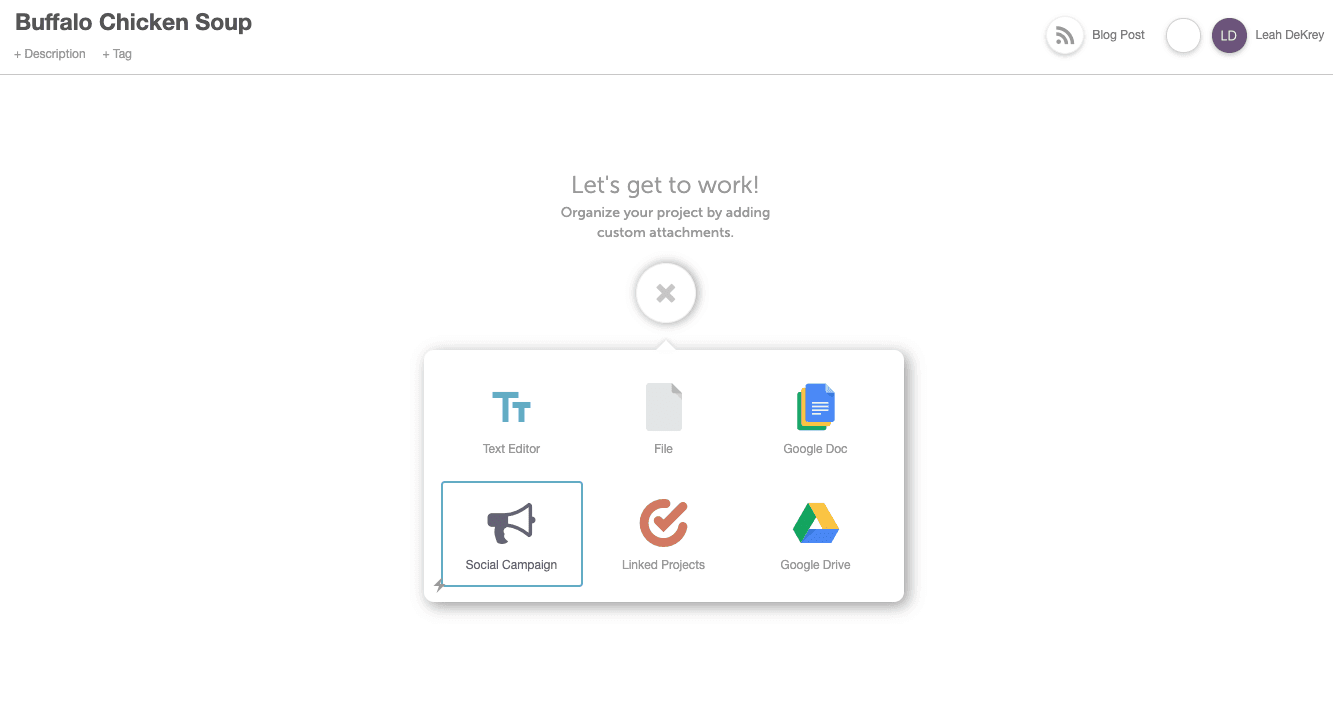 Click the plus sign on a day you want to add a social message to promote your blog post.
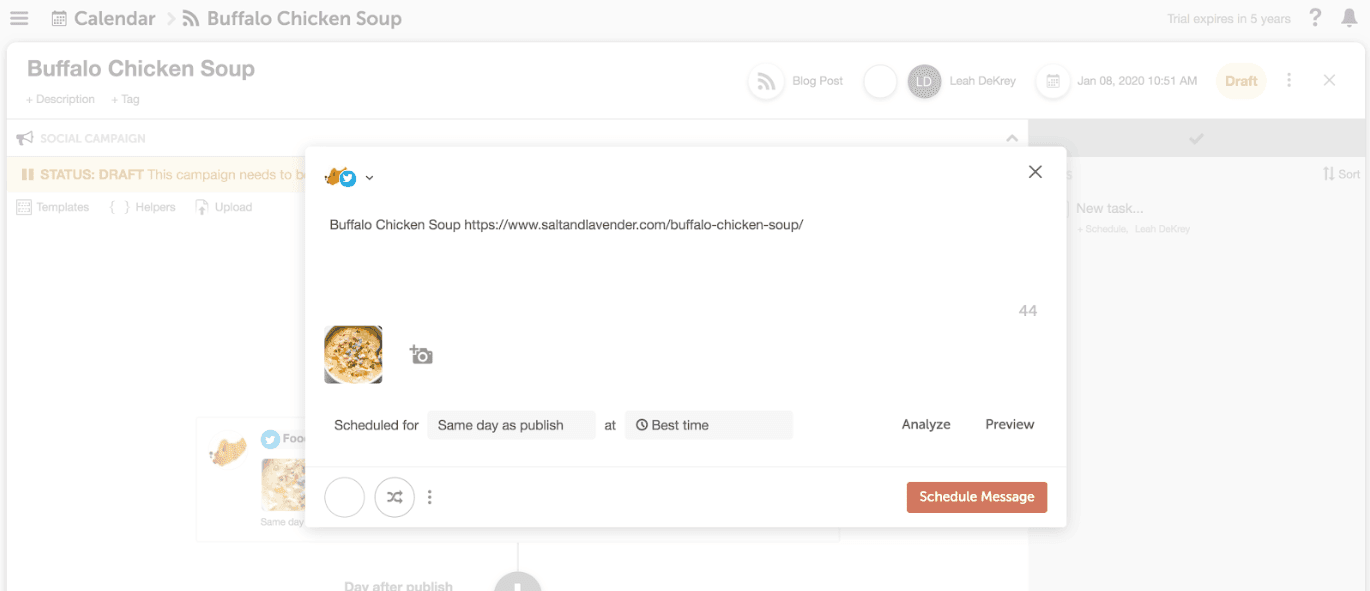
 Choose a social profile from the drop-down, add some text and an image, and add your message to the social campaign.
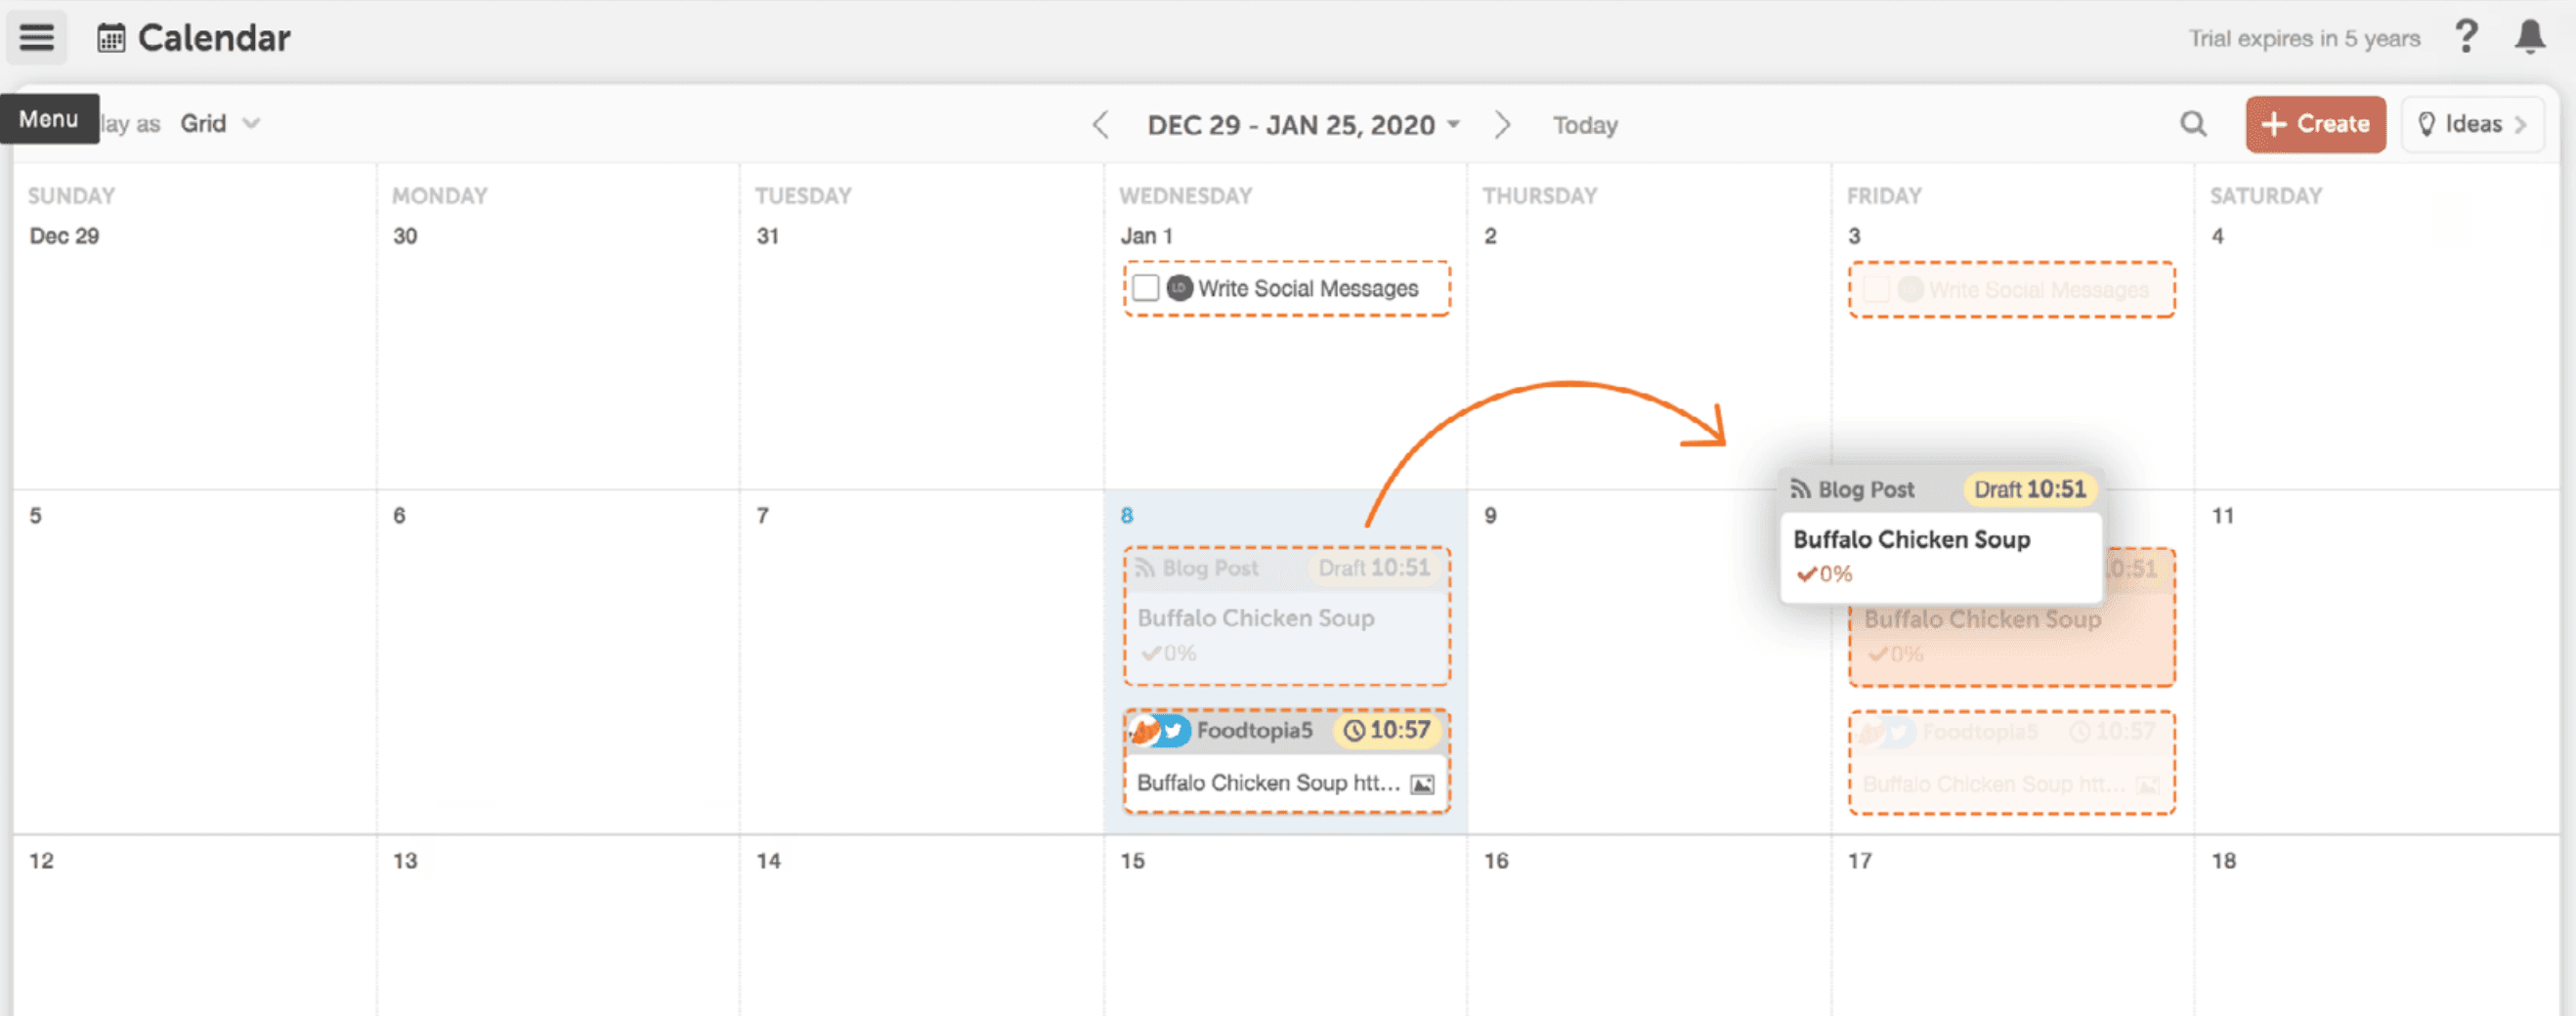
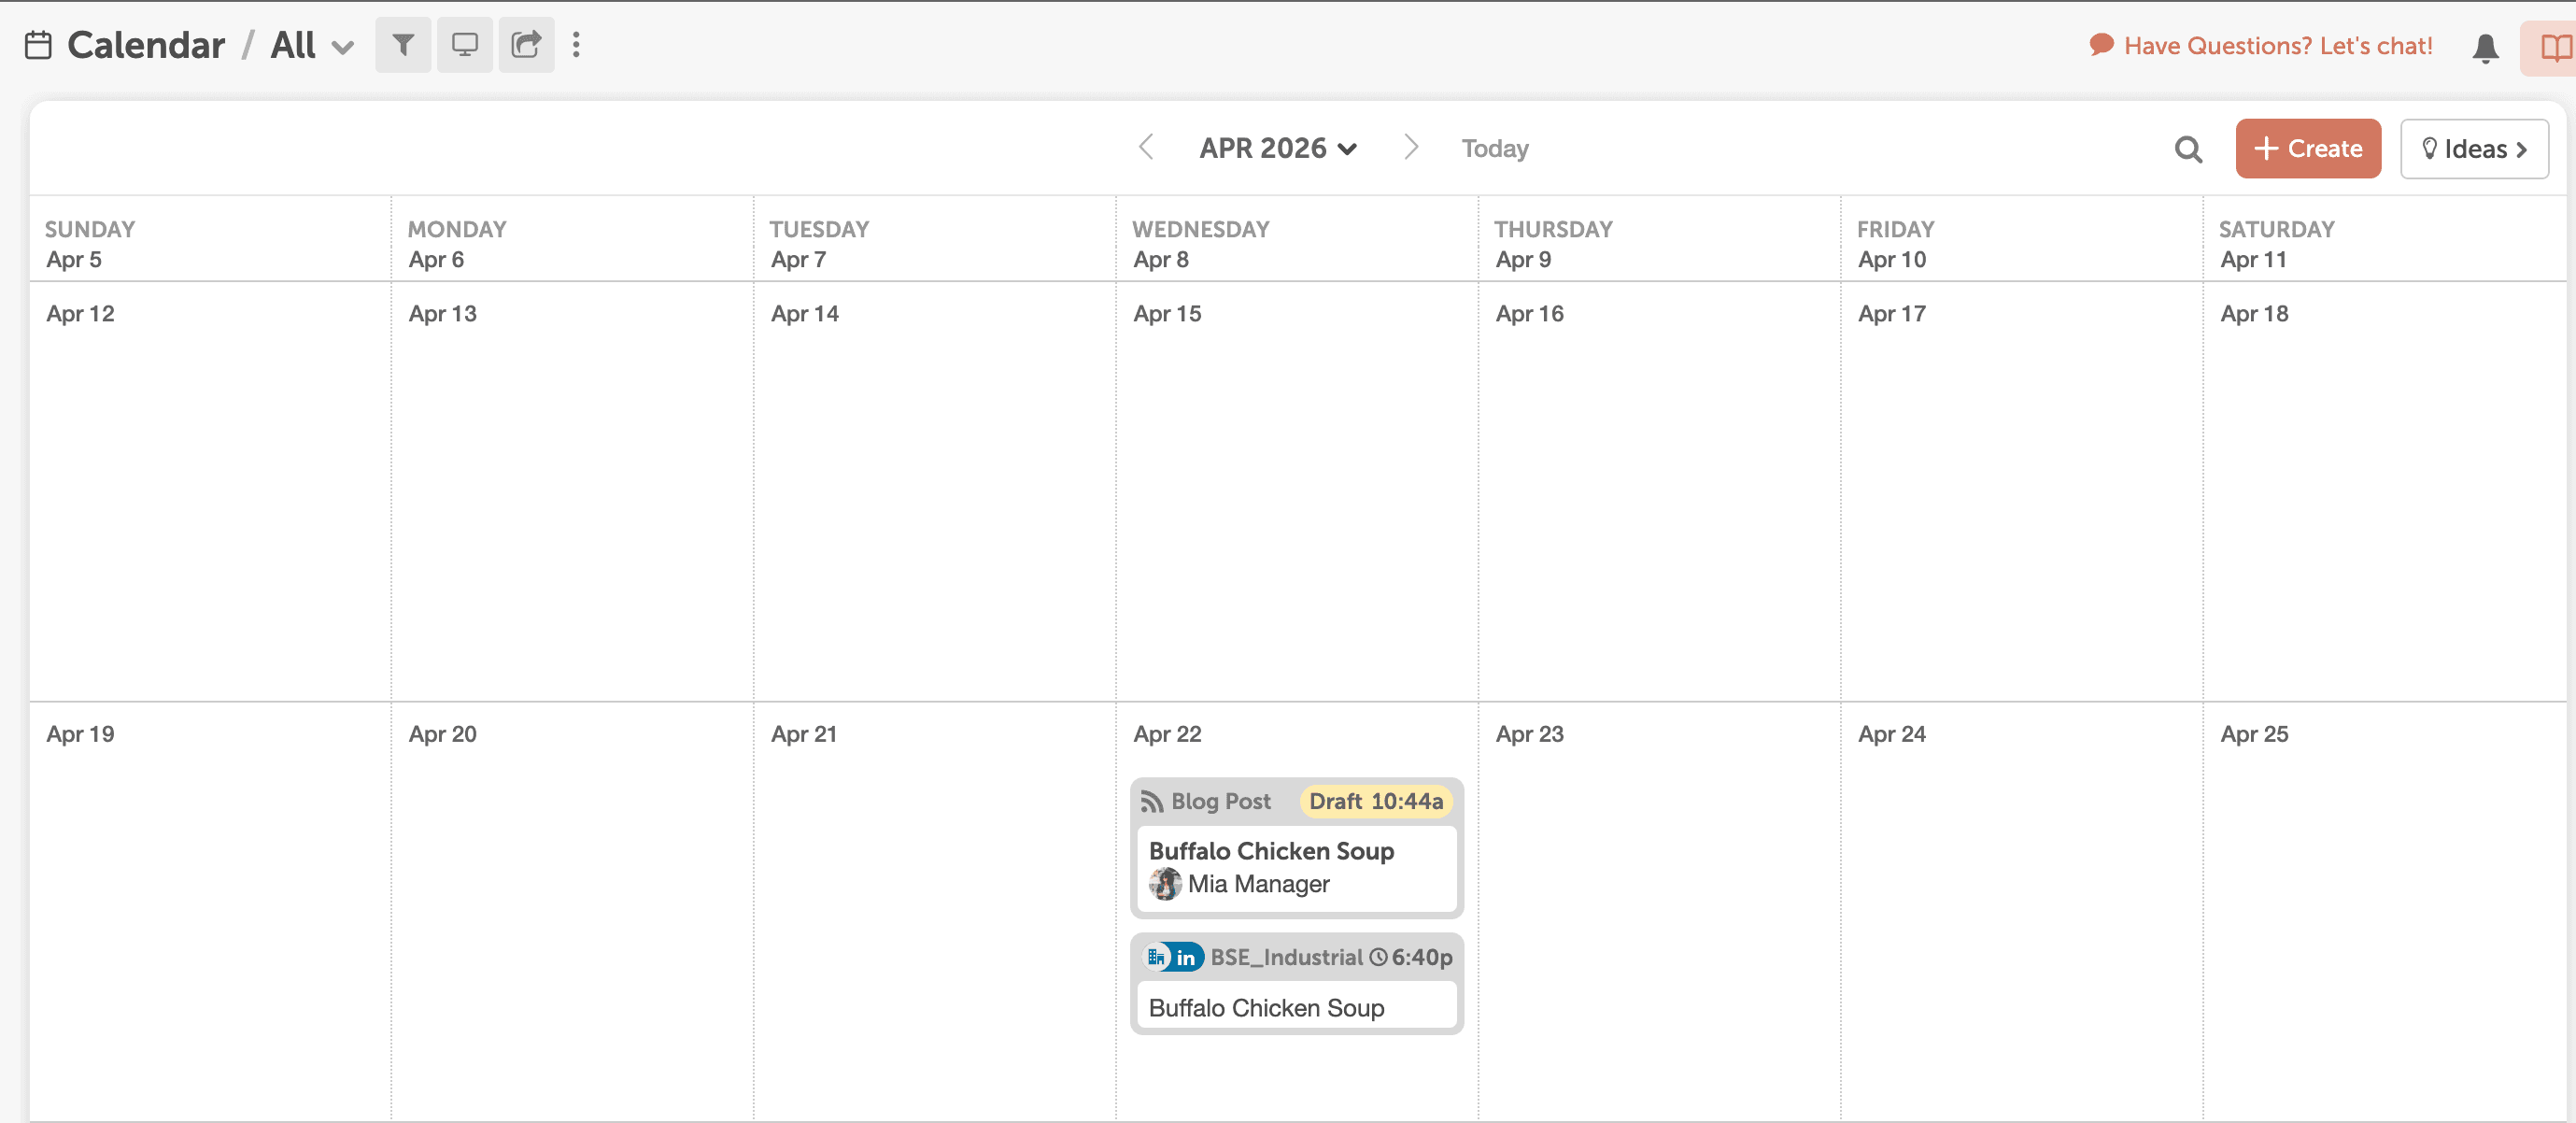
 Next, close out of your blog post and head back to your calendar. You’ll see your blog post scheduled right next to the corresponding social message… ready to automatically publish on your behalf.
 If you want to get traction to your blog, you’ve got to promote your posts regularly.
CoSchedule helps you drive consistent traffic to your blog by making it easier to consistently promote it on social media.
If you want to get traction to your blog, you’ve got to promote your posts regularly.
CoSchedule helps you drive consistent traffic to your blog by making it easier to consistently promote it on social media.
Step 4: Create a Task in your Project
This content isn’t gonna get written by itself. And, unfortunately, managing a blog takes some serious task management… which is less likely to get done if you don’t create a to-do list. The good news is, you can set all your tasks directly in CoSchedule so you know exactly what’s left to be done on every project.What Value Does This Provide?
CoSchedule allows you to clearly see what you need to accomplish every day to maintain your publishing schedule and stay on track. Let’s start adding some tasks to your calendar.
How to Do It
Pop back into the blog post on your calendar. On the right-hand side, you’ll see an area to start adding tasks. Add the title of your task and set a due date using the drop-down menu.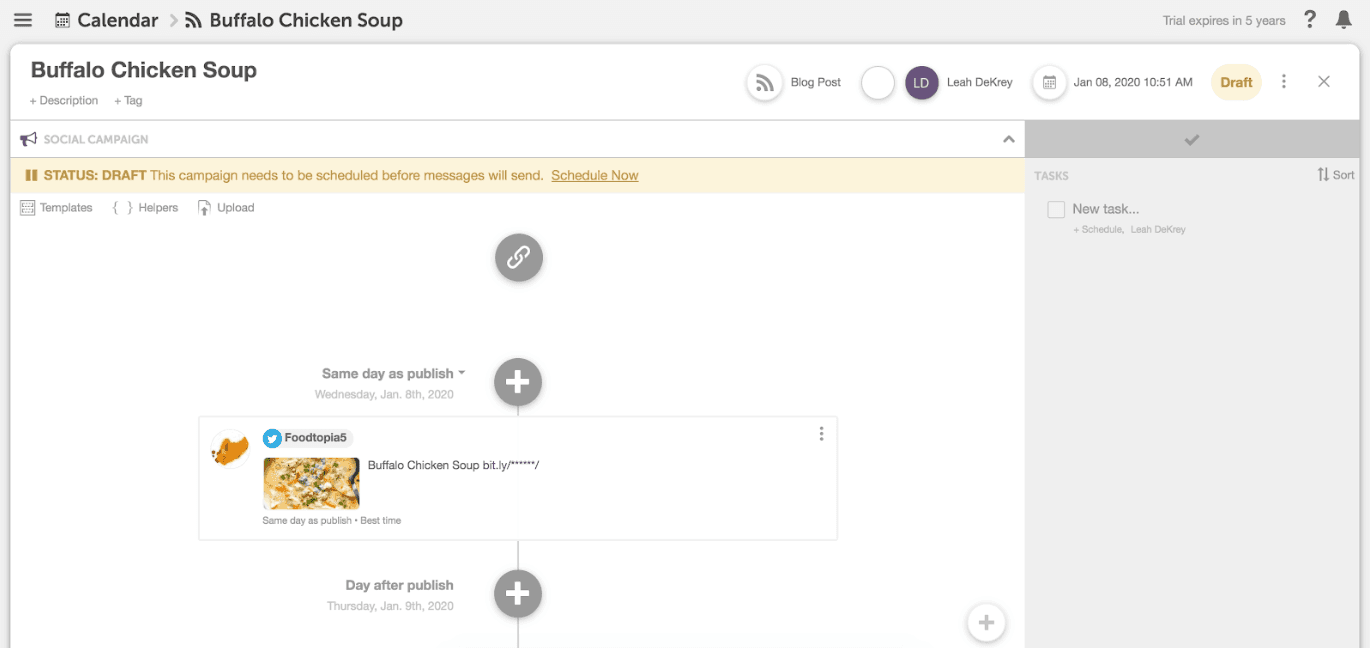 Once you’ve added a task and a due date, head back over to your calendar by closing out of your blog post project.
Now you’ll see a task on your calendar to remind yourself of what you need to get accomplished on any given day.
Once you’ve added a task and a due date, head back over to your calendar by closing out of your blog post project.
Now you’ll see a task on your calendar to remind yourself of what you need to get accomplished on any given day.
Step 5: Drag and Drop the Blog Post
You've made it to step number five... our favorite one. Sometimes things don’t go according to plan. You’ve got to reschedule posts due to roadblocks, snags, and general unforeseen life events that throw a wrench in your plans. Usually, these hurdles mean a LOT of extra work on your part due to manual rescheduling. When this happens, you’ve got to edit one task at a time, reschedule every social message, and move that blog post, too. In short, manually rescheduling everything makes your life even harder than it already is. CoSchedule puts an end to this.
How to Do It
To reschedule everything associated with a project, simply drag and drop your blog post. All of its tasks and social messages will automatically reschedule and snap into place.