
Getting Started With Your CoSchedule Calendar for Marketing Team Members
Plan Your Work In Marketing Calendar
In This Lesson
 What Is This Guide? This guide will walk you through how you can use CoSchedule Marketing Calendar or Suite to manage your daily tasks and projects.
Who’s This Guide For? New CoSchedule Marketing Calendar and Suite users that are on a marketing team.
What You’ll Learn:
What Is This Guide? This guide will walk you through how you can use CoSchedule Marketing Calendar or Suite to manage your daily tasks and projects.
Who’s This Guide For? New CoSchedule Marketing Calendar and Suite users that are on a marketing team.
What You’ll Learn:
 A project in marketing calendar is anything that the marketing team will produce. It could be blog posts, white papers, eBooks conference tear sheets, promotional swag, brochures, paid search ads, or anything in between.


 To start working on one of your tasks, click into the task. This will bring you to the project view where you can complete your task.
 In the project view, you’ll see a workflow on the right-hand side. This holds people accountable for hitting their deadlines.
There is also the ability to have approvals built into the workflow. Once you check off your task, the individual responsible for approving it will automatically be notified. This eliminates bottlenecks that often form when approvals are necessary.
In the project view, you’ll see a workflow on the right-hand side. This holds people accountable for hitting their deadlines.
There is also the ability to have approvals built into the workflow. Once you check off your task, the individual responsible for approving it will automatically be notified. This eliminates bottlenecks that often form when approvals are necessary.


 Adding a social campaign allows you to write your social messages directly in the project they are promoting so you don’t have to bounce over to another tool to promote your content.


- Introduction
- CoSchedule Calendar Activities
- Adding a New Project
- Completing a Task
- Discussions
- Attachments
Introduction
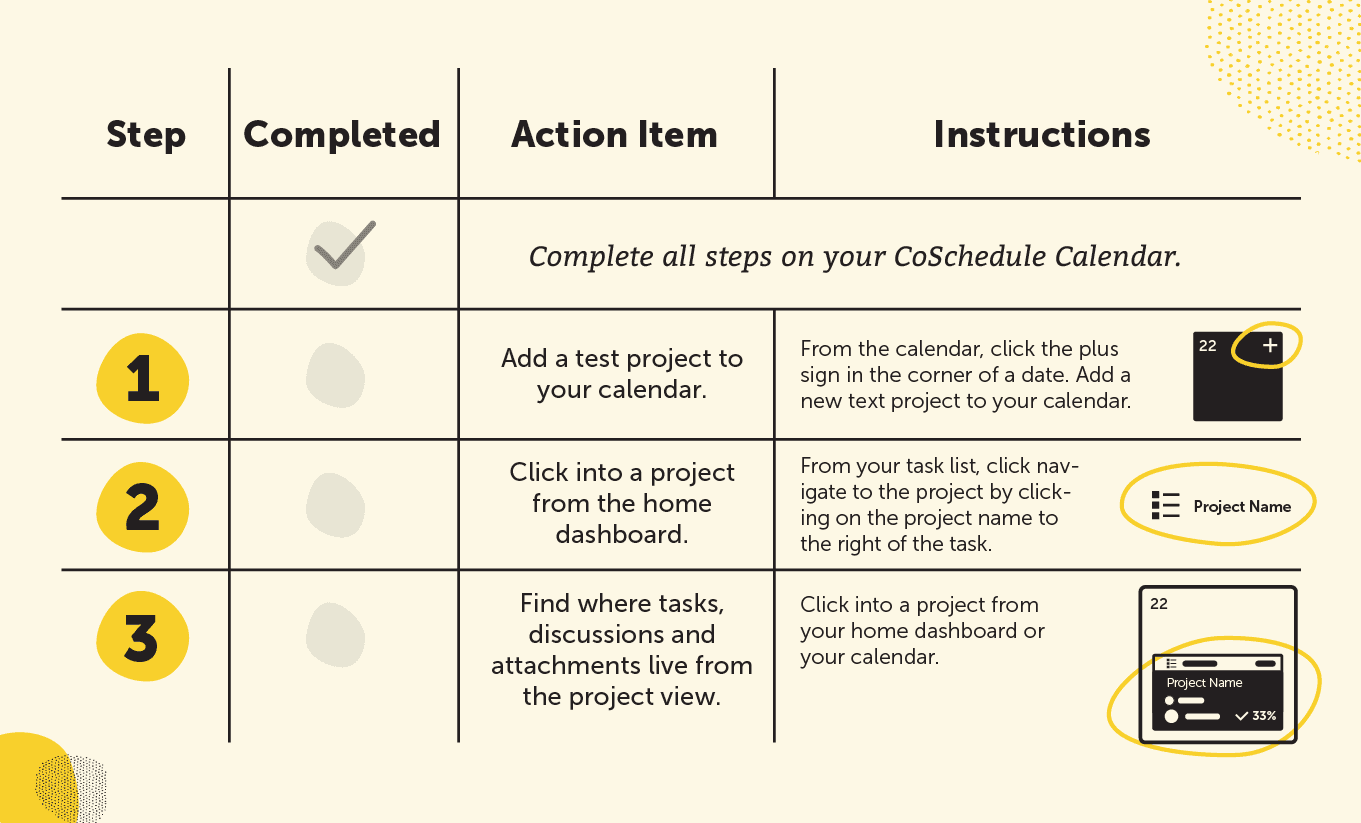
As you work through this guide, use this checklist to learn how to plan daily work in your CoSchedule marketing calendar. It will help you become accustomed to what your daily life will look like working in the tool.
What Is This Guide? This guide will walk you through how you can use CoSchedule Marketing Calendar or Suite to manage your daily tasks and projects.
Who’s This Guide For? New CoSchedule Marketing Calendar and Suite users that are on a marketing team.
What You’ll Learn:
- How to plan new projects.
- Where to find your tasks.
- How to collaborate better using discussions and attachments.
CoSchedule Calendar Activities
Marketing Projects
In Marketing Calendar & Suite, projects are the backbone of the calendar. Each block on the calendar represents a marketing project that your team is responsible for.
A project in marketing calendar is anything that the marketing team will produce. It could be blog posts, white papers, eBooks conference tear sheets, promotional swag, brochures, paid search ads, or anything in between.
Marketing Campaigns
A marketing campaign is made up of a series of projects and has a beginning and end date. Think of it this way: if you’re launching a new product, you usually have a series of associated projects like emails, social ads, search ads, blog posts, social messages, maybe even commercials and print materials. These things run over an extended period of time. A marketing campaign is a way to group projects together to stay organized and to visualize the duration of the campaign.
Adding a New Project
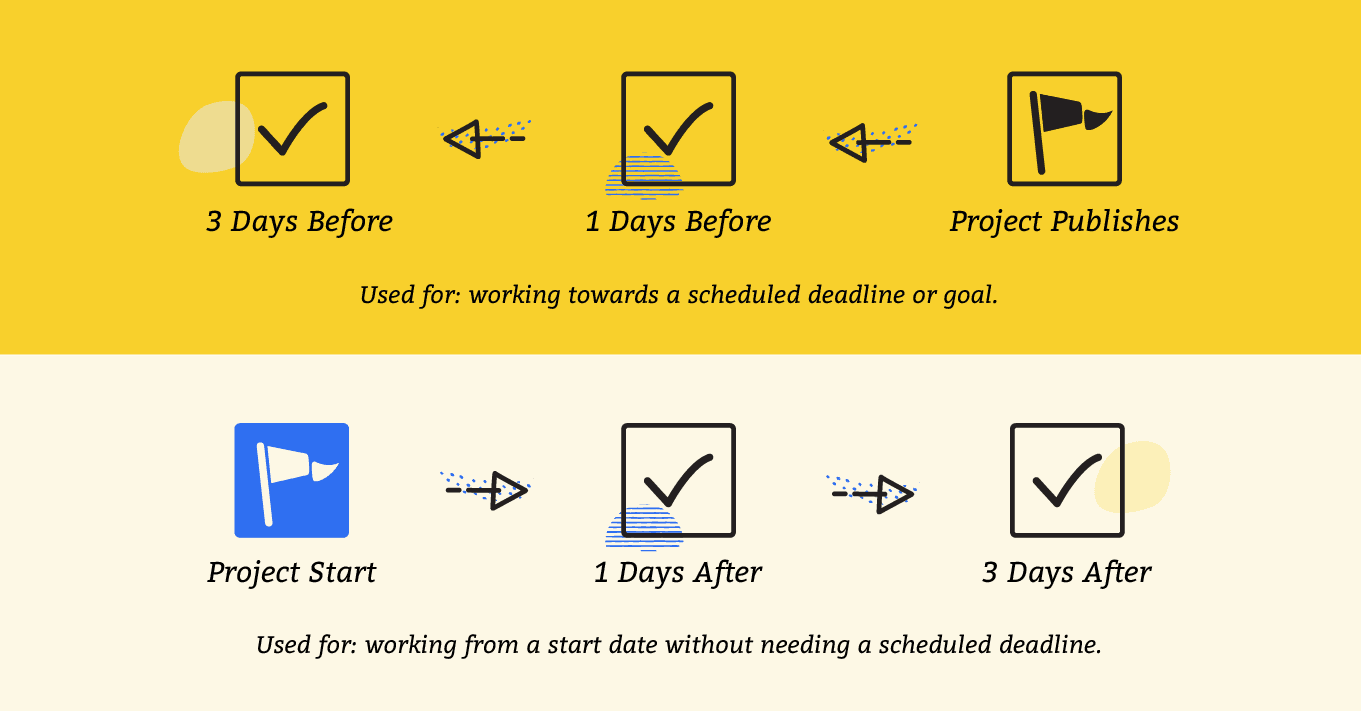
When you want to add a new project to the calendar, simply click the plus sign on a day. There are two ways to think of this:- Add the project on the launch date. (Great for things that have a hard publish date like blog posts.)
- Add the project on the start date. (Great for things that have ongoing activities and no hard launch date.)
Add Projects Individually
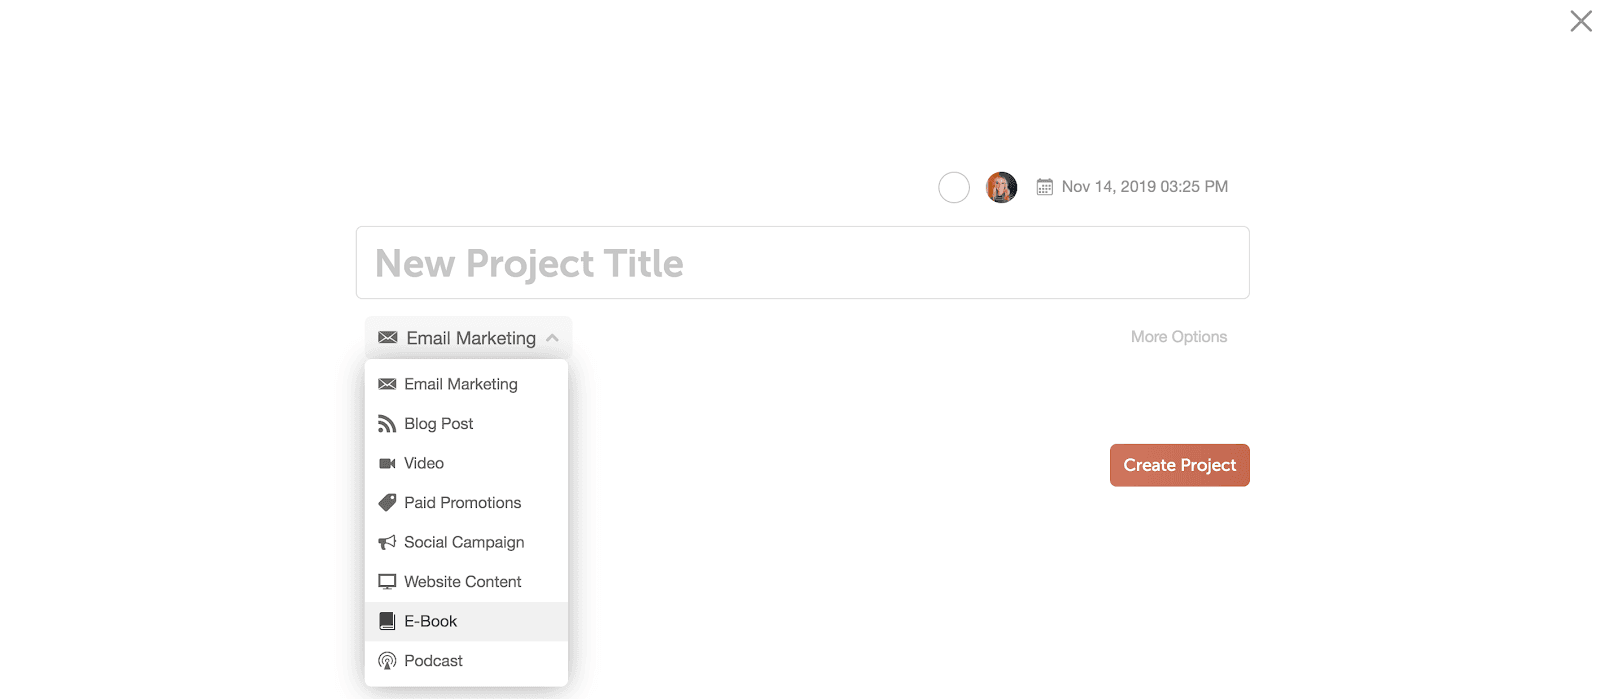
Once you click the plus sign on the calendar date, you’ll see a list of options appear. Your list will vary depending which integrations you have.
- Choose “Project” to add a marketing project like a blog post, video, paid ad, etc.
- Choose “Social” to add a stand alone social media message or a social media campaign.
- Choose “Campaign” if you want to create a series of projects that are related to each other or promoting the same initiative.
- Choose “Mailchimp” if you want to create an email in Mailchimp.
- Choose “Hubspot” if you want to create a new email, blog post, or landing page in your Hubspot account.
- Choose “WordPress” if you want to create a blog post on your calendar AND a new post in your WordPress account.
Recommended Reading:
Project Types Power Tip
If you choose “Projects”, you’ll be able to choose the specific asset you’re creating on the next page by using the drop-down menu.
Add Projects in Bulk
You can also easily bulk import projects into your calendar from a different platform such as Excel, Google Sheets, or project management tool like Asana. To bulk import projects into your calendar, choose Bulk Import Projects from the dropdown create menu. Select the platform you are importing from and follow the directions to easily bulk import your content.
Completing a Task
This is where your home dashboard becomes vital. Head over to your home dashboard to see all of your daily priorities and tasks.
To start working on one of your tasks, click into the task. This will bring you to the project view where you can complete your task.
In the project view, you’ll see a workflow on the right-hand side. This holds people accountable for hitting their deadlines.
There is also the ability to have approvals built into the workflow. Once you check off your task, the individual responsible for approving it will automatically be notified. This eliminates bottlenecks that often form when approvals are necessary.
Discussions
Discussions are a powerful way to cut down on the need for status updates and to make sure you have everything you need to complete your task. It also makes it easy to jump into a project and quickly get up to speed.Discussions can be found by clicking the “discussion” tab.
Attachments
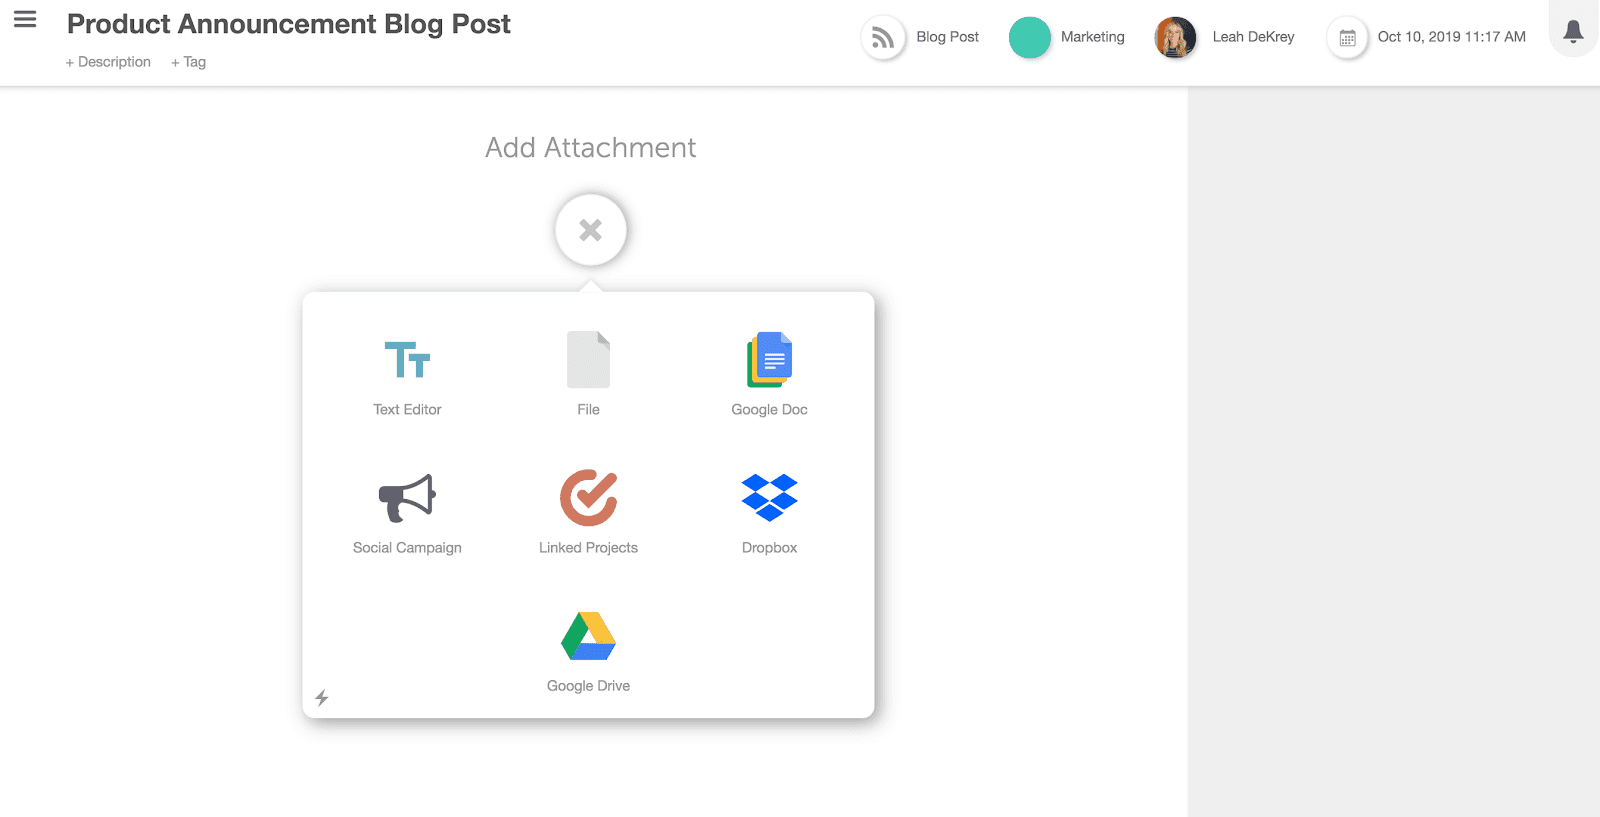
Under the attachments area, you can add things like Google docs, files from your Asset Organizer or Dropbox, or a social campaign.
Adding a social campaign allows you to write your social messages directly in the project they are promoting so you don’t have to bounce over to another tool to promote your content.