How to Create and Use Project Templates
Use the Project Template feature to easily duplicate projects. With this feature, you can automatically create recurring projects, such as weekly webinars or monthly newsletters. Any user can implement a saved Project Template, but only admin users can create and save new templates.
 You'll see a blue Project Template header appear at the top of the page to indicate you are working with a template.
When you create a Project Template from an existing project, all the content and settings from the original project are preserved, with the following exceptions:
You'll see a blue Project Template header appear at the top of the page to indicate you are working with a template.
When you create a Project Template from an existing project, all the content and settings from the original project are preserved, with the following exceptions:
 Note: Instances of the project that have been edited will not be deleted and will be marked [Recovered] on your calendar.
Note: Project Templates are only available in Content Calendar and Marketing Suite.
- Create a New Project Template
- How to Use a Project Template
- Set a Recurring Schedule
- Delete Recurring Projects
- Edit a Project Template
Create a New Project Template
Only Owners, Managers, and Admins can add and edit Project Templates.- Begin on your Calendar.
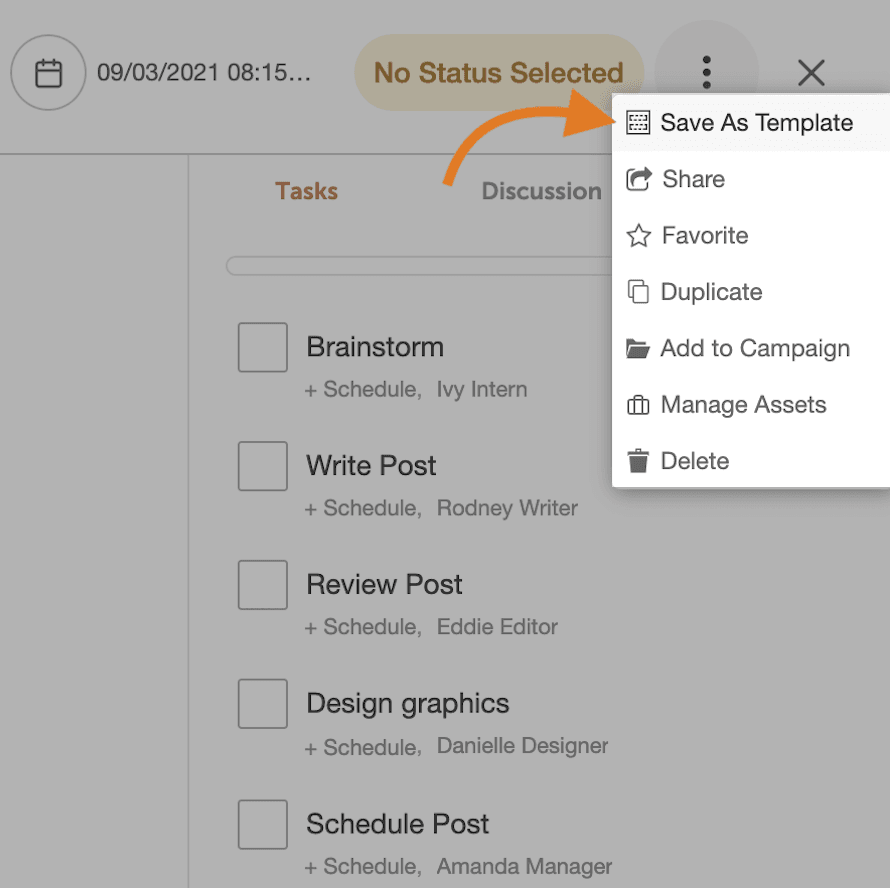
- Click the project you'd like to turn into a template.
- Click the ellipsis icon.
- Select Save as Template.
You'll see a blue Project Template header appear at the top of the page to indicate you are working with a template.
When you create a Project Template from an existing project, all the content and settings from the original project are preserved, with the following exceptions:
- Any discussion will not be duplicated in the template.
- For any scheduled items, times are preserved, and dates become relative to the scheduled date of the project. For example, if the original project was scheduled for September 5th, with a social post scheduled to publish at 8:00 AM on September 7th, the Project Template will have that social post scheduled to publish at 8:00 AM two days after the day project is scheduled. This same relative scheduling applies to tasks.
How to Use Project Templates
Once you have created a Project Template, you can use it as the basis for future projects. To use a Project Template, follow these steps:- From the Calendar, click Create
- Select From Template
- In the Choose a Template panel, select the template you want to use.
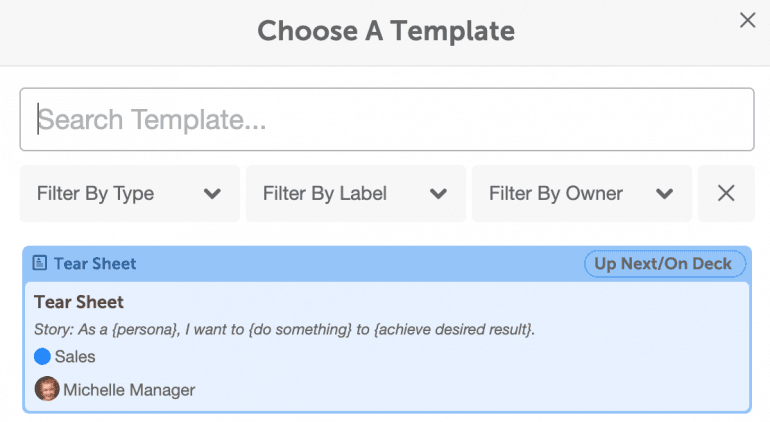
- A new project will be created from the project template. You can edit and schedule this project as usual, without affecting the Project Template.
Set a Recurring Schedule
Automatically add repeating projects to your calendar by setting a recurring schedule.- Go to Settings.
- Select Templates from the side menu.
- Click into any template.
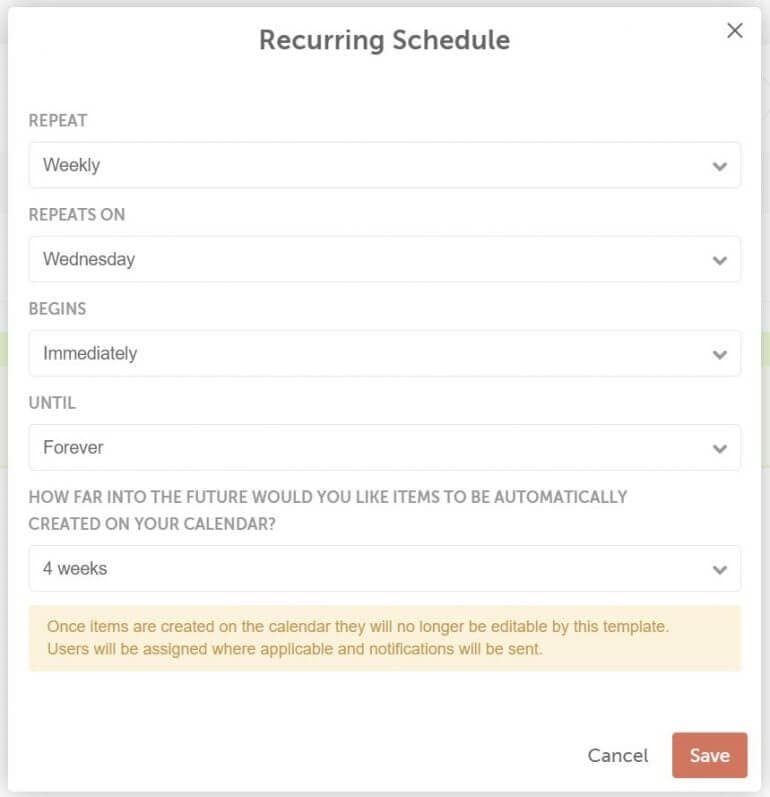
- Click Repeat to open the recurring schedule
- After adding a recurring schedule to a Project Template, you'll see the next set of projects on your calendar based on how far into the future you chose to see items scheduled. This allows your team to focus on the most important projects first while preventing too many notifications about projects that are too far in the future. Editing a project that was created from a recurring schedule will not change any other project.
Delete Recurring Projects
To delete future recurring projects in bulk:- Go to your Settings
- Select Templates
- Click Project
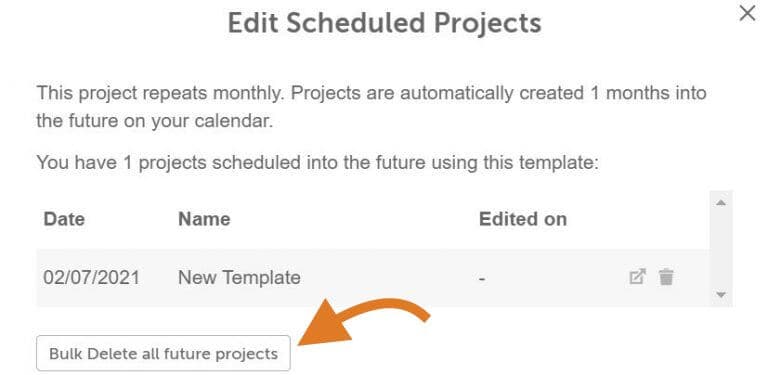
- In the Usage column, click the number of future instances.
- You can delete any individual instance that currently appears on your calendar, or choose Bulk delete all future projects.
Note: Instances of the project that have been edited will not be deleted and will be marked [Recovered] on your calendar.
Edit a Project Template
When you edit a template, the changes only apply to future projects created from the template. Existing projects will be unaffected. Please note that only admins can edit Project Templates. To edit a Project Template:- Go to your Settings
- Select Templates
- Click Project
- Select the template you want to edit
- Make your desired changes