How to Use Request Forms
Request Forms provide an easy way to field incoming requests and organize all the information surrounding them. Using Request Forms also makes it easier to convert these requests directly into CoSchedule projects. Request Forms can be used to field incoming requests for graphic designers, new blog post requests, customer support materials, and more.
 Back To Top
 Back To Top
 Back To Top
Note: Request Forms are only available in Marketing Suite.
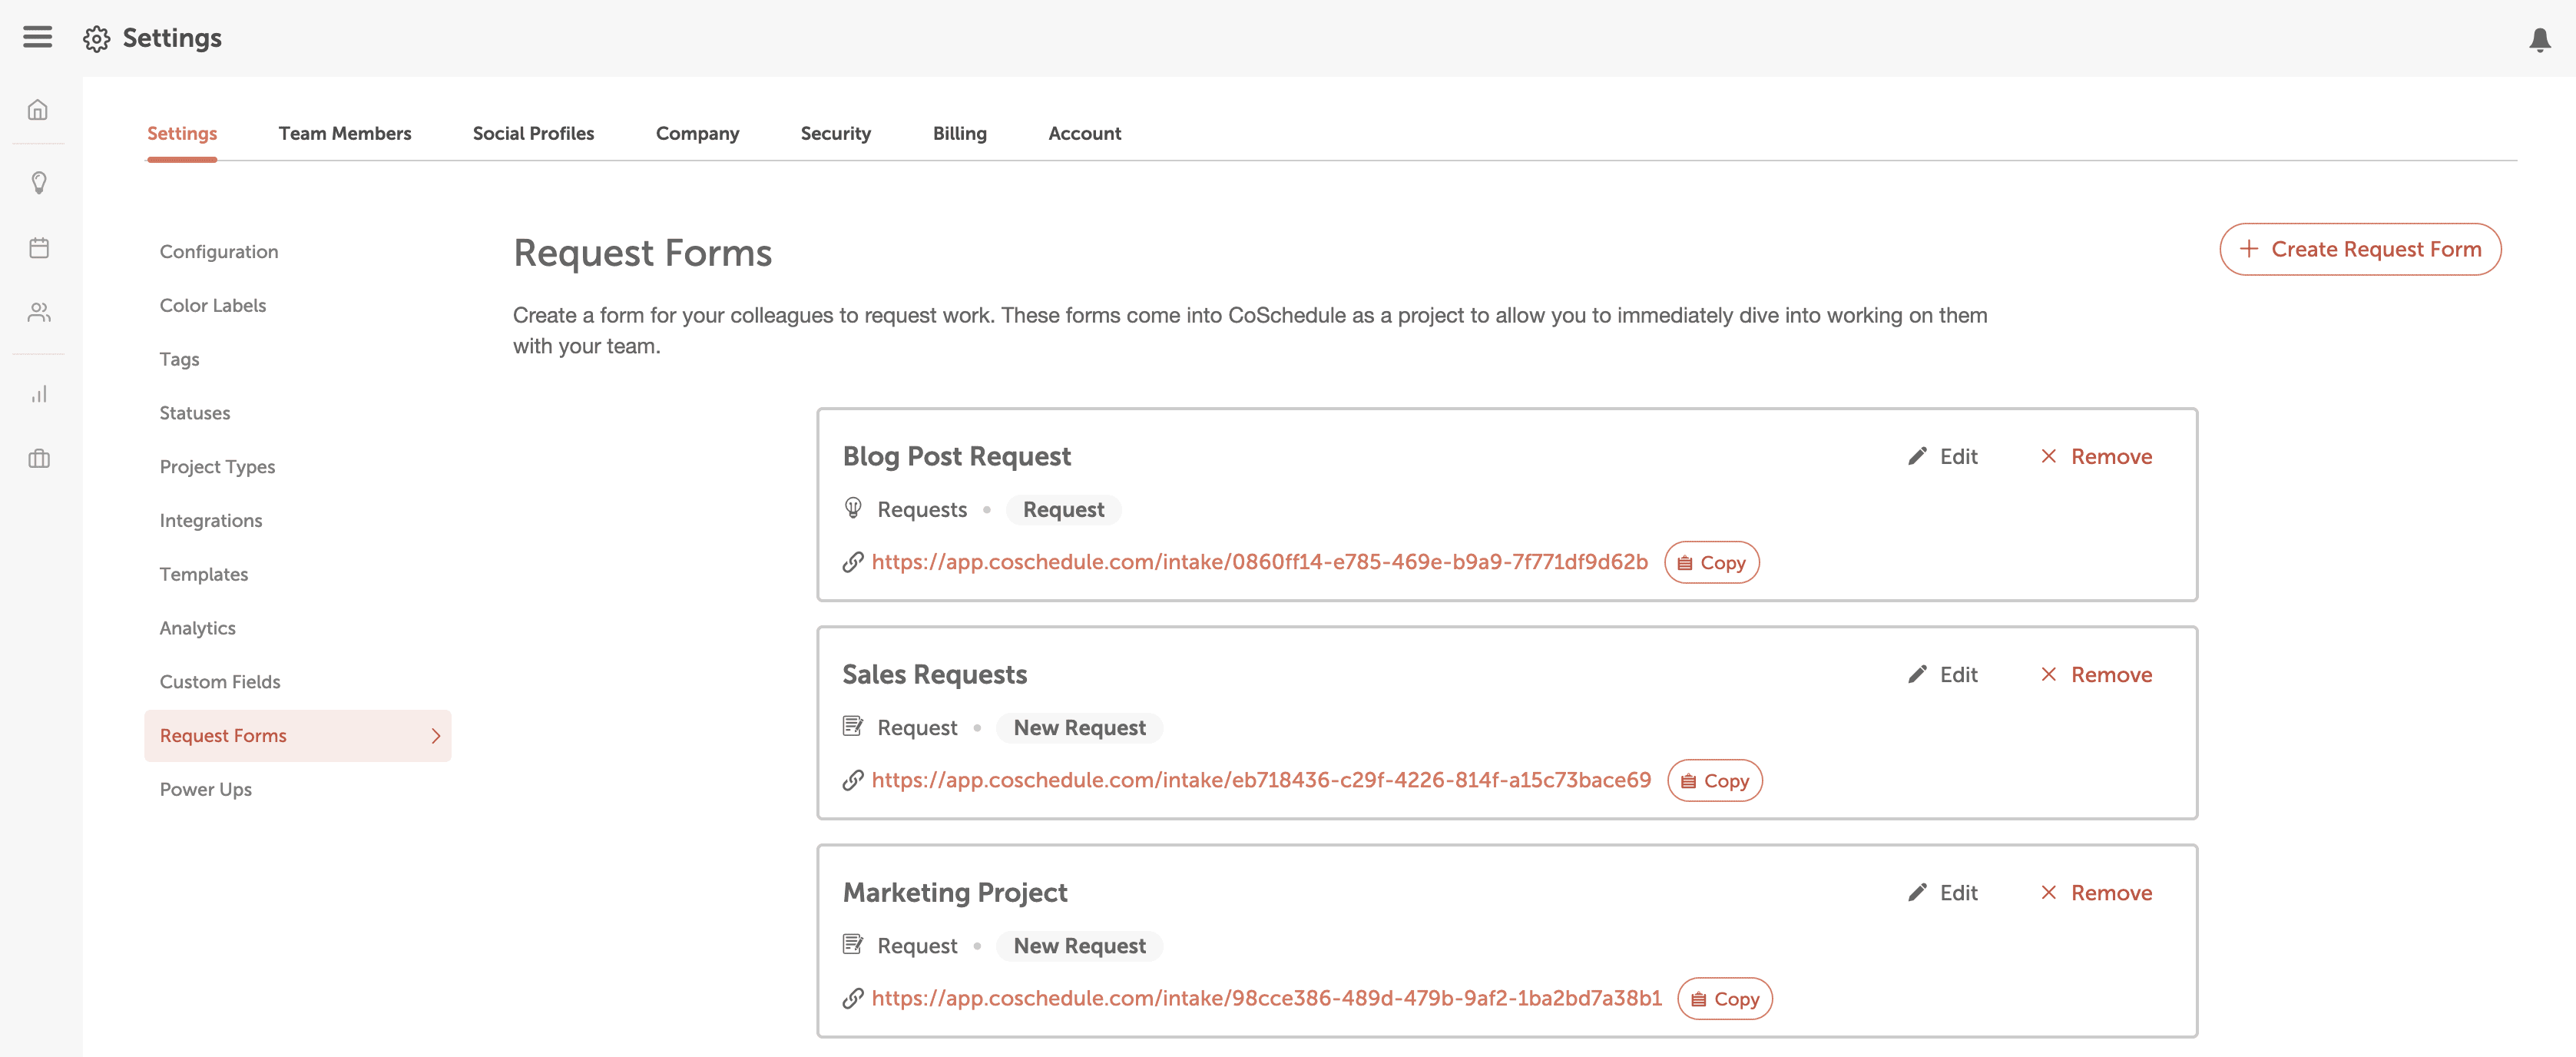
Create a Request Form
- Navigate to Settings
- Select Request Forms
- In the upper right corner, select Create Request Form
- Enter all necessary information (title, initial status, owner, etc.)
- Select Create
- Alternatively, you can click the More Options menu next to a Request Form for the option to duplicate an existing form.
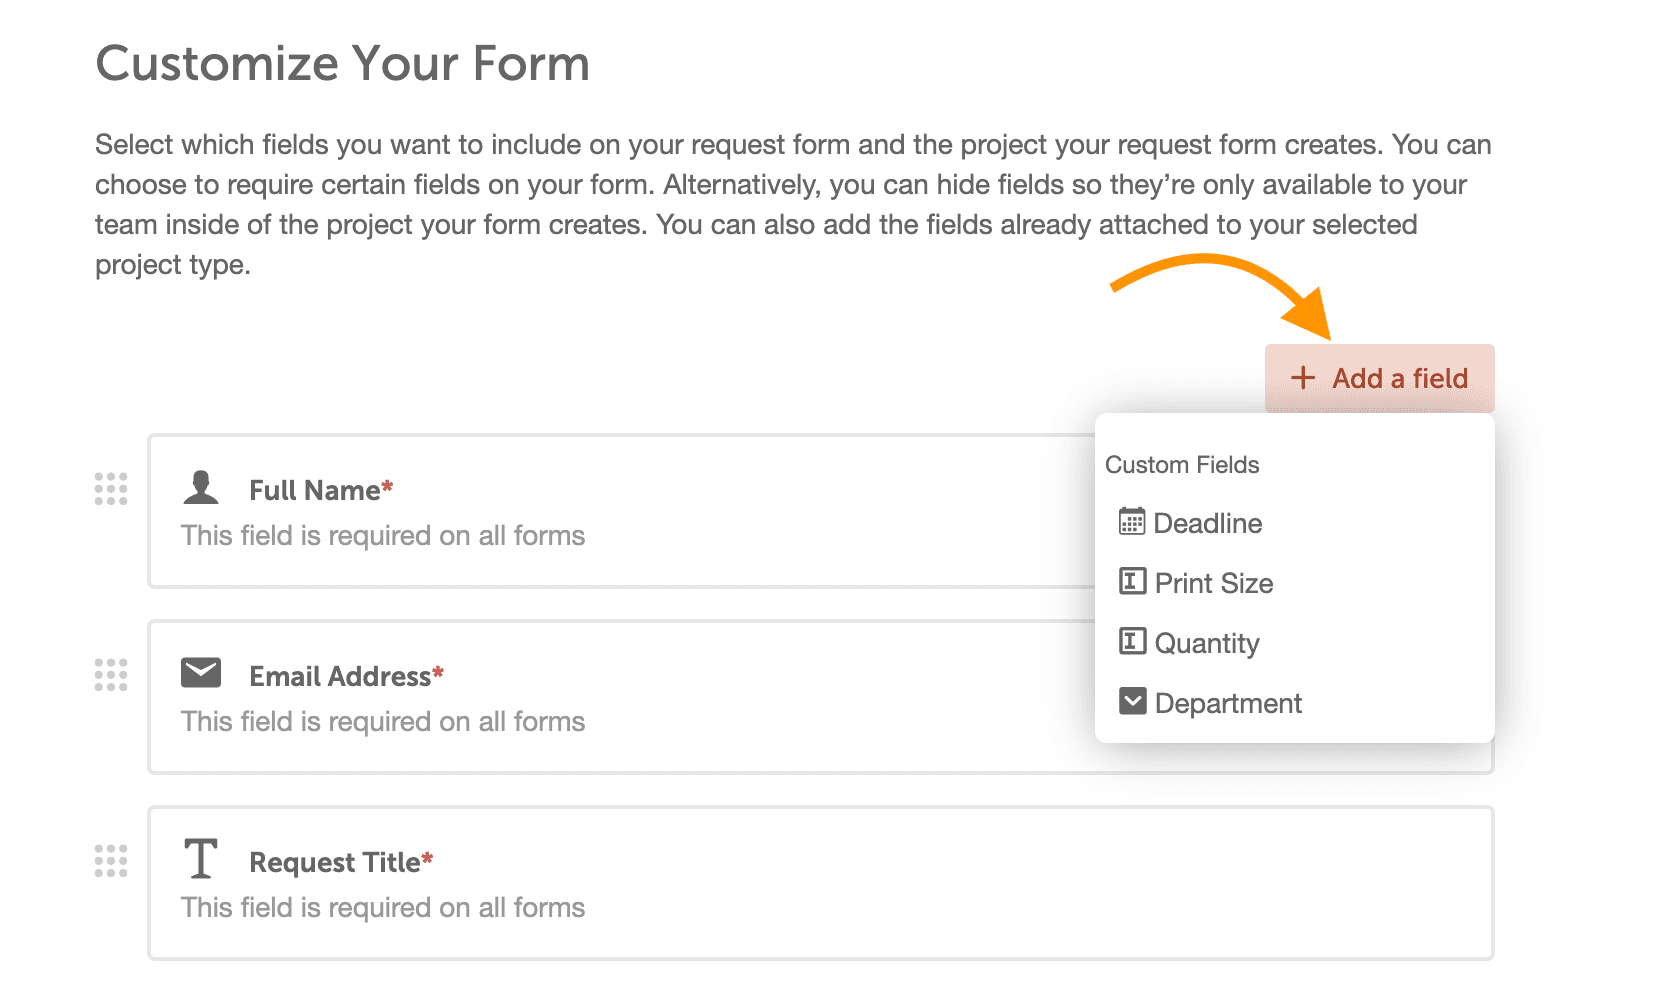
Customize Your Request Form
- To rearrange the order of the form fields, from the left side drag and drop the specific field you want to move.
- Select Remove Field to remove any fields you don’t want.
- Select Add A Field to add Section Headers, Text/Instructions, and Custom Fields.
- You also have the option to select Add a team member to notify (This will notify a team member by email when a new request is submitted as long as they have Request Form email notifications turned on in their notification preferences).
- Select Done.
Back To Top
Edit Request Forms
- Navigate to Settings
- Select Request Forms
- Click the More Options menu, then select Edit and make desired changes
- Select Done
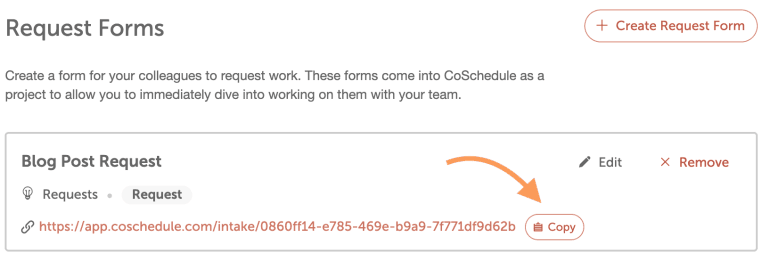
Share a Request Form
- Navigate to Settings
- Select Request Forms from the right-side panel
- Select Copy on the form you want to edit
- Share the link. New requests will automatically populate in your Kanban Board under the pre-selected status for the Request Form.
Back To Top
Frequently Asked Questions
What happens if I export a Request Form?
Within Request Form settings you can click the More Options menu to Export. This will create a CSV file with data from all submissions of the form.Can I embed a Request Form on my website?
Yes! Click the More Options menu next to the Request Form in Settings and select Embed. You can then copy the HTML code provided and paste it into your site's code.How can I organize my incoming requests?
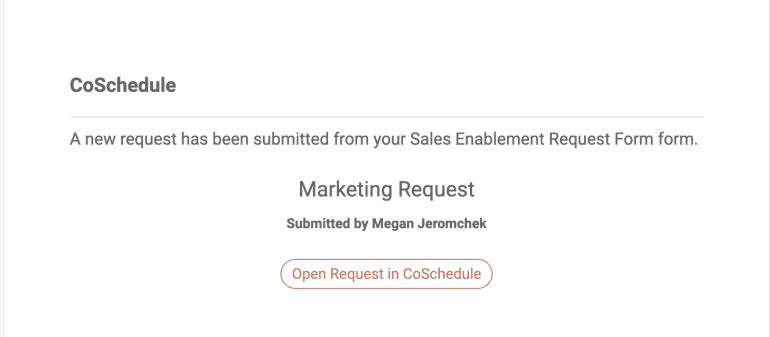
New Requests automatically populate on your Kanban Board under the pre-selected status for the Request Form. Keep organized by creating a filtered Idea Board view that only shows the incoming requests you need to see.Will I get notified when someone fills out my Request Form?
When a Request Form is created, there is an option to select which team members get notified (including yourself, if you add your own name). All users added to be notified will receive an email when the Request Form is filled out as long as they have Request Form email notifications turned on in their notification preferences.) Request Form notifications can be managed from the Account tab within Settings.Does the requester get notified when they submit a Request Form?
Yes, the requestor will get a confirmation email that their form has been submitted.
Back To Top