
If events are part of your marketing strategy, you know planning the perfect event can be a challenge. There are many projects to accomplish, tasks to remember, and deadlines to stay on top of throughout the planning process, day of event, and beyond.
Your CoSchedule Marketing Calendar helps you execute your event without the stress of worrying if you’ve missed any important details, promotional efforts, or key deadlines.
In this blog post, you’ll learn how to plan the perfect event from start to finish using your CoSchedule Marketing Calendar. Easily put together a plan, stay on top of your tasks, and coordinate your marketing efforts without missing a beat.
Add Your Event & Projects To Your Marketing Calendar
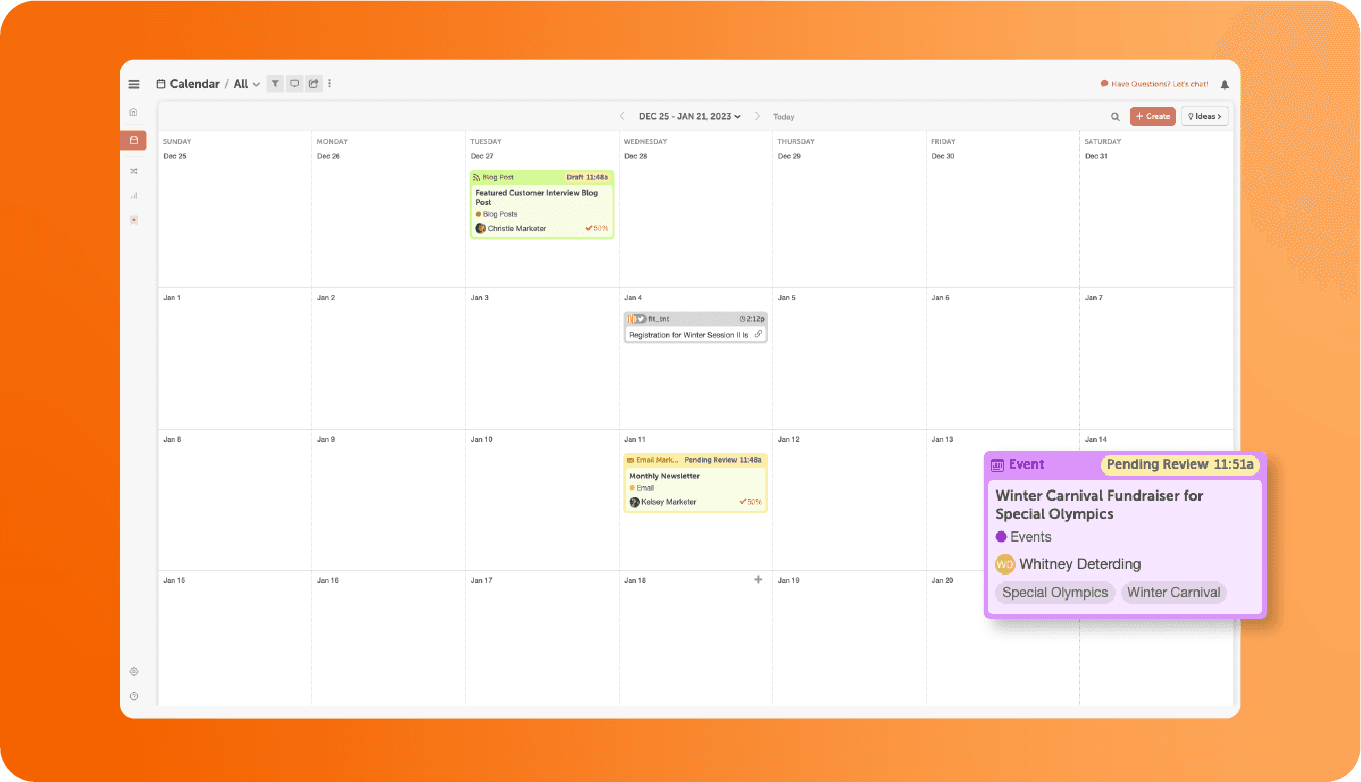
Step 1: Add the event as a Project to your Marketing Calendar.
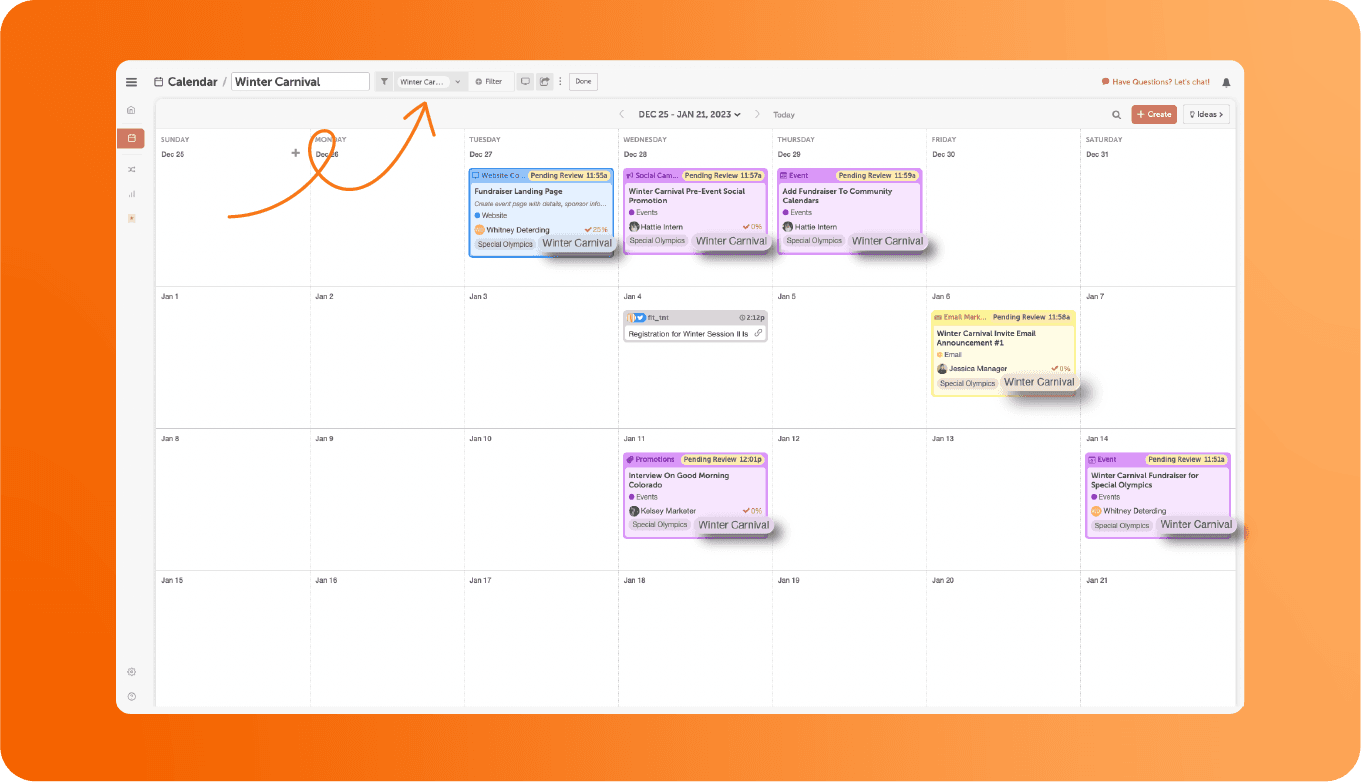
The first thing you need to do is simply create the event as a Project in your marketing calendar.
If you use Marketing Suite, you can also create a Marketing Campaign for your specific event. This way, all your social messages, projects, and other related content will all be linked to your event.
If you don’t have the Marketing Suite, don’t sweat it! We’ll discuss some other ways you can have all your event-related projects linked together below.
 Step 2: Create a list of projects you need to complete before the event & add to calendar.
After you’ve added your event, it’s important to create a list of all the projects you need to get done before the event happens.
This could include:
Step 2: Create a list of projects you need to complete before the event & add to calendar.
After you’ve added your event, it’s important to create a list of all the projects you need to get done before the event happens.
This could include:
- Sending Invites
- Social Promotion
- Finding Sponsors
- Writing a Press Release
- Preparing Flyers
- Updating the website.
- Ordering SWAG
Or anything else you need to do.
In this case, the AI Prompt Library is your best friend, helping you generate everything you need.
 Explore the library of ready-made prompts or create your own! Just tap "Custom Prompts."
 Here are some recommended prompts for planning a list of projects for your upcoming event:
- List {#of} projects that need to be completed before {name of the event}. Use details about {event type}, {event date}, {event location}, and {event purpose} to generate relevant projects. For each project, include name of the project, purpose, details, deadlines, and any other necessary information. Add each project to the calendar with its deadline.
- Create a task list for {event name} happening on {event date}, outlining everything that needs to be completed beforehand. Include deadlines for {each phase of planning}, covering {scheduling, budgeting, promotions, attendee coordination, equipment setup, final checks}. Organize tasks by {category, urgency, responsible team members} to ensure nothing is overlooked and the event runs smoothly.
We tested the first prompt with Spring Art Expo 2025, an art exhibition set for April 12, 2025—here’s what we found:
 The Project Assistant provides clear steps for the event, focusing on:
- Purpose – Showcasing artistic talent and creativity.
- Event Date – April 12, 2025.
- Key Deadlines – Submission deadlines, registration dates, and other important milestones.
 Now it's your turn to give it a try!
Hire Mia will generate detailed project names, purposes, details, deadlines, and any other necessary information. Once you have the results, simply add each project to your calendar with its corresponding deadline—and all of this without leaving your social calendar!
Now it's your turn to give it a try!
Hire Mia will generate detailed project names, purposes, details, deadlines, and any other necessary information. Once you have the results, simply add each project to your calendar with its corresponding deadline—and all of this without leaving your social calendar!
 Step 3: Link projects to the “Event Project” using “Linked Projects” attachment to keep things together.
Now that you have all these related projects on your calendar, it’s time to organize them. When you link projects together, all your projects that surround the event will be linked together in the attachments section. This makes it easier to move between your event related projects to check-in on your team's progress.
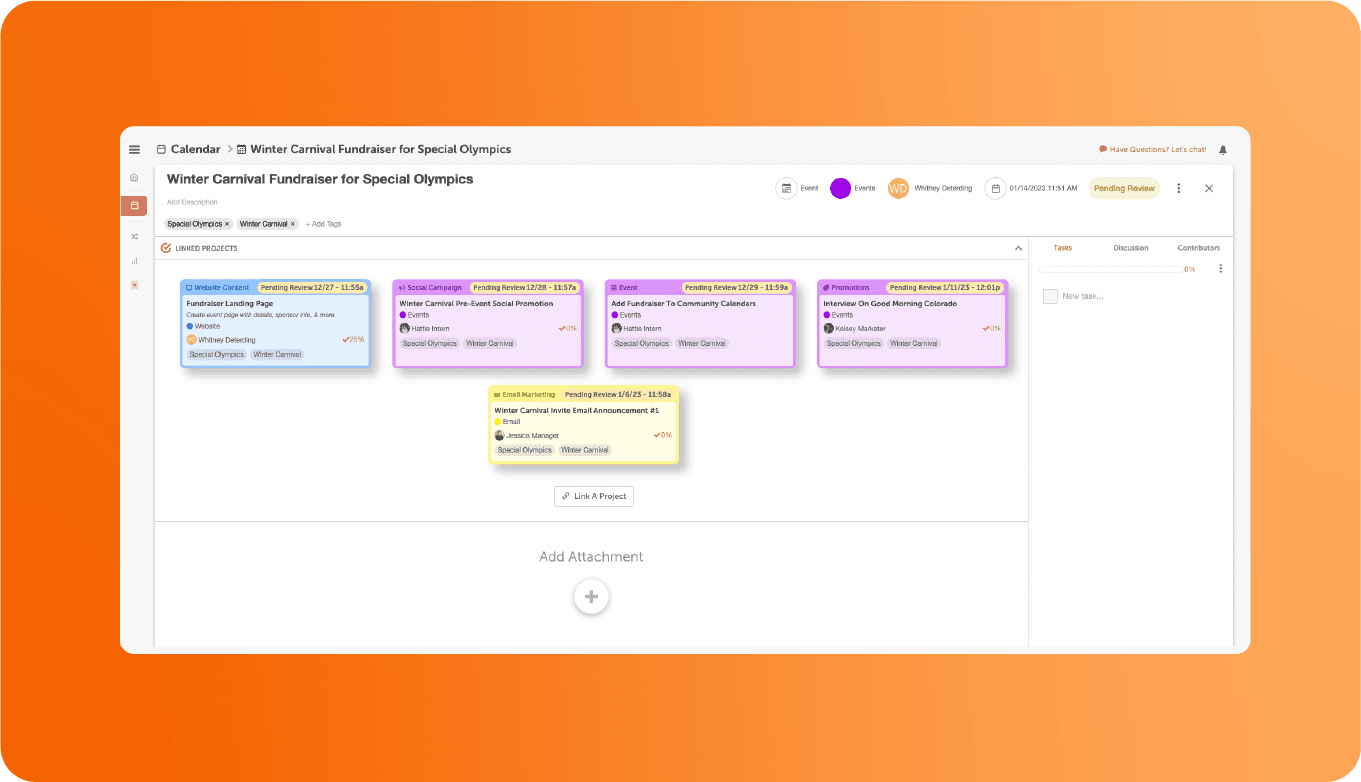
Marketing Suite customer? Instead of linking the projects together using attachments, add them to the Marketing Campaign that you created for the event instead.
 Step 4: Create a tag for the event & add it to your Projects and/or Campaign to keep things organized.
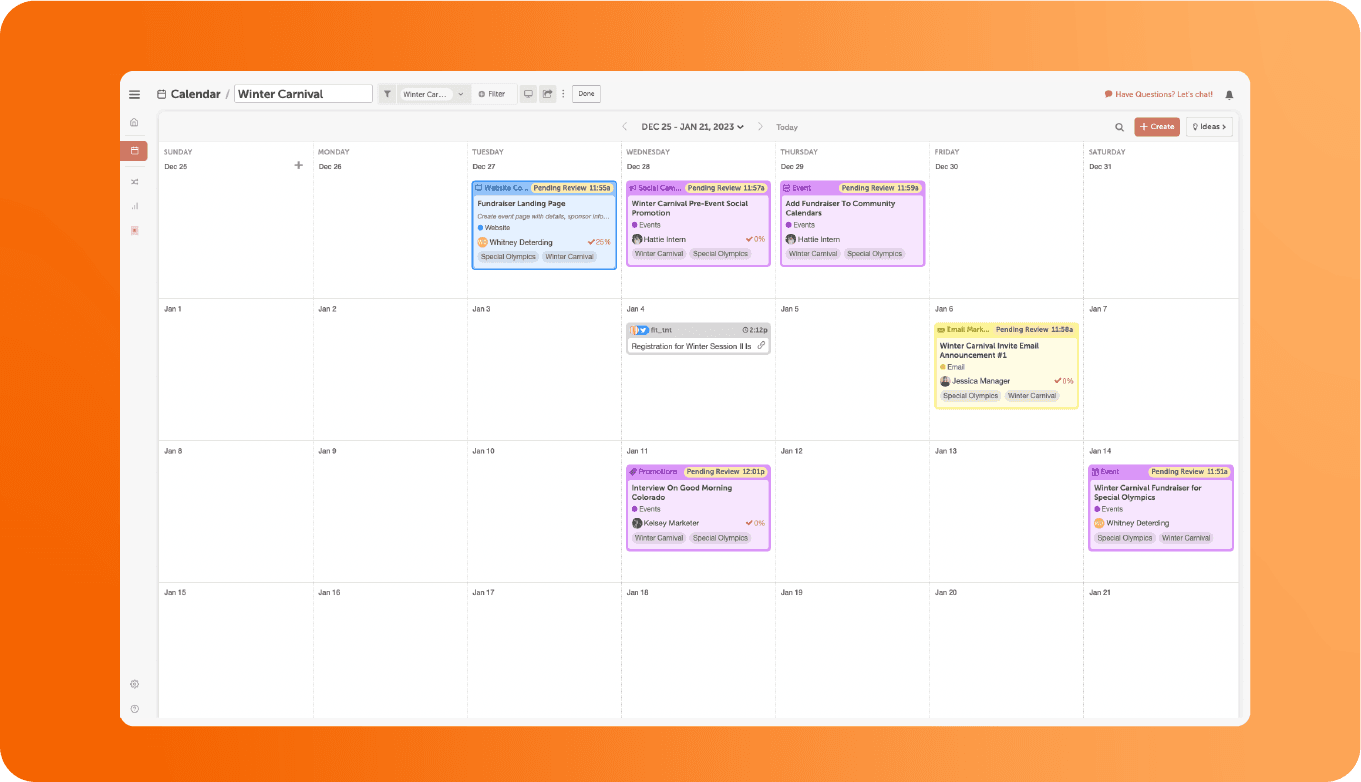
To take your organization a step further, you can also create a tag for the event. Add this tag to every relevant project or event on your calendar.
This way, you know that every tagged project is a part of putting on your event. You can then use this tag for pulling future reports & creating a custom Saved Calendar View for your event.
 Marketing Calendar Bonus Tip: Create A Saved Calendar View For Your Event
If you are using Marketing Calendar Free or Marketing Calendar Pro, create a Saved Calendar View for your event using the event tag as your filter.
Once you create that view, you’ll have a Calendar dedicated for your event tasks, projects, & social.
Skip this step if you are using Marketing Suite. Your Marketing Campaign will do this for you automatically.
Now that you have your whole plan recorded in your calendar, it’s time to make sure you complete & execute everything on time for the big event!
Assign Tasks To Complete Every Project On Time
Adding dates to all of your tasks & projects will help make sure everything is completed on time for the event. You won’t miss a step!
 Step 1: Add tasks to each project
Take a look at each project you added to your calendar. Odds are, you’ll need to complete a couple smaller items before completing the whole project.
Inside your project, make a list of all the tasks that need to be done in order to complete the project.
For example, if one of your projects for this event was to distribute a promotional flyer, you would need to plan tasks for designing the flyer, printing the flyer, and distributing the flyer.
Step 2: Assign tasks to your team
If you have multiple people working on projects - like a graphic designer or a social media manager - make sure each task gets delegated or assigned out to each person that needs to complete it.
Doing this makes sure that all project contributors are on the same page about who is responsible for what pieces of the project.
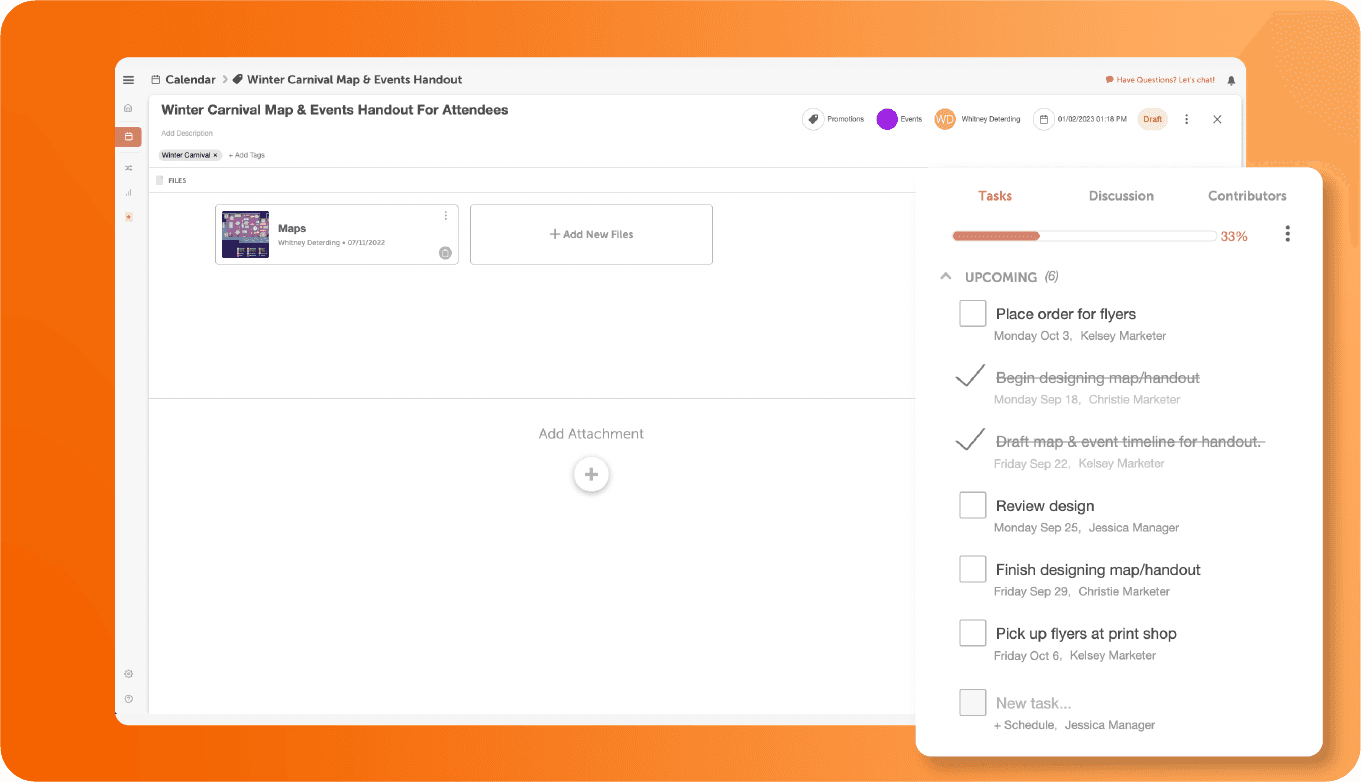
Step 3: Add due dates for each task to make sure every detail gets completed before the event
Lastly, it’s important to assign due dates for each task. This step is vital for your event preparation to run smoothly.
Make sure to consider necessary deadlines. For example, if printed flyers need to be shipped to you, factor in the time it will take for them to ship.
Make sure to schedule your tasks to be completed X days before “publish” or “event day.” This way, your team is on the same page about the event projects and everyone knows when they need to get things done.
Once you’ve gone through these three steps, your project should look something like this:
Promoting your event on social media is a great way to spread the word to potential attendees. Your Marketing Calendar makes this easy with Social Campaigns.
Here are a few recommended best practices for promoting your event on social media with your Marketing Calendar!
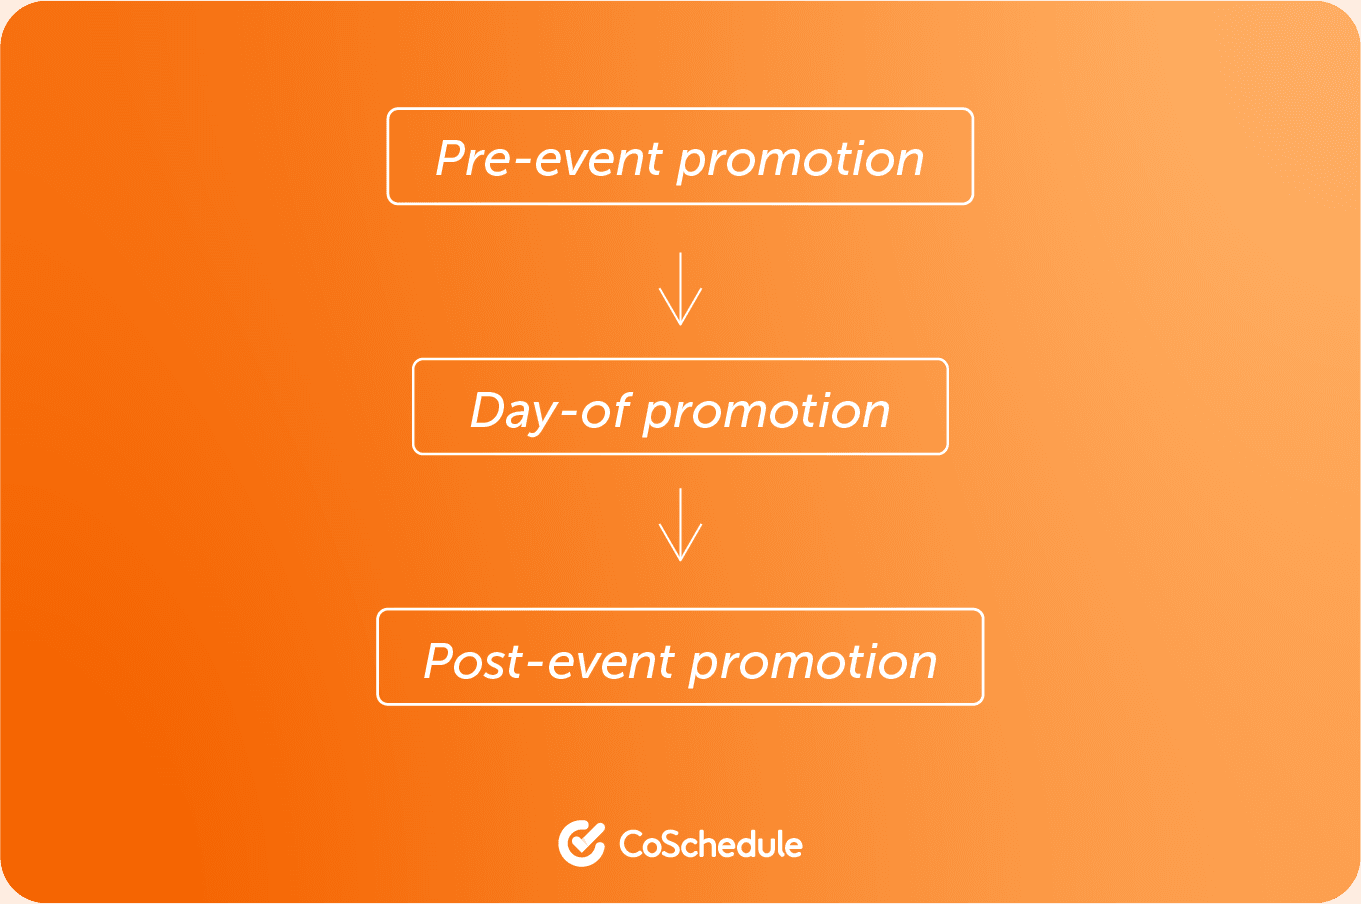
Take the stress out of social promotion by organizing your social messages into specific Social Campaigns.
We recommend that you create one campaign for pre-event promotion, one for the day-of promotion, and one for post-event promotion.
Create A Social Campaign for Pre-Planned “Day of Event” Messages
The next Social Campaign to add to your Marketing Calendar is one for the day of the event. To create this campaign, think about the reminders/pre-planned social messages you might want to send on the day of the event.
This could be things like:
- Doors open in 1 hour
- There’s still 3 hours to attend
- Photo of the event schedule encouraging people to join the event
- Parking information
This will complement any social you share in real-time. Schedule these messages out over the day. This works best for time-specific reminders & content.
In the craze of the event, you don’t need to remember when and what to post; your Marketing Calendar does it for you!
Create a Social Campaign for Post-Event Recap Messages.
Use this campaign to send out social messages after your event is over.
This could include messages like:
- Recap photos or videos
- Thank you messages for sponsors, volunteers, and other contributors
- Any social messages your audience might be interested in after attending your event
- Promoting the next related event you might be hosting
If you’re sending recap photos or videos, make sure your campaign is in draft state & you can upload content from the event before you publish.
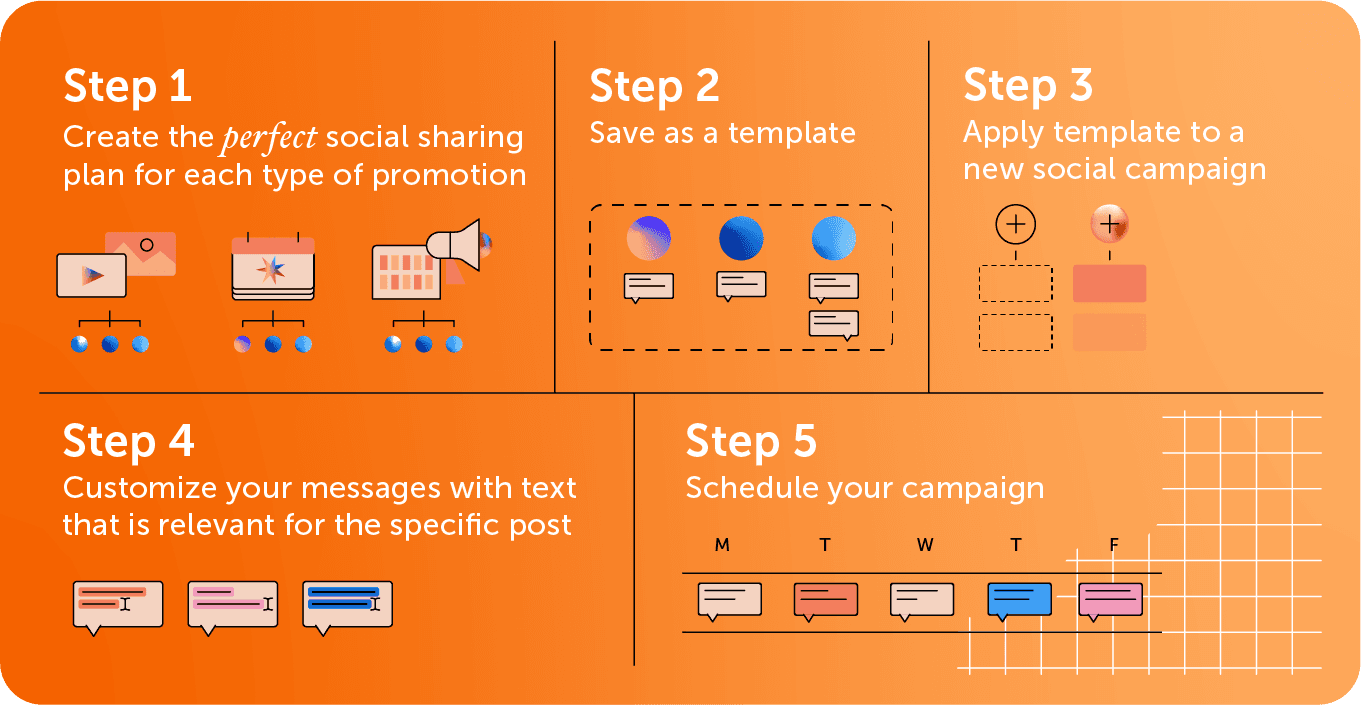
If you have recurring events, you can save these social sharing plans as Social Templates. With Social Templates, you can easily reuse these social campaigns again for future events!
Here’s an example of how you could schedule out promotional social messages in social campaigns using Social Templates for before & after your event:
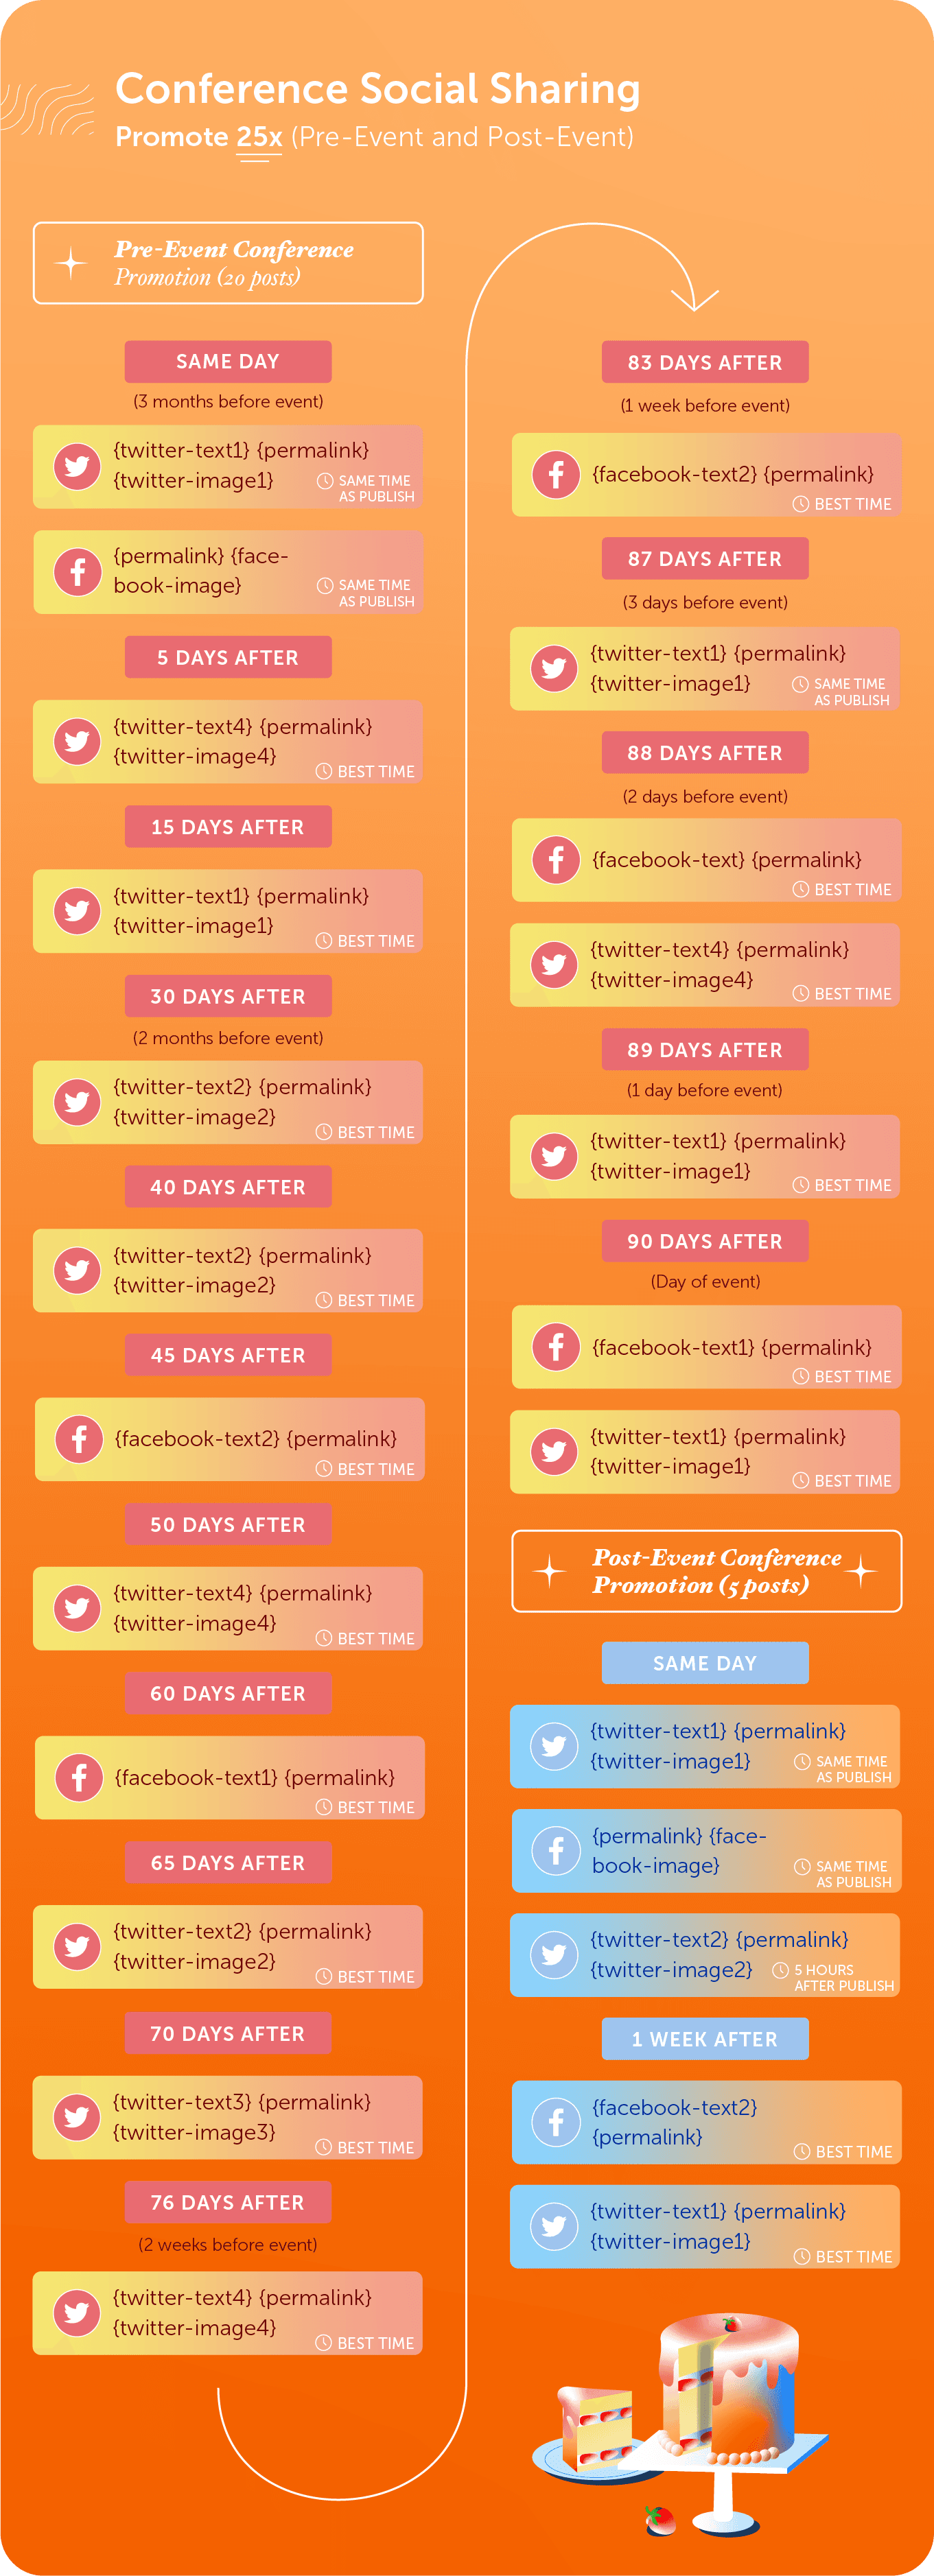 Want to save more time? Add in Social Helpers to build out messages even faster. Learn how to in this Getting Started With Social Templates Guide.
Create Custom Social Reports For Your Event To Share With Stakeholders
Interested in how your event performed on social media? You can help by creating a custom Social Campaign Report for your event's social messages to see what resonated (and what may not have resonated) with your audience.
Plus - you can share these reports with any stakeholders that are interested in an update.
Use the findings to help you improve future events’ social campaigns.
Follow these tips to successfully plan & execute your first event from start to finish with CoSchedule Marketing Calendar.
Recommended Reading:

 2. Give the Social Campaign a title.
 3. To start your first social campaign, simply tap the + button.
 4. Find the “Social Assistant” button.
 5. This is where creativity begins! Generate campaign ideas, captions, and details—all in one place. Let’s see an image example for an Instagram post.
 You can customize the post ratio, image style, and number of images—making it super convenient!
 6.Modify your result as needed—Hire Mia will keep adjusting the image until it’s just right for you!
 Possible messages you could include in this social campaign include:


