How To Design The Best Blog Graphics With Free Tools And Design Theory

 Writing awesome content for your blog is essential to earning your readers' trust and attention. Yet there’s another overlooked element that can largely increase your blog traffic: design.
Studies have found that 60% of us are visual learners, while only 46% of blogs are actually using visual content.
Design often gets a bad rap for just “making things look pretty” (which it should, don’t get me wrong), but more importantly, it guides your reader in their overall experience. In fact, design can even guide your readers' decisions since 67% of consumers consider images to carry more weight than customer ratings, reviews, and product descriptions.
What do you want their first impression to be? How can you make your reader read more content? What do you want your reader to take away?
All of these questions can be answered by using the tool of design.
Writing awesome content for your blog is essential to earning your readers' trust and attention. Yet there’s another overlooked element that can largely increase your blog traffic: design.
Studies have found that 60% of us are visual learners, while only 46% of blogs are actually using visual content.
Design often gets a bad rap for just “making things look pretty” (which it should, don’t get me wrong), but more importantly, it guides your reader in their overall experience. In fact, design can even guide your readers' decisions since 67% of consumers consider images to carry more weight than customer ratings, reviews, and product descriptions.
What do you want their first impression to be? How can you make your reader read more content? What do you want your reader to take away?
All of these questions can be answered by using the tool of design.
How To Design The Best Blog #Graphics With Tools Anyone Can Use #blogging
Click To Tweet- Adobe color wheel for complementary colors.
- Aviary for imagery, editing, and more.
- Bannersnack for banner ads and promotion.
- Buncee for combining visuals and text with your images.
- Create.Vista for awesome blog graphics, imagery, and more.
- Da Button Factory for... um... buttons.
- Freebiesbug for free fonts.
- Google Drawings for sketching out a thought.
- Haiku Deck for turning words into graphics and presentations.
- imgflip for generating memes.
- infogram for infographics.
- Magdeleine for imagery.
- Matthew Kosloski's hexbook for complementary colors.
- Online Image Editor for... editing images online.
- Paint Shop Pro for sketching out your thought.
- Phonto for layering text on images.
- Photoscape for editing images.
- Photoshop for editing images (and a lot more).
- Picasa for small graphics you could use on your blog.
- Picmonkey for free online photo editing.
- Piktochart for infographics, reports, charts, and presentations.
- Pixel Buddha for fonts and icons.
- PixTeller for making awesome posters.
- Placeit for free iPhone and iPad mockups.
- PowerPoint for smaller graphics.
- Prezi for animated presentations.
- Quotes Cover for making visual quotes.
- Recite for turning quotes into graphics.
- Visage for turning your data into beautiful graphics and charts.
- Visual.ly for imagery and brand creative services.
- Word Swag for adding visual words to images.
- Bonus: Skillshare for design classes.
Note: Many of these are free, some of the more robust tools require just a bit of investment.
This post will help you use any of these tools even better to make sure your blog graphics are awesome and not just... a visual to have on your blog.
The better the visual, the more social shares you'll get. The more shares you get, the more traffic you get. And the more traffic you get, the more opportunities you have to convert your readers into paying subscribers of your brand.
33 Design Tools That Will Help You Create Awesome Blog Graphics #blogging
Click To Tweet1. Remember Your Audience And Purpose
When you start a design, it's easy to get caught up in all the fun options you have: color, layout, typography, and tons of others. But instead, you should begin by focusing on who your audience is and what you want them to learn. Begin by doing some research.
What are other people in your industry doing visually? What are they doing well? What are they doing poorly? Are there certain colors that your audience likes or dislikes?
These questions will keep your attention on your audience, while guiding you into the beginning stages of design.
Begin by doing some research.
What are other people in your industry doing visually? What are they doing well? What are they doing poorly? Are there certain colors that your audience likes or dislikes?
These questions will keep your attention on your audience, while guiding you into the beginning stages of design.
Design for your audience, not just to have a visual on your blog. #blogging #contentmarketing
Click To Tweet2. Every Good Design Starts With A Good Idea
It's easy to forget that every good design begins with a great idea. Before even getting into the design, consider what your blog topic should be, do some research, and create an outline. It’s really important to have your idea before designing, because without it, your graphics will either have nothing to point to or your graphics will only be an excuse to cover up your not-so-great idea, which never works.
Find your idea and make sure it’s a good one so that your design can take it to the next level.
It’s really important to have your idea before designing, because without it, your graphics will either have nothing to point to or your graphics will only be an excuse to cover up your not-so-great idea, which never works.
Find your idea and make sure it’s a good one so that your design can take it to the next level.
Use design to take your blog idea to the next level. #blogging
Click To Tweet3. Design To Draw Attention To Your Content
Your reader is probably drawn to your blog because they love the content, so rather than distracting them with the design, let it highlight your work!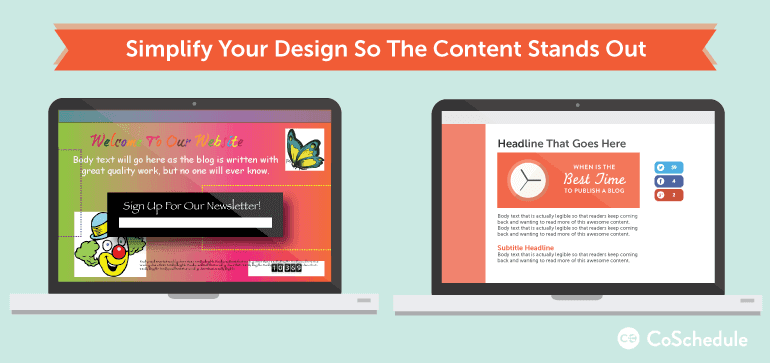 You’ve spent hours researching, editing, and refining your content—so the last thing you need is a distracting graphic flashing in the sidebar.
In order to draw attention to your content, keep the design simple. Find a layout that keeps your line lengths short (about 50–75 characters) and contains a straightforward call to action in the sidebar.
Next, find a color scheme that is easy on the eyes, rather than one that’s flashy and neon. This way, the design will direct your readers to the beautiful text, rather than distract.
You’ve spent hours researching, editing, and refining your content—so the last thing you need is a distracting graphic flashing in the sidebar.
In order to draw attention to your content, keep the design simple. Find a layout that keeps your line lengths short (about 50–75 characters) and contains a straightforward call to action in the sidebar.
Next, find a color scheme that is easy on the eyes, rather than one that’s flashy and neon. This way, the design will direct your readers to the beautiful text, rather than distract.
Good design helps your content stand out. #blogging
Click To Tweet4. Practice The Fundamental Design Concepts
Within the design world, there’s a few general principles that are known to help any design work to the best of its ability. Here’s a few I’d like to share with you.Number 1: Consistency
Everyone enjoys what’s familiar. They find it to be safe and comfortable, which is exactly why it produces trust and dependability. Just as producing consistent content is important, so is creating consistent design.Just as producing consistent content is important, so is creating consistent design.
Click To Tweet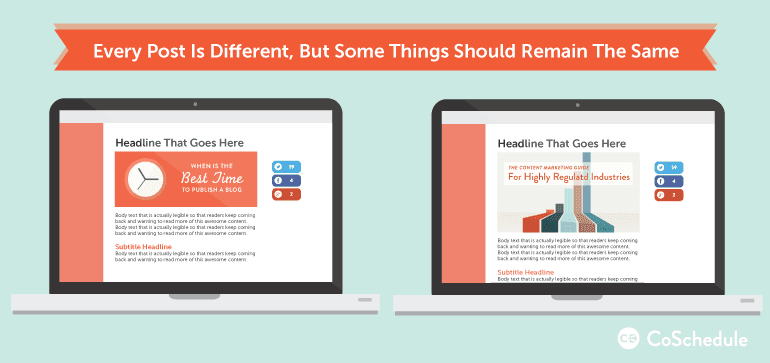 Just remember to choose a style, and then stick to it. This consistency will encourage your reader to read more content, which then develops familiarity and overall trust.
Number 2: Repetition
Everyone learns through repetition. I think we’ve all studied for school or practiced for a sporting activity.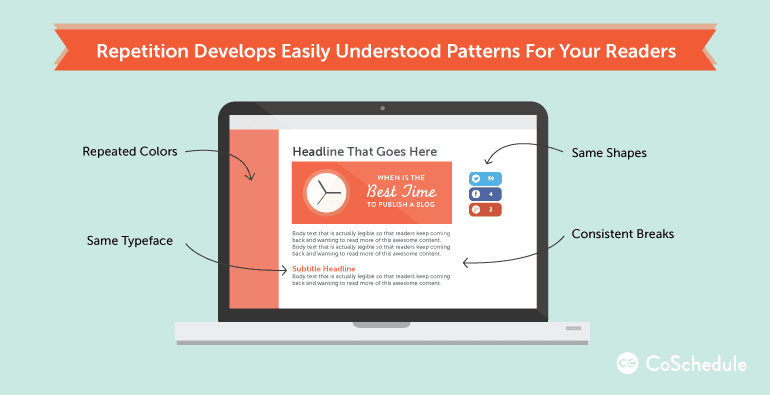 The more we do or see something, the more we learn.
In the case of you blog, using repetition in your design can help the reader learn more from your content. By using repetition, they'll be able to begin recognizing certain visual cues and patterns that guide them through the content in a very successful way.
The more we do or see something, the more we learn.
In the case of you blog, using repetition in your design can help the reader learn more from your content. By using repetition, they'll be able to begin recognizing certain visual cues and patterns that guide them through the content in a very successful way.
Number 3: Alignment
While some of us may not be organized by nature, nobody wants to stay over at a messy house. The same applies to your blog.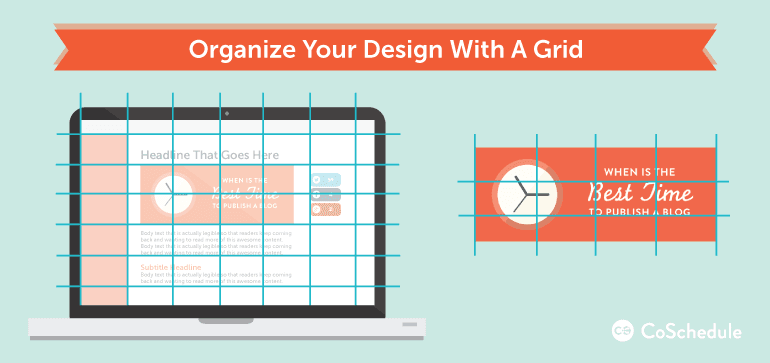 With alignment, you can create a grid in your layout that keeps things clean and tidy.
A grid will break up each section of your blog into different parts, making it structured and easier for your reader to find what they’re looking for. This also keeps your blog consistent from post to post as they’ll have the same layout.
By keeping everything organized, your reader will easily be able to read through your blog without tripping over a shoe.
With alignment, you can create a grid in your layout that keeps things clean and tidy.
A grid will break up each section of your blog into different parts, making it structured and easier for your reader to find what they’re looking for. This also keeps your blog consistent from post to post as they’ll have the same layout.
By keeping everything organized, your reader will easily be able to read through your blog without tripping over a shoe.
Number 4: Hierarchy
This is a really fancy word for ‘order’. Within your content, there will be some things that matter more than others, such as your headline.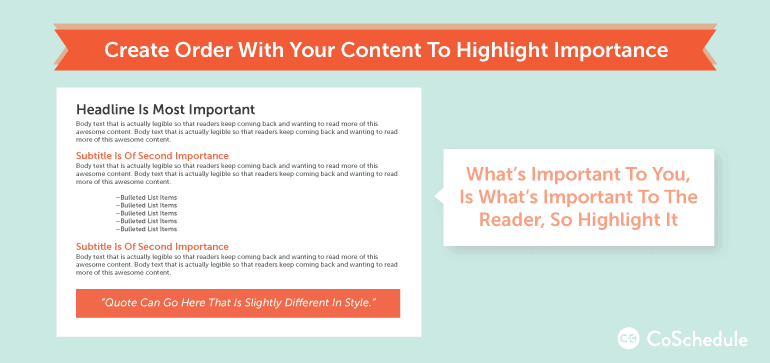 Your headline is very important for drawing your readers in, and making a connection before even entering the blog.
Using design, you can make your headline shine visually by making sure it's larger than your body text. You can also add a color that directs the reader’s attention to the headline right away.
Within your content, you can create order with your headers and sub points simply by adjusting the sizes and colors.
Another option is text formats. If the header is more important, try bolding it. If you have a list you’d like the reader to pay attention to, indent it. These are all ways to create order within your content.
Your headline is very important for drawing your readers in, and making a connection before even entering the blog.
Using design, you can make your headline shine visually by making sure it's larger than your body text. You can also add a color that directs the reader’s attention to the headline right away.
Within your content, you can create order with your headers and sub points simply by adjusting the sizes and colors.
Another option is text formats. If the header is more important, try bolding it. If you have a list you’d like the reader to pay attention to, indent it. These are all ways to create order within your content.
Number 5: Proximity
“You are who you surround yourself with.” This is a common thing we all hear growing up, and it's also true with design. We naturally make associations with things that are next to each other and separate things that are far away. Using blog design, you can make it easier to draw connections within your content if you become intentional with placement and white space.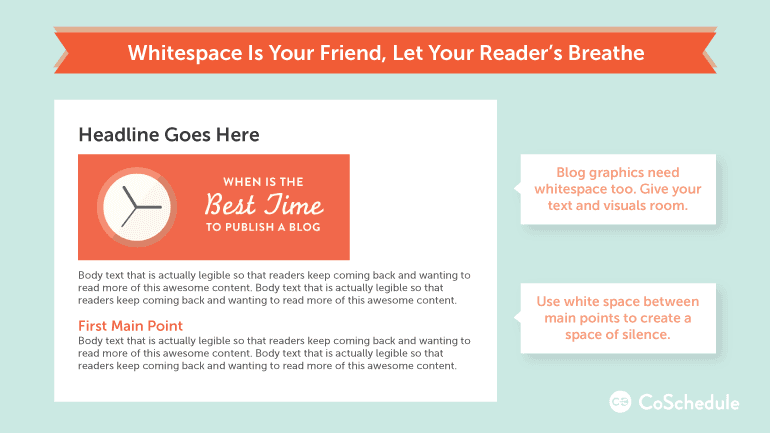 For example, if you have a main point within your blog, and then have a graphic to emphasize that point, keep them somewhat close together. Your reader can then draw a connection from the two combined because even though they’re different in format, they’re close together and have the same message.
Then let’s say you want to move onto your next main point.
Make sure to include some white space so that the reader can rest, and know you’re moving on. White space works as a period and space, breaking up each idea. While white space can be one of the most overlooked design tools, I highly encourage using it in order to let your reader relax and take a breather.
For example, if you have a main point within your blog, and then have a graphic to emphasize that point, keep them somewhat close together. Your reader can then draw a connection from the two combined because even though they’re different in format, they’re close together and have the same message.
Then let’s say you want to move onto your next main point.
Make sure to include some white space so that the reader can rest, and know you’re moving on. White space works as a period and space, breaking up each idea. While white space can be one of the most overlooked design tools, I highly encourage using it in order to let your reader relax and take a breather.
Number 6: Color
Everyone has their favorite color, but beyond our general opinion, colors have direct psychological implications. Color can make us feel loved, sad, embarrassed, or excited. Color can even make us feel overwhelmed or super relaxed. Either way, color is a great way to visually communicate to your readers.
Here’s a couple tips: First, don’t use bright colors. Instead choose ones that are more subtle, and have the brighter colors as accents for links and buttons. Second, less is more. I generally recommend using two to three colors in order to have enough variety, while also staying consistent. Remember, color should be used to draw attention to your content, not distract.
Number 7: Imagery
In today’s culture, photos, videos, infographics, and charts, are all extremely popular and a great option for helping your audience understand your topic. Sometimes the imagery can even do a better job explaining the content than the text itself since some of us are more visually orientated.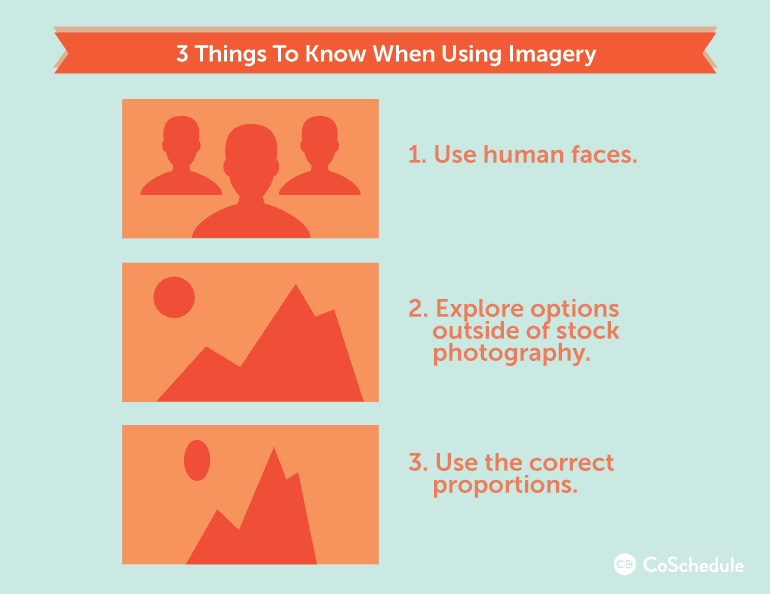 Either way, there are a few guidelines to using your imagery successfully: Use human faces. One of the first things a baby notices is the human face. Science has shown we’re naturally drawn to faces, so take advantage and use that in your imagery.
Second, be creative. Stock photography is a very popular option, but that also means it’s often far less unique. Your audience wants to find gems and takeaways, not something they’ve seen before.
In today’s mass-media culture, it's more important than ever to be genuine and unique. Plus, there are tons of great tools out there that can help you in this! (Just check out that list at the beginning of this post.)
Lastly, make sure you have the right proportions. Nobody enjoys a squished face or a fat word that’s hard to read. Keep it the right size, and you’ll be all set!
Either way, there are a few guidelines to using your imagery successfully: Use human faces. One of the first things a baby notices is the human face. Science has shown we’re naturally drawn to faces, so take advantage and use that in your imagery.
Second, be creative. Stock photography is a very popular option, but that also means it’s often far less unique. Your audience wants to find gems and takeaways, not something they’ve seen before.
In today’s mass-media culture, it's more important than ever to be genuine and unique. Plus, there are tons of great tools out there that can help you in this! (Just check out that list at the beginning of this post.)
Lastly, make sure you have the right proportions. Nobody enjoys a squished face or a fat word that’s hard to read. Keep it the right size, and you’ll be all set!
Number 8: Icons
Icons are a great way to communicate complex ideas super fast. They are little, simplified visuals that represent something greater. We can see them every day driving home, shopping at a grocery store, or on our social media platforms.Number 9: Typography
Did you know that some typefaces are easier to read than others? Government documents and traffic signs have a specific typeface for this very reason.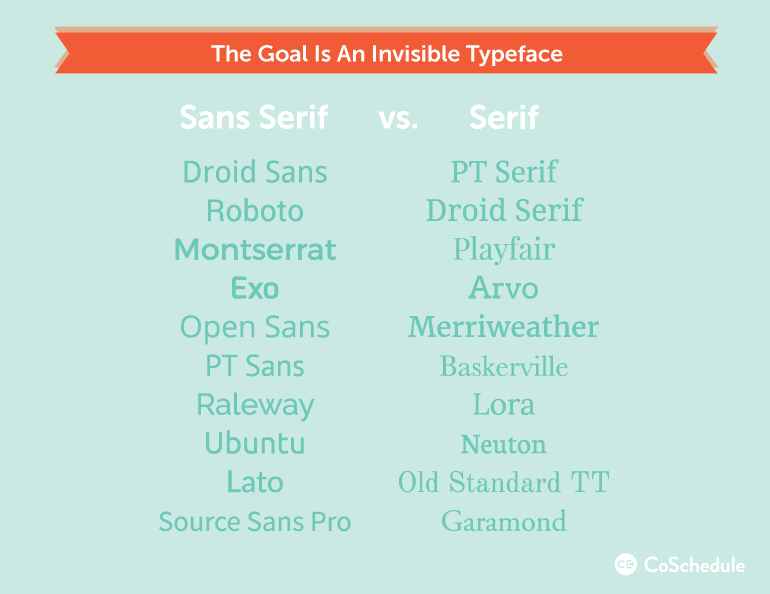 In a blog, the ability to read your content is one of the most important parts, if not the most important, so make sure to choose a simple typeface that is easy to read. It’s also great to find one that has different styles such as bold and italic so you can stylize your different headers.
In fact, some of the best typefaces are those that are known to be ‘invisible’ because they allow the readers to focus on the content rather than the appearance. Use typography to make your content as legible as possible.
In a blog, the ability to read your content is one of the most important parts, if not the most important, so make sure to choose a simple typeface that is easy to read. It’s also great to find one that has different styles such as bold and italic so you can stylize your different headers.
In fact, some of the best typefaces are those that are known to be ‘invisible’ because they allow the readers to focus on the content rather than the appearance. Use typography to make your content as legible as possible.
The best typefaces are invisible. They help readers focus on content, not appearance.
Click To TweetThose are the fundamentals you should know about great design.
While some of these concepts might seem more complex than others, if you use them one by one, you’ll soon learn just how complementary they are. By using a grid with alignment, you’re also creating consistencies… and by using typography you can create an awesome hierarchy within your content, and so on. They overlap more than we think, so just take one step forward, begin with one or two, and watch them do their thing.9 design fundamentals you need to know for #blogging
Click To Tweet5. Push Through Creative Block
In every creative project, you'll most likely experience what is known as creative block at some point. This happens for writers as well as designers. It's as if all your wonderful ideas have suddenly ran out, and no matter how hard you think, you feel like a new idea will never come. But don’t worry… here are a few tips that I’ve found to be successful.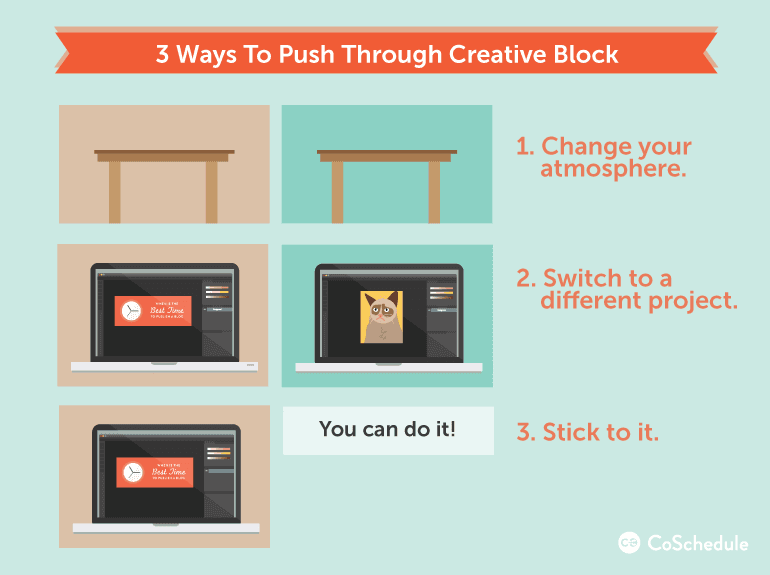 First, change your atmosphere. Find a new room, new colors, new people to surround yourself with so your brain can switch gears and think along a different track.
Second, try putting that aside and work on something totally different. Sometimes thinking through a different project will give you an idea for your previous one. If that doesn’t work, come back to it the next morning. Just as our bodies need rest each night, so does your design brain. Take a break, relax, and come back with a refreshed mind.
And if all else fails, just push through. I've found some of my best solutions because I forced myself to just keep going, reworking each option, until I finally found the solution. While creative block is something we all experience, there are ways to work through it and find awesome solutions.
First, change your atmosphere. Find a new room, new colors, new people to surround yourself with so your brain can switch gears and think along a different track.
Second, try putting that aside and work on something totally different. Sometimes thinking through a different project will give you an idea for your previous one. If that doesn’t work, come back to it the next morning. Just as our bodies need rest each night, so does your design brain. Take a break, relax, and come back with a refreshed mind.
And if all else fails, just push through. I've found some of my best solutions because I forced myself to just keep going, reworking each option, until I finally found the solution. While creative block is something we all experience, there are ways to work through it and find awesome solutions.
6. Here's a challenge for you.
There are several awesome resources out there that can help you in your design endeavors. If you feel overwhelmed, just start small. Try out one of these tools and see how it goes. Maybe start incorporating one or two images in your first few posts, and see how it goes. For those of you who are familiar with your blog design, try taking it to a new level. Instead of purchasing your imagery, make something yourself. Get creative and see how far you can go. Finally, if you’re ready to go all in, try creating a graphic that you can give to your readers as a free download. Your readers will love the resource and you’ll get even more traffic. Bonus Tip: Repurpose your graphics for social media! Tweets with graphics get up to 150% more click-throughs than those that don’t.How To Design The Best Blog Graphics With Free Tools And Design Theory
Click To Tweet


