The Best Blog Planner Toolkit to Make Your Blog Successful

 Want consistency and quality on your blog? Feeling like you can only choose one of those?
You’re not alone. Between your clients, admin work, emails, keeping up to date with your industry, and taking actual breaks, your time and energy to regularly maintain a consistent, quality blog are scarce.
The solution? A blog planner that works for you. You need a blog planner that will make creating content easier and a lot more fun, and that’s exactly what this post will take you through.
By the end of this guide, you’ll know how to:
Want consistency and quality on your blog? Feeling like you can only choose one of those?
You’re not alone. Between your clients, admin work, emails, keeping up to date with your industry, and taking actual breaks, your time and energy to regularly maintain a consistent, quality blog are scarce.
The solution? A blog planner that works for you. You need a blog planner that will make creating content easier and a lot more fun, and that’s exactly what this post will take you through.
By the end of this guide, you’ll know how to:
- Brainstorm endless blog post ideas that your audience cares about and makes them keep coming back.
- Use a blog calendar, so you can save time, achieve more, and navigate your content easily.
- Streamline and automate your content promotion, so your blog posts can make the maximum impact.
First, Download Your Very Own Blog Planner Toolkit
You're maybe just now realizing how much work goes into creating the perfect blog post. Well, we've got you covered. If you download our blog planner toolkit, we guarantee you'll find the light that's at the end of your dark, confusing, blogging tunnel.- 100 Blog Title Templates: These templates offer title options where all you have to do is fill in the blanks.
- 105 Blog Promotion Ideas: Use this massive list of ideas to find creative ways to promote your blog.
- 150 Bonus Blog Ideas: Writer's block? Check out all of these content ideas, so you don't have to stare at a blank screen anymore.
- Best Time to Publish Blog Posts: When is the best time to publish your ready-to-read blog post? We've done all the research for you.
- Blog Post Writing Template: If writing a blog post isn't exactly your forte (or you need help organizing your content when writing), use this template to get you started on the right path.
- Blog Calendar Template: If you're not sure when you want to publish your blog posts, use this calendar to organize your schedule and publish at the best times.
- Best Blog Length Report: What does your blog post length say about its potential for success, and does it really matter anyway? Find out with this report.
Table of Contents
- Blog Planner: What It is and Why You Need It
- Three Versions of Blog Planners
- How to Use a Blog Planner: A Step-by-Step Process
- Step One: Plan Topic Themes Throughout the Year
- Step Two: Brainstorm Ideas That Align With Your Topic Themes
- Step Three: Map Out Your Blog Post Ideas on a Blog Calendar
- Step Four: Develop Repeatable Checklist-Based Processes for Writing Posts
- Step Five: Schedule Social and Email Promotion for Your Blog Content
- Step Six: Track Your Results and Do More of What Works Best
Blog Planner: What It is and Why You Need It
A blog planner is a central place for all of your blog posts. This includes those you’ve already published, and blog posts you plan to research, write, edit, publish, and promote. It’s also a great place to brainstorm and store ideas that come to mind. When used right, your blog planner becomes an essential tool for your business growth. Here are its biggest benefits:- It keeps details about all your blog posts and ideas in one place. No more random papers, sticky notes, notebooks, or failing to find that great idea you had last week.
- You can get an overview of your blog in seconds.
- You always know your tasks for the day, week, or month. No project or action item falls through the cracks.
- It connects your day-to-day execution with your longer-term goals. A blog planner will make it easier to prioritize tasks that bring you close to your end goal and avoid the Shiny Object Syndrome.
If you want to hit ambitious goals with your blog, you need a blog planner.
Click To TweetThree Versions of Blog Planners
Here are the three main versions of a blog planner you can utilize.1. Paper Planner
A paper planner can function in a couple of ways:- A printed wall calendar with blog posts added to their corresponding publish dates that you write by hand or mark with sticky notes.
- A list of blog post ideas with publish dates you write next to each idea.
2. Notebook-Style Day Planner
If you like the idea of a paper planner, but want to be able to take it with you, a notebook-style day planner is a better option. Many day planners have a page with a monthly overview, which is ideal for an overview of blog posts you need to work on next. Then, you can use that overview to build your day-to-day schedule.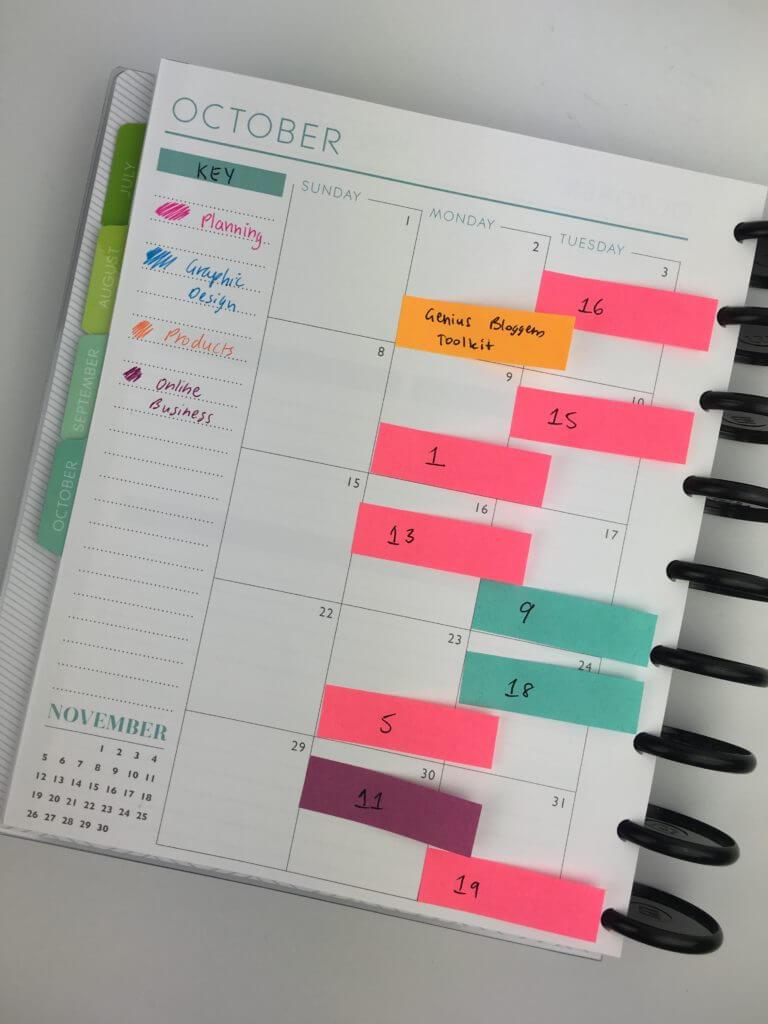 This type of planner gives you the benefit of a big picture overview, a daily plan, and portability. Of course, as with anything else done on paper, changing and updating things can take a while.
3. Software for Blog Planning
Blog planning software can be divided into two main options:- A generic tool, like Google Sheets or Microsoft Excel, that you need to tailor to your blog planning needs.
- A specialized tool, like CoSchedule’s Blog Calendar, that lets you plan and publish your content from a single platform.
 Unlike paper options that eventually, well, run out of paper, software can support you for many years and help you build a single place for all your blogging and social media activity.
How to Use a Blog Planner: A Step-by-Step Process
Now that you know your blog planner options, here are all the steps you need to take to make the most of it.Step One: Plan Topic Themes Throughout the Year
Topic themes are the best strategy to part ways with the “What will I write about today?” question for good. Simply put, topic themes are high level groups of topics that match your blogging goals and your reader’s needs. They guide your topic brainstorming process and fuel creativity. Your topic themes can be based on time of the year, as well as categories important to your reader. Use these questions and examples to brainstorm up to 10 topic themes.Make sure you're staying on top of it by planning blog topic themes throughout the year.
Click To Tweet- Finance blog: yearly planning, tax seasons, and quarterly planning.
- Food blog: recipes for each of the four seasons, holiday recipes, and indoor/outdoor party recipes.
- Style blog: wardrobe and hairstyles for each of the four seasons, shopping guides for new trends, and best times of the year to shop on a budget.
- Entrepreneurship blog: leaving a full-time job, saving, prioritization, focus, business plan, hiring, and scaling.
- Content marketing blog: marketing plan, content writing, editing, promotion, hiring writers, providing feedback, and tracking content success.
- Photography blog: cameras, lenses, accessories, editing software, and techniques.
- Finance blog: saving, investing, mortgage, paying off debt, banking, and insurance.
Step Two: Brainstorm Ideas That Align With Your Topic Themes
Your topic themes will help you brainstorm blog post ideas. Here’s the best content brainstorming process CoSchedule regularly uses. Write down as many ideas as you can in 10 minutes. Grab a stack of post-it notes and a pen, a whiteboard and a marker, or anything you can write on and stick up on a wall later. Then, set a timer for 10 minutes and write down as many ideas about your topic themes as you can. The goal is to get your thoughts out of your head — as many as possible. Don’t worry about quality just yet. Write down one idea per sticky note or per bullet point if you’re working with a whiteboard. To come up with as many ideas as possible, consider your audience’s questions, goals, and pain points. Score your ideas with a 1, 2, or 3 in 10 minutes. Move all of your ideas to the left side of your board or wall. On the right, outline three columns and label them 1, 2, and 3. Then, rank your ideas as 1 (weak), 2 (average), or 3 (exceptional). Consider one idea at a time, score it, and move it to the corresponding column. Take 10 minutes to prioritize all your 3s.
Finally, take stock of the ideas that ended up in the ‘exceptional’ column. Consider each idea and think about:
Take 10 minutes to prioritize all your 3s.
Finally, take stock of the ideas that ended up in the ‘exceptional’ column. Consider each idea and think about:
- How will this blog post transform your target reader? How will it help them hit their goal or solve a problem?
- What are some potential headlines for this blog post?
- Which resources can I add to it to make it actionable and useful?
- What is my unique experience with this topic that would make the blog post stand out?
- What angle can this post take?
Step Three: Map Out Your Blog Post Ideas on a Blog Calendar
With this list of your best blog post ideas, it’s time to move them to a blog calendar — into your blog planner. Here are the main tips to keep in mind. Establish a publishing cadence you can sustain. With so many great blog post ideas in mind, you may be tempted to aim for an ambitious publishing frequency. If you publish three blog posts in a week, and then none for the next two months, you’ll end up feeling bad about it, and you won’t see the results you want. Instead, start with something you can stick to for a long period of time based on other activities in your schedule. One blog post a week is an excellent place to start. You’ll end up with a library of useful and interesting blog posts in a matter of a couple of months, and you’ll be able to keep going. Consider increasing blog post frequency over time. If publishing one blog post per week goes smoothly for a while, consider increasing your publishing cadence. You already have your topics, so it’s only a matter of dedicating the time to creating an additional blog post. To make this easier, consider batching your creation stages. For example, you could outline, write, edit, and/or review both blog posts in a single day or working session. This will help you avoid context switching, which can cost you up to 80% of your productive time. Color-code your calendar for different types of posts. Want an easy way to discern between types or themes of your blog posts on your calendar? Use color coding. On a paper calendar, use highlighters or sticky notes. If you’re using a digital tool like a spreadsheet or CoSchedule, define your color labels and what each of them means. Your color coding can be based on:- Topic themes
- Blog post formats (step-by-step guides, question and answer, review/walkthrough, list-based post, etc.)
- Target audience segments
Step Four: Develop Repeatable Checklist-Based Processes for Writing Posts
Your new blog calendar looks motivating, but how can you make sure to make every item on it happen? With a rock-solid blogging workflow. A blogging workflow is a list of tasks you need to do for every blog post you want to publish. To make the most out of a defined process, turn it into a checklist that you can then apply as a template to each blog post you’re working on.A blogging workflow is a list of tasks you need to do for every blog post you want to publish.
Click To Tweet- Write out everything you need to do to publish a blog post. This can include outlining, research, writing, editing, proofreading, optimization for search, writing a headline, and more.
- Condense your list. For example, merge tasks that naturally happen together and remove those that only seem useful, but are outdated or unnecessary.
- Rewrite each task on your list to consist of an action verb and a clear outcome. For example, not just "writing," but, "Write the first draft."
 Define how many days ahead of the publish date you want to complete each of the tasks. You can group them in any way that makes sense for your schedule.
Using a checklist will organize your entire blogging workflow, ensure you complete every project on time, and keep you efficient and accountable. You’ll eliminate mistakes, stay consistent, and hit your blogging goals with ease.
Following a checklist also helps you avoid hyperbolic discounting. Hyperbolic discounting, also known as “present bias,” is when we choose immediate, small rewards instead of larger rewards that come later.
If a blog post seems like a massive, overwhelming project, you’re likely to procrastinate. When you procrastinate, you opt for the instant gratification of enjoying yourself now rather than the future reward of accomplishing the things you set out to do.
Define how many days ahead of the publish date you want to complete each of the tasks. You can group them in any way that makes sense for your schedule.
Using a checklist will organize your entire blogging workflow, ensure you complete every project on time, and keep you efficient and accountable. You’ll eliminate mistakes, stay consistent, and hit your blogging goals with ease.
Following a checklist also helps you avoid hyperbolic discounting. Hyperbolic discounting, also known as “present bias,” is when we choose immediate, small rewards instead of larger rewards that come later.
If a blog post seems like a massive, overwhelming project, you’re likely to procrastinate. When you procrastinate, you opt for the instant gratification of enjoying yourself now rather than the future reward of accomplishing the things you set out to do.
 Nir Eyal, author of Indistractable, recommends you break your big tasks into smaller, more immediate wins to get you started and help you overcome hyperbolic discounting. That’s exactly what a checklist helps you achieve.
Recommended Reading: SEO for Blog Posts: Your Essential Guide (Checklist Template Included)
Step Five: Schedule Social and Email Promotion for Your Blog Content
With a packed blog planner, you’ll have plenty of content to post on social media and to send in your newsletters. Here’s how to make it happen. Map out your social media promotion on your blog calendar. Here’s why organic social media works really well for your blog promotion:- You’ll reach different types of readers across different platforms.
- You can post about the same blog posts multiple times on the same platform to reach more people by slightly tweaking your message.
- Platforms give you insights on reach and engagement, so you can do more of what works best.
- Twitter: On the day of publishing, day after publishing, week after publishing, and 14 days after publishing.
- Facebook: On the day of publishing, week after publishing, and 21 days after publishing.

Recommended Reading: How to Maximize Your Social Media Strategy with CoSchedule
Map out your email marketing promotion.
Do you want to send an email newsletter every week? Twice a month? Once every month?
There’s no one-size-fits-all answer. It depends on email format, as well as your own schedule. If you publish one blog post per week, you’ll have plenty to talk about in your emails, so it’s up to you to choose your frequency.
As always, make sure to keep track of your email marketing activity, so you can adjust it as you go if necessary.

Recommended Reading: Email Marketing Strategy: The Best Way to Organize Yours (Template)
Automate your social media and email promotion.
With CoSchedule, you can automate your content promotion with automation and integrations.
To automate and streamline your social media promotion in CoSchedule’s Blog Calendar, you can:
- Integrate your CoSchedule account with social media platforms and schedule posts.
- Build a long-term social campaign to promote your post, all from a single screen.
- Use templates, helpers, and CSV uploading to streamline creating your social messages.
- Plan, schedule, and reorder your messages directly from WordPress.
- Use ReQueue to intelligently automate your best social messages.
 Here’s how you can be more efficient with email marketing in CoSchedule’s Content Organizer:
- Integrate with your email service provider, including Mailchimp, Campaign Monitor, Active Campaign, and Constant Contact, to manage your campaigns from CoSchedule.
- Maximize the impact of your subject lines with the Email Subject Line Tester built into your CoSchedule dashboard.
- Schedule email campaigns based on dates of blog posts and other important events.
Step Six: Track Your Results and Do More of What Works Best
The best part of taking action and publishing the content you’ve planned out is getting the feedback from it. Feedback from your audience, yes, but also from the platforms you’re using: Google Analytics, social media analytics (like Facebook Analytics, Twitter Analytics, and Instagram Insights), and results from the emails you send.Keep track of the feedback you get out of your planned content.
Click To Tweet- What is your audience clicking on the most? Which topics attract them?
- What drives their deepest attention? Which emails do they reopen, and which blog posts do they stay on the longest? What keeps them clicking through?
- Which topics perform best on Google?
- Which topics work best on specific platforms?
- What formats seem to resonate on different platforms?


