How To Triage Incoming Marketing Requests With CoSchedule Marketing Calendar

 Marketing managers are flooded with marketing requests and no way to organize them. Your inbox is overflowing, there’s no good way to manage the process, and there is a constant fear that things are getting missed.
The good news is there are actually a few super slick processes for this in your CoSchedule Marketing Calendar.
Imagine never having to worry about missing requests that are stuck in your inbox!
In this blog post, you will find a step-by-step process to help you create a seamless system using CoSchedule’s Marketing Calendar with Zapier Integration & Google Forms.
Marketing managers are flooded with marketing requests and no way to organize them. Your inbox is overflowing, there’s no good way to manage the process, and there is a constant fear that things are getting missed.
The good news is there are actually a few super slick processes for this in your CoSchedule Marketing Calendar.
Imagine never having to worry about missing requests that are stuck in your inbox!
In this blog post, you will find a step-by-step process to help you create a seamless system using CoSchedule’s Marketing Calendar with Zapier Integration & Google Forms.
Prioritizing and Organizing Incoming Marketing Requests With Marketing Calendar
First, you’ll want to create a Google Form. Google Forms are easy to use & create - plus they’re free too!
To get started, here’s a Google Form template we’ve created for you.
Step 1: Create A Marketing Request Form
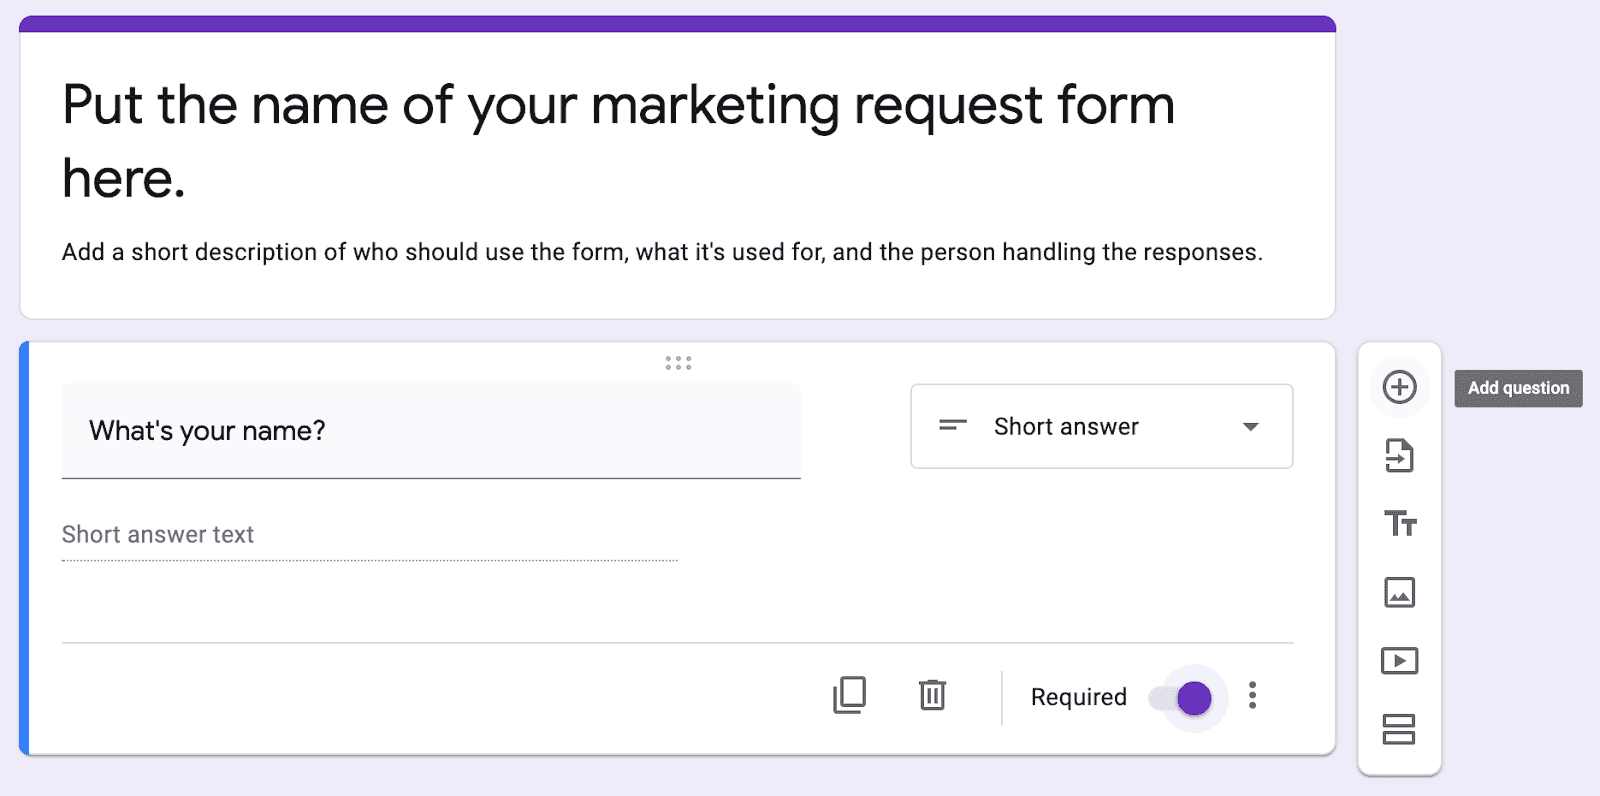
To get started, head to Google Forms. Browse the selection of templates, or click “Blank” to create your own from scratch: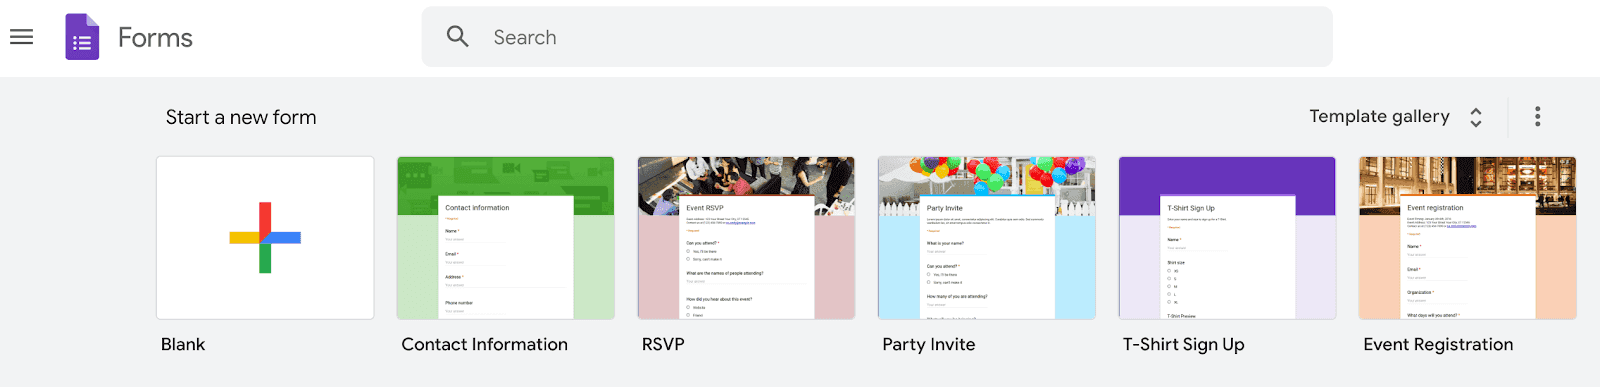 Give your form a name, and add a description that tells your team:
- Who should use the form
- The purpose of the form
- The person who will be handling responses
 Think through the information you need to know before you can start on a new project.
Make these items required fields on your Google Form.
This could include things like:
Think through the information you need to know before you can start on a new project.
Make these items required fields on your Google Form.
This could include things like:
- Name & contact info for the requester
- Project details
- Project deadline
- And more!
Share The Link
Once you’ve created your form, it’s time to start sharing. You can share a link to a Google Form with anybody by hitting “Send,” and limit permissions to only allow internal staff members (or departments) to access it: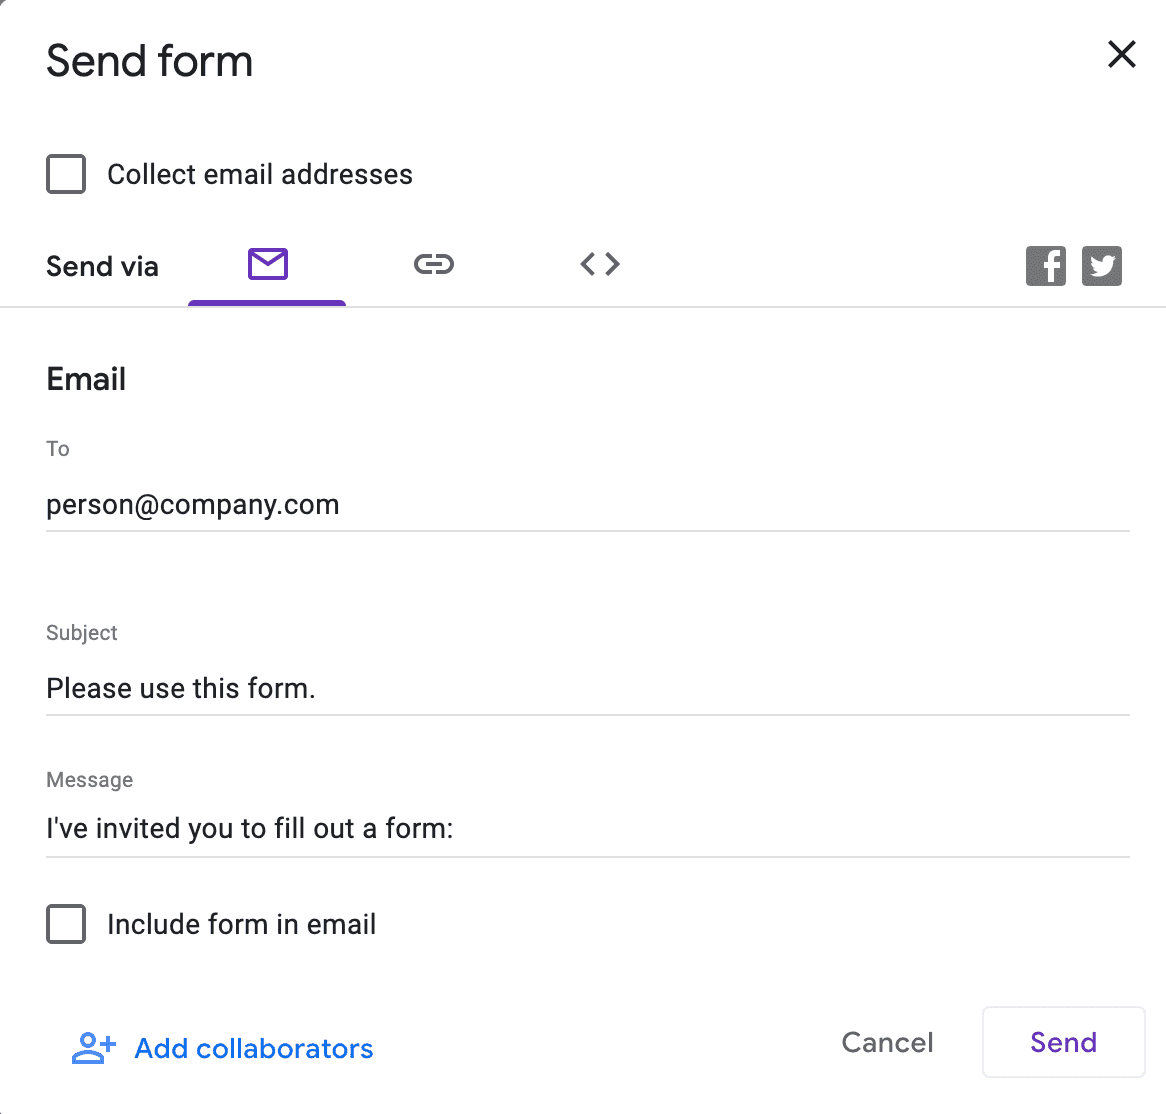
Convert to Google Form
Now that you have your Google Form, you need a place to organize form submissions. You can do this with your Marketing Calendar by following these steps. To do this, head over to your freshly-made Google Form and go to the “Responses” tab to turn this form into a Google Sheet.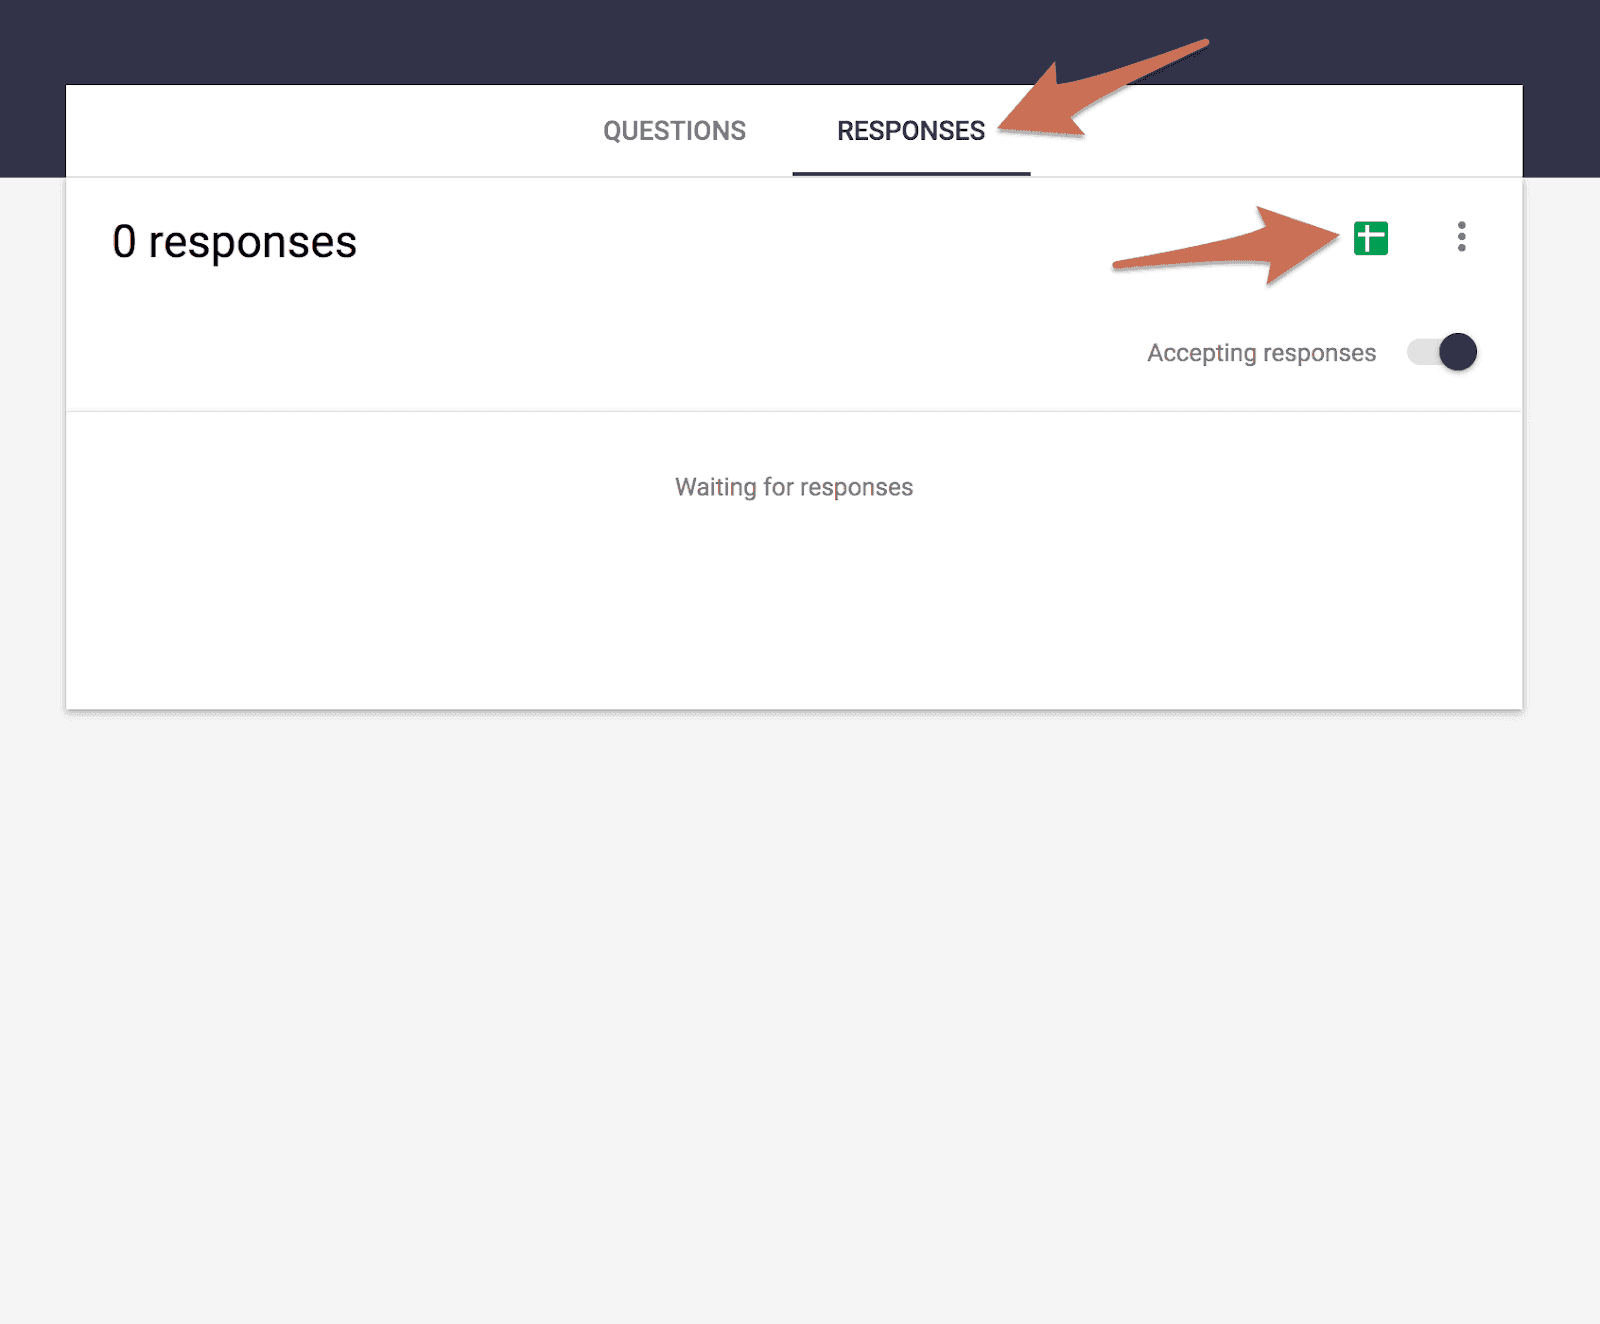
Step 2: Create A New Marketing Requests Color Label
Now that you have created your request form, head over to your Marketing Calendar settings and create a new Color Label called “Marketing Requests.”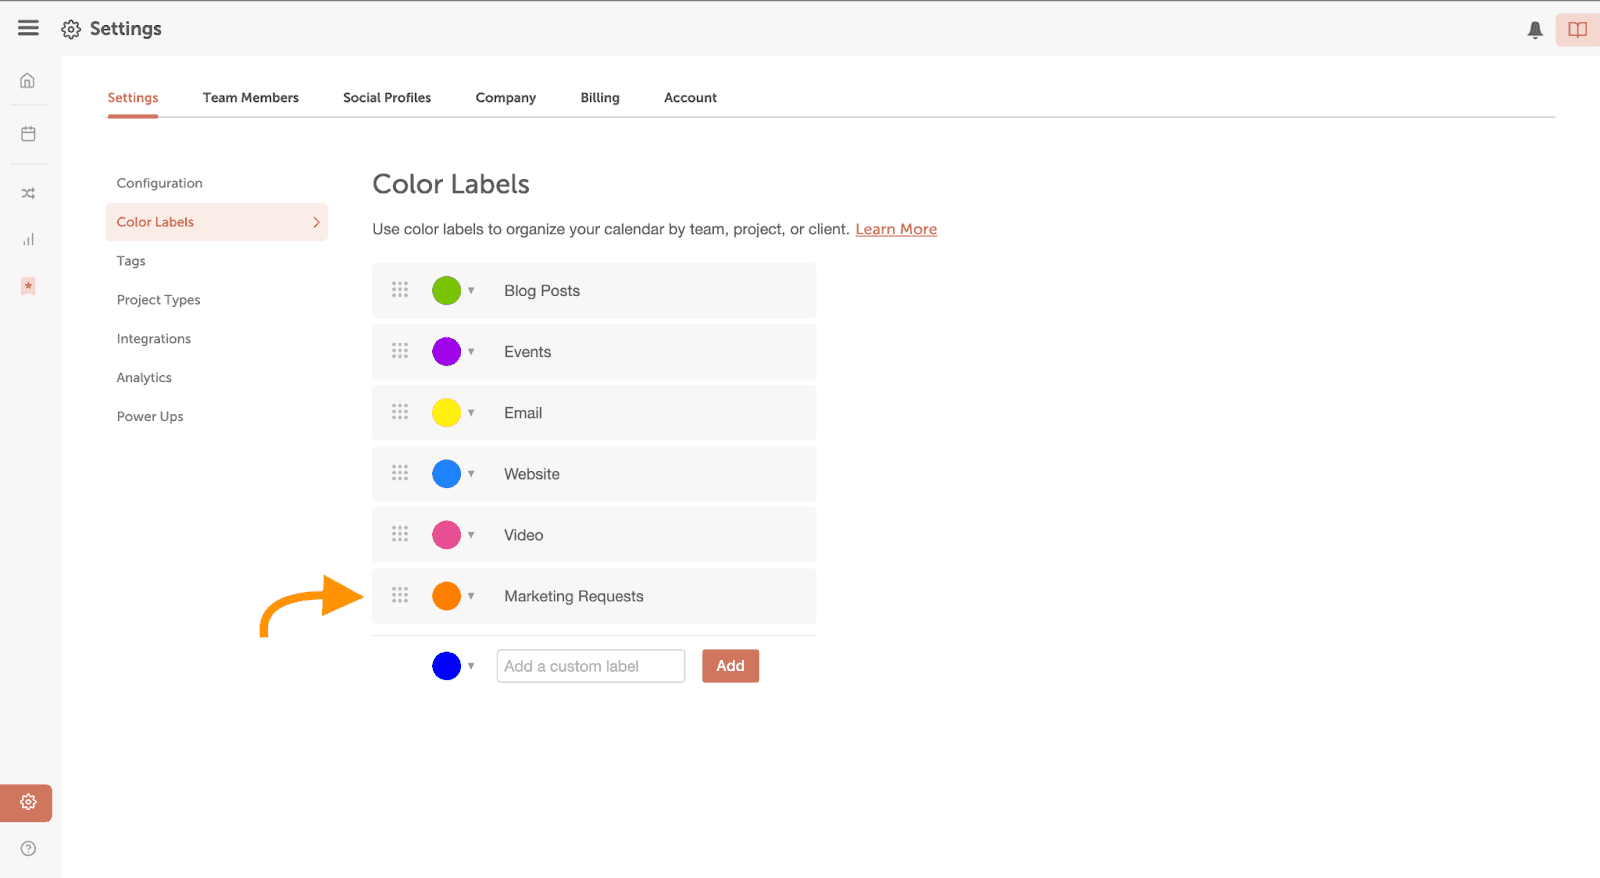 When people submit a marketing request form, it will appear in your Idea Bin. Keep in mind, the Idea Bin is different from the Idea Board (which is available in Marketing Suite plans).
Idea Bin creates a backlog of ideas that are not yet scheduled on the Calendar. This is where all of your Marketing Requests will go once submitted via your Google Form. You’ll learn how to do this in Step 3.
The next step is creating a Saved View called “Marketing Requests” using the color label you just made.
When people submit a marketing request form, it will appear in your Idea Bin. Keep in mind, the Idea Bin is different from the Idea Board (which is available in Marketing Suite plans).
Idea Bin creates a backlog of ideas that are not yet scheduled on the Calendar. This is where all of your Marketing Requests will go once submitted via your Google Form. You’ll learn how to do this in Step 3.
The next step is creating a Saved View called “Marketing Requests” using the color label you just made.
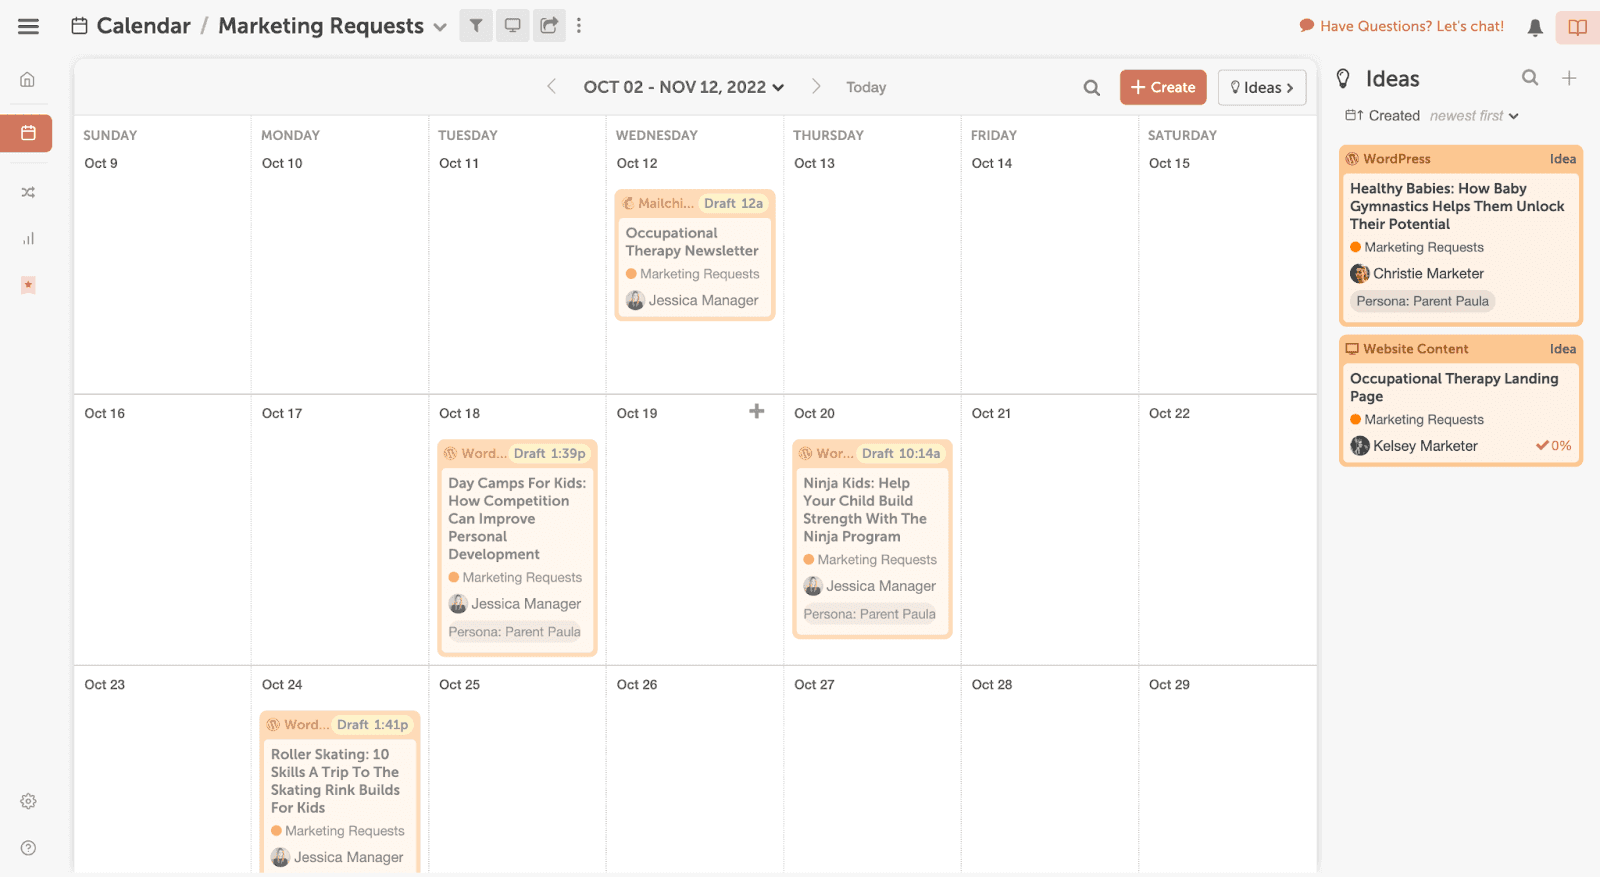
 When you select the “Marketing Requests” saved view, your calendar and Idea Bin display only your marketing requests.
Step 3: Connect Zapier
When your Google Form is created, and you’ve added a new color label, connect Marketing Calendar to the Google Form using Zapier. Click here to visit your Marketing Calendar account's integration area to ensure you’ve added Zapier as an integration. Don’t have a Zapier account? Click here to create a free Zapier account. Once you’ve added the Zapier integration to your Marketing Calendar, you’ll need to create a Zap in Zapier. In Zapier, choose to connect Google Forms with CoSchedule.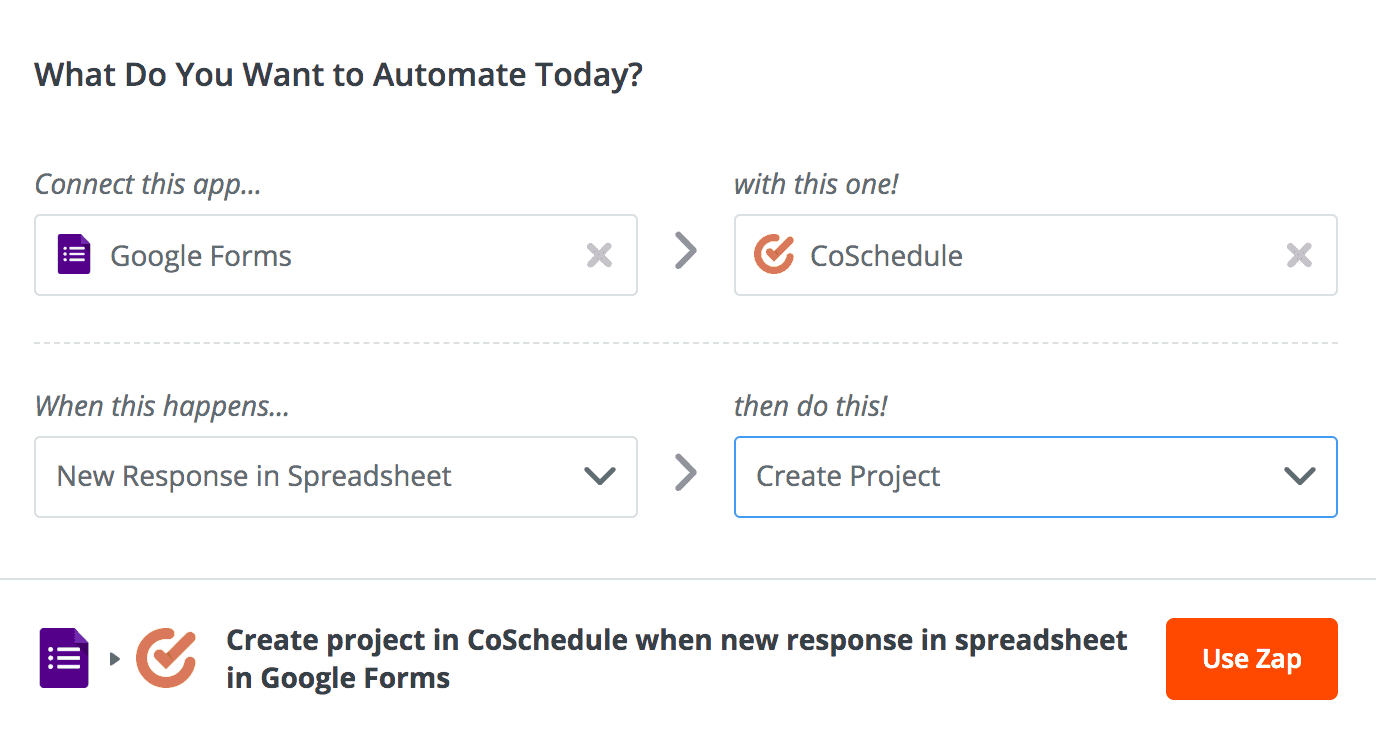 Once you’ve clicked “Use Zap,” Zapier will walk you through the process of setting it up. We’ll go through it below to help.
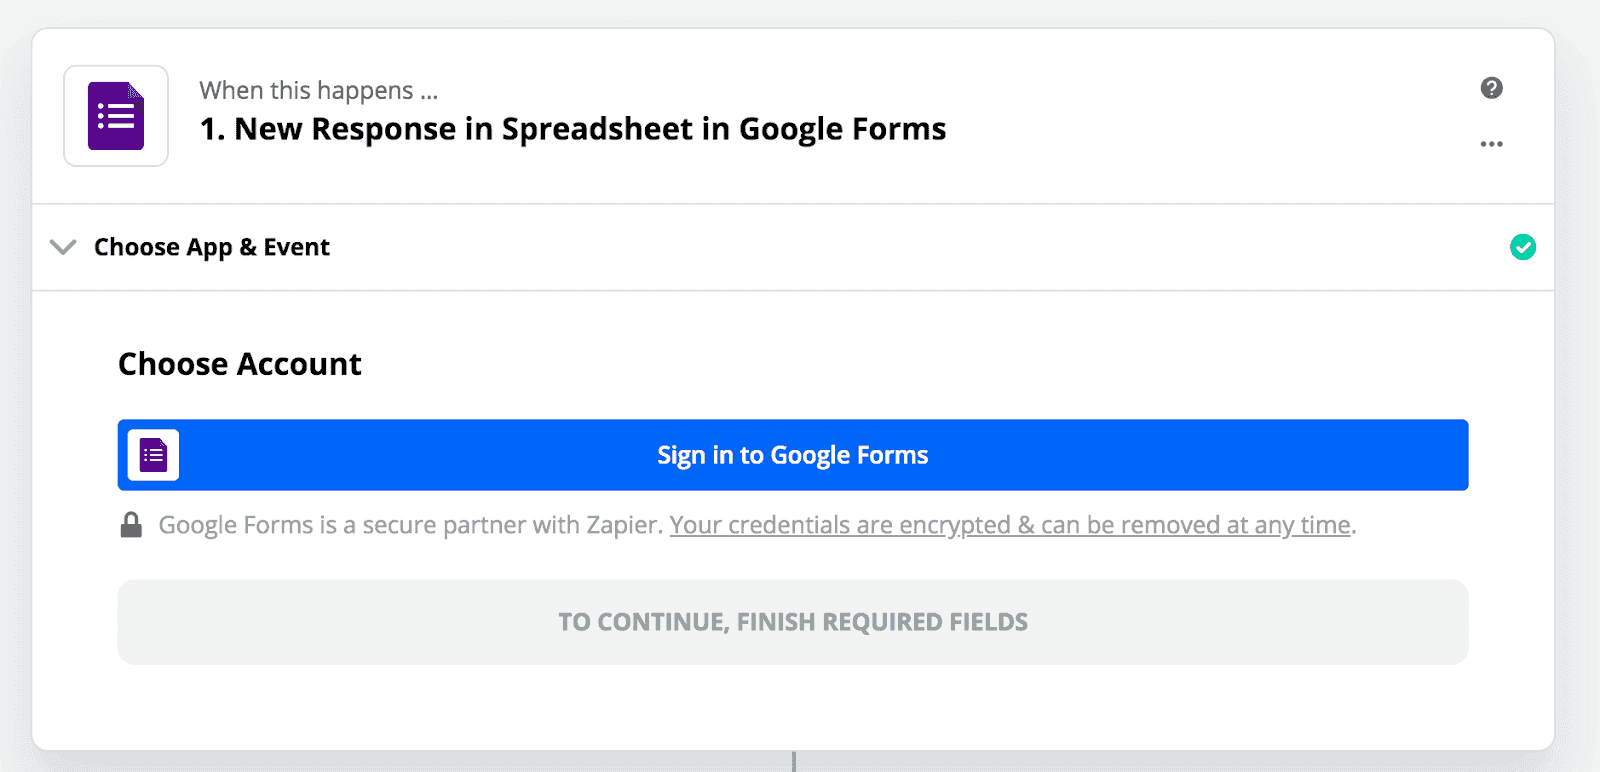
Sign into your Google account using the blue button.
Once you’ve clicked “Use Zap,” Zapier will walk you through the process of setting it up. We’ll go through it below to help.
Sign into your Google account using the blue button.
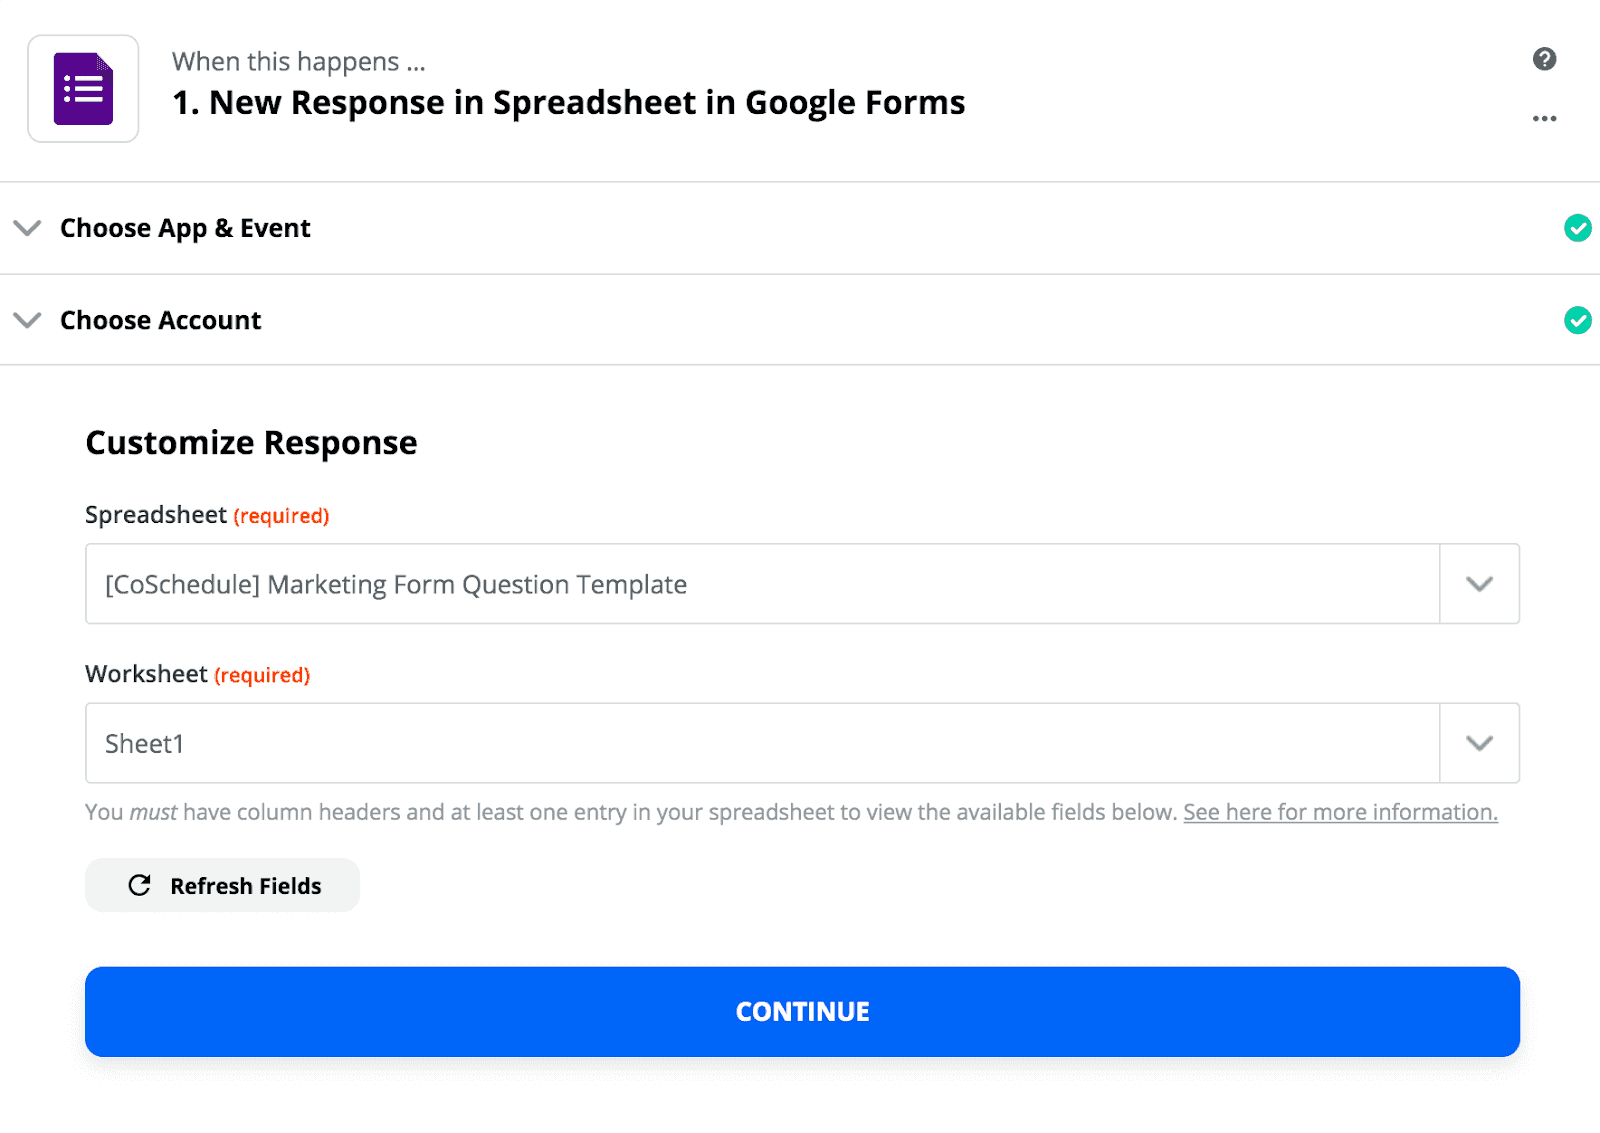
 Use the dropdown menu called "Spreadsheet" to find the sheet you created in step one.
 Then choose Sheet 1 in the drop-down menu called “Worksheet.”
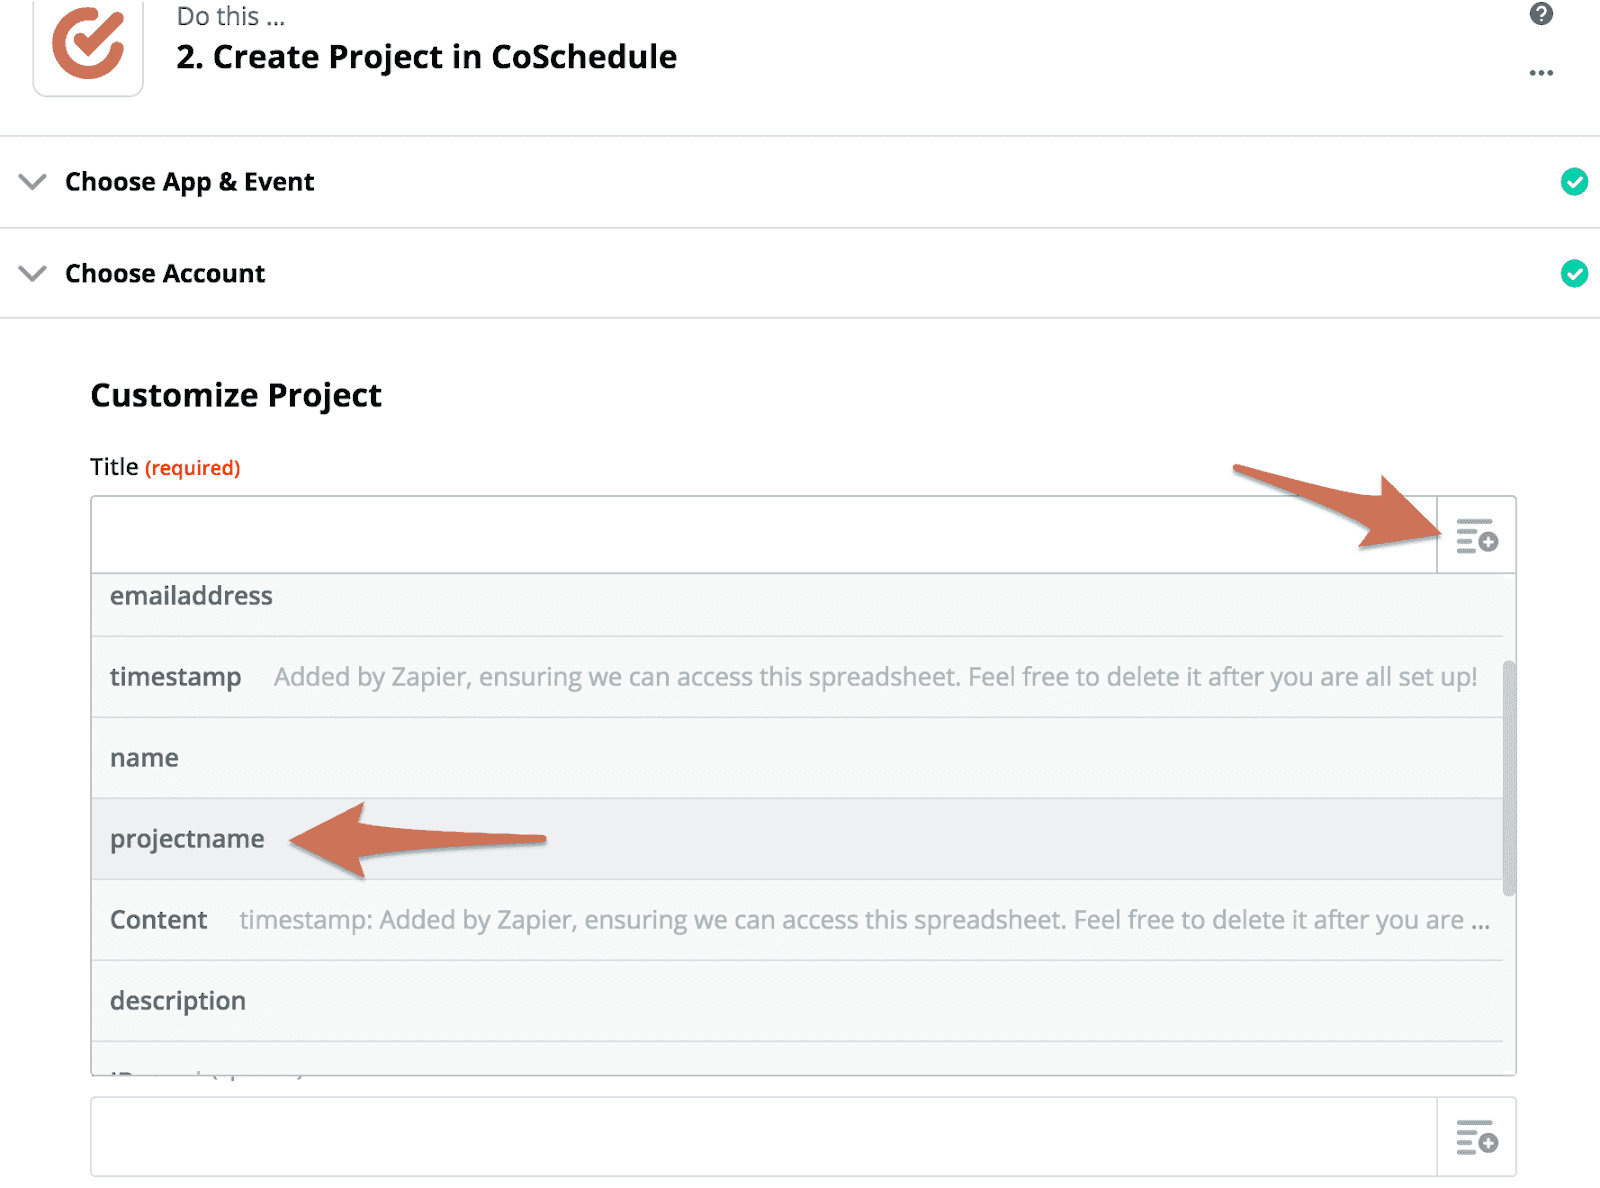
 Next, you’ll continue to the CoSchedule part of the Zap setup. You might need to copy and paste the API key from your Marketing Calendar. You’ll find it in the integrations area on your Marketing Calendar.
Under the title field, find the option that says “projectname.”
Next, you’ll continue to the CoSchedule part of the Zap setup. You might need to copy and paste the API key from your Marketing Calendar. You’ll find it in the integrations area on your Marketing Calendar.
Under the title field, find the option that says “projectname.”
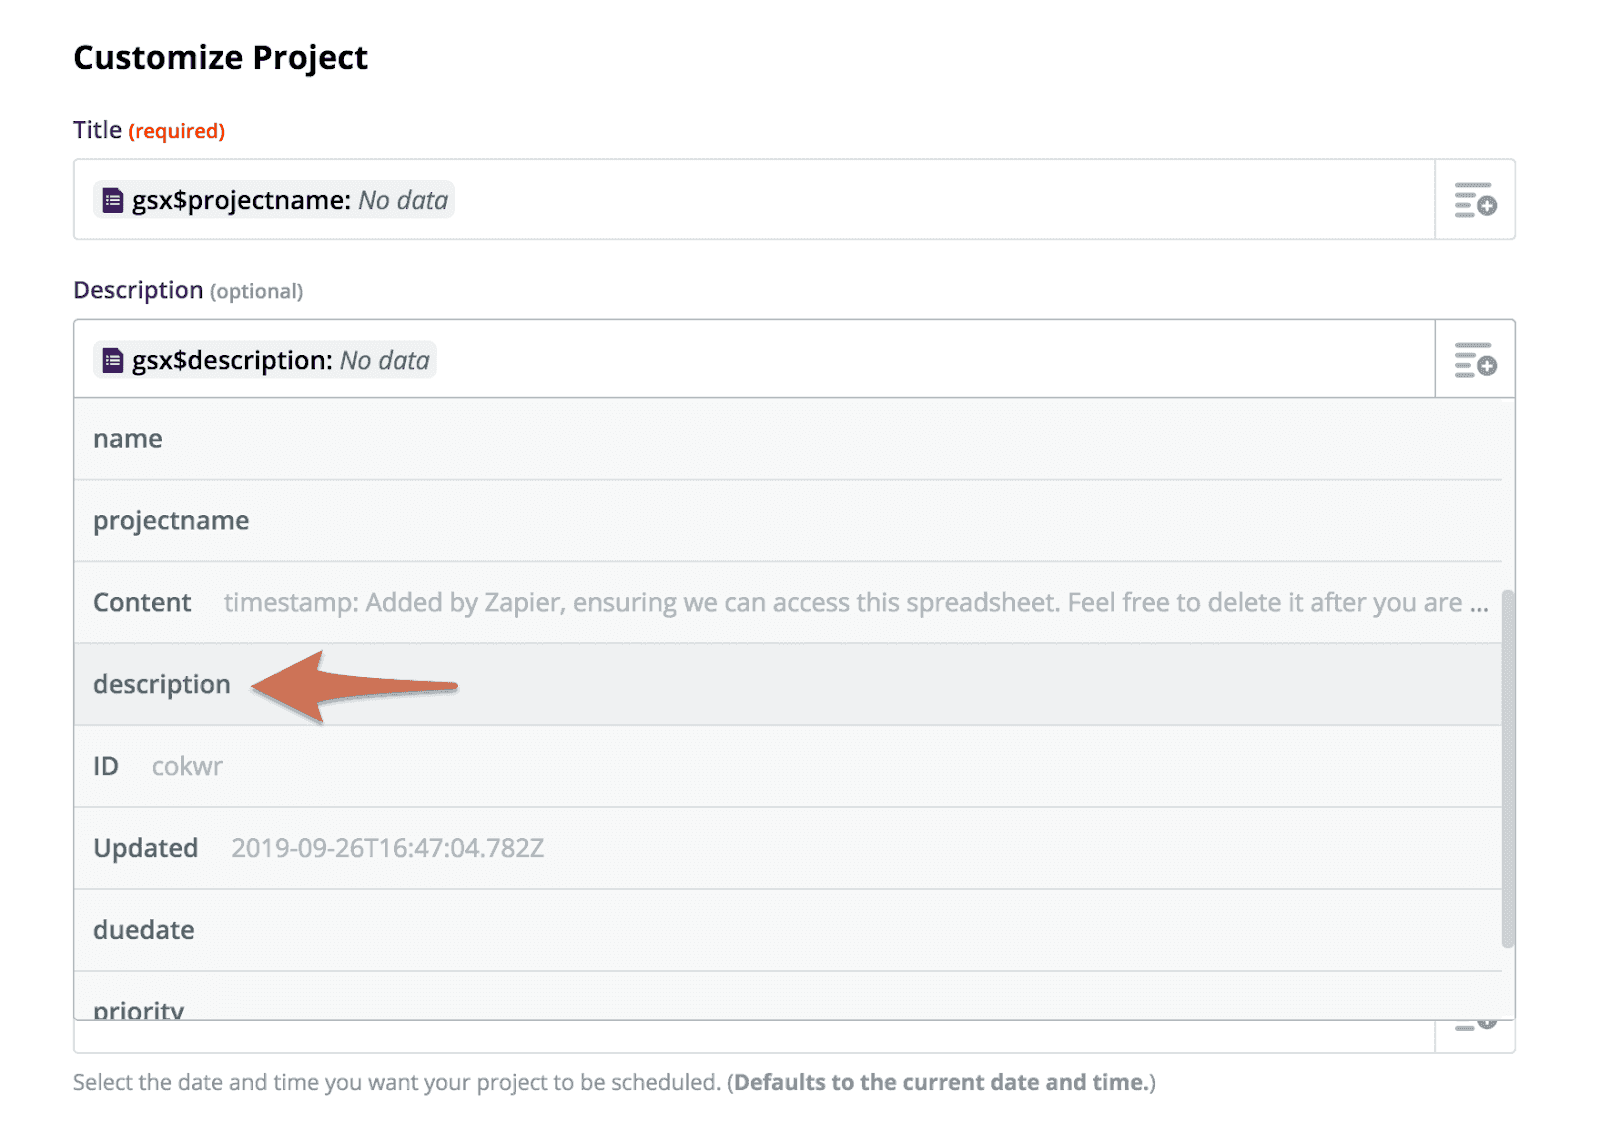
 In the description field, choose the option that says “description” from the drop-down menu.
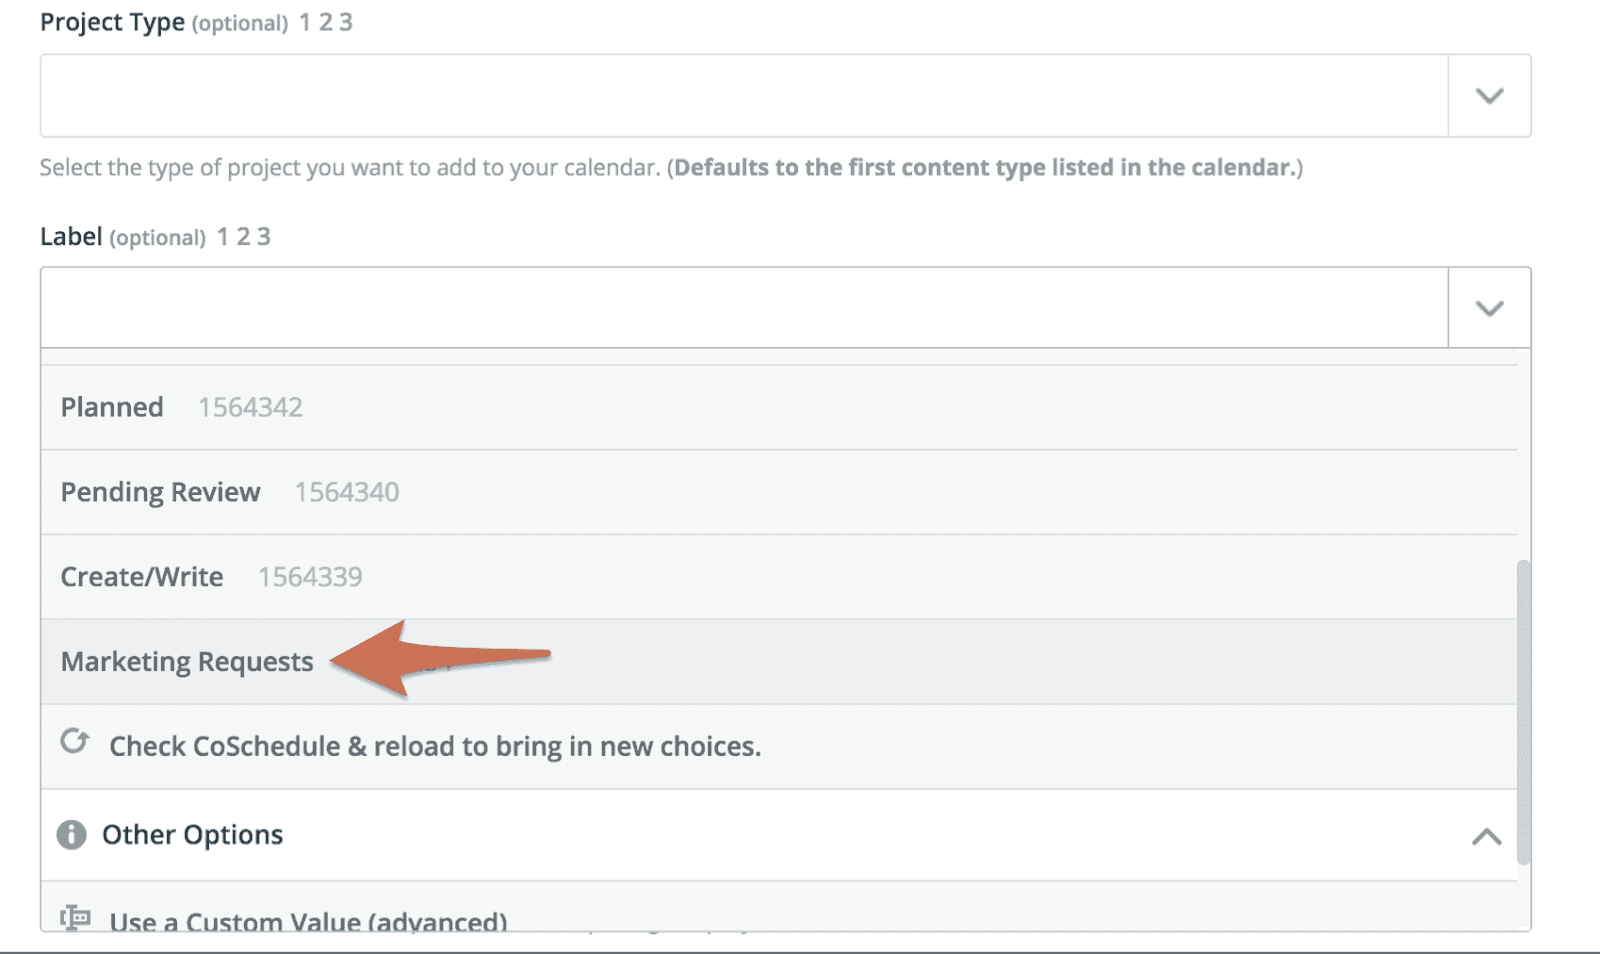
 Under the "Label" field, choose the “Marketing Requests” color label you just created.
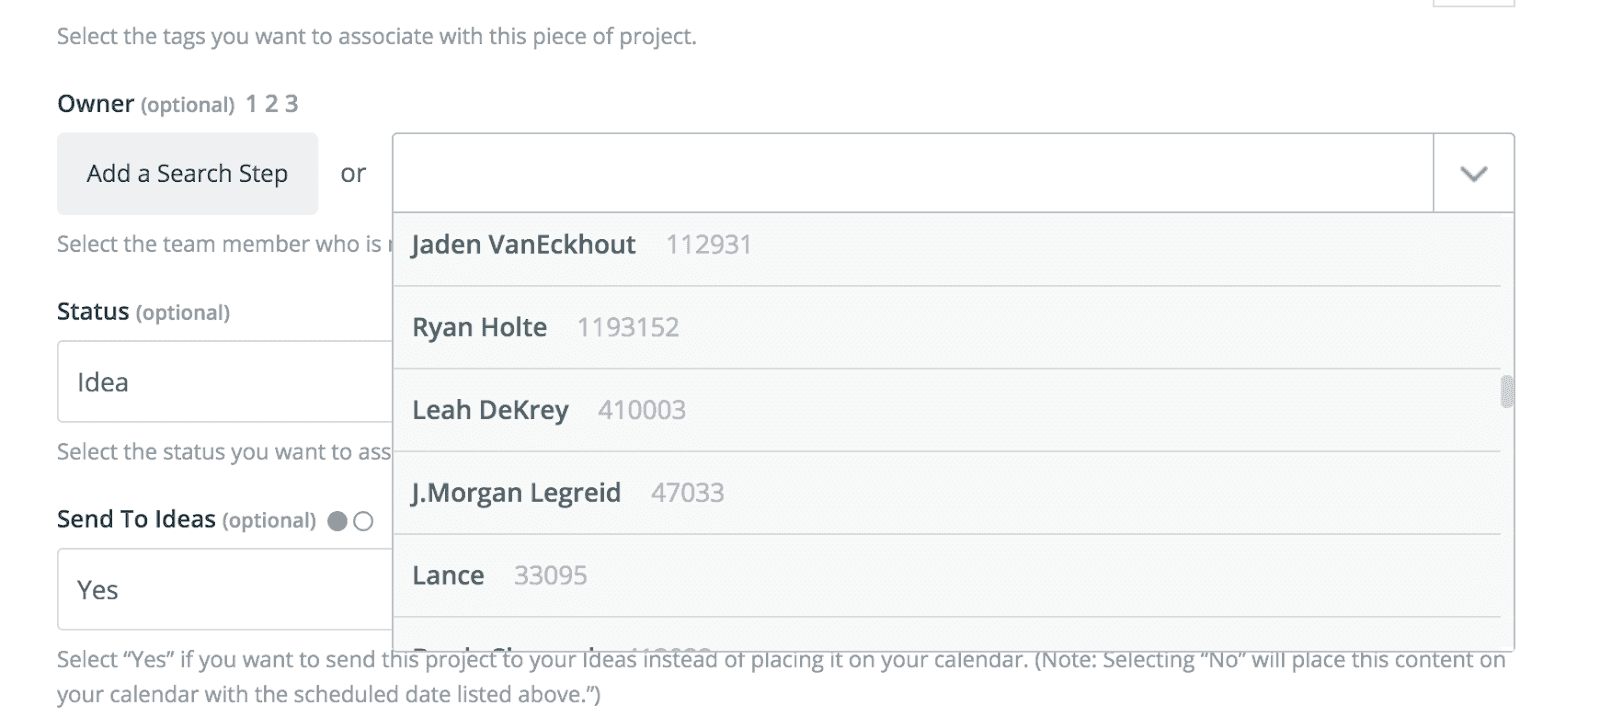
 Next, add yourself as the owner for all requests. This will notify you in your Marketing Calendar dashboard whenever a new request is created. Find your name using the drop-down menu to add yourself as the owner.
 Finally, change the status to “Idea” and say “Yes” to send the request to your Idea Bin.
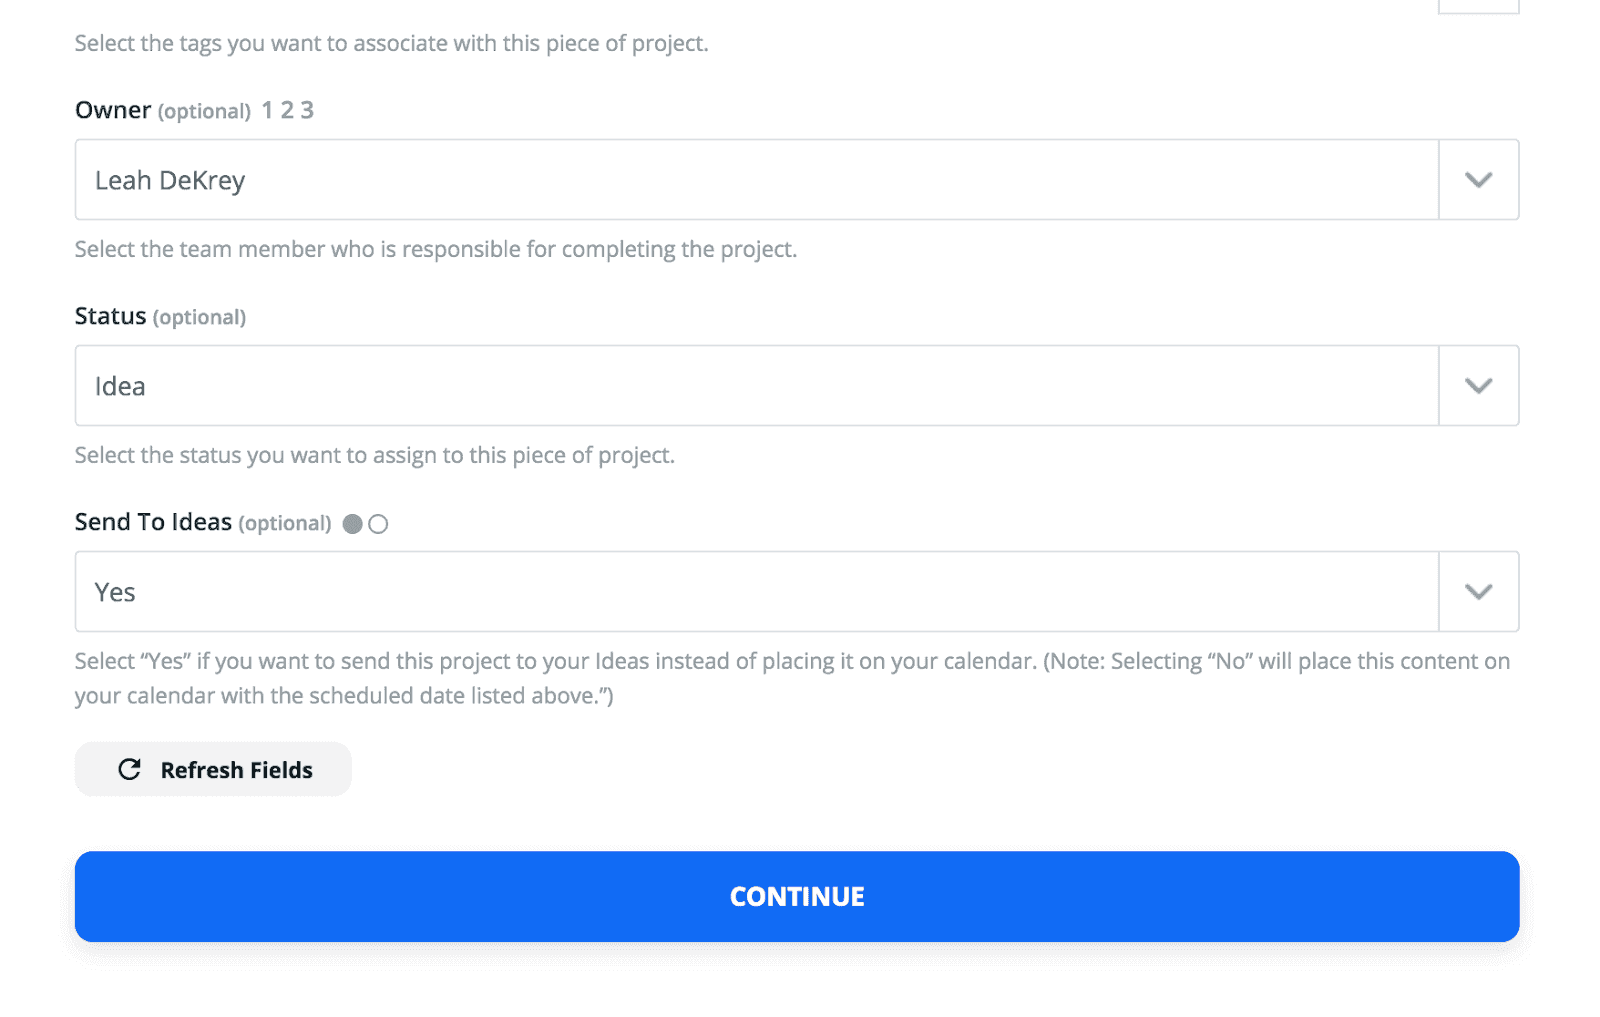 When finished, you'll click “Continue” and finalize your Zap. A test will be sent to your calendar to ensure everything is connected correctly.
Step 4: Send The Google Form To Your Organization
Now that you’ve successfully set up your Zap. You’ll need to tell everyone at your organization that they need to use the Google Form to request marketing collateral from now on. Here’s an example email you can steal to save time. We also recommend bookmarking the link for quick access when people forget to use it. You can simply respond by sending them the link again until they get the hang of the new process.
Step 5: Monitor Incoming Requests
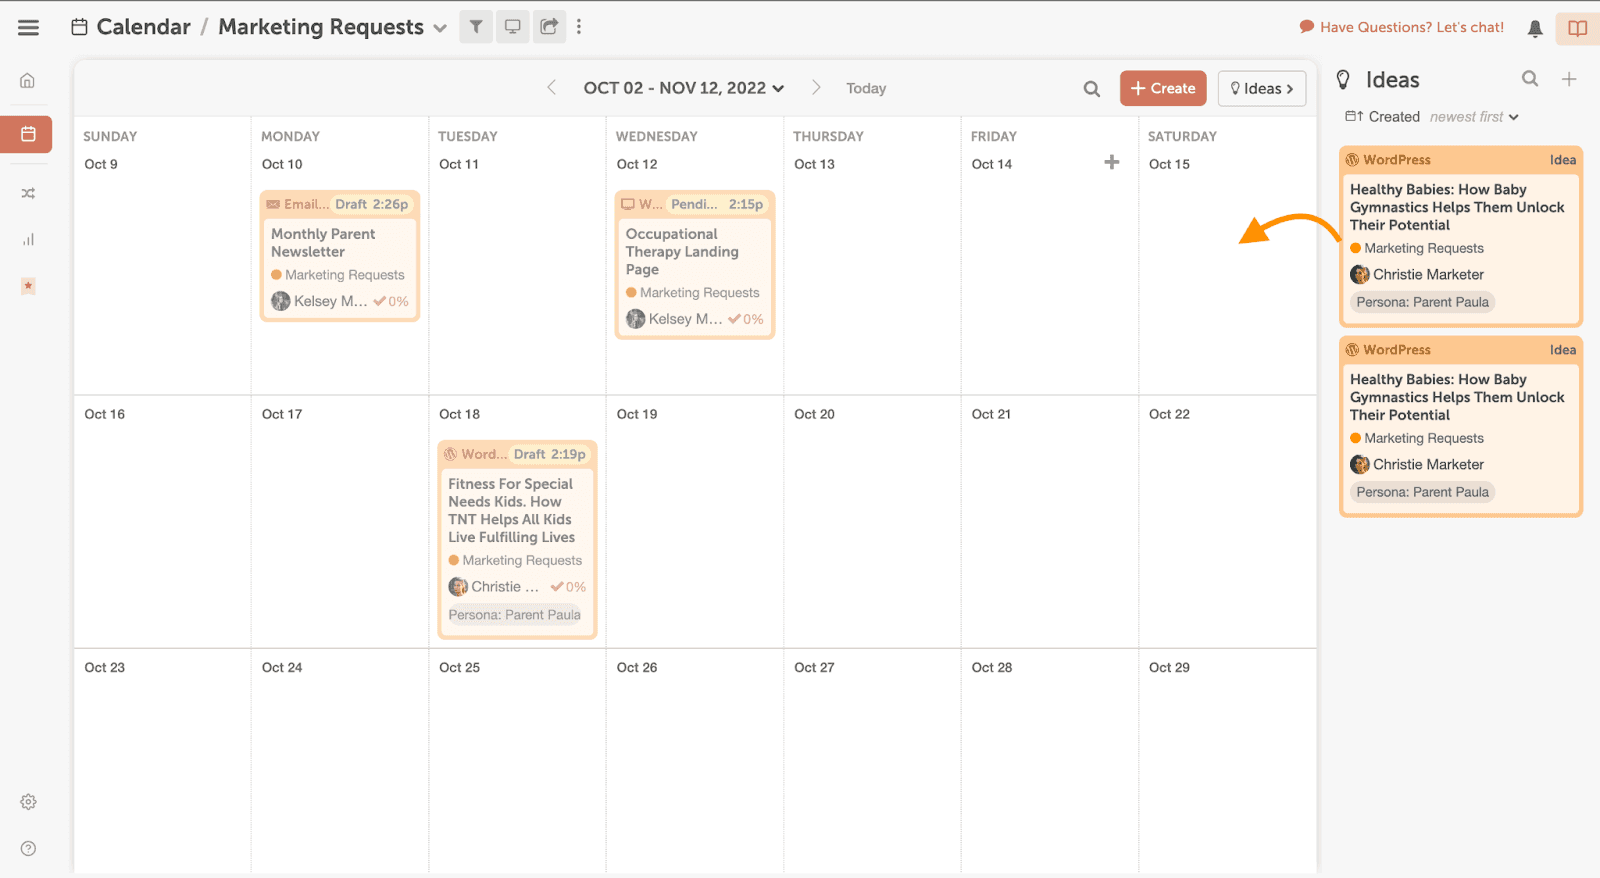
Once you’ve shared the request form with your organization, remember your Idea Bin because that’s where new requests will appear. Switch to the saved view you created in Step 2 to visualize all the marketing requests your team is (or will be) working on.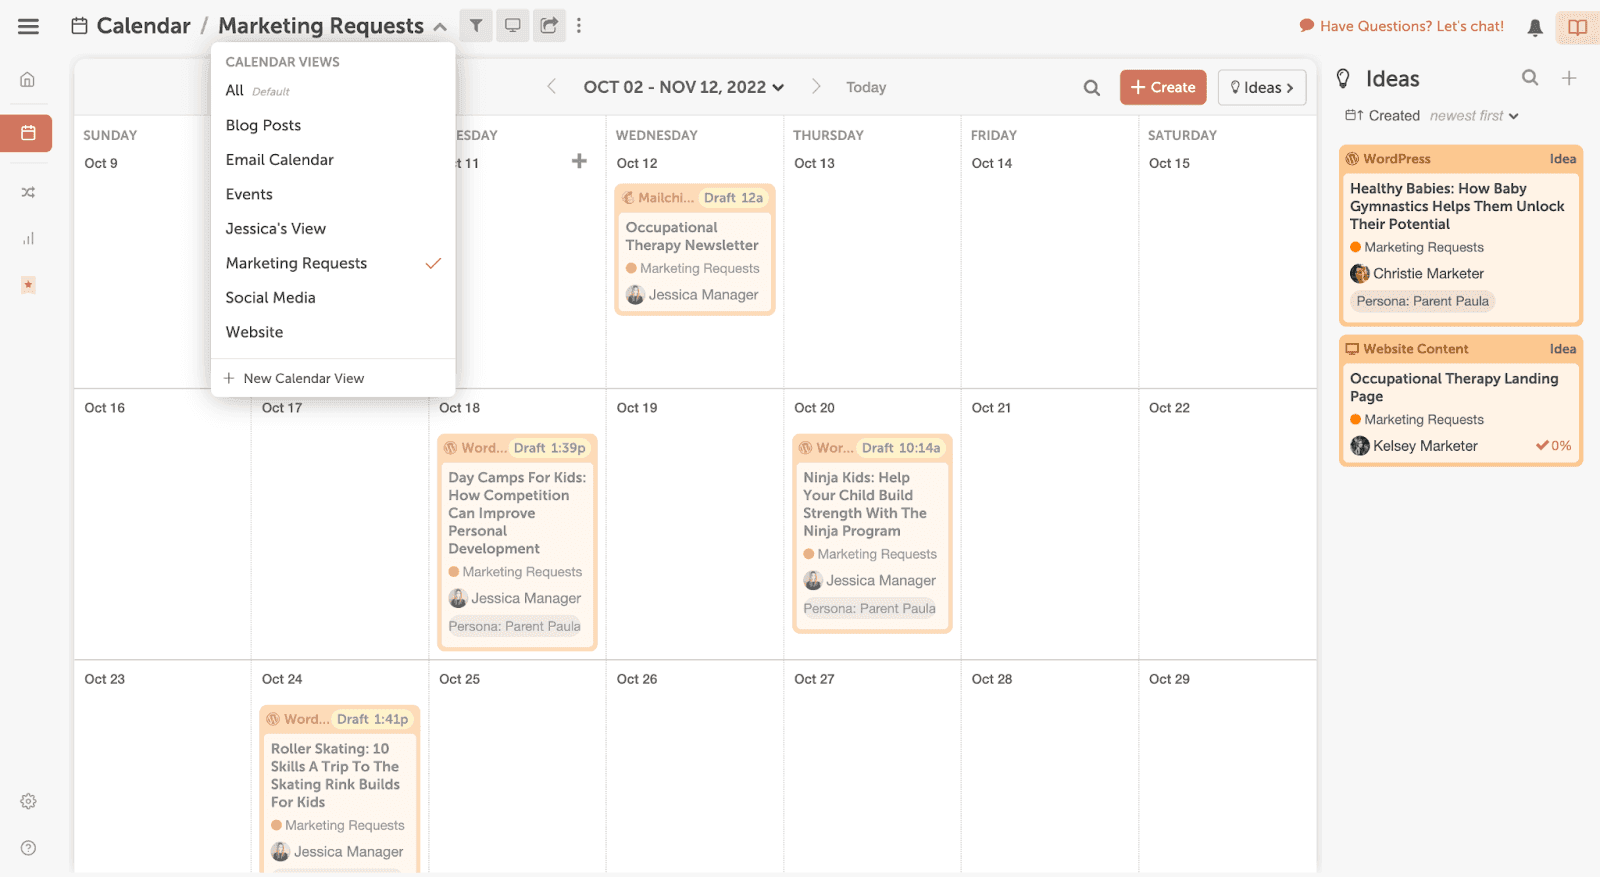 When you decide to accept a request, drag and drop the request into the calendar.
Step 6: Share Project Progress With The Requester
Having that saved view allows you to share the calendar with anyone who does not have access. However, the Idea Bin is not included in the read-only link. Also, note that read-only views are only available in Marketing Calendar Pro, not the free version. To create a read-only view, click “share calendar” and select your marketing request view.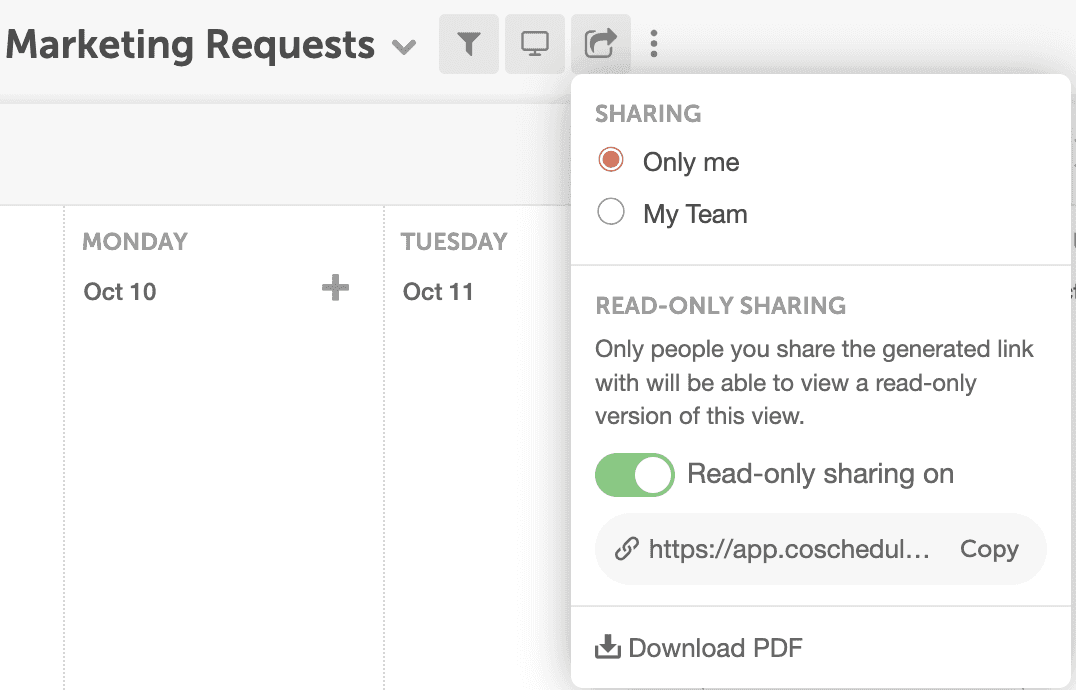 This creates a read-only version of your calendar so stakeholders can stay in the know. This is convenient when you want to update the requester on the progress of their request.
You can also choose to download the saved view as a PDF rather than using a read-only link.
Follow these simple steps to triage incoming marketing requests using CoSchedule Marketing Calendar.
This creates a read-only version of your calendar so stakeholders can stay in the know. This is convenient when you want to update the requester on the progress of their request.
You can also choose to download the saved view as a PDF rather than using a read-only link.
Follow these simple steps to triage incoming marketing requests using CoSchedule Marketing Calendar.


