Webinar Schedule: How to Effectively Plan and Schedule Webinars
 A webinar is an interactive online seminar meant to educate your audience about an industry-relevant subject. They’re also used to demonstrate new products or research, have a company-wide presentation, host a training workshop for users/employees, and so on.
As a marketing tool, webinars are growing in popularity — 53% of marketers say they plan to include webinars in their 2021 video strategy, up 11% from 2020. And 91% of webinar marketers say they’ve been a success — making webinars one of the most effective video marketing channels.
So with no delay, let’s further understand why you need to plan your webinars, how you can effectively do so, and some essential checkpoints to ensure your webinar achieves the desired results.
Webinar Schedule: How to Effectively Plan and Schedule Webinars via @CoSchedule
Click To TweetDownload Your Webinar Scheduling Templates
Before you go on, make sure you download your complimentary templates to help plan and schedule your webinars and set yourself up for success.Benefits of Effectively Planning Your Webinar
Simply put, webinars make interaction with prospects, employees, partners, and customers more efficient, engaging, and easier. Here are just four of the many benefits of planning and hosting webinars.1. Reach more prospects and generate leads
76% of marketers say that webinars help them reach more leads, 75% say it extends brand reach, and 49% say that it helps them reach targeted accounts.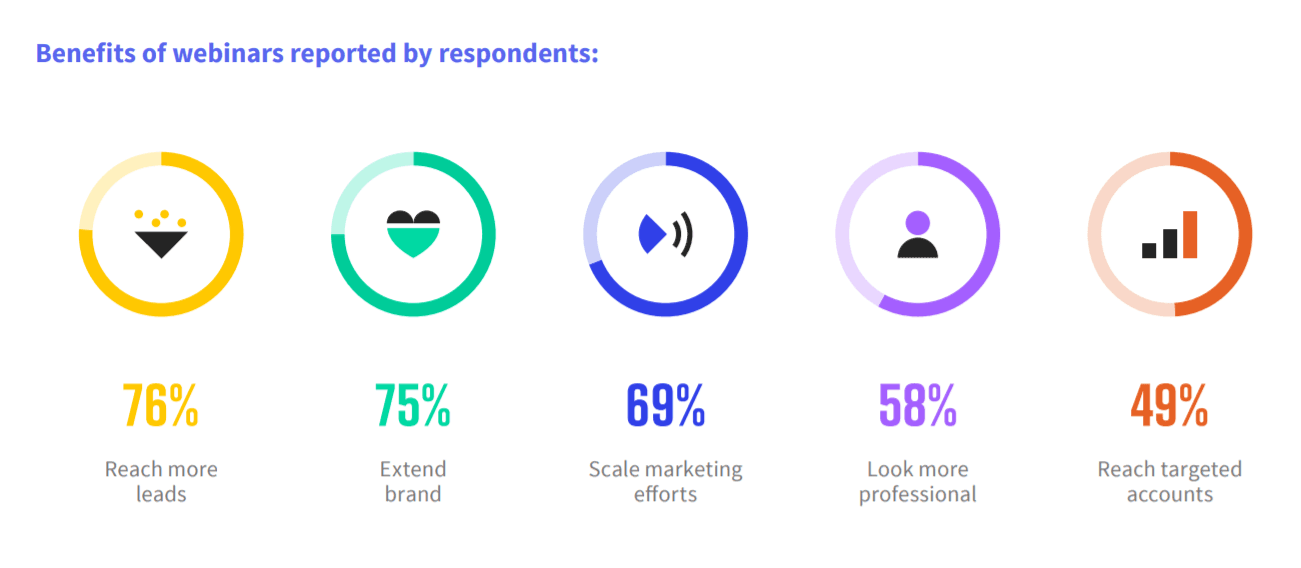 Furthermore, recent studies suggest that 20-to-40% of webinar attendees turn into qualified leads, while 73% of B2B marketers say a webinar is the best way to generate quality leads.
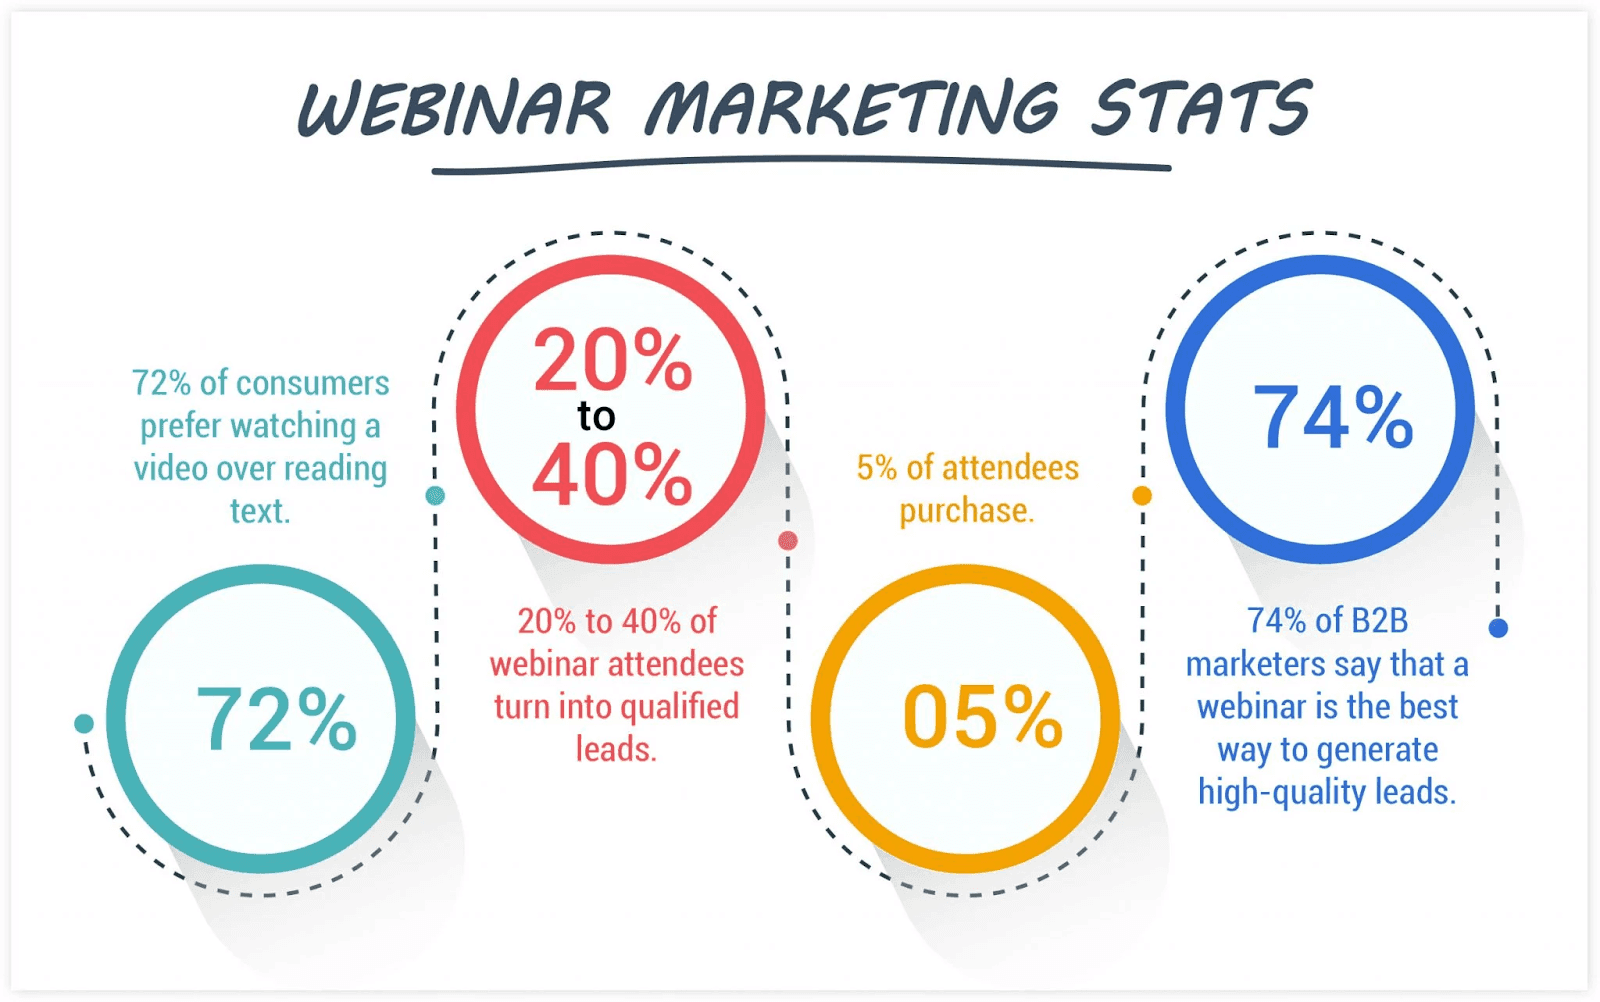 Source: ClickFunnels
If a prospect invests the time to attend and sit through your webinar, they’re likely to turn into a highly qualified lead who is ready to be sold to.
2. Build Your Brand Awareness in Line With Marketing Strategy
You can promote a well-planned webinar as an exciting branded event across all social media channels to boost brand awareness. And after the webinar is over, you can use it as TOFU content and also repurpose it into other formats. For instance, a 40-minute B2B webinar recording can be split into short video clips for your brand’s LinkedIn marketing, or repurposed into a written blog post that helps with your site’s SEO.3. Present to the Right Audience at the Right Time
Just as with any other type of content publishing, you can survey your audience preferences to publish your webinar at the best times (typically around mid-week) for maximum participation and engagement. You can also pre-record your webinar and use the simulator feature (available in most webinar software) to make the content live on the webinar day without actually being present.4. Streamline Your Marketing Processes
It’s easy to integrate webinar software with CRM tools to manage and optimize your marketing, lead generation, and event creation in one place. For example, GoToWebinar easily syncs with HubSpot CRM. Likewise, many webinar tools integrate with Salesforce. You can also gauge the success of a webinar in terms of registrations, the webinar landing page conversion rate, the source of sign-ups, the attendee conversion rate, the ROI of the event, etc. By measuring your webinar’s performance and keeping track of webinar-specific metrics, you can tie your webinars more effectively into your overall content marketing strategy and goals.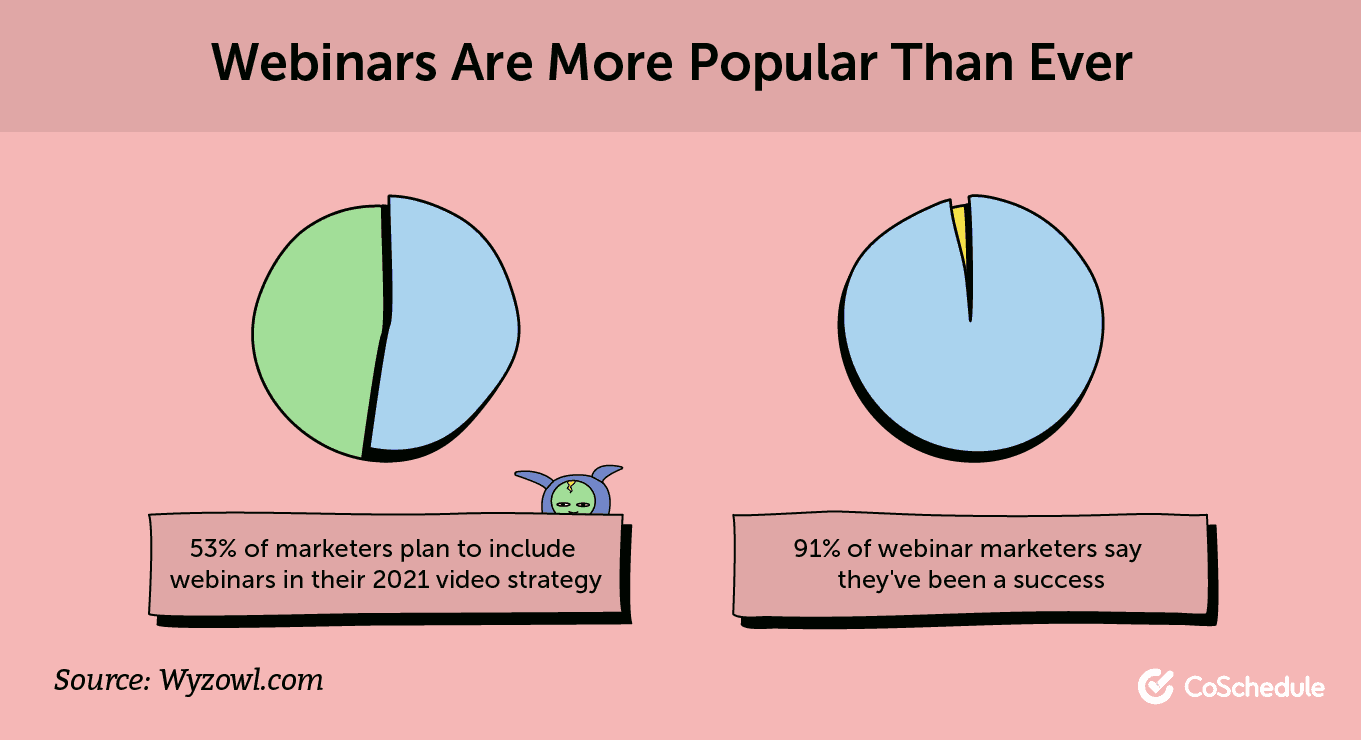 Source
Smart Strategies to Enhance Your Webinar Scheduling
With the benefits of webinar scheduling clear, be sure to follow the seven best practices below to schedule a webinar that resonates with your target audience.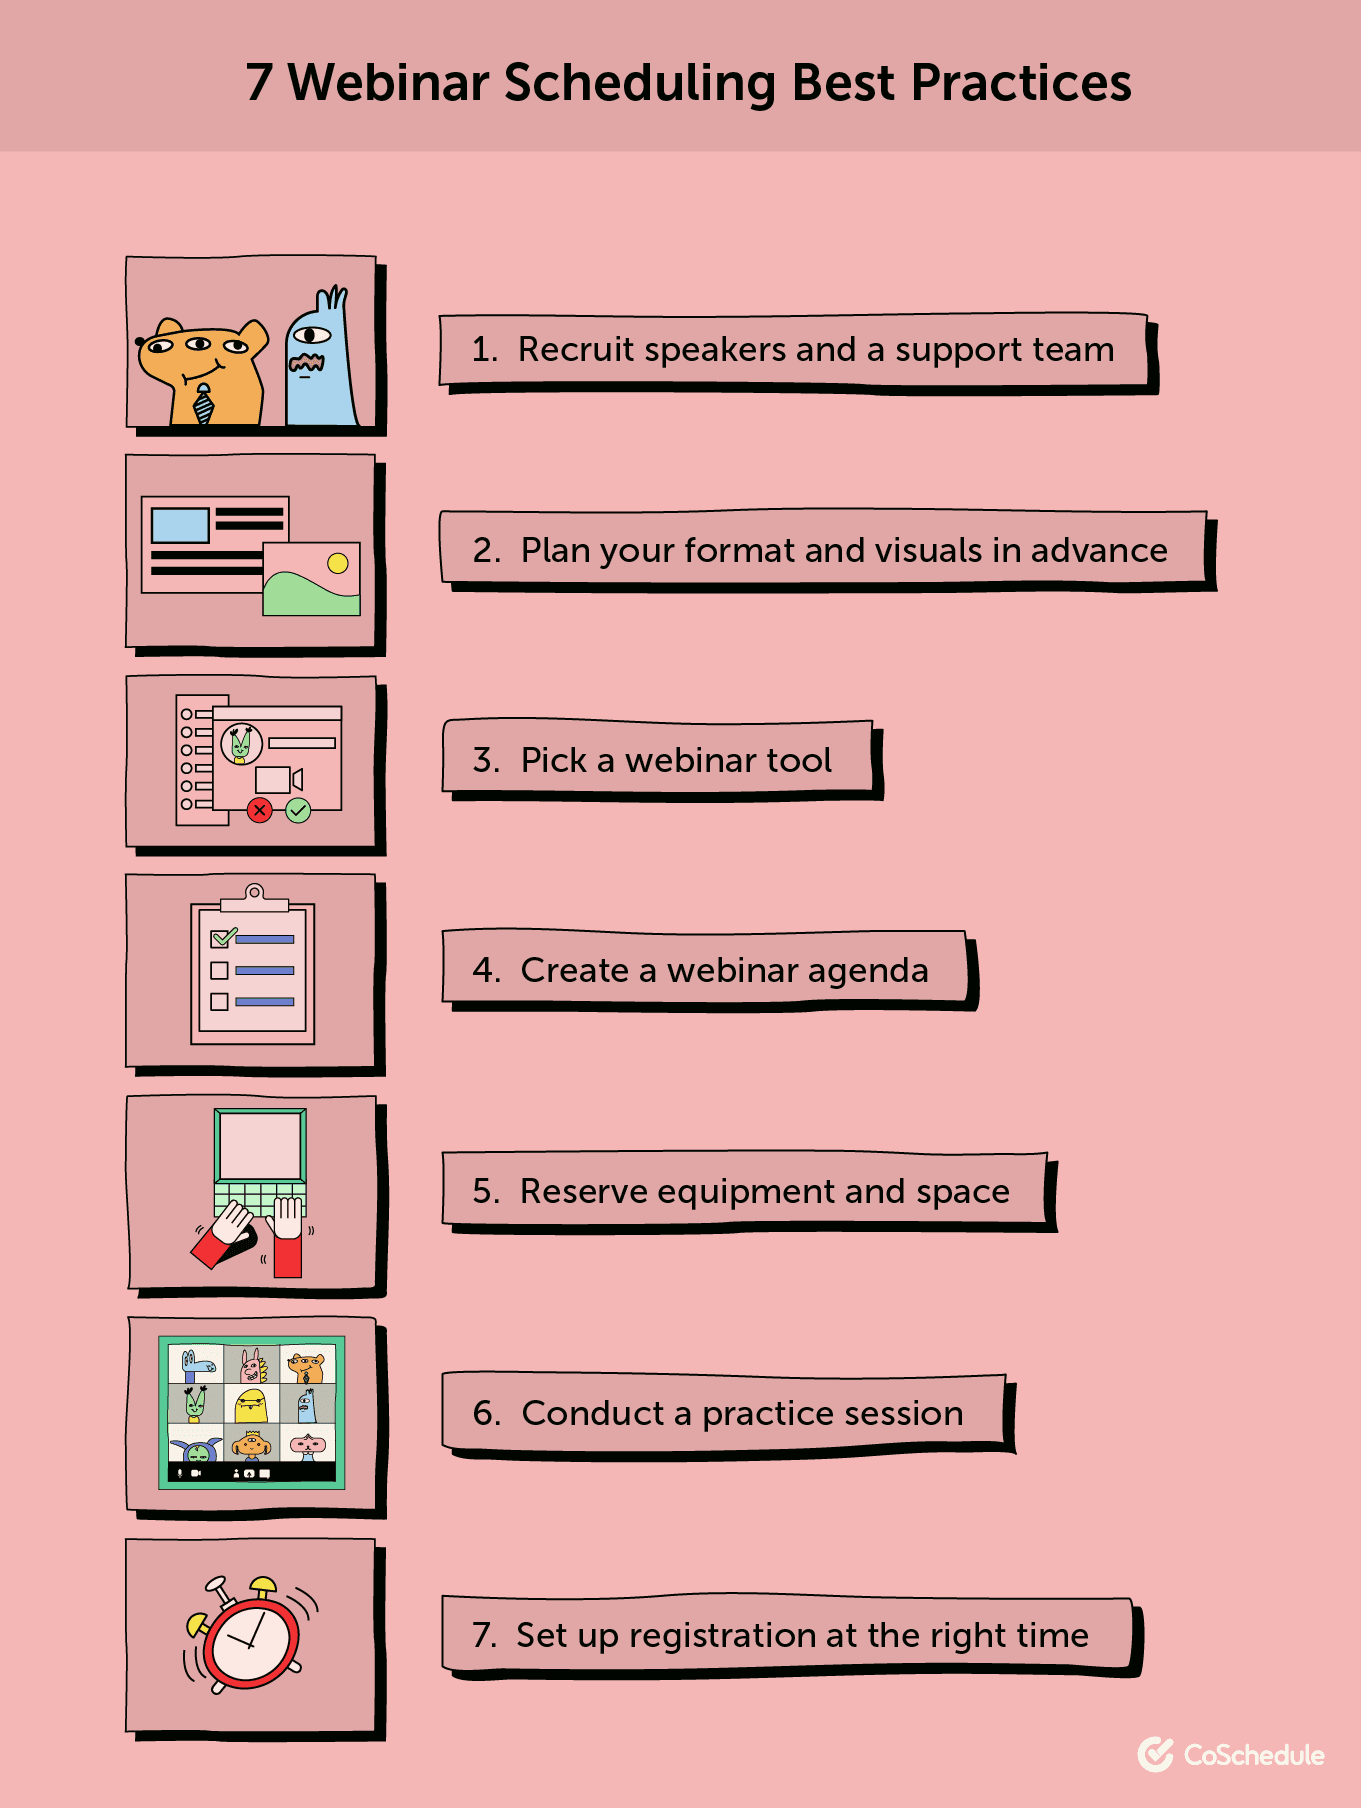
1. Recruit Speakers and a Support Team
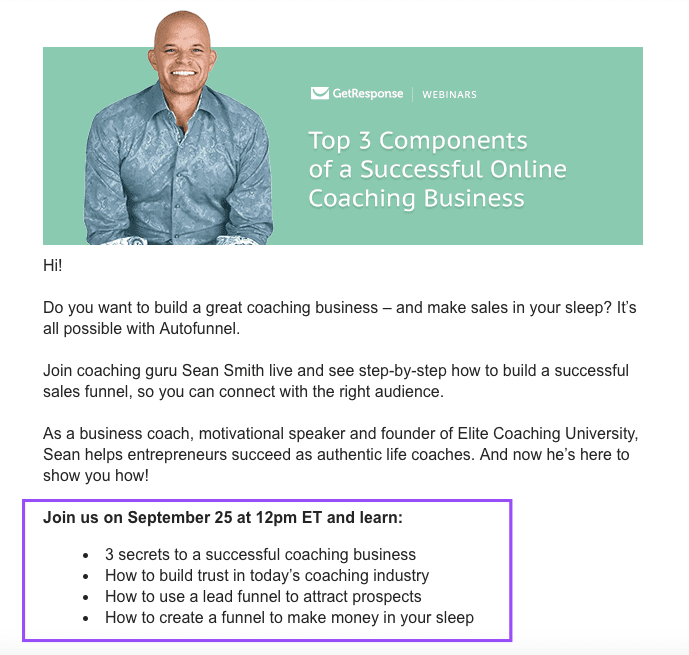
Hosting a webinar typically involves three main stakeholders — the organizer, the presenter(s), and the assistants.- Organizer: The person in charge of deciding the webinar topic, recruiting a speaker, marketing the event, setting up the registration page, and interacting with participants before and after the webinar. Essentially, the organizer is responsible for making all the arrangements and ensuring a smooth event that drives results.
- Presenter(s): The person(s) responsible for creating and delivering the webinar content. They may also interview subject matter experts and encourage audience participation.
- Assistants: Additional support people who help in answering technical and logistical questions (such as "I can't hear the audio”), typically in larger events with a bigger audience.
 Source: Envoke
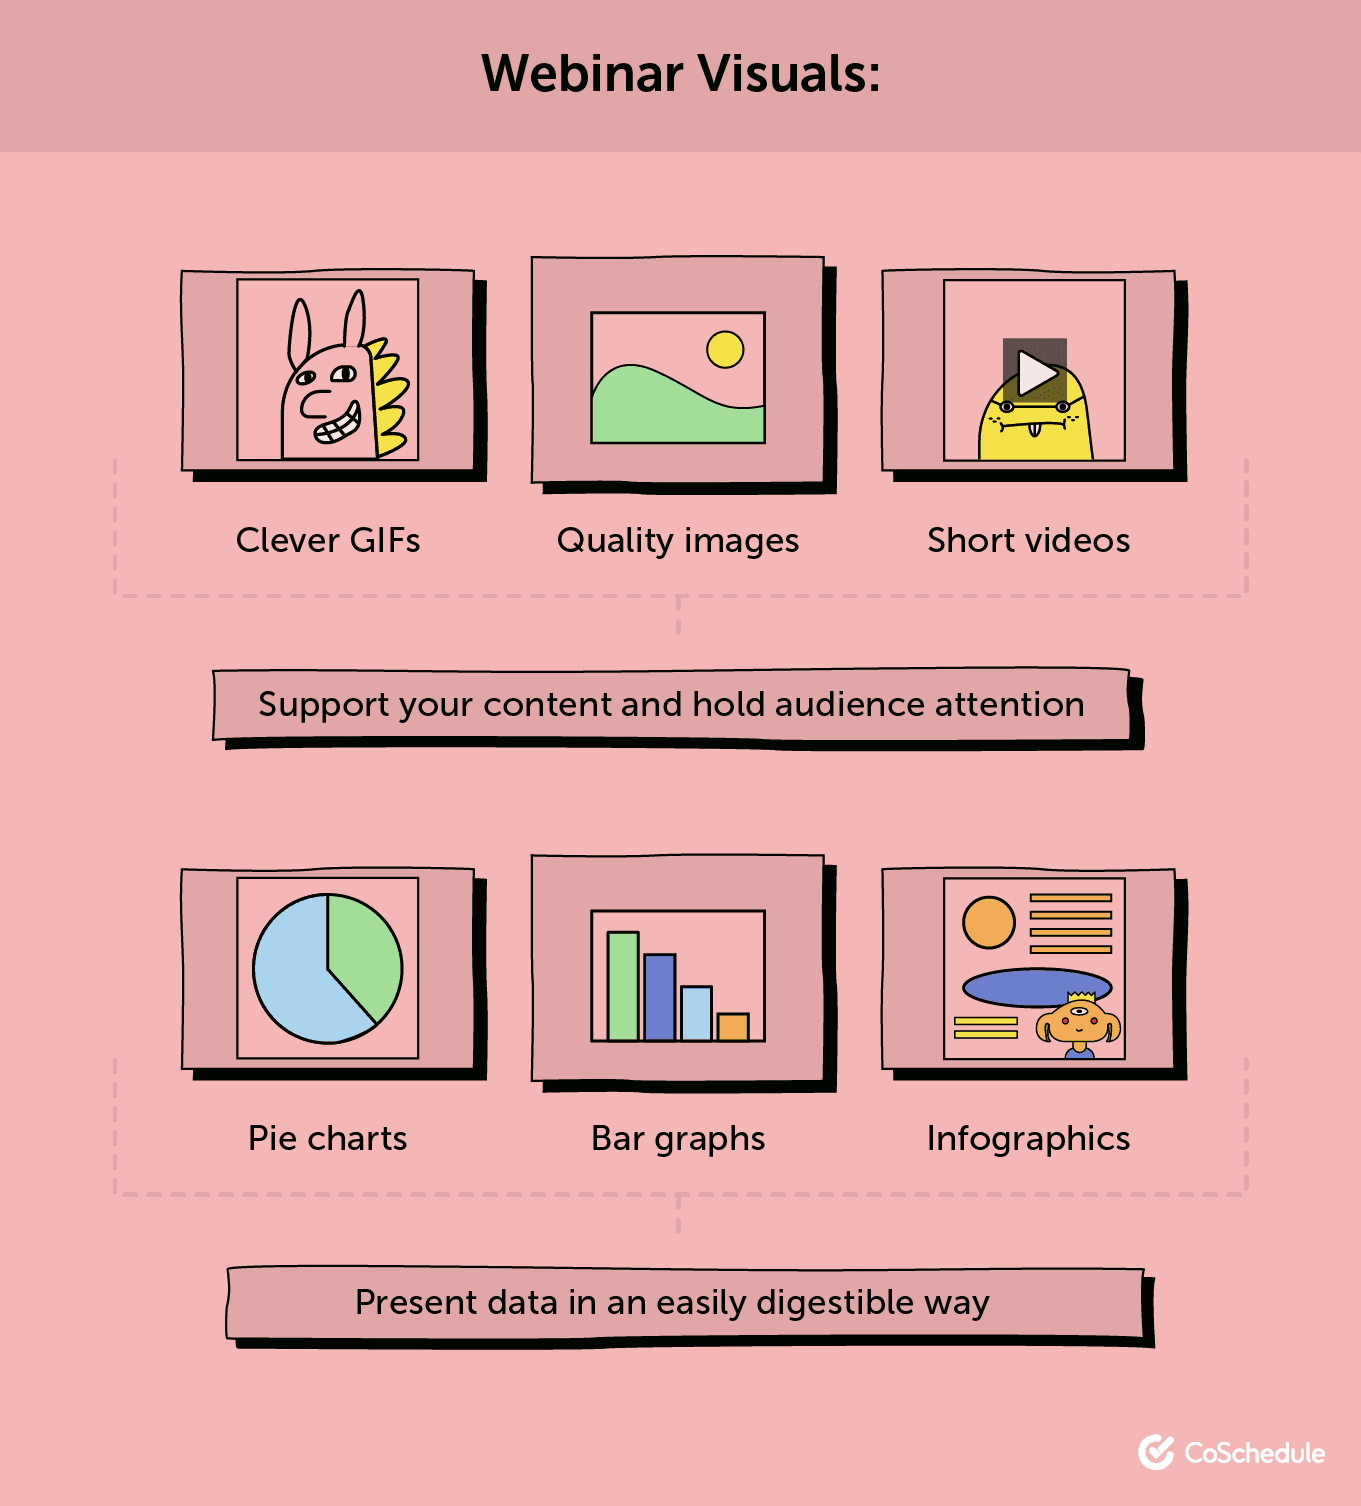
2. Plan the Format and Visuals in Advance
Besides the standard single-presenter webinar, here are a few popular webinar formats you can use:- Panel Discussion: This format keeps your audience hooked with several experts voicing their opinions on a topic of interest. If panelists have different skills and experiences, they can offer a lively discussion with varied insights and perspectives.
- Interview: This simple Q&A format provides a more personal approach, which makes the audience feel like they’re getting uncut insider information from an influential expert first-hand.
- Interactive: This format enables the audience to directly participate via presenter-led exercises and facilitated conversations. When done well, participants receive a deeper understanding of the topic as they're fully engaged in the dialogue and the exercises.
3. Pick a Webinar Tool
There’s no shortage of webinar software. When weighing your options, consider the following questions:- How many participants does the tool accommodate?
- What is your budget per webinar?
- Which features do you need?
- Does the tool offer integrated, web-streaming audio?
- Do you wish to save the webinar content for later viewing and repurposing?
4. Create an Agenda for the Webinar
Setting up a clear plan in advance about what you’ll cover in your webinar is an obvious yet crucial step. Block time in your calendar around three or four weeks before your webinar to have a meeting with your presenters and/or speakers to figure out things like:- The audience questions you'll answer and the order in which the speakers will present.
- The presentation content and flow. The slides and accompanying material should be ready at least a couple of days before the practice session so you have enough time to revise and finalize the content.
- An agenda with the subtopics to cover and the duration of each segment.
5. Reserve Your Equipment and Space
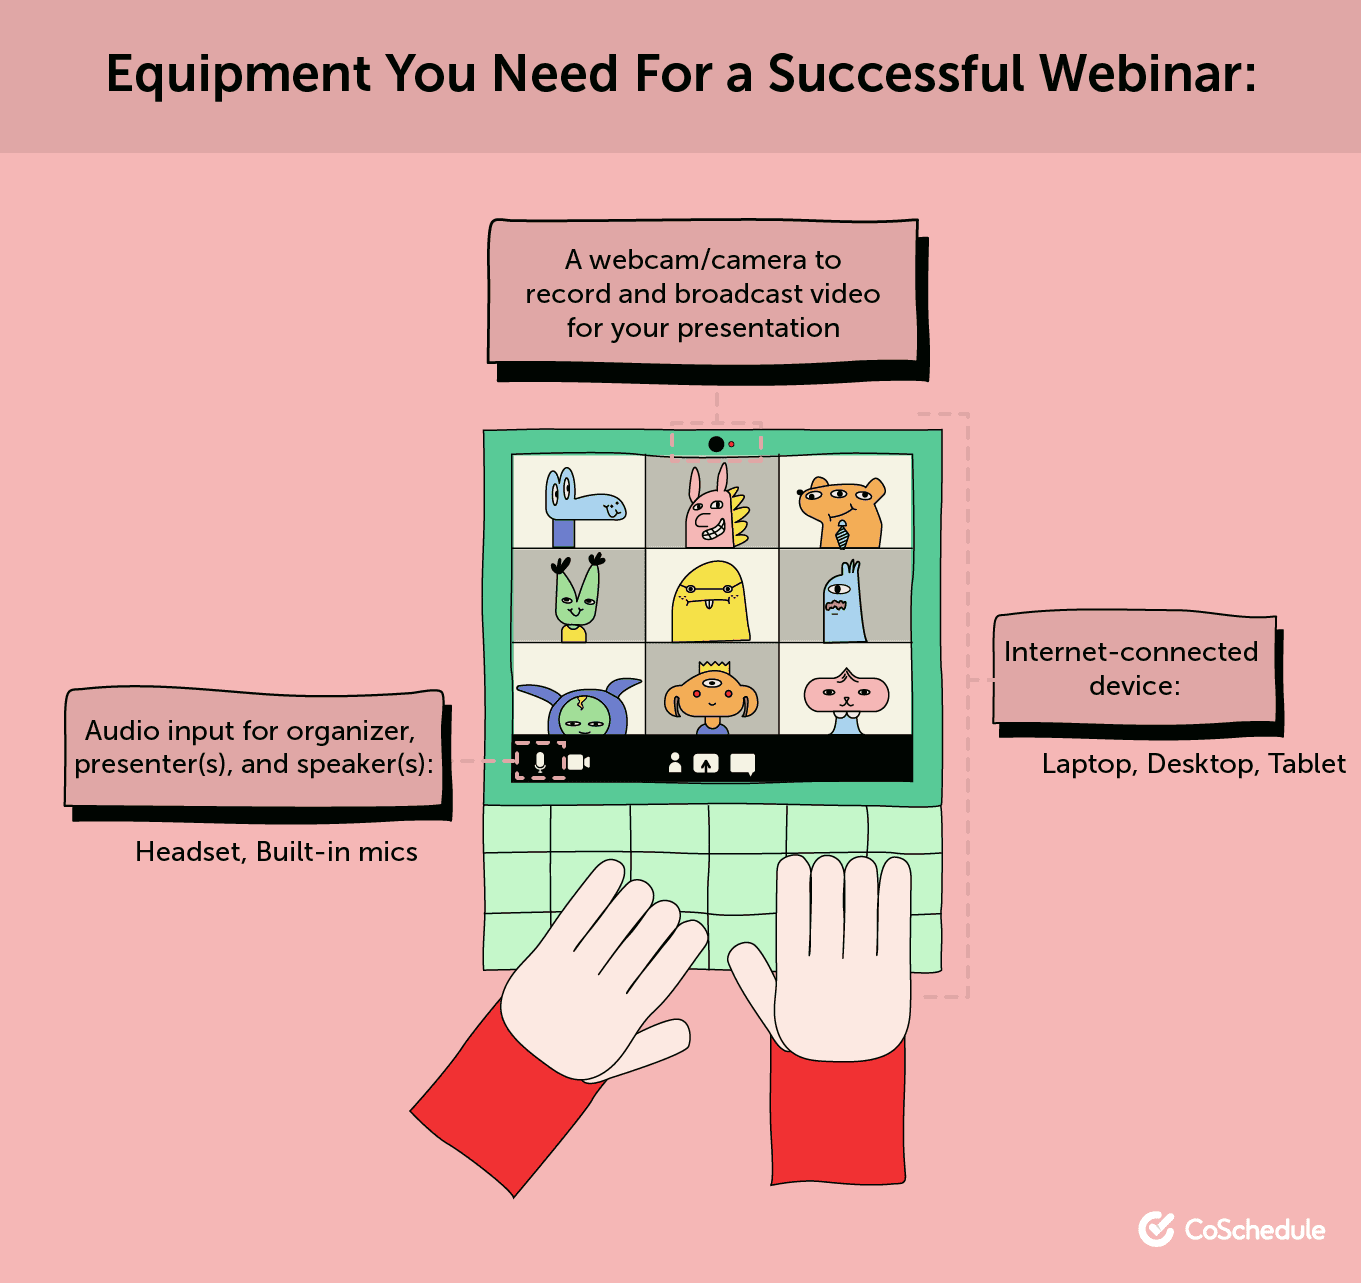
No matter the equipment you use, you need a quiet space to host your webinar without disturbances. Book a conference or meeting room where there’s no background noise and the internet connection is strong. To host a successful webinar, you need the following equipment:- An internet-connected device such as a laptop, desktop, or tablet.
- Audio input for the organizer, presenter(s), and speaker(s). A headset is ideal, but your device’s built-in microphone may also get the job done.
- A webcam if you’d be broadcasting a video along with the presentation.
6. Conduct a Practice Session
Five-to-seven days before the event, conduct at least one dry run with all participants to eliminate any unresolved questions or technical issues. Go through your presentation slide-by-slide, as per the agenda, as if you’re conducting the actual event. Quickly recap how to use the webinar tool and the features that are available to the presenters. Ensure everyone knows whom they should turn to (and how) if they run into hiccups during the webinar. Do an equipment check to make sure all of your presenters' systems, webinar software, headsets, and other equipment are working as expected. Review the presentation and visuals to ensure everything is in the right order and the speakers know where they step in. A dry run serves as a great opportunity to build enthusiasm for the upcoming event and boost confidence that the event will be a resounding success.7. Set Up Registration at the Right Time
Before you promote your webinar, you need to build a landing page to register attendees. Some webinar and conferencing tools include a built-in registration feature. You can also use a separate event registration tool like Splash or Bizzabo. The majority of registrations occur in the last week, so send a reminder email invitation a week and a day before the event to those who haven’t registered and create a sense of urgency. Pro-tip: It’s a good idea for you to leverage a strong email marketing service while working on promoting your webinars.Essential Checkpoints for Your Webinar
Here is a neat checklist with clear guidelines to plan a flawless webinar with ease.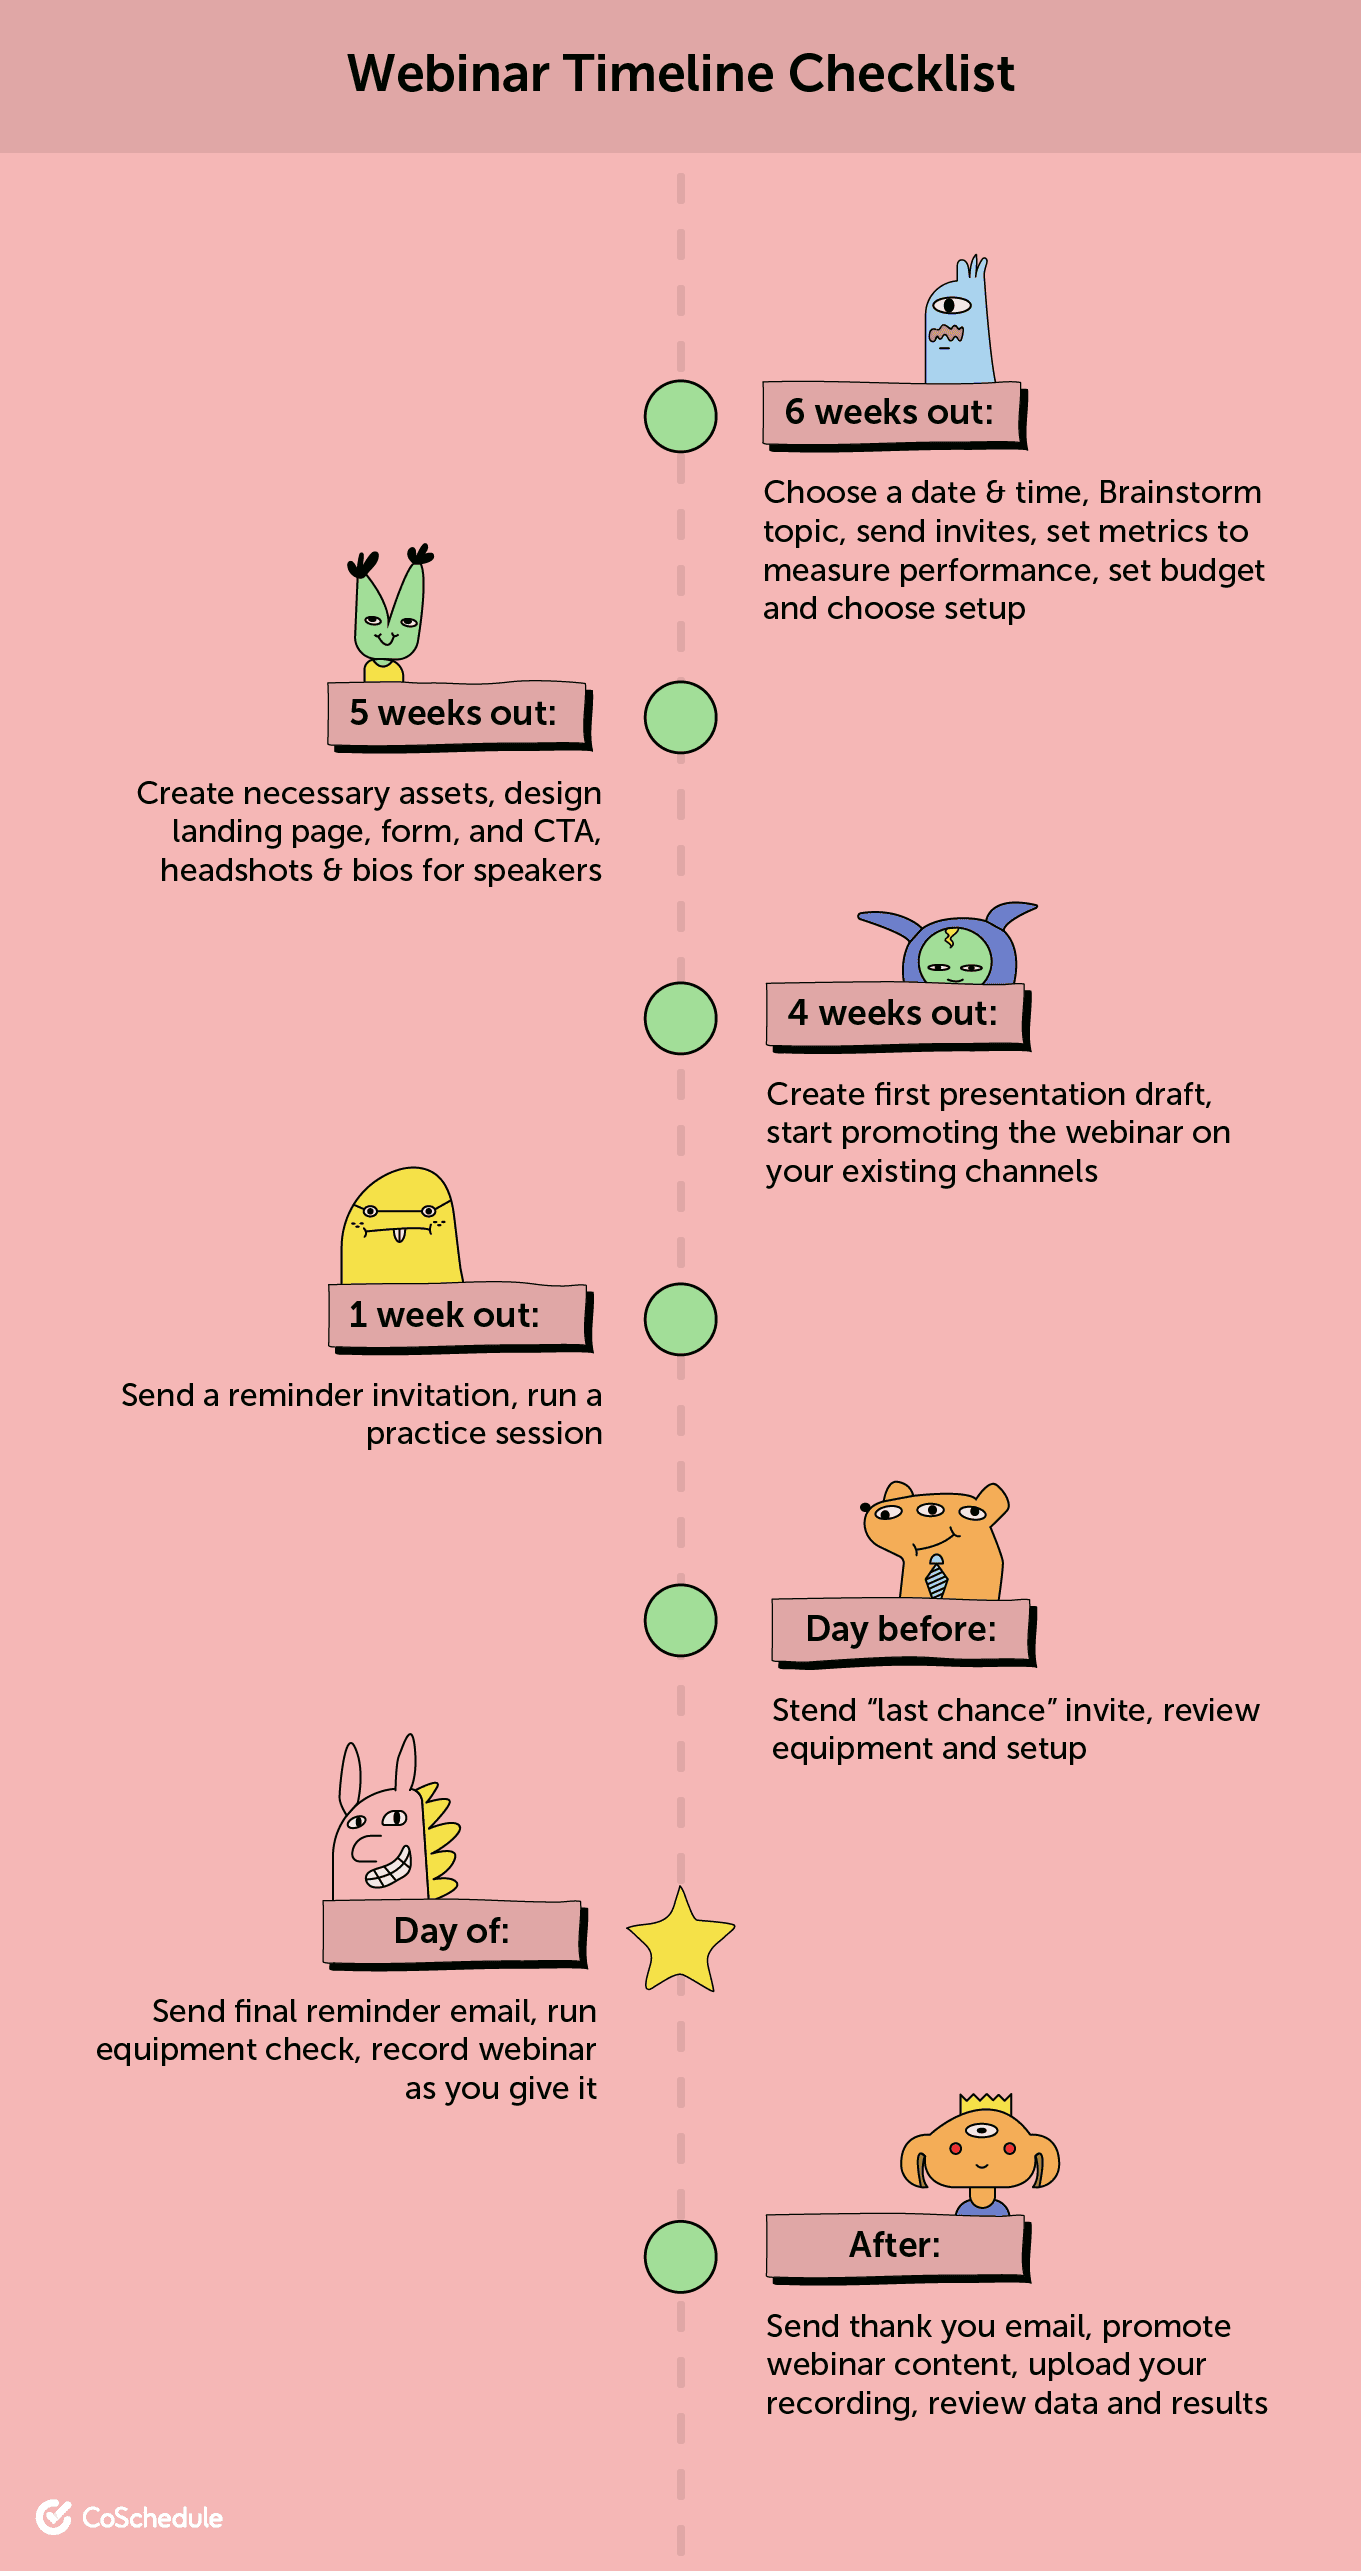
6 Weeks Before the Webinar
- Decide on the date and time of your webinar that’s best for your target audience.
- Brainstorm the topic with your content team. Check Google Analytics and existing best-performing content for powerful ideas.
- Send invites to speakers and experts.
- Set webinar metrics you will use to measure your performance (such as attendance rate, conversion rate, leads generated, etc.).
- Set a budget and decide on the setup (equipment, space, etc.).
5 Weeks Before the Webinar
- Create your marketing assets such as your registration page and the email sequence, which includes an invitation, confirmation, and reminder emails.
- Design the landing page content, form, and call to action.
- Include a brief summary with 3-4 bullet points explaining what attendees will gain from the event.
- Also include headshots and brief bios of the speakers.
4 Weeks Before the Webinar
- Work with your team to create the first draft of your webinar presentation.
- Keep the content more visual with supporting bullet points of text.
- Use appropriate font sizes and backgrounds. Ensure branding consistency.
- Start promoting your webinar using familiar channels such as your website, email list, social media profiles, paid ads, etc.
1 Week Before the Webinar
- Send a reminder invitation and retarget those who haven’t registered. Create a sense of urgency and exclusivity.
- Convene with your presenters and speakers to review your registration list and conduct a practice session.
Days Before the Webinar
- Send out your “last chance to register” reminder on social media and email.
- Review the setup of your webinar — background, equipment, internet connection, etc.
Day of the Webinar
- Send the final reminder email to registered people.
- Arrive early and ensure you are ready to go at least 30 minutes in advance.
- Run a quick equipment and agenda check.
- Answer all audience questions at the end of the webinar to boost trust in your brand and share the next steps you’d like them to take.
- Record your webinar to promote it later as on-demand content.
After the Webinar
- Send a thank-you email to everyone who registered for your webinar with a copy of the recording, slides, and any other relevant material.
- Promote your webinar content to those who weren’t able to attend.
- Upload the recording to your website and social platforms like YouTube or LinkedIn.
- Review data to see how the event performed against the metrics you set out.


