
Getting Started Guide: Free Calendar
Build Your Own Marketing Calendar
Build your ideal marketing calendar with these helpful tips & tricks.
In This Lesson:

 Now that your existing projects have been added to your CoSchedule Calendar, you can now add all of your new projects.

 Continue adding planned marketing projects to your calendar to create visibility into all of your projects.
 The project type helps you understand the kind of content you’ll create without having to click into the project for more details.
Why is a Project Type important?
The project type helps you understand the kind of content you’ll create without having to click into the project for more details.
Why is a Project Type important?
 2. Select Integrations from the menu list under Settings.


- Bulk Import Existing Projects & Content On Your Marketing Calendar
- Add A Project To Your Calendar On The Publish Date
- Give Your Project A Name
- See The Big Picture & What’s Coming Next: Project Card Breakdown
- Add Your Integrations
Core Concept: Put Everything In Your Calendar
Bulk Import Existing Projects & Content On Your Calendar
- Select Bulk Project Import in the Create drop down menu.
- Choose which platform to import your projects.
- Follow the provided directions to import all your content into your CoSchedule Calendar.
Now that your existing projects have been added to your CoSchedule Calendar, you can now add all of your new projects.
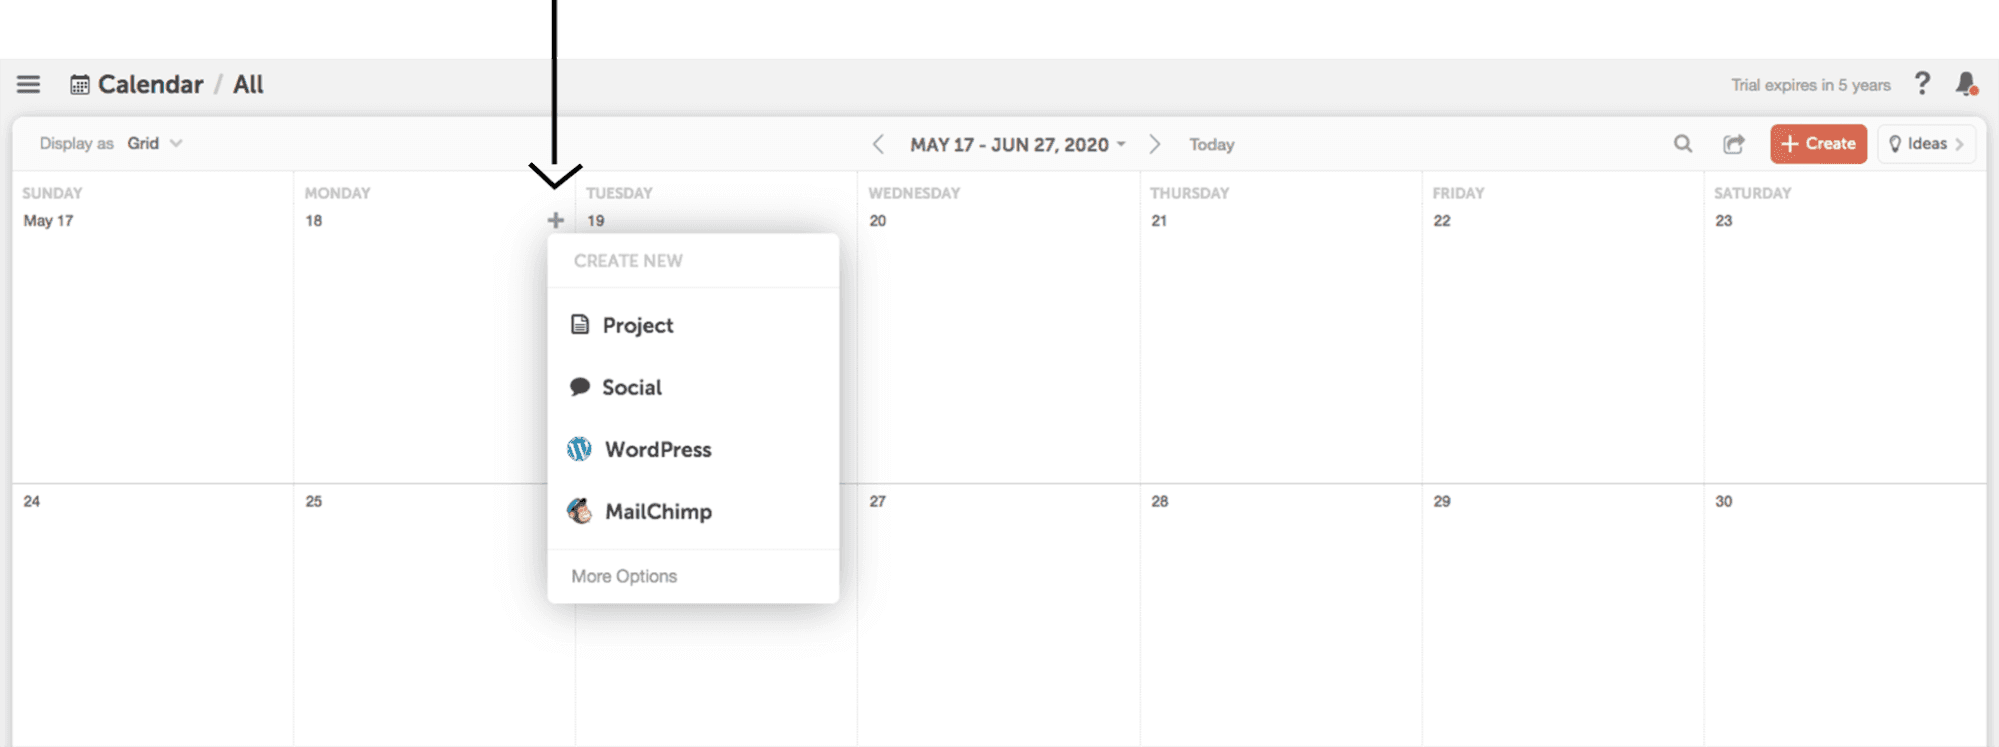
Add A Project To Your Calendar On The Publish Date
- This provides visibility, so you (and others) know what’s going live and when.
- It helps set priorities (i.e. the next upcoming project should be your priority).
- It creates a deadline – which increases the likelihood of accomplishing a project on time.
Give Your Project A Name
After you’ve clicked the plus sign on the publish date and selected the project type, you’ll need to give your project a name. The project name shows up on your project card when you are on the Calendar view.
Continue adding planned marketing projects to your calendar to create visibility into all of your projects.
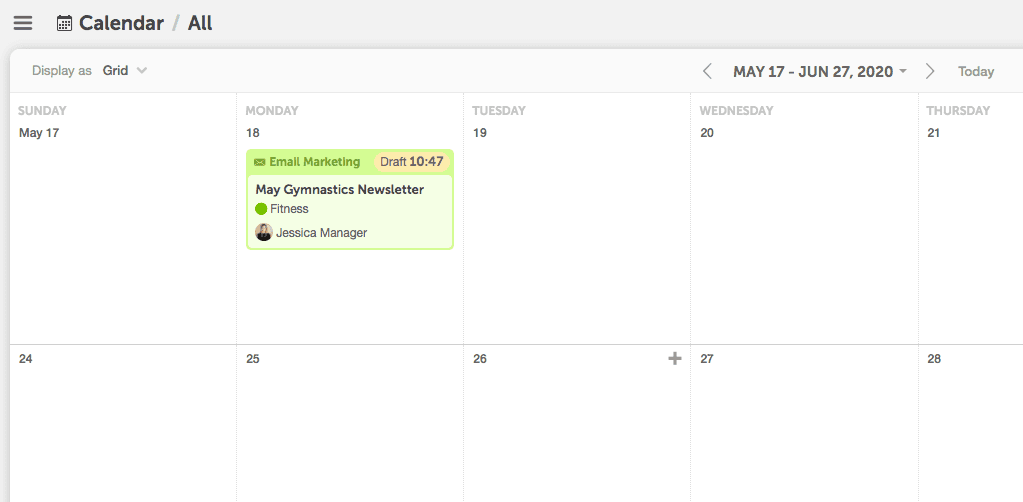
Project Card Breakdown: See The Big Picture & What’s Coming Next
The project type helps you understand the kind of content you’ll create without having to click into the project for more details.
Why is a Project Type important?
- It shows the tactics that contribute to your marketing strategy.
- It helps inform others what you’re working on for better visibility.
- It highlights project frequency so your strategy can be more balanced.
- It allows you to create saved, filtered views of your calendar (i.e. social messages only, email calendar, etc.).
Add Your Integrations
- WordPress & HubSpot – Whenever someone creates a new blog post in WordPress or HubSpot, it will automatically appear on your Calendar.
- Email Marketing – Whenever someone creates a new email in Mailchimp, HubSpot, Constant Contact, or Campaign Monitor, a new project card will appear on your Calendar.
- Social Media – Your Free CoSchedule Calendar allows you to add one social media profile, so you can plan, create, and schedule your social messages alongside your other marketing projects. Additional profiles can be added to any paid plan.
2. Select Integrations from the menu list under Settings.