How to Plan Projects, Events, and Campaigns With Marketing Timelines
 You're hard at work documenting an actionable marketing strategy, and now it's time to map out timelines for all your marketing projects.
Marketing timelines make it easy for your entire team to see:
- Which projects are coming up in the pipeline.
- What they need to be working on right now.
- When their deadlines are, so they don't get missed.
What is a Marketing Timeline?
A marketing timeline allows your entire marketing team to see all projects, events, campaigns, and sales that will be happening throughout the year. They can be used to map out deadlines on a quarterly, annual, or per-project basis.
Why Should Your Team Have a Marketing Timeline
There are many reasons why a marketing team would adopt a marketing timeline into their overall marketing strategy.- Timelines allow your team to see a full overview of which marketing activities are coming up.
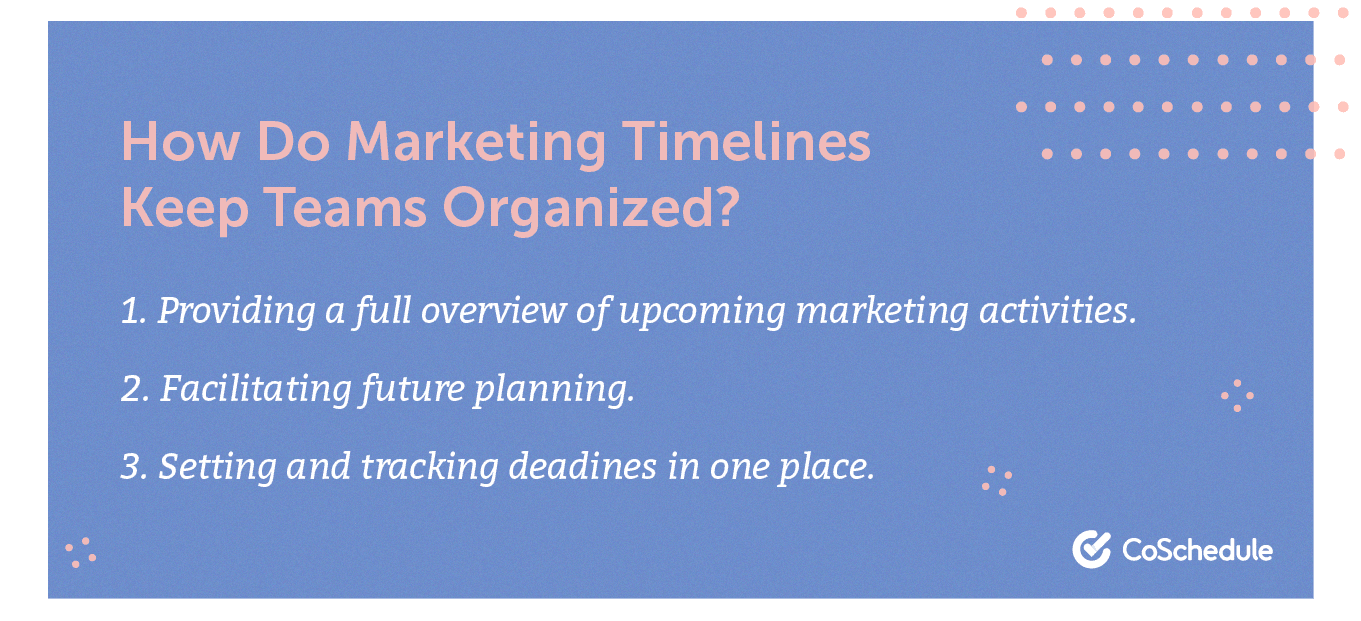
- They allow you to (as we say at CoSchedule) plan your work, then work your plan. Planning ahead can mean the difference between a well-executed project and one that is thrown together haphazardly.
- Finally, they help keep all of your marketing tasks on track. These brief overviews can show each member of your marketing team what they need to get done for a specific project — more importantly, when it’s due. That means less stress and fewer missed deadlines.
Create an Annual Marketing Timeline
The first timeline your marketing team will need to create is an annual marketing timeline. These should contain every project, sale, and campaign that you plan to run in a year. Why is a timeline like this so important? For each one of your projects, sales, and campaigns, fill out the:
- Title
- Team that’s responsible for this project
- Team budget
- Resources you might need
- Goals you have
 Next, you need to fill out the start and end date of your campaign or project. These dates should begin the day you start your ideation or planning process for a specific campaign. The dates should end the day you complete your last report on said project.
 The last thing you need to do in this section of your template is choose the color code for your project. This will be used in the top part of your template, and it will help you identify which project is which.
 After that, go up to the top part of your marketing template and fill in the color code on the dates that your project will be running. It should look like this.
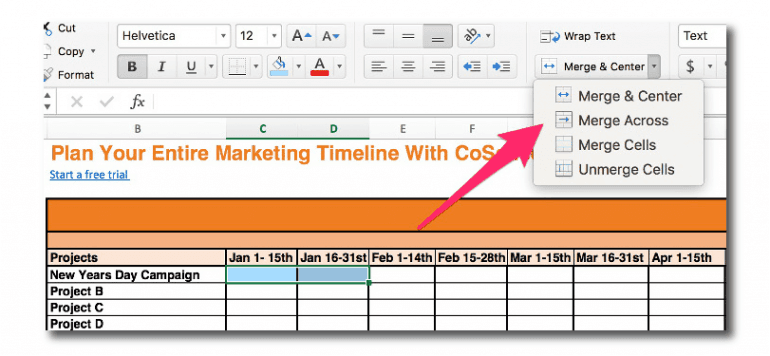
 You can also merge the two sections by selecting Merge Across from the menu in Excel:
 Repeat this process for every project until your timeline is filled.
You can also create a more collaborative timeline by uploading your spreadsheet to Google Drive or another cloud-based program.
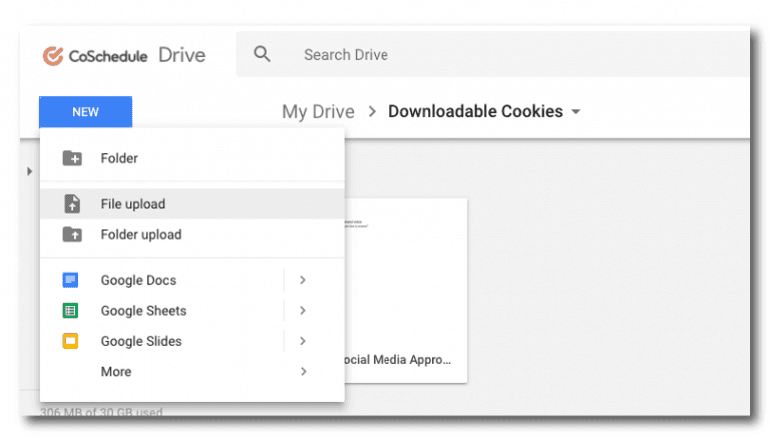
To convert your Excel document to Google Sheets, go to your Drive and select Upload a File.
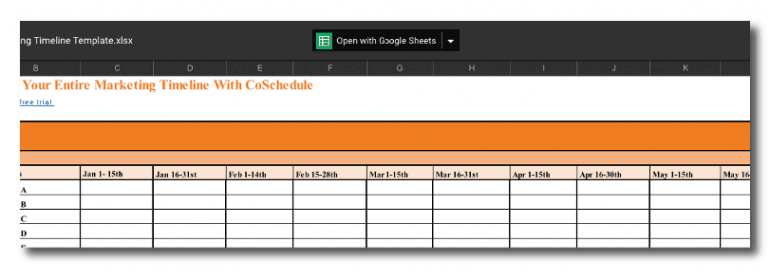
 Select your annual template and click Open with Google Sheets.
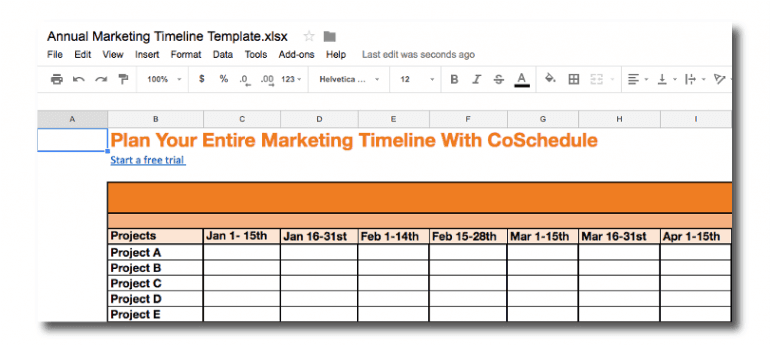
 After that, Google should convert your template, and you’ll be able to share it in Google Drive.
Organize Your Marketing and Sales Campaign Timeline
The next template we’re going to walk you through is your marketing and sales campaign timeline. Your marketing and sales campaign timeline is going to help track every sale and accompanying promotional campaign. This will help you avoid last minute planning or forgetting about a sale entirely. After all, as a marketer, you have a lot to do.Your marketing and sales campaign timeline is going to help track every sale and accompanying promotional campaign.
Click To Tweet- Holidays
- Seasonal sales
- Events
- Anniversaries
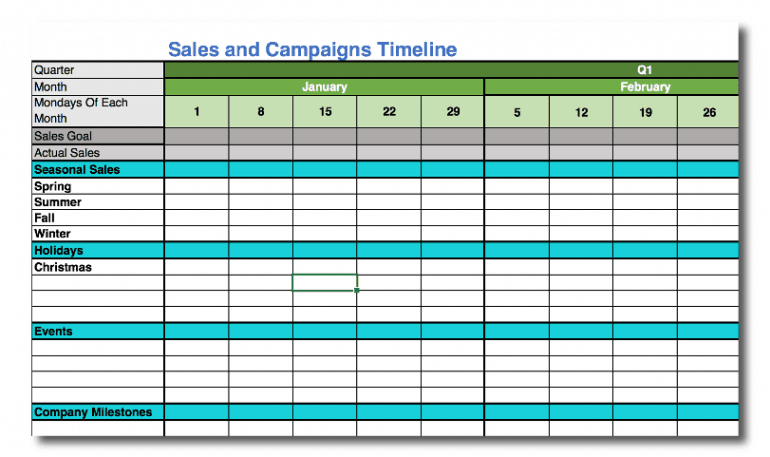 In your calendar, highlight what times these sales and their campaigns will occur, so it looks something like this.
 As you continue to scroll through your template, you’ll notice there are sections labeled for different marketing promotional tactics.
These are here so you can indicate to your team what tactics you’ll be using to run the promotional campaigns that are attached to each sale. Some common tactics are:
- Social media
- Blog posts
- Landing pages
- Email newsletters
- Press releases
- Print ads
- Billboards
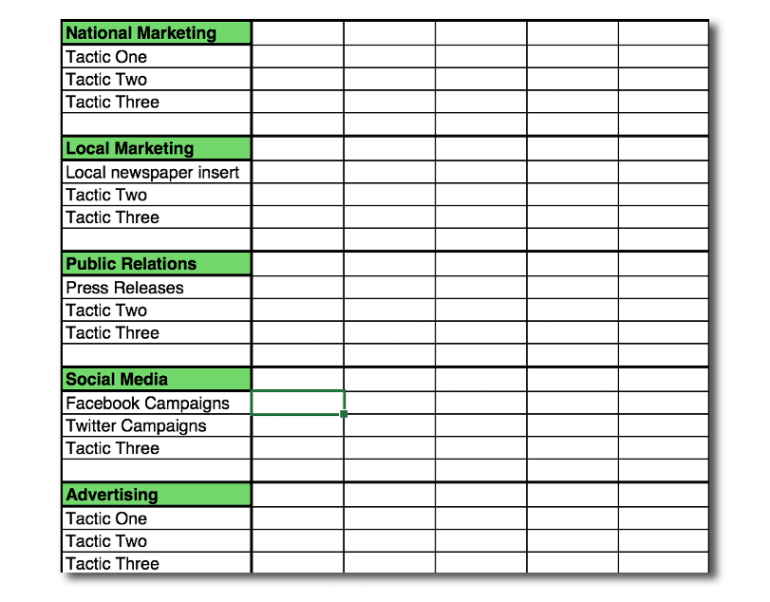 After you’ve determined your tactics, highlight each week of a sale that you’re going to be using a particular tactic, so it looks something like this.
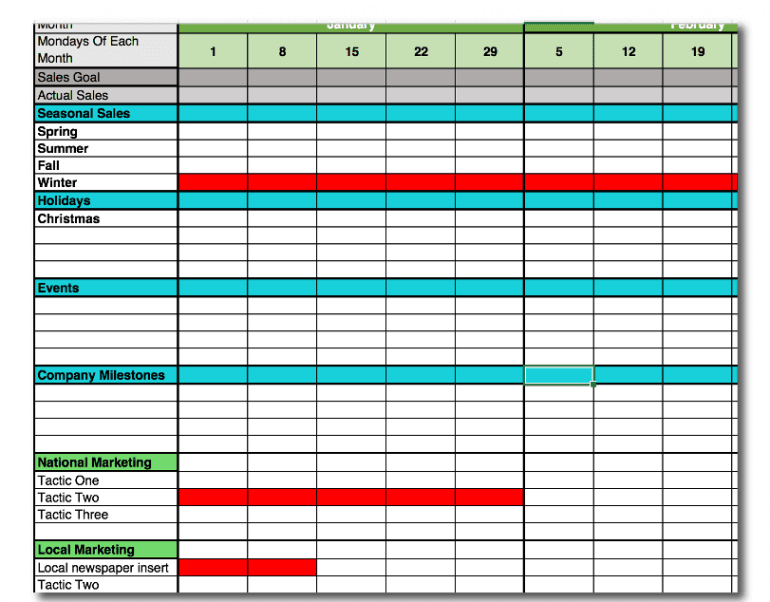 In the case of this example, you can see that during the first two weeks of your winter sale you’ll be running an insert in the local newspapers.
Fill out each of your sales and campaigns until your template is complete.
Map Out Projects With Your Project Timeline Template
The next template in your bundle is your project timeline template. This template will help you break down each one of the projects and campaigns that you listed in your annual marketing timeline. Why is a project timeline like this so critical? Each one of your projects is going to have multiple moving parts that it can become hard to keep track. Your project timeline will help you see all of those moving pieces on a project or campaign-based level. This provides a more granular view of each project’s timeline, giving visibility to anyone working for when their part is due.Your project timeline will help you see all of those moving pieces on a project or campaign-based level.
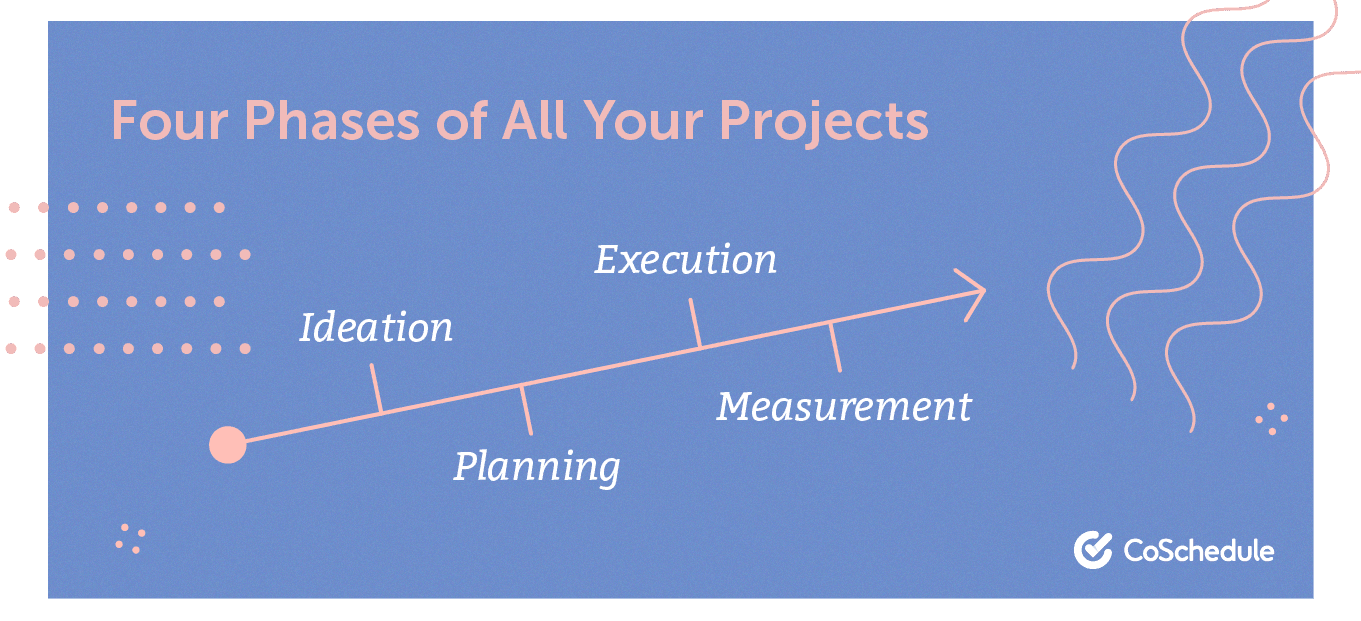
Click To Tweet- Ideation
- Planning
- Execution
- Measurement
Ideation
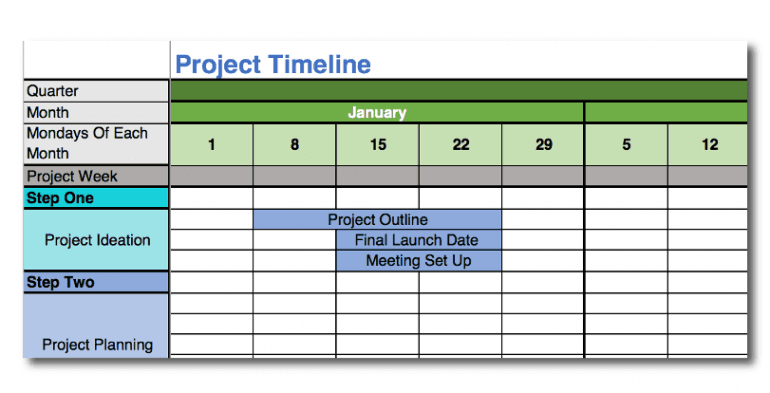
The ideation phase of your project planning is the first phase. This is where the initial idea of your project comes to fruition.- Project plan: What does the overarching process of your project planning look like?
- Initial launch: Decide when your official launch date will take place.
- Meeting set up: When are your meetings going to occur, and who needs to be in which ones?
Planning
The next phase of your project is the planning phase. This is the phase where you need to determine everything you need to do to publish the project. It could include things like:- Project scope: What needs to be completed to consider this project ready for launch?
- Goal setting: What are you hoping to achieve at the end of this project?
- Budgeting: What funds do you have to complete the project? Where are they going?
- Work breakdown: Who is doing what on this project? What are their deadlines?
- Contacts: Who are your key points of contact?
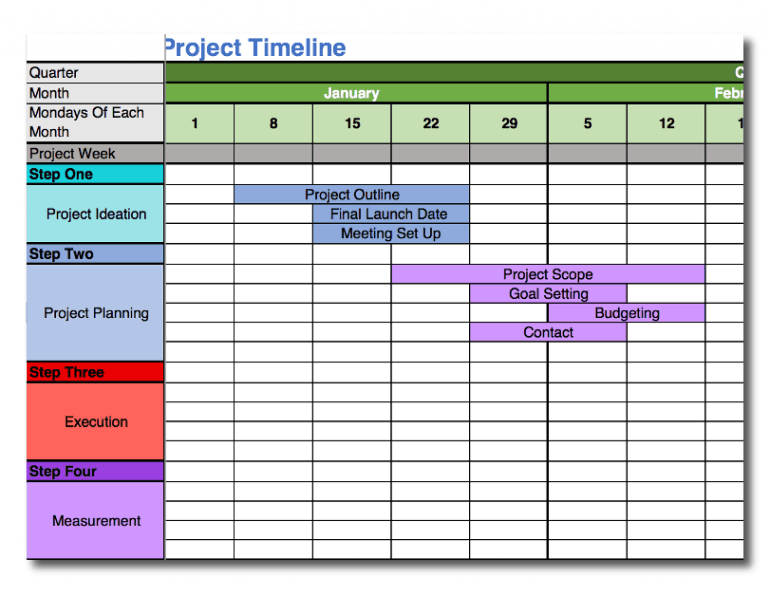 It’s important to note that some of your planning steps may overlap with one another, and that’s okay!
Execution
Next is the execution phase of your project. At this point, you’ve hit the Go button, and now you need to keep track of everything that is going on. How you decide to keep track of your execution process will be up to you. Here are a few things you could add to your timeline.- Project launch: When are you publishing your project?
- Status and KPI tracking: What is the status of your project, and what metrics do you need to track to make sure that you’re going to make your goal?
- Objective execution: Is each objective you planned being completed?
- Performance of project: What is the status of your project, and can it run the full course of your plan?
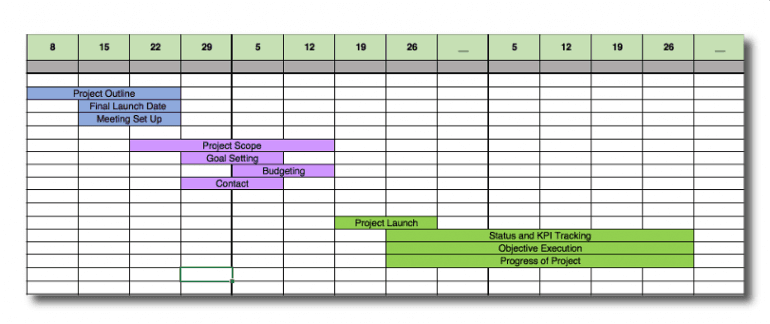 This is one phase of your project where multiple steps will most likely be overlapping as you will be tracking a lot of metrics and data at one time.
Measurement
The last phase of your project is going to be measurement. In this phase, you’re going to assess the data you gathered and determine if the project was a success or not. This phase usually falls into four steps:- Project debrief: Gather your team and talk about the successes or failures of the entire project.
- Time and cost tracking: Was your project completed on time and on budget?
- Goals met: Did you meet your goals?
- Reporting: Are there any reports that you need to put together for those who were not an active part of your project?
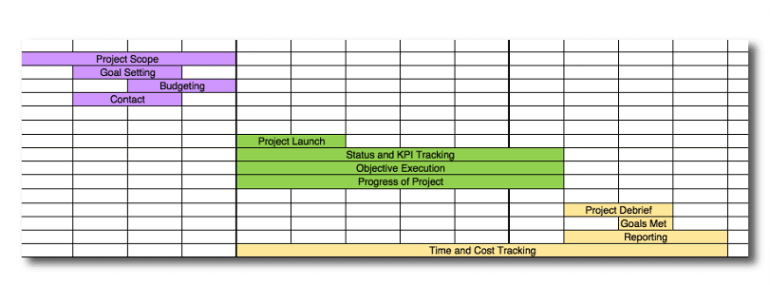 Each project that you complete will need its own timeline, so be sure to keep a blank copy of this template handy at all times.
Plan Events Marketing Event Timeline Template
The last template in your bundle is your marketing event timeline template. This template will help your team organize an event from start to finish. Why is a timeline like this important? Even if it is small, there are still lots of moving pieces that need to be taken care of in order to execute an event smoothly. Your timeline can help keep you on track and allow you to plan ahead for what is coming next.There are lots of moving pieces that need to be taken care of in order to execute an event smoothly.
Click To Tweet- Planning
- Promotion
- Final preparation
- Post event
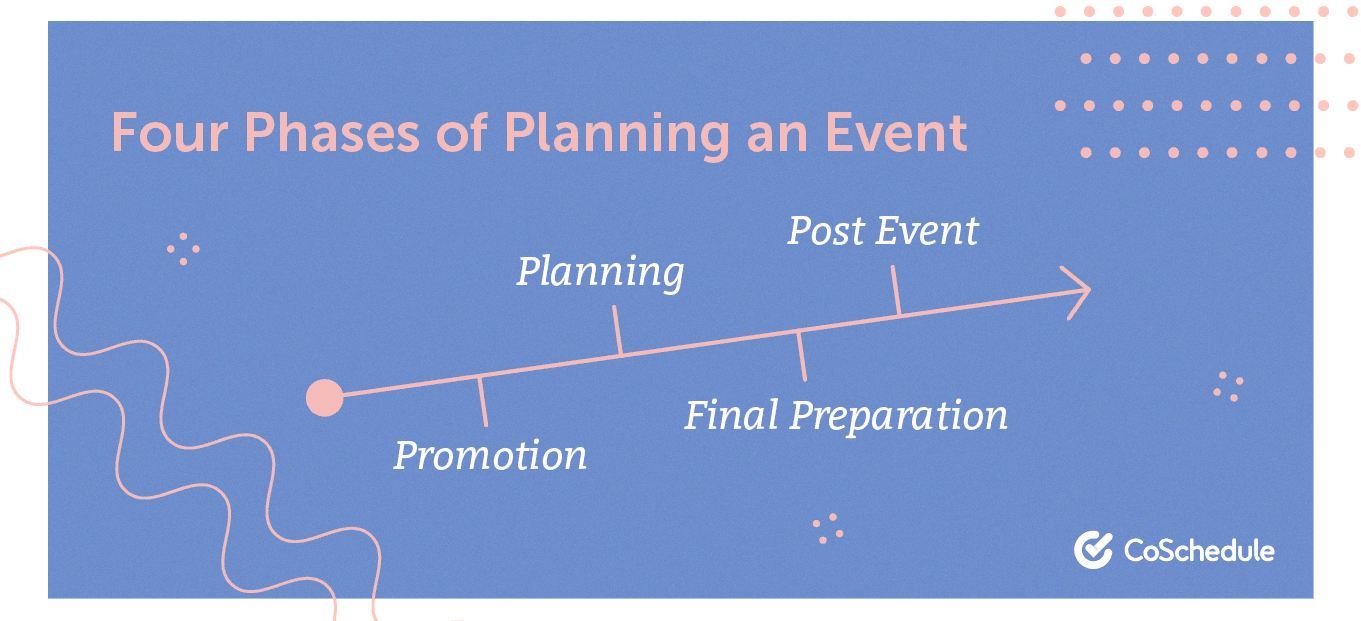 Each one of these phases are broken down into different parts that will help you plan and execute your event.
You can remove or add things to these lists based on what you decide to do for your event.
Planning
The planning phase of your event usually happens six to eight months before your event takes place. Here are some steps you could take:- Ideation. What do you want your event to be?
- Setting goals. What do you want your event to accomplish?
- Defining roles and responsibilities. Who is in charge, and who is taking care of what part of your event?
- Determining when and where event meetings take place. Who needs to be at what meeting and when?
- Deciding how many attendees need to be at an event. Is your event being enacted on a large scale with hundreds of people, or are you planning a small get together?
- Setting an event budget. How much money does your event planning committee have to spend?
- Finding your vendors and venue. Where is your event taking place, and who will be taking care of details, like food, music, etc.?
- Creating an emergency plan. What happens if something goes wrong at the venue, weather, etc.?
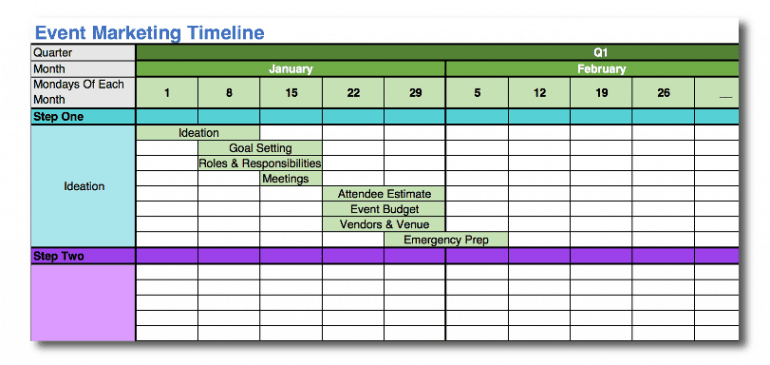 Like some of the other templates and plans, it’s common to see tasks overlap.
Promotion
The next phase of your event planning is going to focus solely on promoting said event.
As a committee, you need to determine channels in which you’re going to promote your event, what tactics you’re going to use, and when each of your promotions is going to launch.
Some examples of promotions you could run are:
- Social campaigns promoting your event
- Including event information in your email newsletters
- In-store signage
- Printing promotional posters and more
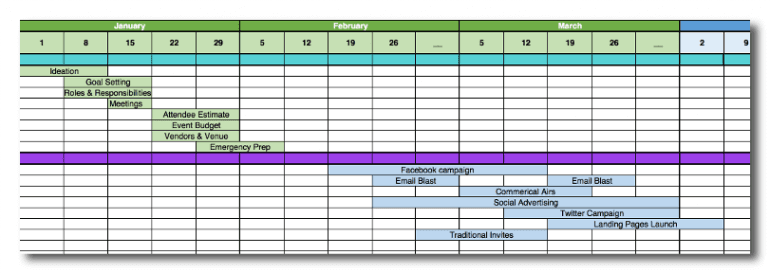 You can add or remove rows from this section of your template based on the number of promotions your team needs to run.
Final Preparations
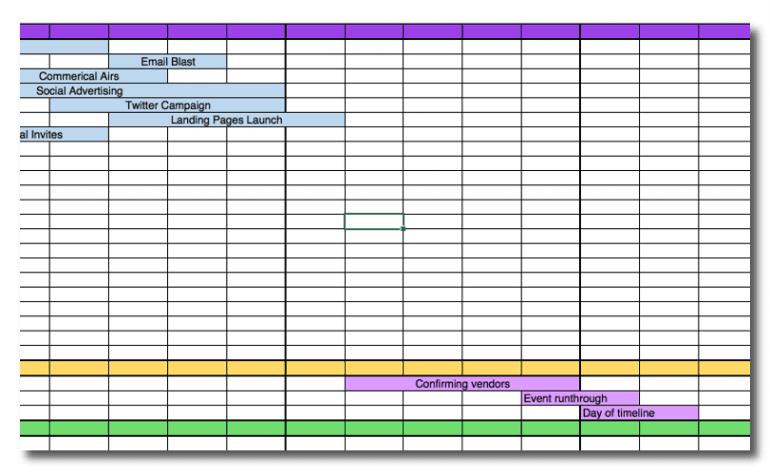
The next phase of your event planning is going to be final preparations. These are the last things that your event planning team will need to take care of before the actual event takes place. It should include things like:- Confirming your vendors. Is everyone you paid to help complete your event going to show up?
- On-site run through (if needed). Do you have a significant change or part of your event that needs to be practiced in the space beforehand?
- Creating your day of event timeline. Create a timed list of who needs to be doing what and when.
Post Event
The last thing you need to take care of is your post-event debrief and cost comparison. Your debrief should include the entire team. It should cover what did/didn’t go well and things you can learn from this recent event planning experience. Your cost comparison should be a brief review of the budget you had versus the money you spent. If you went over budget, use this time to figure out why. Record the days those meetings will take place in your template, and you’re done.
How to Plan Everything With CoSchedule
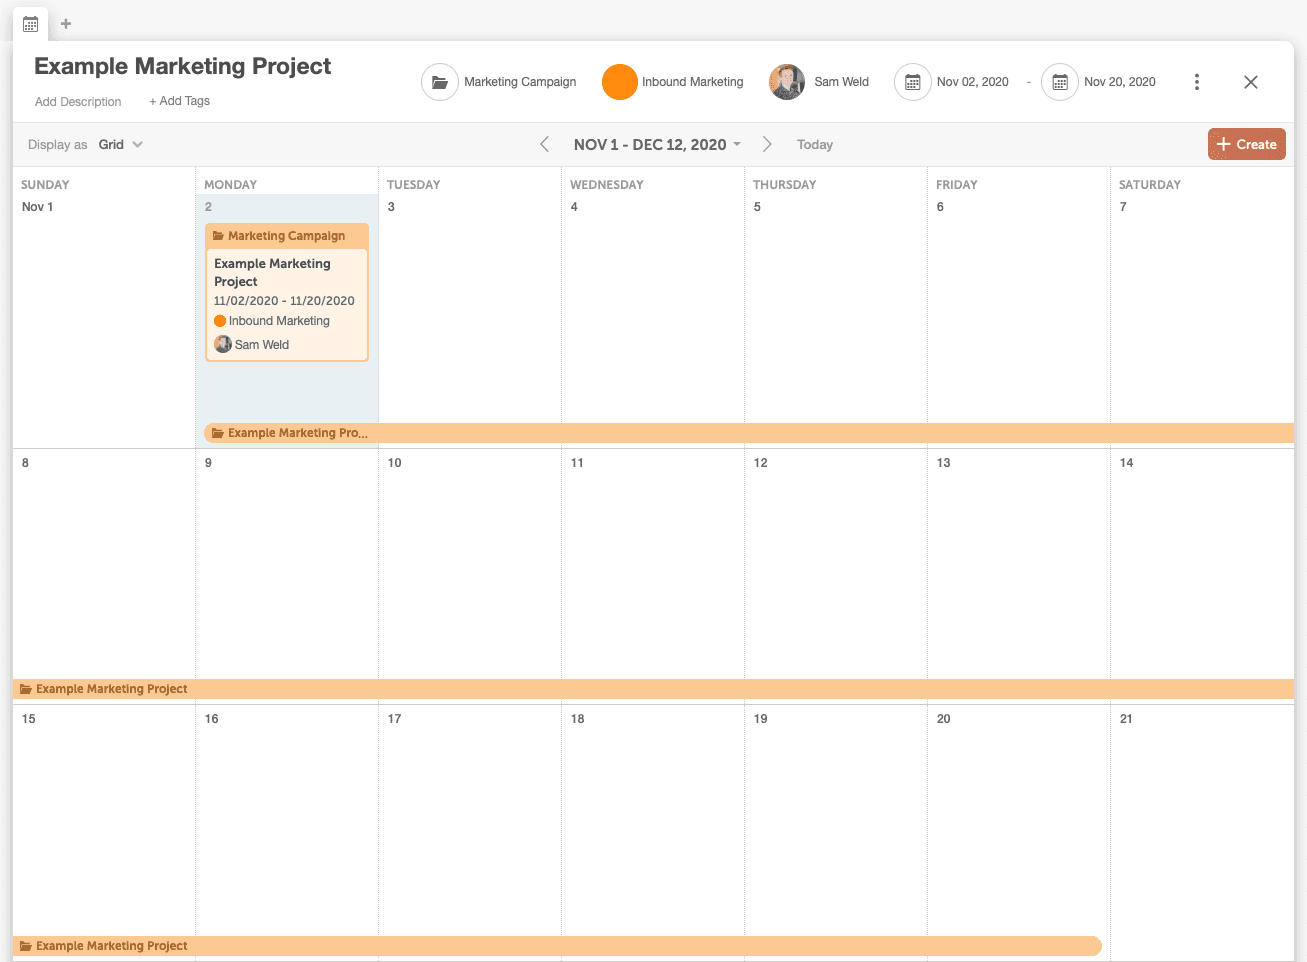
Now you know how to plan your entire marketing strategy into a marketing timeline. However, there is one, big problem. These spreadsheets are all pretty static. What happens if an event moves? You have to copy and paste everything into your timeline, which could lead to mistakes, missed deadlines, and make a mess of things. What if there was a way to make it easier; a simple marketing suite that would help you plan and organize every facet of your marketing strategy. That’s where CoSchedule comes in. Our marketing suite will allow you to plan everything you need to complete your entire marketing strategy all in one place. How? With Marketing Campaigns in CoSchedule. Marketing Campaigns was designed to keep projects and campaigns neatly organized. How does this all work? Go to your calendar, select Marketing Campaigns from the menu, and title your project.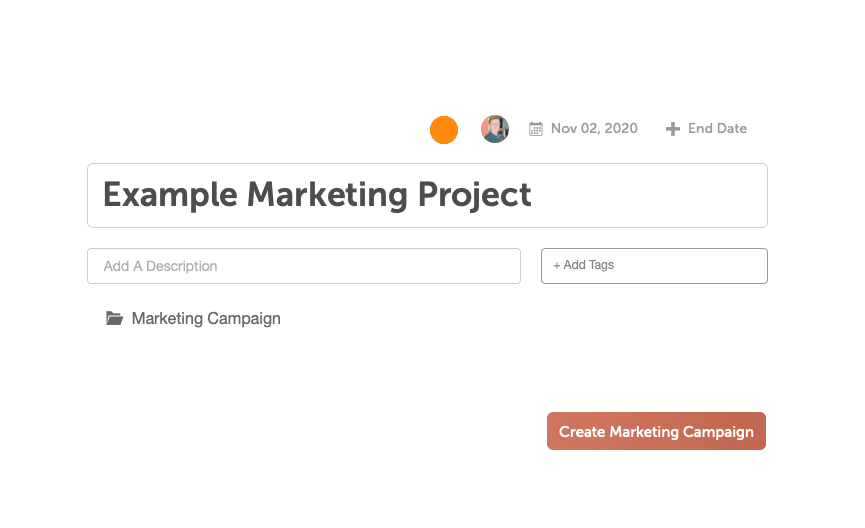 Select the start and end date of your project and click Create.
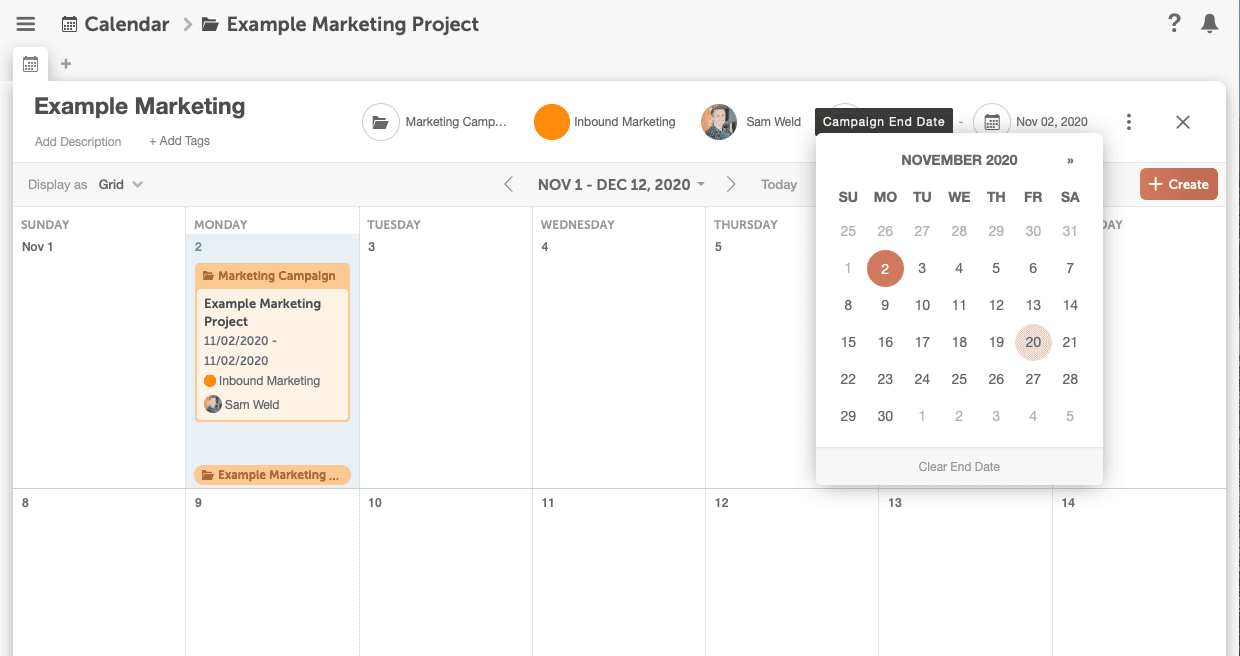 From there, a new window will appear giving you a one-on-one view of your project.
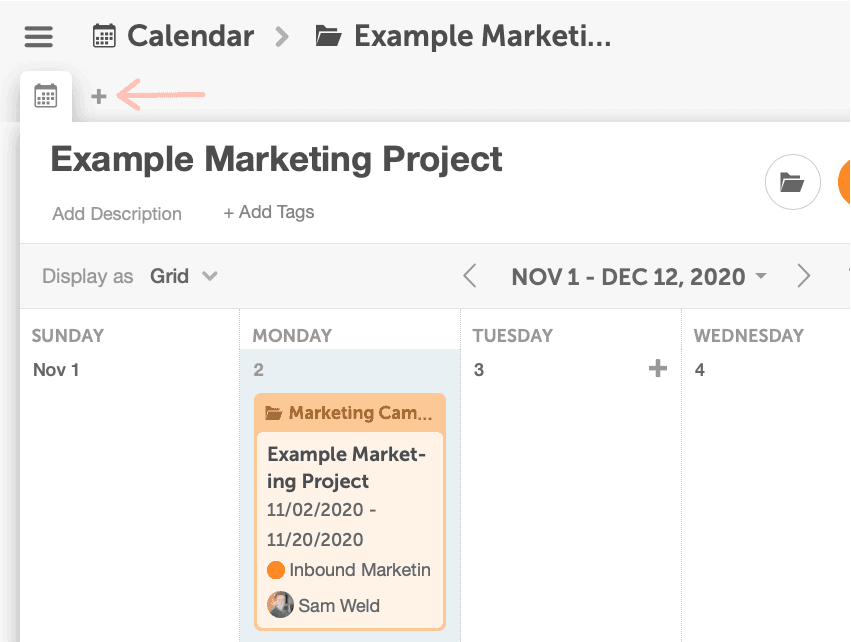
 You can add in the different parts of your project by clicking the + arrow in the upper left-hand corner.
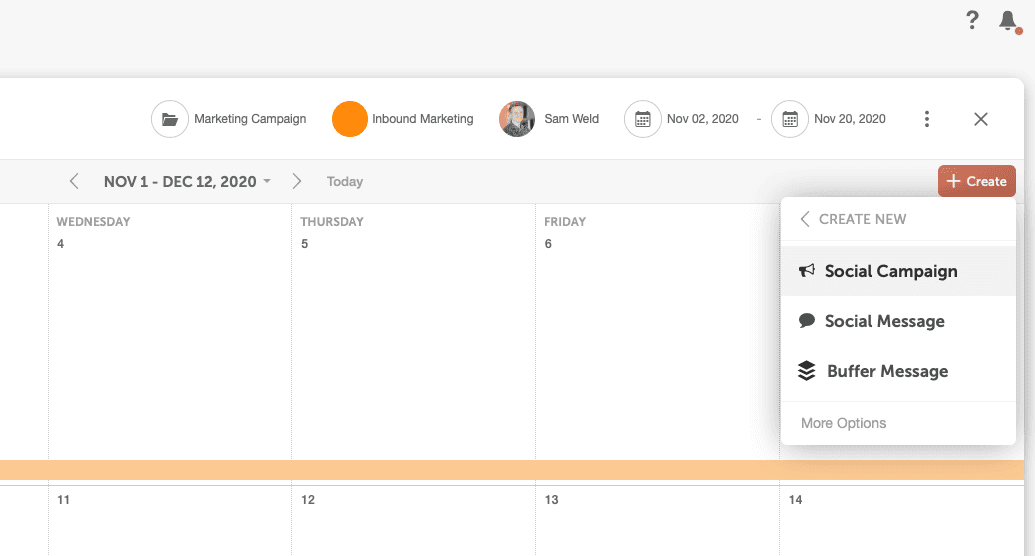
 For example, let’s say we need to add a social media campaign to our project. We’d simply click the arrow and select Social Campaign from the content menu. Remember to title your promotional pieces, so you can keep track of them.
 You can also change the color of each of these additional items, so you have a more organized view.
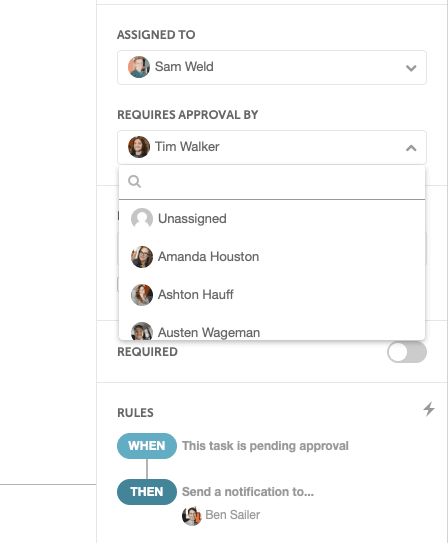
Finally, you can assign tasks to the members of your project by adding them to the task section of each of your content pieces.
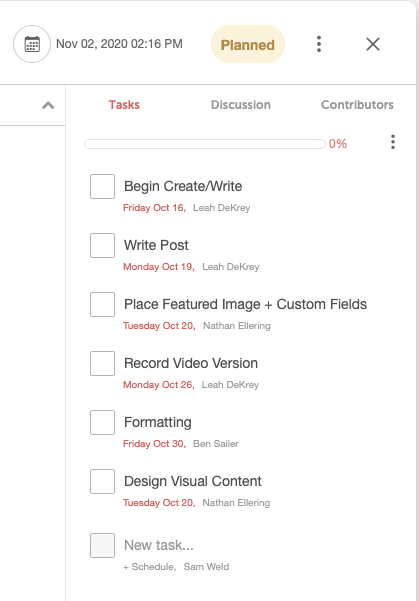 You can assign deadlines, team members, and set approval steps for every task.
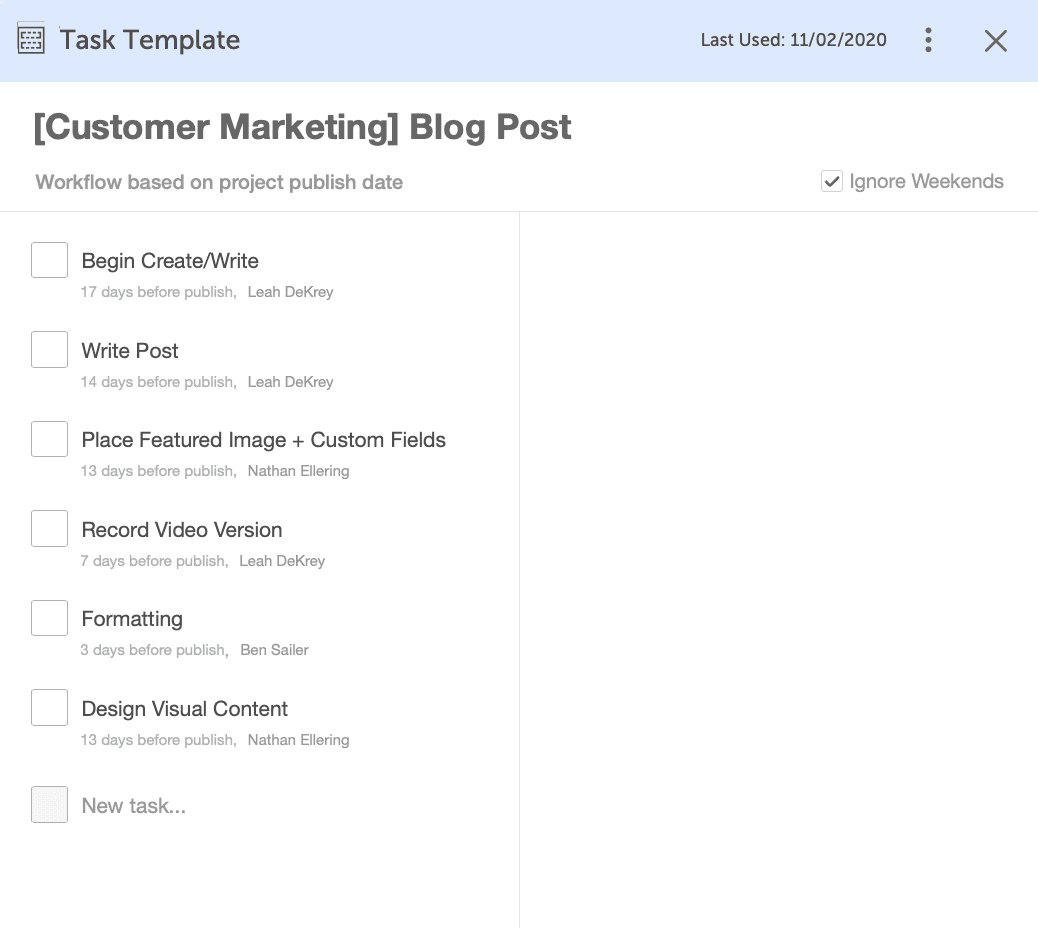
 If you have a series of repetitive tasks that is continuously being assigned in your projects, make it easier on yourself by creating a Task Template that you can apply to a piece of content whenever you want.
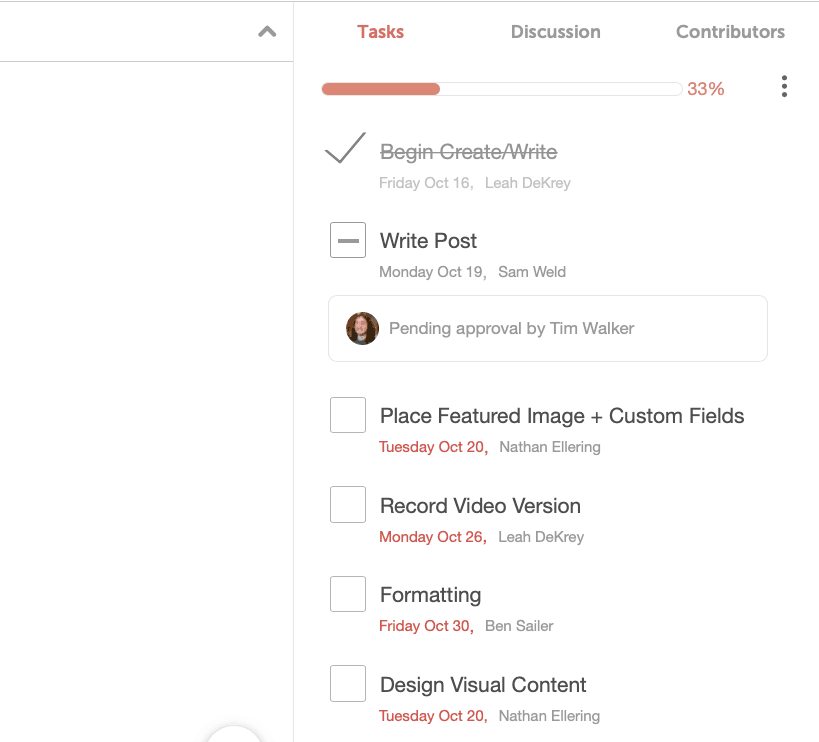
 The more tasks you check off on each of your content pieces, the more the progress bar in your Marketing Campaign will move.
 The more content pieces and people you add to your project, the more the calendar will expand.
As you can see, CoSchedule makes it easy to transfer your timeline from a static sheet to a responsive calendar. Create your free marketing calendar or schedule a demo to see what else CoSchedule can do for your team.
