
Project types sort the projects on your calendar, and you can filter your calendar by type. Add types from CoSchedule's list, create your own, and set what each type includes. Custom project types are available on Suite.
Only the Owner, Managers and Admins can open Settings > Project Types.
Add a project type from the list
- From your calendar, open Settings.
- Select Project Types.
- Click Add New Project Type.
- Choose a project type from the list.
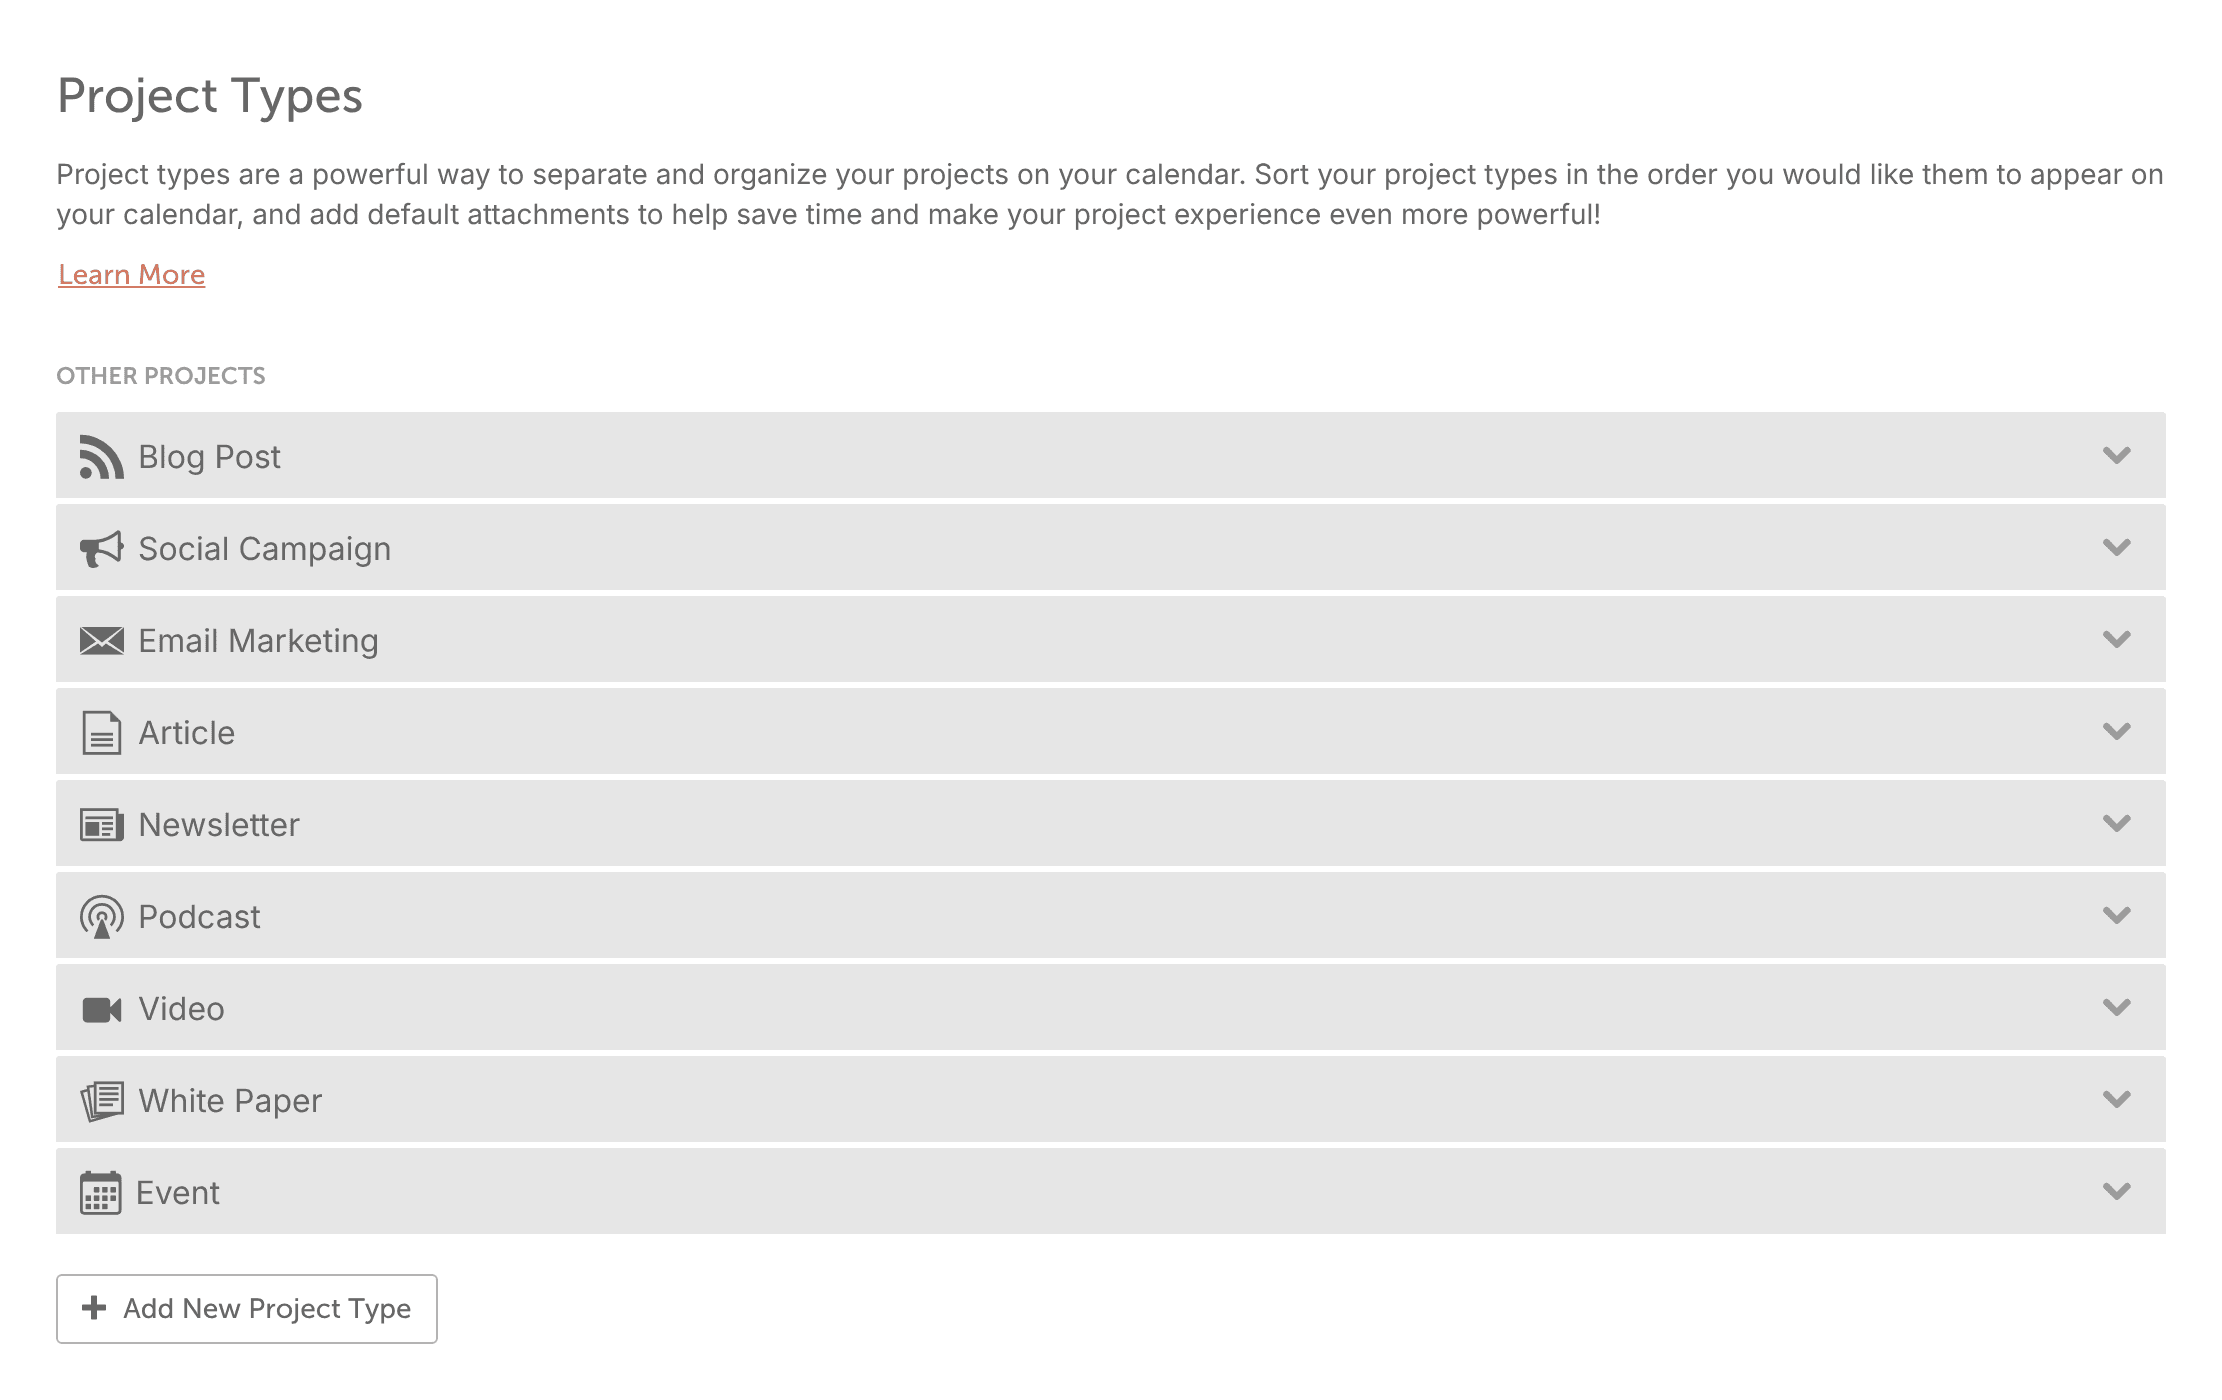
Some project types, such as Email Marketing, appear only after you connect the matching integration. See Email marketing services you can connect.
Create a custom project type
- From your calendar, open Settings.
- Select Project Types.
- Click Add New Project Type, then choose New Project Type.
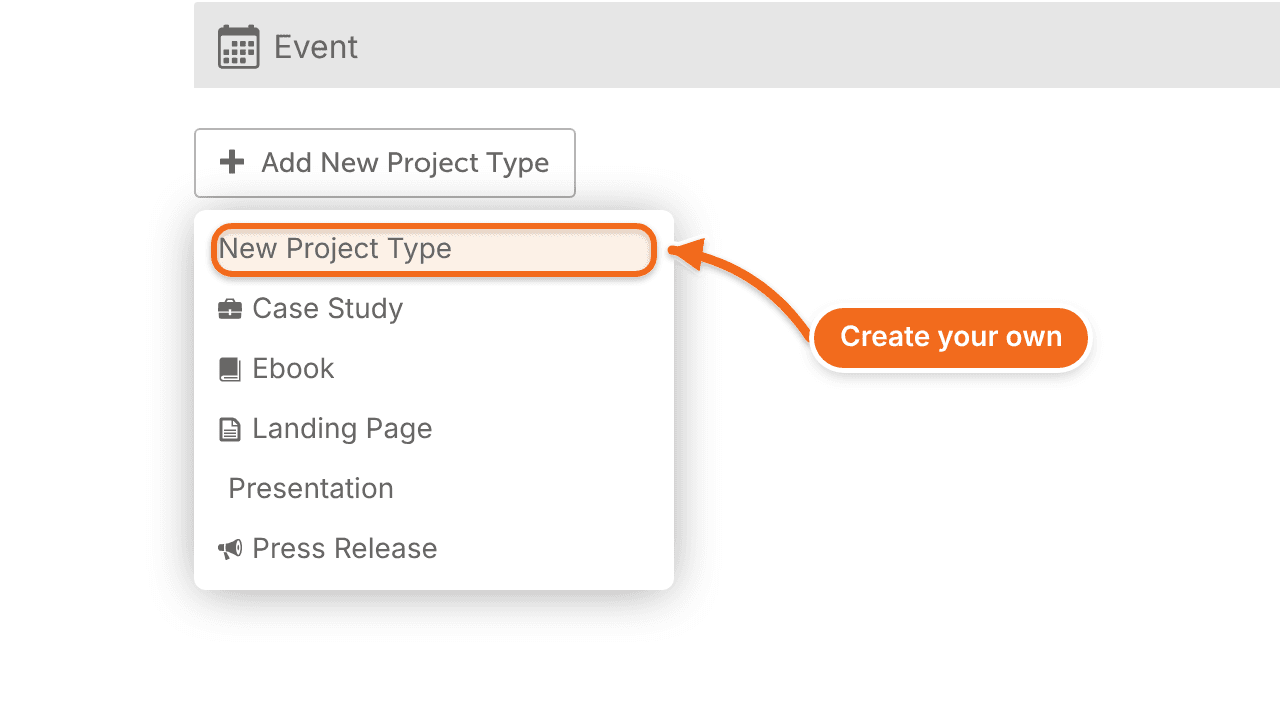
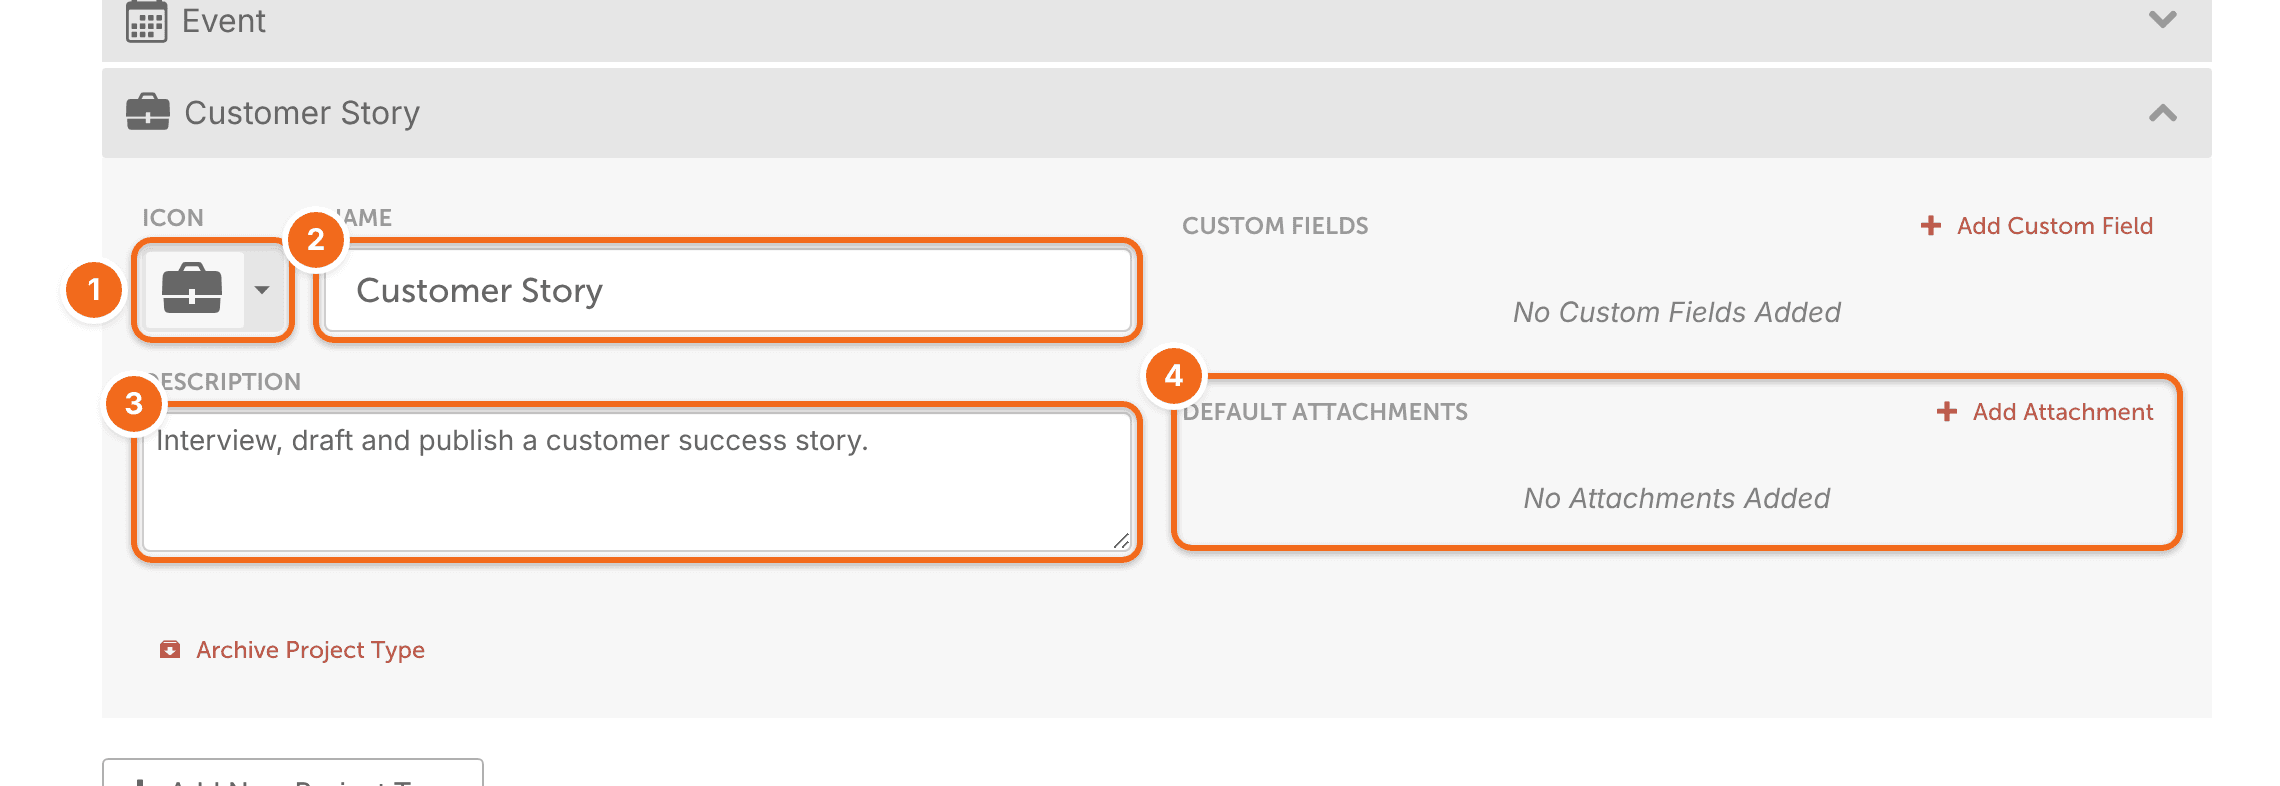
- Click Icon Type and choose an icon for the project type.
- Enter a name, a description and any default attachments.
Project types save automatically about a second after you stop typing. There's no save button.
The new type appears in the list of project types when you create a project on your calendar.
Customize a project type
Give a project type a description, default attachments and custom fields so they're ready in every new project of that type.
- From your calendar, open Settings.
- Select Project Types.
- Click the project type.
- Add a description or default attachments.
- On Suite, click Add Custom Field to add custom fields to the type.
When a calendar has project types with default attachments or custom fields, CoSchedule shows a list of project types when someone selects Project from the Create menu. The new project opens with the chosen type's attachments and custom fields already added. See Create a project.
To change the order of that list, hover over a project type and drag it to a new spot. For more on fields, see Create custom fields.
Changes to a project type apply only to projects created afterward. Projects already on your calendar don't change, and that includes the type's custom fields.
Archive a project type
- From your calendar, open Settings.
- Select Project Types.
- Click the project type.
- Click the arrow icon in the bottom left corner.
Projects that already use the type keep it, but the type no longer appears when you create a project. To bring it back, click Show Archived Projects (it then reads Hide Archived Projects) and click Unarchive Project Type on the type.