White Label
CoSchedule's White Label feature allows you to customize your reports and read-only calendars with a different logo for each client.
Note: White Label is not available in Free or Social Calendar.
- Enable White Label
- Creating New Clients
- Assign Clients to Read-Only Items
- Assign Clients to Saved Reports
Enable White Label
- Open your calendar and click to open Settingse
- Under Settings, click Power Ups
- Click Enable White Label on the White Label tile
Create and Manage Clients
- From your calendar, click to open Settings, then navigate to the White Label section under Power Ups
- Under the Clients, click Add New Client
- Upload your client's logo and enter your client's name
- Each client you add will appear under the Clients tab of your White Label settings
- To edit or delete a client, hover over the client and click the ellipsis menu
Assign Clients to Read-Only Items
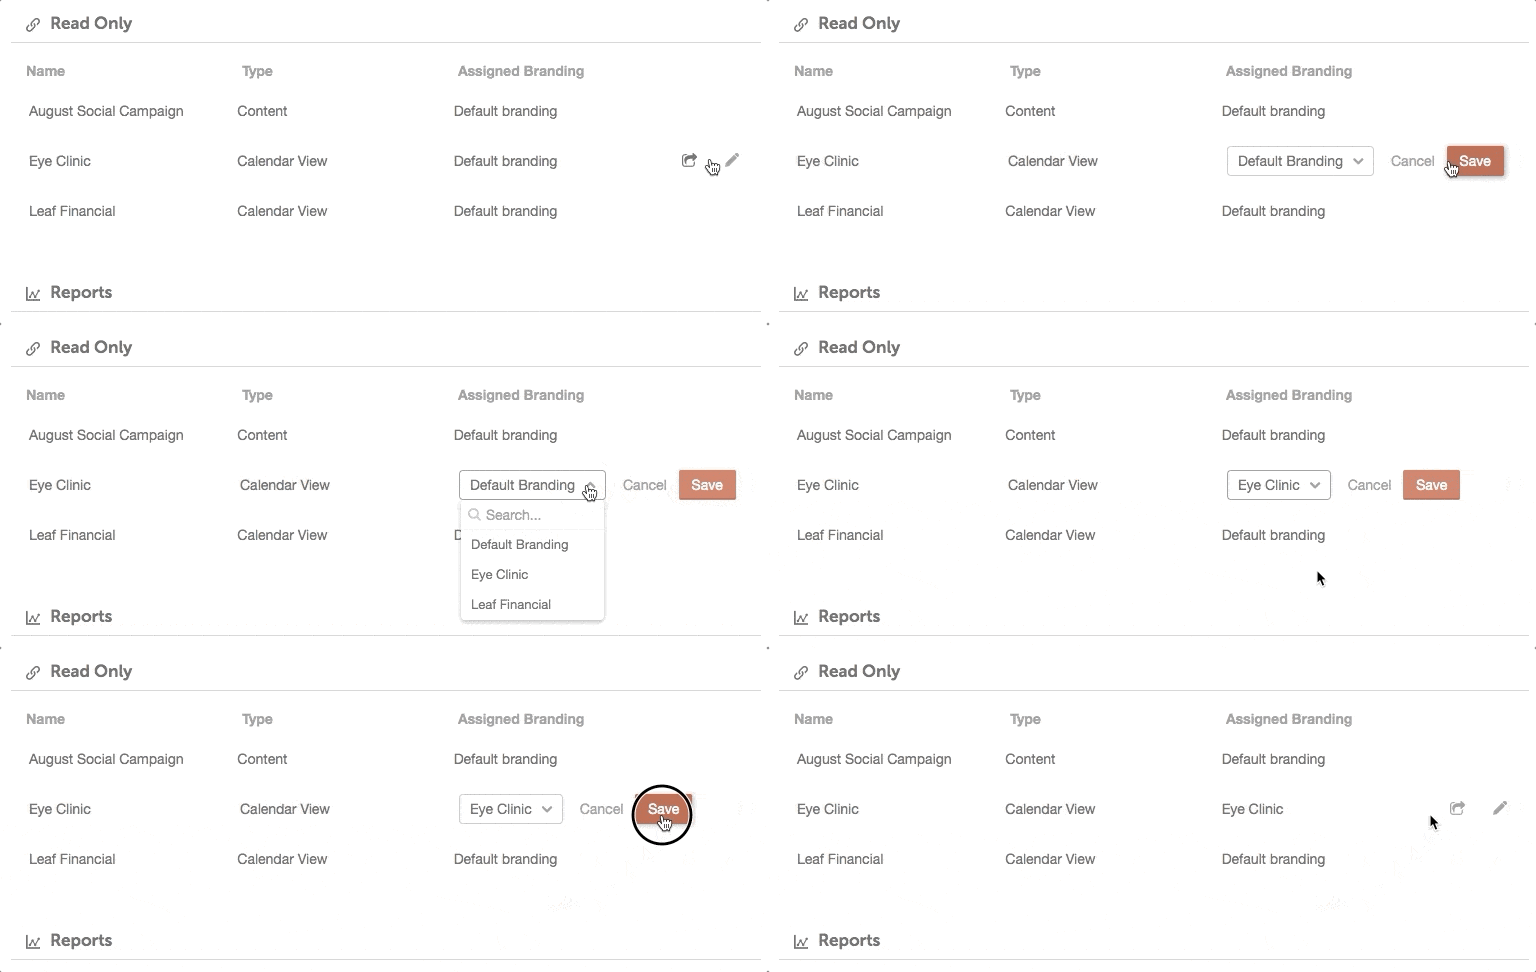
The Customized Branding section will display all Read-only calendars, marketing campaigns, projects, and social campaigns.- From your calendar, click to open Settings, then navigate to the White Label section under Power Ups
- Under Customized Branding, hover over the item within the Read-Only section and click the pencil icon
- Select the client and click Save
- To open any Read-Only item, click the share icon. Your client's logo will be displayed in the top-left-hand corner when you share a read-only calendar or content item.

Assign Clients to Saved Reports
The Reports section will display all saved shareable analytics reports.- From your calendar, click to open Settings, then navigate to the White Label section under Power Ups
- Under Customized Branding, hover over the item within the Reports section and click the pencil icon
- Select the client and click Save
- To download any report, click the download icon. Your client's name and logo will be displayed on the cover page of the report.
