Blog Integrations
CoSchedule integrates with some of the most popular content management systems (WordPress and HubSpot), so you can plan, schedule, draft, publish, and promote your blog posts with CoSchedule.
This guide will walk you through the best practices for taking your blog posts from Idea to Publish.
So let’s get to it!
Planning Your Blog Posts
Most teams start their blogging process by referencing/creating a long list of post topics and ideas. And more than likely, it’s saved in a spreadsheet somewhere.
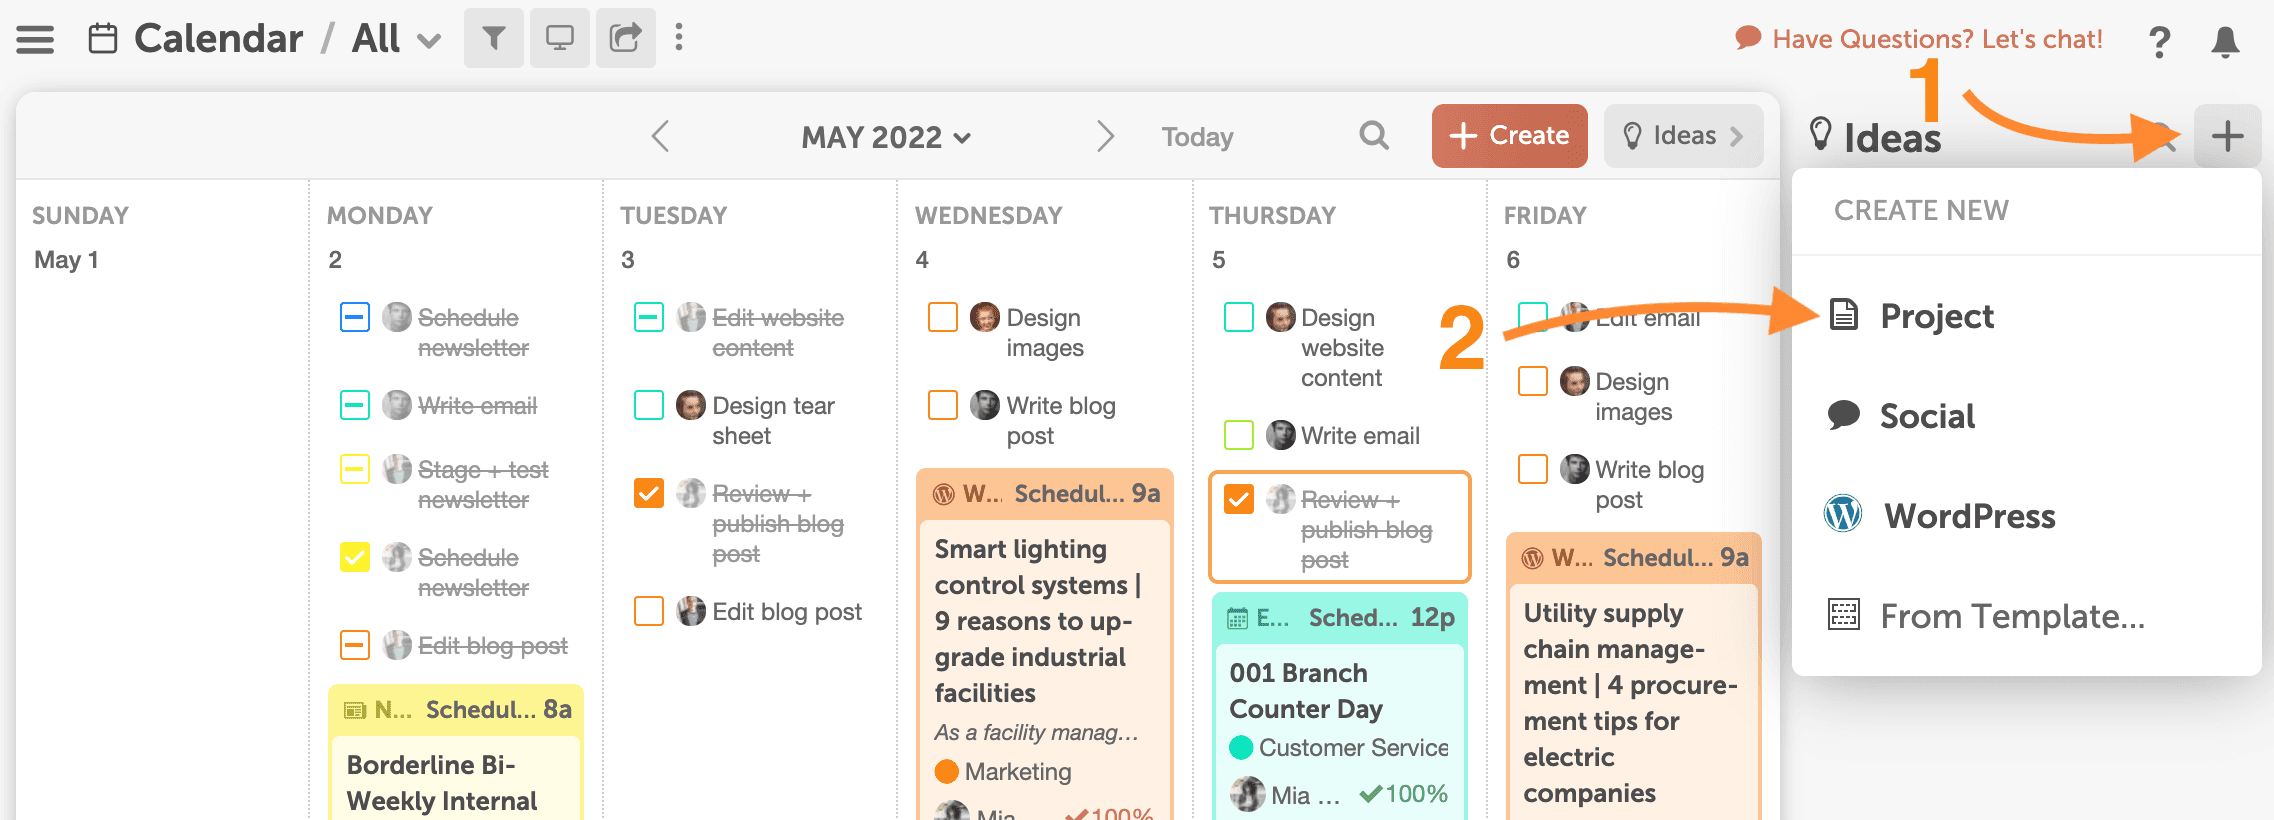
Get your ideas out of the spreadsheet and into CoSchedule by using the Ideas Bin.
1. Click the Plus in the Ideas Bin.
2. Select Project.
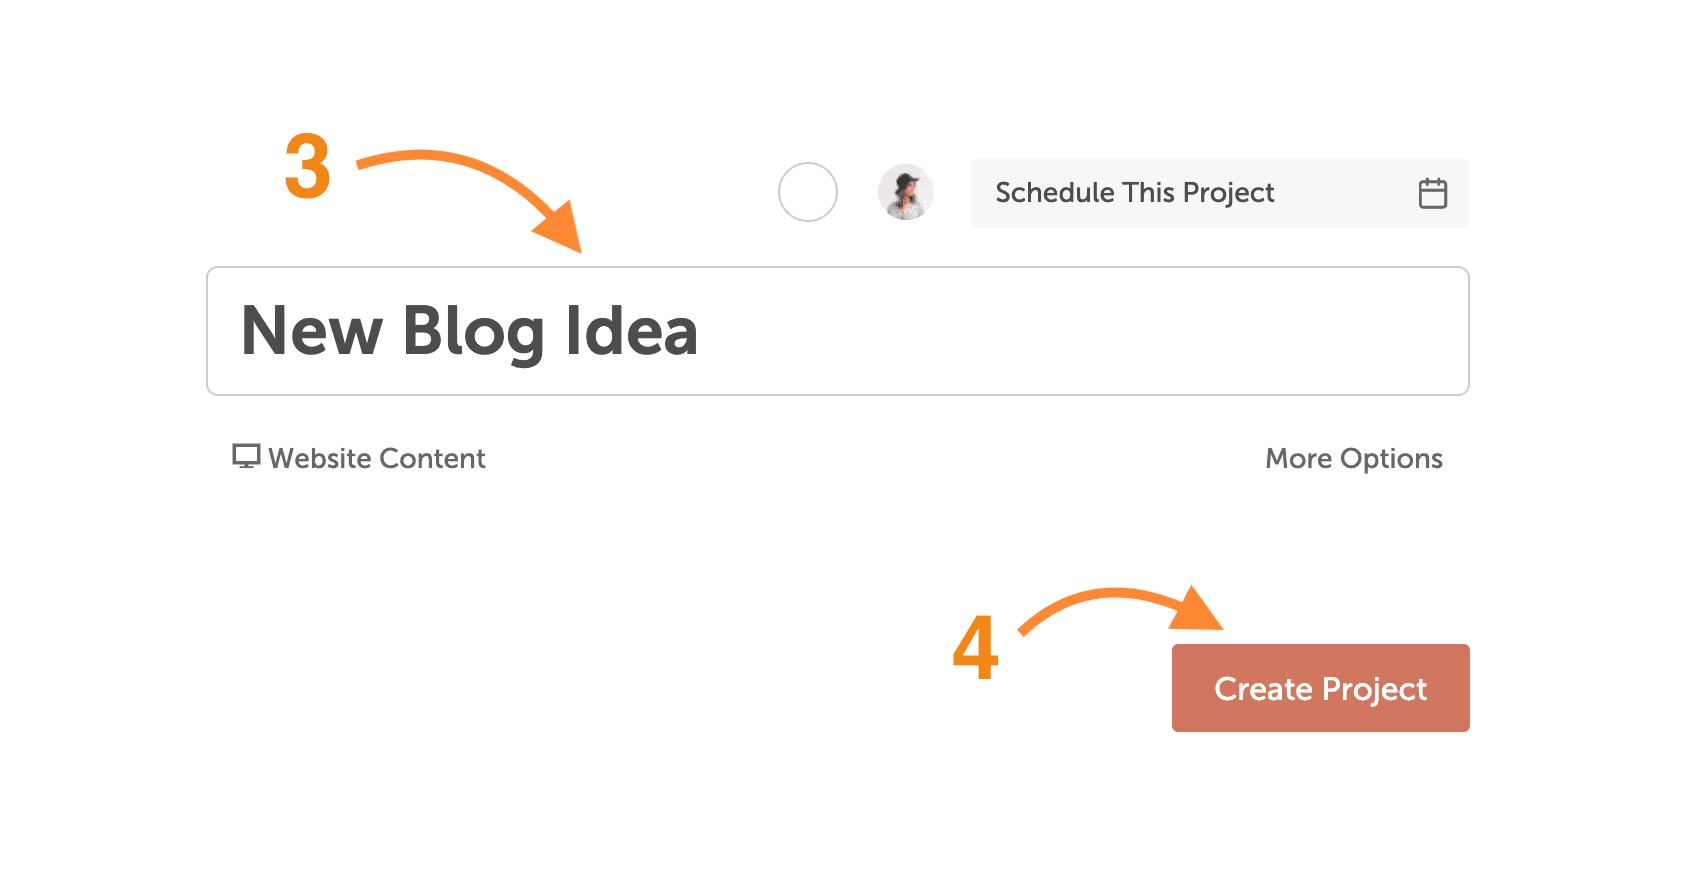
3. Name the Blog.
4. Click Create Project.
During your next content meeting, brainstorm new blog post topics and add them in Ideas in CoSchedule. Now your entire team has access to them, and you won’t forget your best topics when you want to work on them.
Prioritize your post ideas in order of importance, so when you need to plan out what posts your team needs to create next week, next month, or next quarter – they’re easy to add to your calendar.
Document Your Process
Once blog posts are added to the calendar, it’s time to map out your workflow. Most teams create a task template to outline their blogging process. This ensures everything gets completed in the right order, by the right people, at the right time.
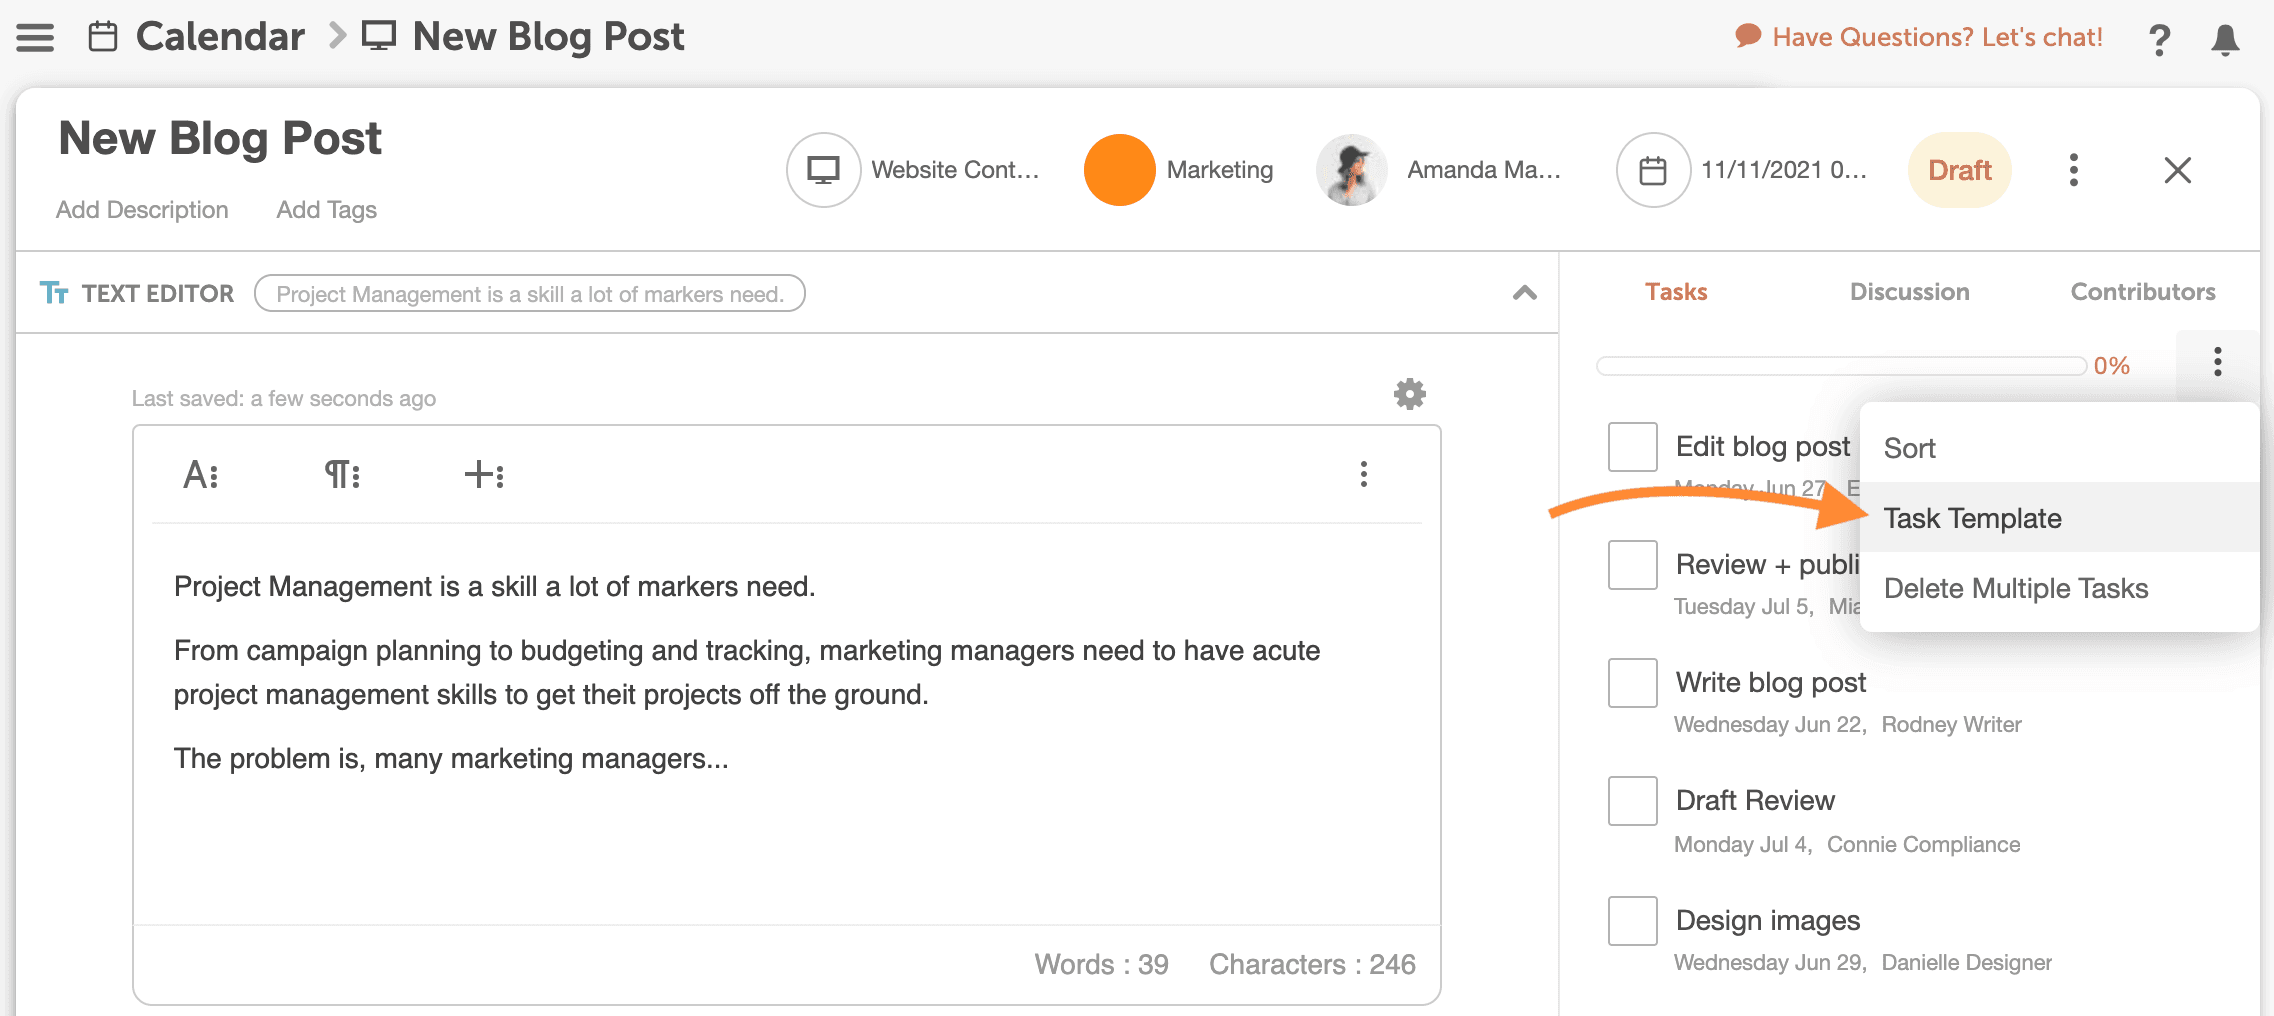
Check out Power Tips for Task Templates to see how it’s done.
Create Your Post
Now you’re ready to start working on your post.
Some teams create WordPress or HubSpot blog posts in CoSchedule and draft and edit in the respective CMS.
Or if you prefer to draft posts in Google Docs or a Text Editor, you can outline and write them there instead before staging in your CMS.
If you’re drafting outside of WordPress or HubSpot, attach your working draft in CoSchedule. This gives your team access to the latest in-progress version.
As your team writes and designs images, upload all of the files into CoSchedule. This keeps all assets for the project in one spot and easy for your team to find when they need them.
Promoting Your Blog Posts
Best of all, you can pre-plan and schedule all of your social promotion for your blog post before it is published.
Attach a social campaign to your blog post project in CoSchedule, and we’ll tie your promotional messages to your blog post.
CoSchedule automatically pulls the live blog post link and ties it to all of your social messages.
You can even use social templates to create your entire promotion plan in seconds. Learn more about those in our Power Tips.
Once your post goes live, your social promotion will begin sending promo messages based on your set schedule.
Review Your Blogging Schedule
For many teams, a blog is an integral piece of their marketing strategy.
If you’re connecting WordPress or HubSpot for the first time, CoSchedule will pull in your historical posts so you can review past blogs on your calendar.
Most teams create a sub-calendar view that pulls in only blog posts – giving you a focused view of your blogging strategy.
Many teams use color labels and tags to segment blog posts even more. Giving you the ability to visualize your blog posts by target audience, content theme, etc.
If you’ve got multiple stakeholders you’re blogging for, you can segment and refine your calendar with sub-calendar views and share them using read-only links.
For more info on using WordPress with CoSchedule, visit this help doc.
HubSpot user? Check out this help doc instead.
If you still need to connect your CMS integration, log in to CoSchedule to get it enabled.