
Calendar views save a set of filters and display settings, so you can switch what the calendar shows in one click. Your views don't change what your teammates see. Available on Starter, Professional and Suite.
You'll find Calendar Views in your main calendar navigation.
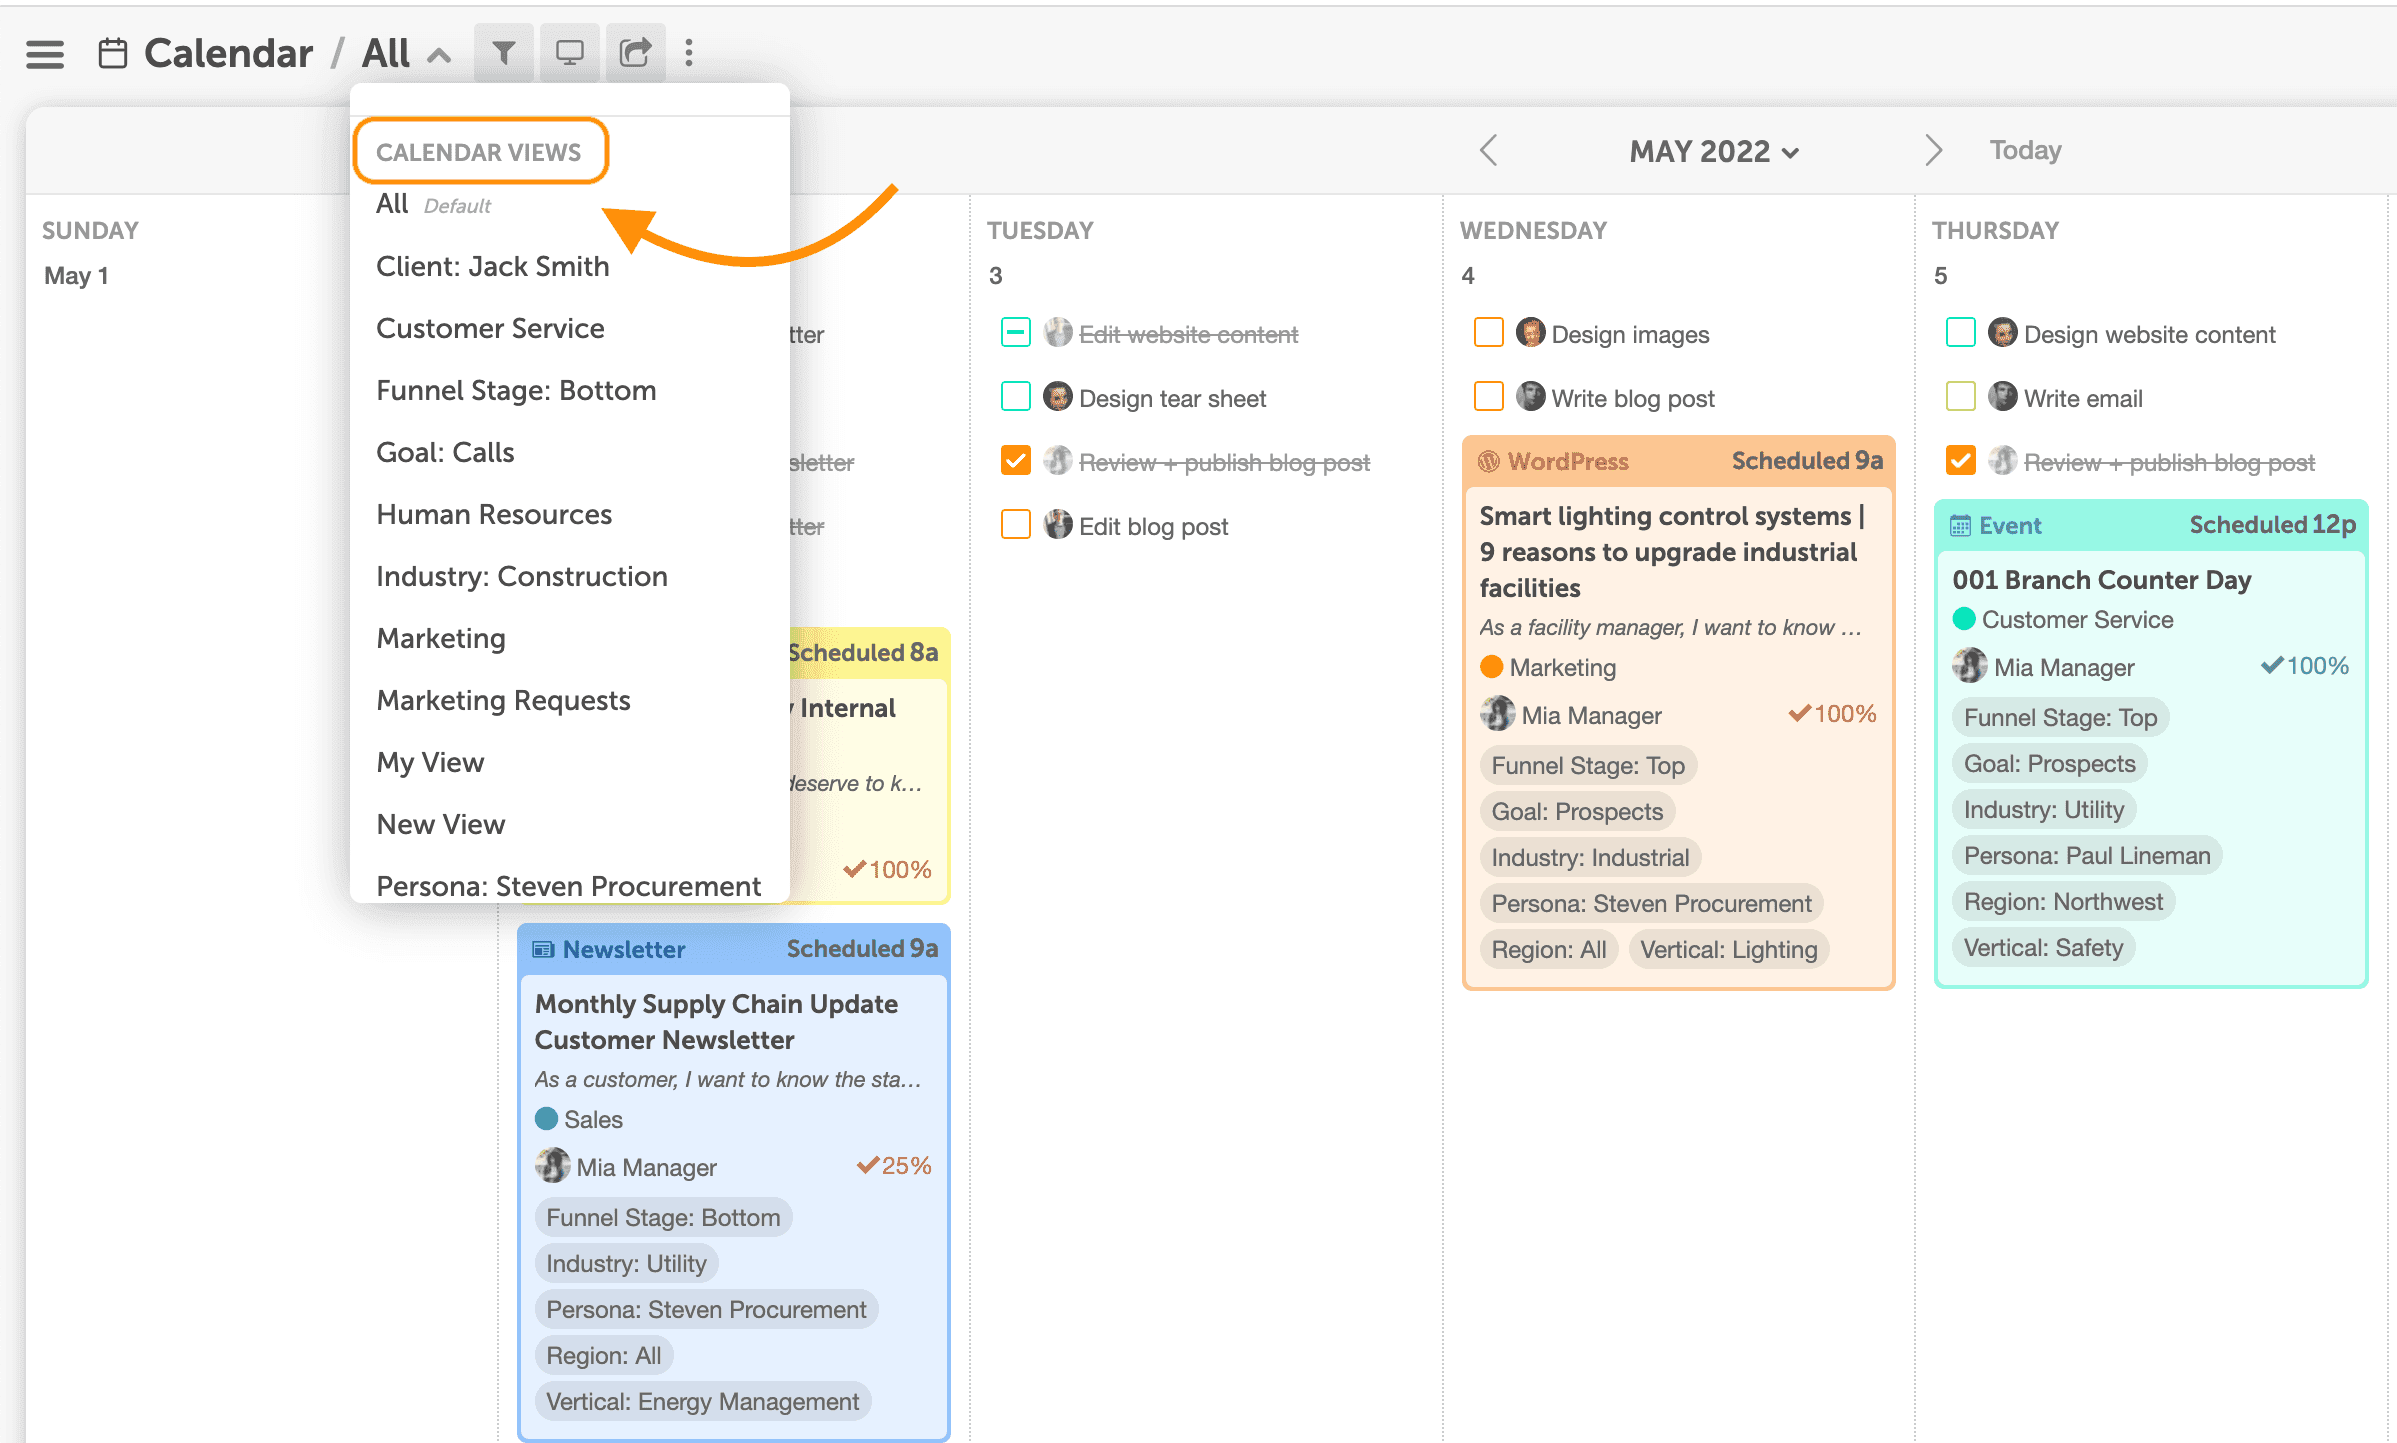
Create a calendar view
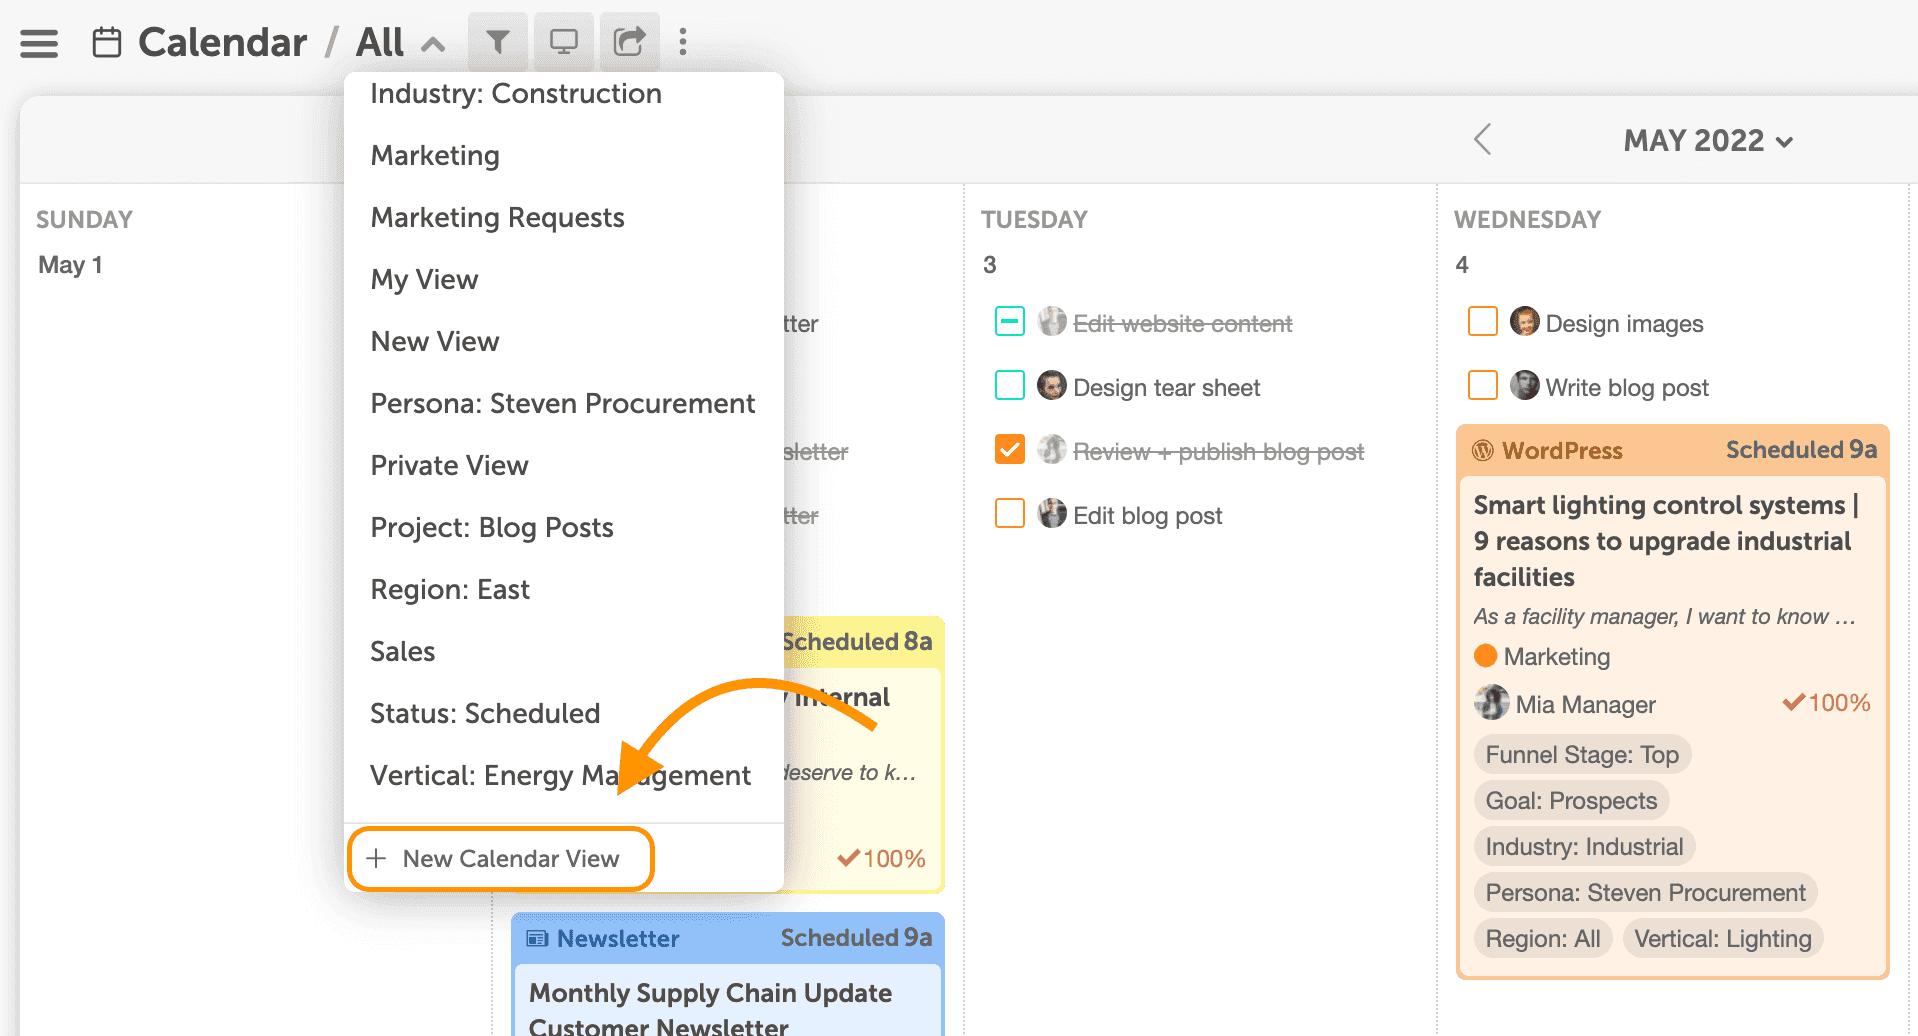
- Select Create New View.
- Give the view a name.
- Make your selections under Filter Content and Calendar Display Settings.
- Click the filter icon to add or remove filters by type. You can pick several filters, and several options under each one.
- Click Save View.
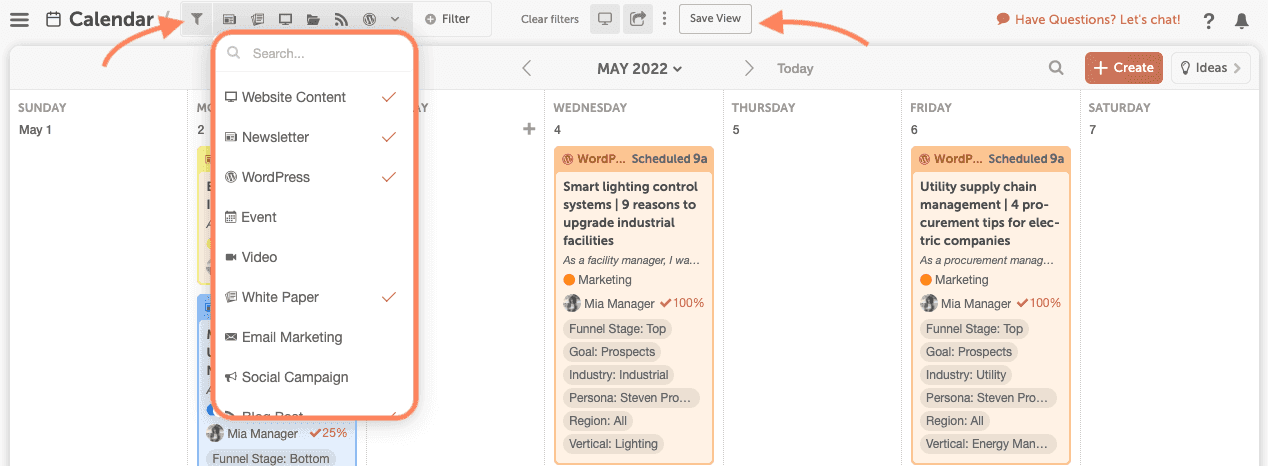
Whatever you select shows on the calendar right away, and every time you use this view.
Edit a calendar view
- Open the view from your Calendar Views.
- Click the filter icon.
- Change the filters, then save the view.
Choose the filters
Each filter only narrows the items it applies to. Items the filter can't apply to still show. For example, a tag filter narrows projects, marketing campaigns and social messages to that tag, but items that can't have tags stay on the calendar. Add more filter types to narrow the view further.
- Color Label: items with the selected color label.
- Project Type: items of the selected project type.
- Team Member: projects that person owns, and tasks assigned to them. A project doesn't show just because the person is assigned one of its tasks or is a contributor.
- Tag: items that can have tags: social messages, projects and marketing campaigns.
- Status: items that have a status: projects and social messages.
- Social Profile: social messages for the selected social profile.
- Custom Fields: projects with the selected custom field value. Dropdown, Multi-Select Dropdown, Checkbox and Multiple Choice fields can be filtered. Custom fields are on Suite.
To hide one color label, select all the other color labels in the view's Color Label filter.
If items are missing from a view
- Social messages missing? If the view filters by Project Type, select social messages as one of the types too.
- Fewer items than you expect? Every extra filter, such as a second tag filter, can hide more items. Remove filters one at a time to find the one hiding them.
Set your default view
Choose which saved view opens for you by default. Your default doesn't change what your teammates see, and each view type, such as the calendar, the Kanban Dashboard or Table View, keeps its own default.
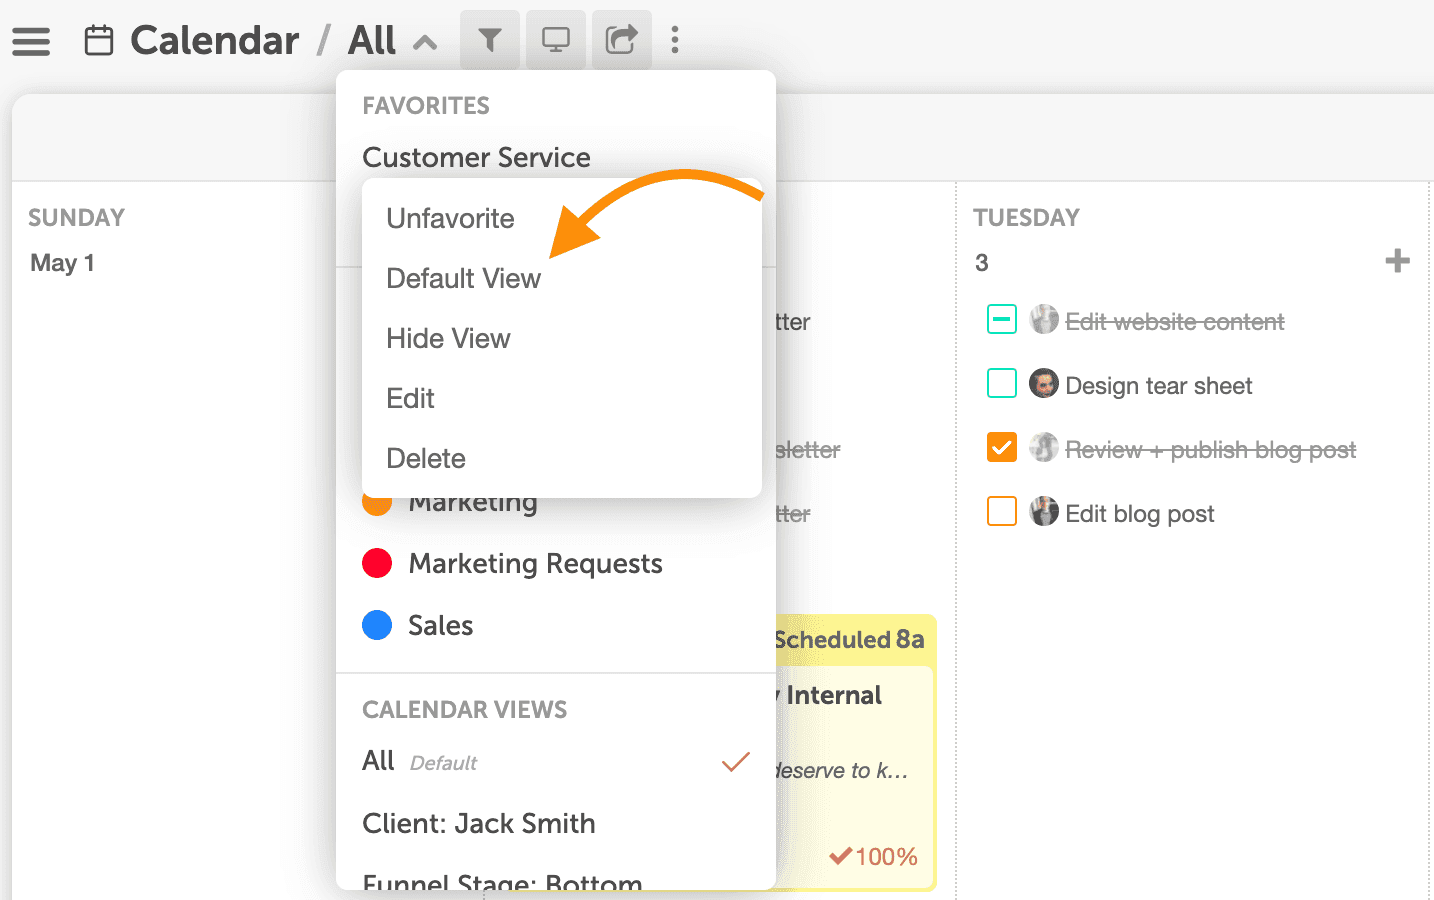
- Open the saved views dropdown in the top bar.
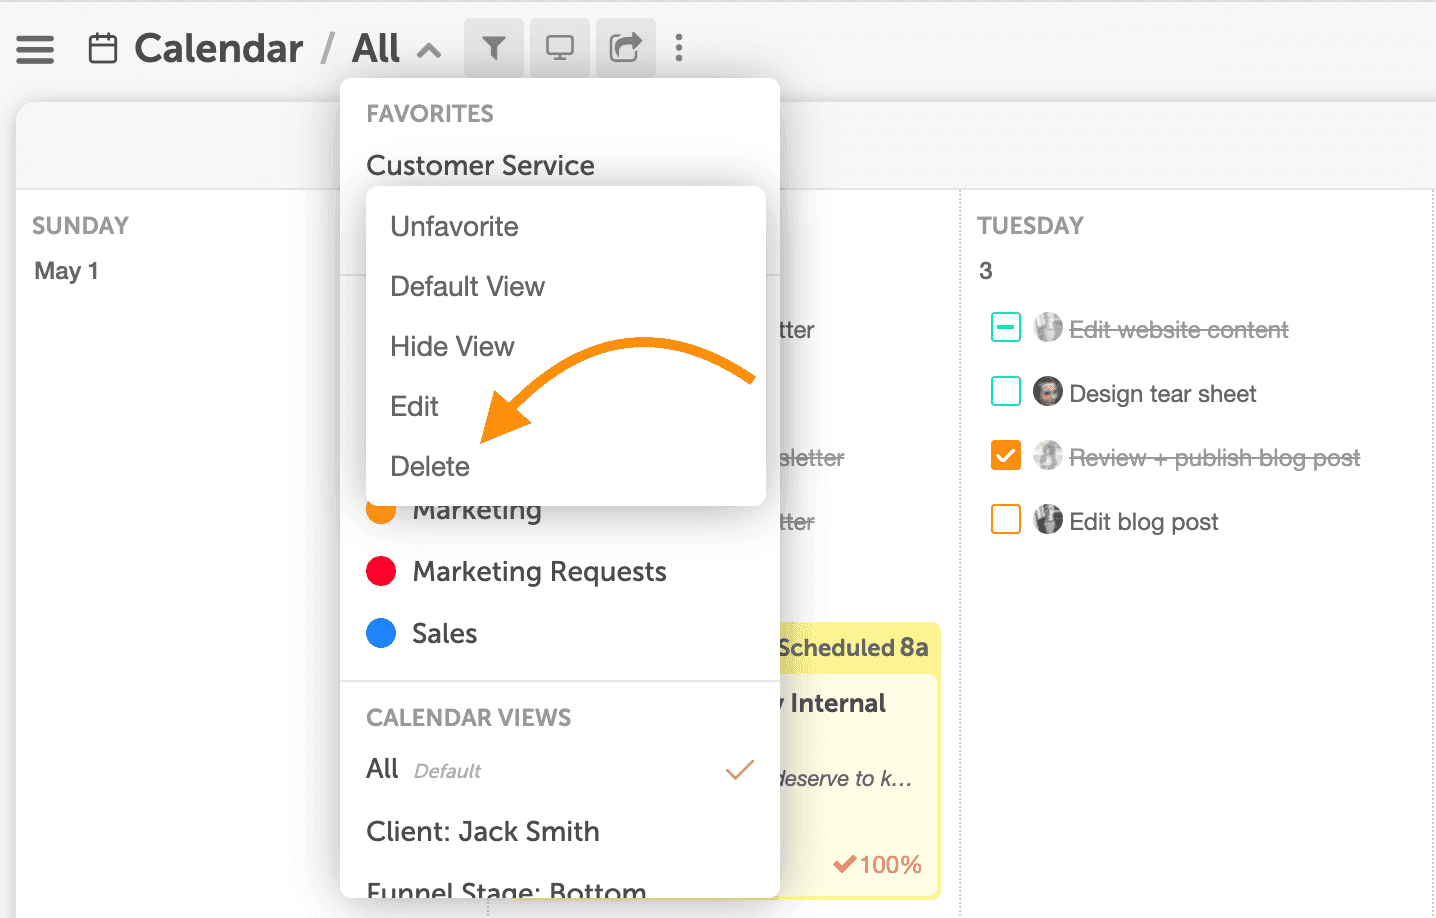
- Click the vertical ellipsis next to the view's name to open its submenu.
- Select Default View.
Delete a calendar view
- Click the ellipsis next to the name of the view you want to delete.
- Select Delete View.
Views for each color label
On Professional and Suite, the calendar can also list a view for each color label. You manage those in Settings, under Client Calendars on Professional or Sub-Calendar Views on Suite, not from the view menu. See Create sub-calendars.
Download a view
You can download a view from its share menu: click Download PDF. In Table view (Suite), the menu shows Download CSV instead. The CSV holds whatever the view's filters show and doesn't ask for dates, so to export a date range, add a Scheduled or Created date filter to the view first. To find the share menu, see Share a read-only view of your calendar.