
White Label lets you show a different logo for each client on your read-only calendars, projects and campaigns, and on the cover of downloaded reports. Available on Professional and Suite.
Turn on White Label
- From your calendar, click Settings.
- Click Power Ups.
- On the White Label tile, click Enable White Label.
Add a client
- From your calendar, open Settings and go to the White Label section under Power Ups.
- Under Clients, click Add New Client.
- Upload your client's logo and enter your client's name.
Each client you add appears under the Clients tab of your White Label settings. To edit or delete a client, hover over it and click the ellipsis menu.
Show a client's logo on read-only items
The Customized Branding section lists your read-only calendars, marketing campaigns, projects and social campaigns. Marketing campaigns are available on Suite; see Plan a marketing campaign.
- From your calendar, open Settings and go to the White Label section under Power Ups.
- Under Customized Branding, in the Read-Only section, hover over the item and click the pencil icon.
- Select the client and click Save.
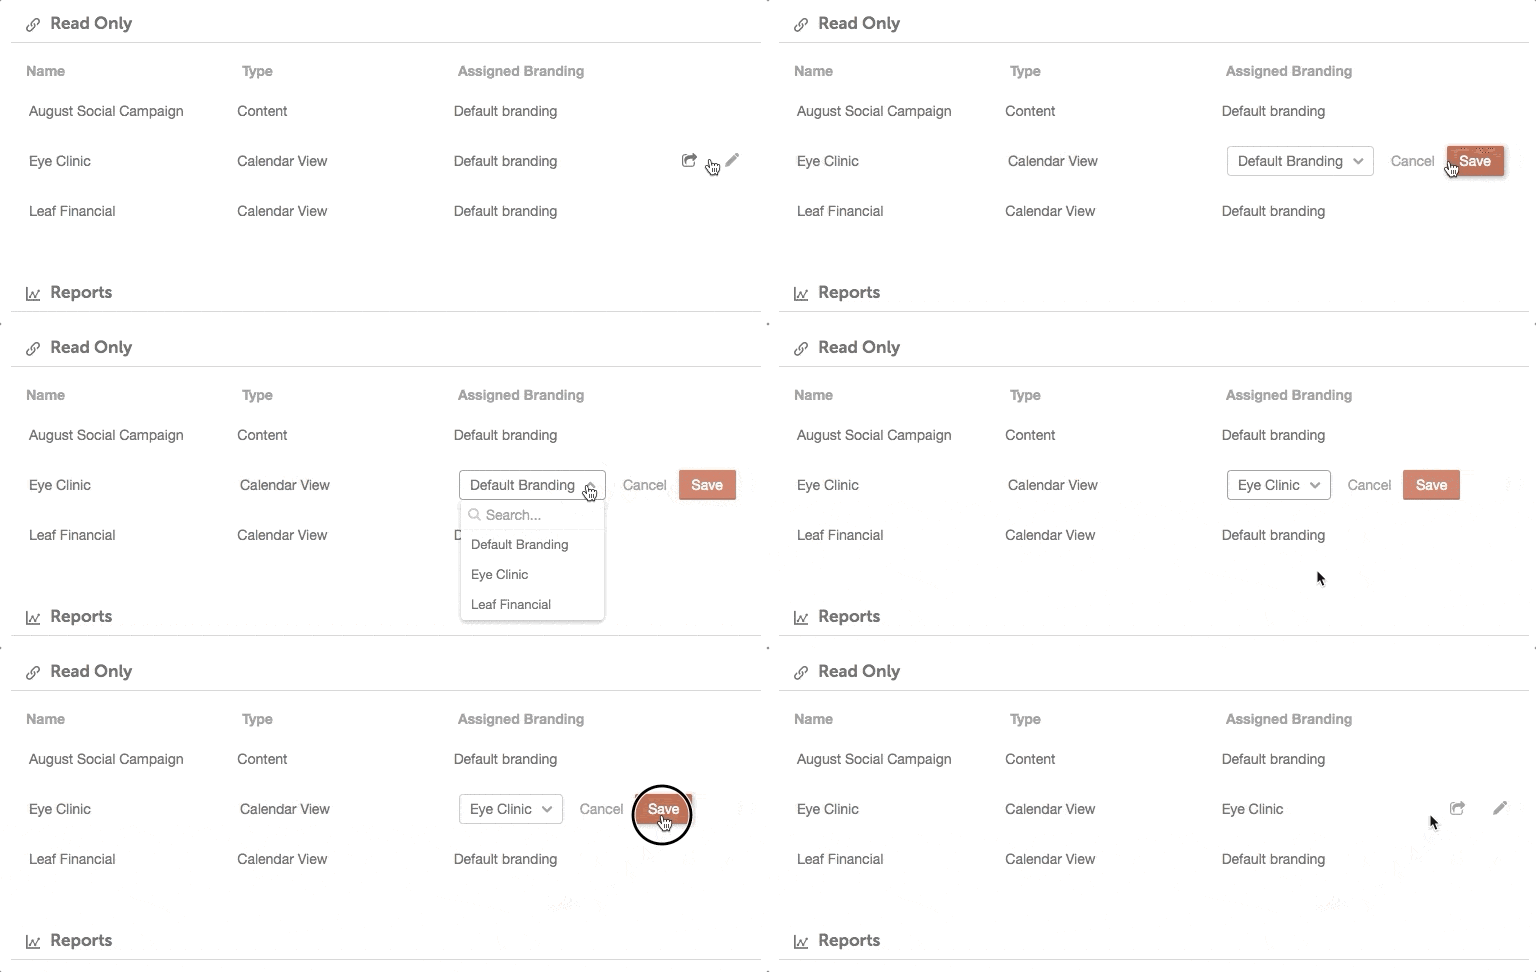
To open a read-only item, click its share icon. Your client's logo shows in the top-left corner of the shared calendar or item.
To show your own logo on read-only views instead, upload it in your calendar settings. See Change your calendar name, timezone and date format.
To share a calendar view, project or campaign as read-only, see Share a read-only view of your calendar.
Show a client's name and logo on reports
The Reports section lists your saved shareable analytics reports.
- From your calendar, open Settings and go to the White Label section under Power Ups.
- Under Customized Branding, in the Reports section, hover over the report and click the pencil icon.
- Select the client and click Save.
- To download the report, click the download icon.
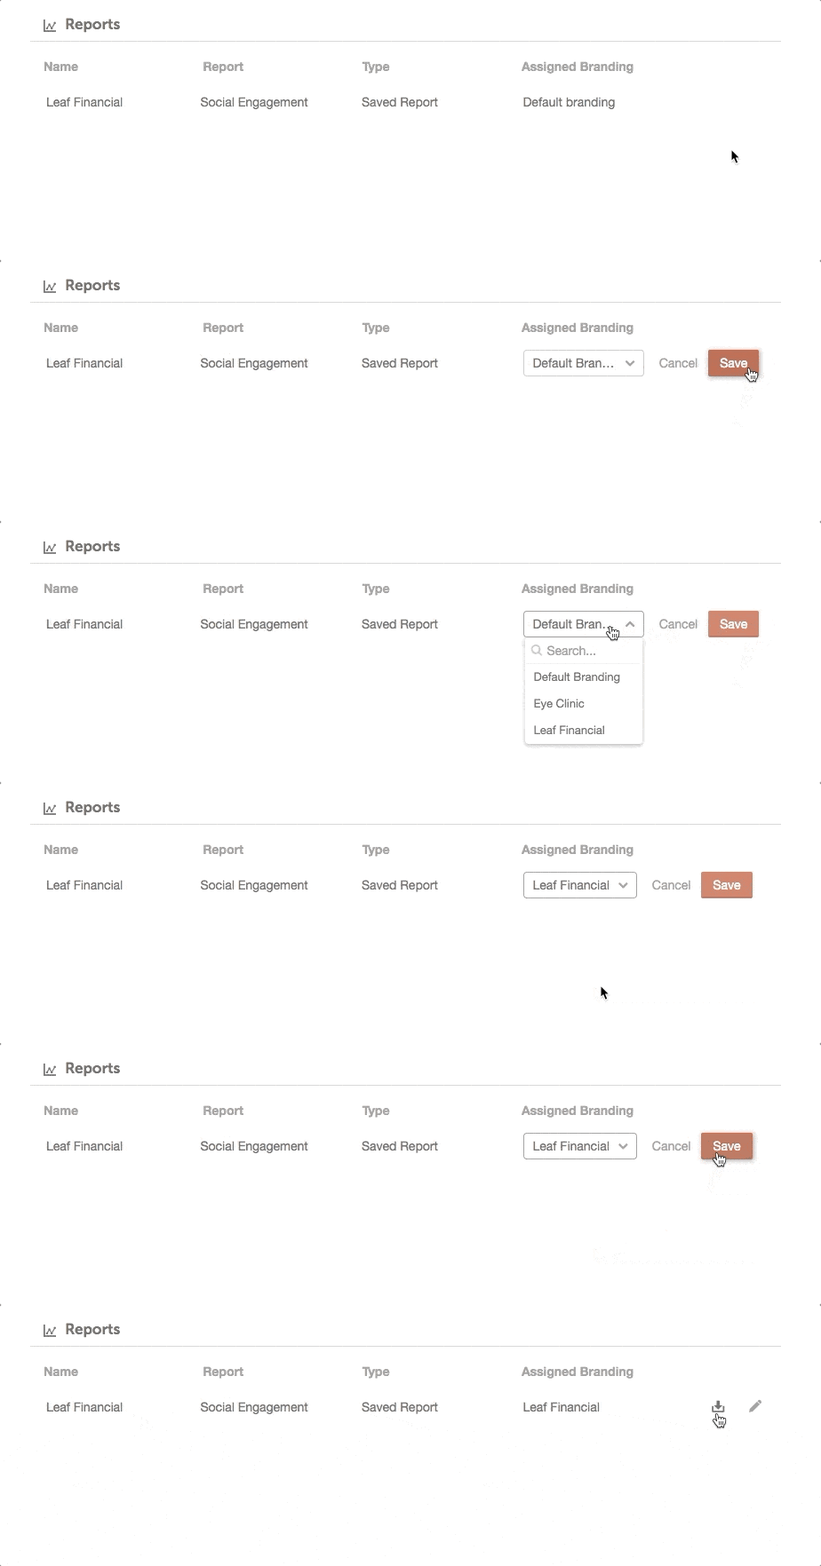
Your client's name and logo show on the cover page of the downloaded report.
To put your own company logo and name on reports instead, use Settings > Analytics. See Export and schedule reports.