How To Write A Blog Post: The Easy 3-Step Process That Will Attract & Influence Your Audience

 Tasked with writing a blog post and looking for a place to start? You’ve found a good source.
A lot of blog posts on the topic (pretty meta, I know) claim to be ultimate guides. The thing is, do you really want—or need—to read 10,000 words before you get to work?
I didn’t think so.
At its most basic level, you can write a highly informative blog post in three simple steps:
Tasked with writing a blog post and looking for a place to start? You’ve found a good source.
A lot of blog posts on the topic (pretty meta, I know) claim to be ultimate guides. The thing is, do you really want—or need—to read 10,000 words before you get to work?
I didn’t think so.
At its most basic level, you can write a highly informative blog post in three simple steps:
- Topic: Choose a topic of interest to your audience (and your company) that your business has the credibility to publish. This may include understanding audience demand for the topic through keyword research as well.
- Outline: Research your topic by Googling it, discussing it with subject matter experts (internal and external), and turning what you learn into a bulleted list of points to cover in your blog post.
- Write: Fill in the outline with your own words as you understood the topic from your research.
Research The Blog Post Topic
Audience
Start by brainstorming topics in which your target audience has demonstrated interest.- What are the hot topics people are discussing in your niche? Be part of an existing conversation. For example, follow competitors’ social media accounts, join relevant groups on LinkedIn or Facebook, follow discussion threads on reddit, and review your product categories on directory sites such as G2Crowd.
- What are prospects, leads, and customers asking your customer service folks? These are gold mines for highly targeted blog posts.
Recommended Reading: Target Market: Definition, Purpose, Examples, Types, & Segments
Topic
Next, choose a specific topic for your blog post.- What is your target audience searching for? Tools like AHREFs, Ubersuggest, and Google Trends can help you understand the demand for your anticipated blog post content.
- Do you have any burning issues you feel are under-discussed? Get the conversation started.
- Have similar topics done well in the past? This can indicate whether a related blog post idea will do well. For example, this blog post about best times to post on social media performed well at CoSchedule, so we published a similar blog post about the best times to send email using a similar layout. It also performed well.
Recommended Reading: Blog Post SEO Checklist: How to Write SEO-Friendly Blog Posts that Guarantee Traffic
Credibility
Determine why your business should publish a blog post on this topic.- Is this topic relevant to my blog or business? The closer the topic is to your product or blog, the better.
- Who in your company may share knowledge on this topic? A subject matter expert who knows more about the topic than other sources on the internet can help you write a winning blog post.
- Which external partners may share knowledge on this topic? Can you crowdsource information, interview an expert, survey your own audience, or gather some other type of proprietary datasets you may publish so your blog may feel like an authoritative source?
- Why does your business have the authority to publish a blog post on this topic for your audience? Determining your why may help you write a powerful hook and introduction to keep readers interested.
- Can I write an authoritative post on this topic? Prioritize posts you can write better than anyone else.
Research
Sleuth and analyze the topic using credible sources. Here are some basic things to remember when doing any kind of serious online research:- Avoid referencing Wikipedia unless you have no other options. Wikipedia is awesome, and we all use it for personal purposes. However, it isn't a reliable source for professional information.
- Cross-reference sources to verify any information you're unsure about. The more reputable sources make a claim, the more likely it's accurate. Usually.
- Support your blog post with facts and not assumptions. Opinions are harder to refute when they're backed up by verified information.
- Library Of Congress: Search tons of historical news articles, photos, recordings, and more.
- The National Archives: Useful for finding federal records.
- Archive.org: Nonprofit resource to find tons of free books, videos, and more.
- Google Books: Google Books features over 15 million publications you can search and check out for free.
- State Libraries and Historical Archives: Check out this 50-state list from the Open Education Database.
Hook/Angle
Explore your topical research to provide a unique perspective in your blog post that adds to the already-existing online content (and doesn’t merely repeat information your audience may discover in other sources).- What are other blog posts on this topic missing that you’ve discovered through your research? Your blog post may contribute new, unique, and proprietary statistics, facts, quotes, opinions, and perspectives on this topic that your audience cannot find elsewhere.
- What is the primary emotional reason your target audience should care about this topic? Understand the motivators the target audience should have to influence their quest for the information you’ll write in your blog post.
- What intriguing stats, facts, stories, and quotes may make an impressionable first sentence for your blog post? A hook is an intrigue that inspires your audience to read your blog post. This kind of information is good to include in headlines, page titles, meta descriptions, introductions, and conclusions.
- What 14 Studies Say About The Best Time To Send Email
- The Best Times To Post On Social Media In 2022: An Analysis Of More Than 35 Million Posts [Original Research]
- 25 Best Marketing Blogs To Help You Become A Better Marketer
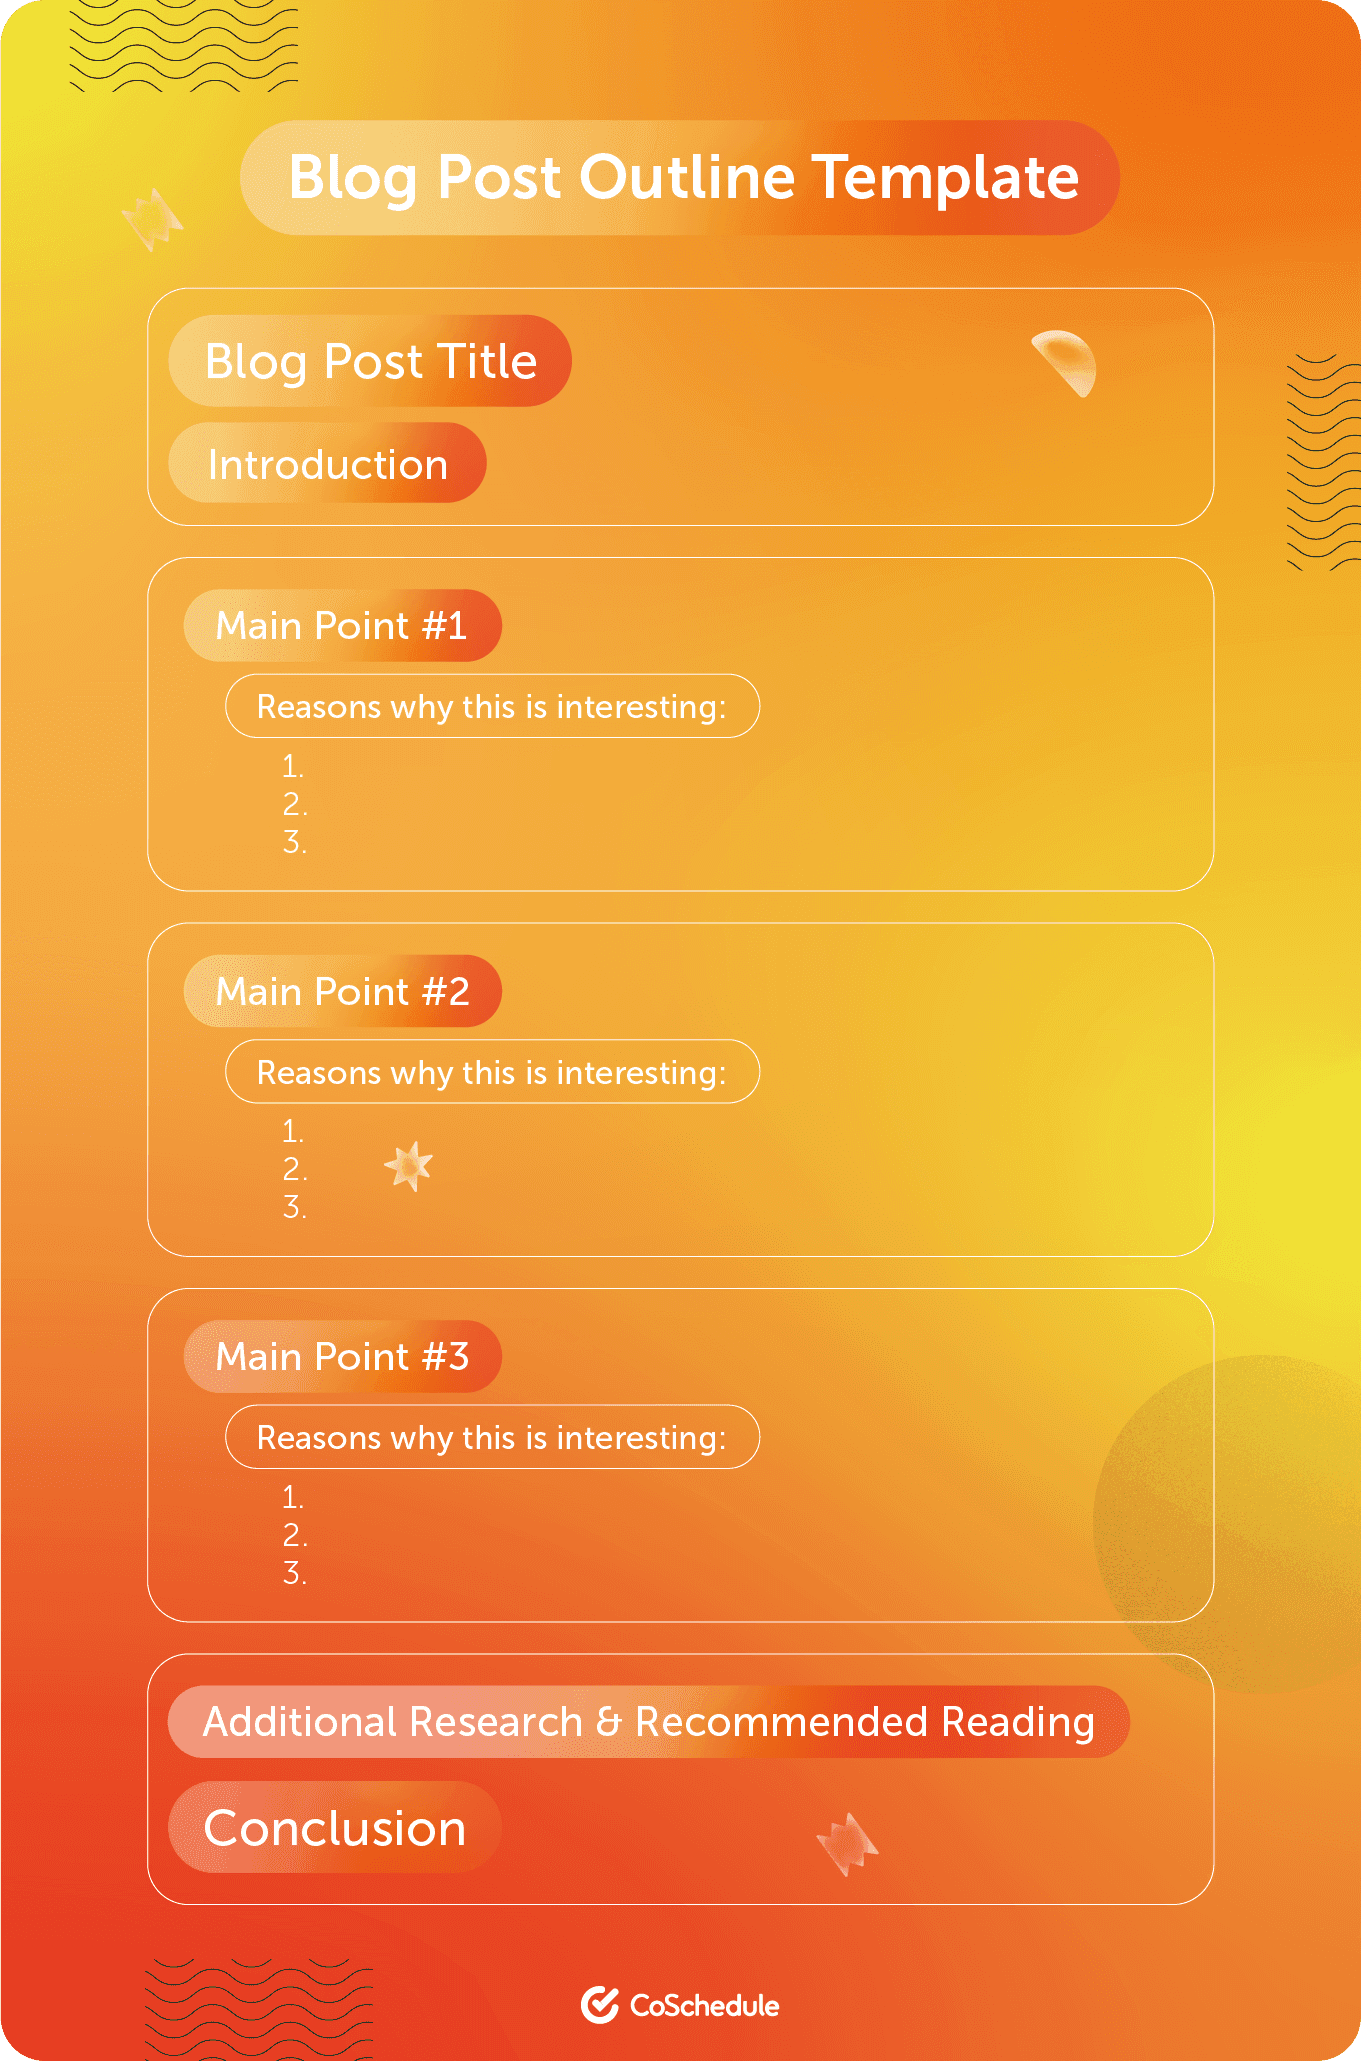
Outline
Outlines help you cover every detail to make sure you publish comprehensive content that solves all of your readers' challenges with the topic.- Establish your blog post sections: In most cases, this simply entails listing your introduction, and then your subsequent section headings. Each heading should represent a main point you want to elaborate on.
- Add bullets and sub-points: Once you've established each section of your post, it's time to drill down even deeper into your sub-points. Identify which points you'll cover underneath each section heading.
Layout
Writing a blog post without determining your final layout is like starting a road trip without a map. It's destined to end in you getting lost. So, review your outline and analyze the flow of your article before you start writing. Make sure your article aligns with these best practices:- Each section should flow naturally into the next section
- You should plan to add an image every 350 to 500 words (give or take)
- Your article should follow the correct H1/H2/H3/H4 structure
Call To Action
Your Call To Action (CTA) is likely the most important part of your article. And many, many content marketers approach CTAs all wrong. You see, many writers don't plan their CTAs in advance. As a result, the CTA seems like an afterthought to readers— a strangely promotional push that comes out of the blue. You can avoid this mistake by planning your CTA during the outline stage. Specifically, you need to determine the following:- What action you want the reader to take (start a free trial, download an eBook, join your mailing list, etc.)
- What will compel the reader to take that desired action
- When you will transition into your CTA (remember: the conclusion isn't always the best place)
- Bridging sentence. This transitions the conversation from your topic to your offering.
- Introduction to the offering. This gives the reader a high-level view of the offering.
- Why the offering will benefit the reader. This section covers your offering's features and benefits.
- The CTA itself. This short section asks the reader to take action. For example: "start your 7-day free trial now".
Write The Blog Post
Headline
Your headline is what makes anyone click, share, and read in the first place. It should capture your audience's intention and clearly communicate the value of your post. Strong headlines should:- Be punchy. You need to get people's attention quickly.
- Include an action verb. Your headline needs something happening.
- Communicate a clear benefit. Why else would people care about your post?
Introduction
The introduction will be something you'll revisit when you are all through with your draft. But writing it first helps you put into words what you're going to say in your post. It might be clunky, but it'll launch you into the writing of the actual copy. You can go back and make it amazing and full of hooks later, once your full draft post is done. Here are some tips to write your introduction:- Value: Think of your unique angle for the blog post. Like your headline, share the value your readers will get if they continue to read your blog post. One way to think about this is with the classic marketing technique, WIIFM, otherwise known as what's in it for me?
- Fact: Start with an interesting fact or stat about the content within your blog post. Alternatively, you could start with a fact or story that may seem unrelated, but tie it in through the introduction.
- Anecdote: What is a personal opinion you hold as true that could catch your readers' attention?
- Question: Ask a question to help your readers understand the answer is covered throughout your blog post. ‘What if’ kinds of questions work well for this: What if you never had to worry about {something} ever again?
Recommended Reading: 11 Tips & Best Practices for Writing a Blog Post Introduction
Content Upgrade
Content upgrades are free, supplementary pieces of content you offer your readers as a bonus. For example, if you were writing a blog post on how to craft the perfect Instagram caption, you could offer an eBook with 100 Instagram hashtags as a content upgrade. Content upgrades can be as creative (or uncreative) as you like. Here are some suggestions:- A PDF version of the blog post
- Cheat sheet
- Checklist
- Webinar
- Podcast
- Case study
- Printable
- Worksheet
- Interview
- Template
- Make it actionable and useful
- Integrate your content upgrade into your email marketing tool so you can create a segment from your content upgrade subscribers
- Save readers time and money with your upgrade
- Use a widget so that your upgrade stands out (see the image below)
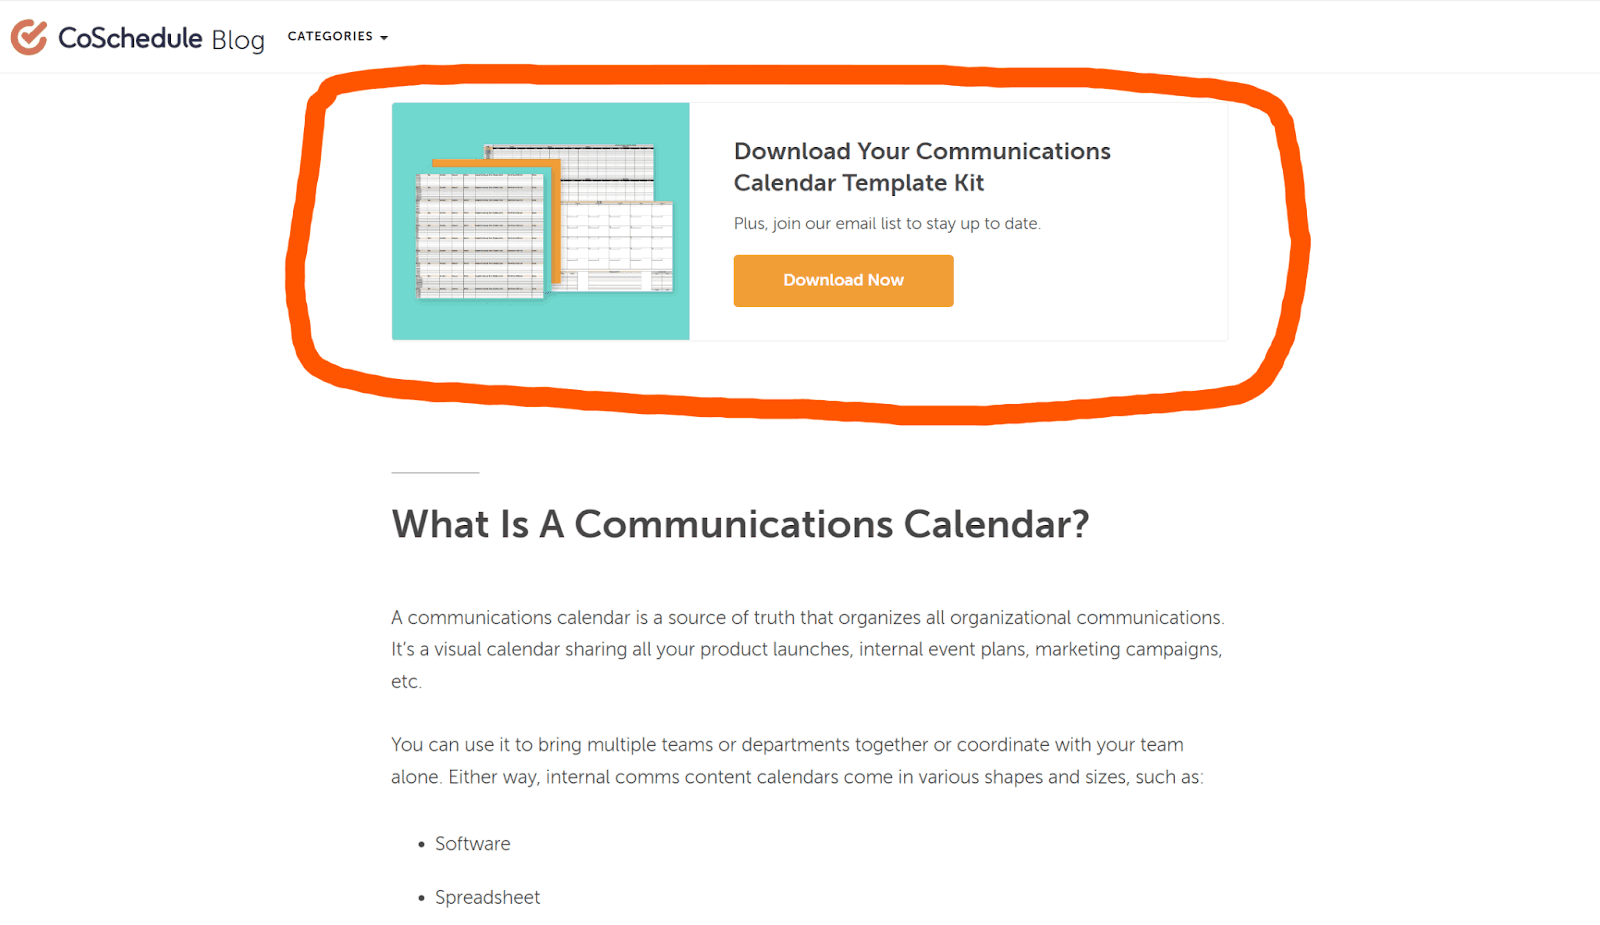 Check out the communications calendar on the CoSchedule Blog.
Recommended Reading: How to Create Amazing Content Upgrades for Your Blog
Table Of Contents
Have you ever opened a blog post and had to painstakingly scroll down the page until you found the section you needed? Yeah. Me too. And it SUCKS. That's where a table of contents comes in handy. It helps your readers jump to the section they need instantly. A 200-word table of contents isn’t helpful. So, reduce your table of contents so that it only displays your H2s and H3s. And poof. You're done. That's all there is to it.Body/Solution
Ideally, your introduction should have set the stage for your body content to shine. If you took the time to write a strong outline, then writing the rest of your post should be simple.Keep Paragraphs Relatively Short
Paragraphs in a blog post should be brief and to the point. Where appropriate, use single sentences to add punch behind statements (see above). Keep paragraphs down to two or three sentences for crispness and clarity (and avoid more than five at the most). This will keep your writing easy to read and skim through.Add Descriptive Headings To Each Section
Give each section a descriptive heading. This is a good time to take the headings from your outline and turn them into something more attention-grabbing. Here are some tips for writing subheadings:- Make sure the reader knows what to expect in each section. Creativity is great. Clarity is better.
- Add unique value propositions throughout your headings. For example, instead of saying "How To Change Your Own Motor Oil", you could write something like, "How To Change Your Own Oil & Save $30." That adds specific value to the subhead.
Add Relevant Points To Support Each Heading
Beneath each heading, you should have several sub-points that support the section's theme or idea. Take each bullet point you put beneath each heading in your outline. Then, add a few paragraphs on each one in the appropriate section. If you get on a roll and uncover more relevant information, add it into your post. Let's pull this all together to ensure you're equipped to write awesome body content for your blog post. This simple yet effective process will ensure your post follows a logical structure:- Each main point in your outline is a subheading. This is an easy way to map your outline to your actual post.
- Each subheading should be supported by facts and relevant information. Consider adding at least two or three paragraphs for each bullet point, beneath each subheading, from your outline.
- Where appropriate, use links to other posts and research materials to support your post.
Conclusion
The purpose of a conclusion is to tie your blog post together. At the most basic level, a blog post conclusion does the following:- Resolve the problem.
- Summarize what you said.
- Suggest action that the reader can take.
Images/Visuals
Writing a great blog post takes more than words. It also needs excellent visual content. A best practice is to include a visual in your blog post where it provides value to the reader. There are two ways to do this: hire a graphic designer, or create visuals yourself using free or low-cost design tools.Work With A Designer
If you work with a designer, add notes for image direction in-line in your text document instructing them on what you'd like. Include the exact copy and other information you need, and in most cases, they'll take it from there. CoSchedule's team uses this format:
GRAPHIC: [Insert copy and general description]
That's all you need to do. Every graphic you see on this blog starts this way.
Create Graphics & Photos
However, if you're working alone and don't have design skills, you're not out of luck. The following tools make it easy to design images (even with little or no previous graphic design knowledge):Proofread/Edit
Editing isn't exactly fun. But it is important. Typos, continuity errors, and grammar mistakes can throw readers off. Start your editing process by using Grammarly or Writer.com to correct any errors. Both of these tools can be slightly off when you have tables, so remove all tables in advance. If you're using Google Docs, you can also catch errors using the in-built tool (go to "tool" and select "spelling and grammar check"). Next, read through each section and edit harshly. Make sure you double-check that:- All images have a source
- All statistics are correct
- All quotes are accurate
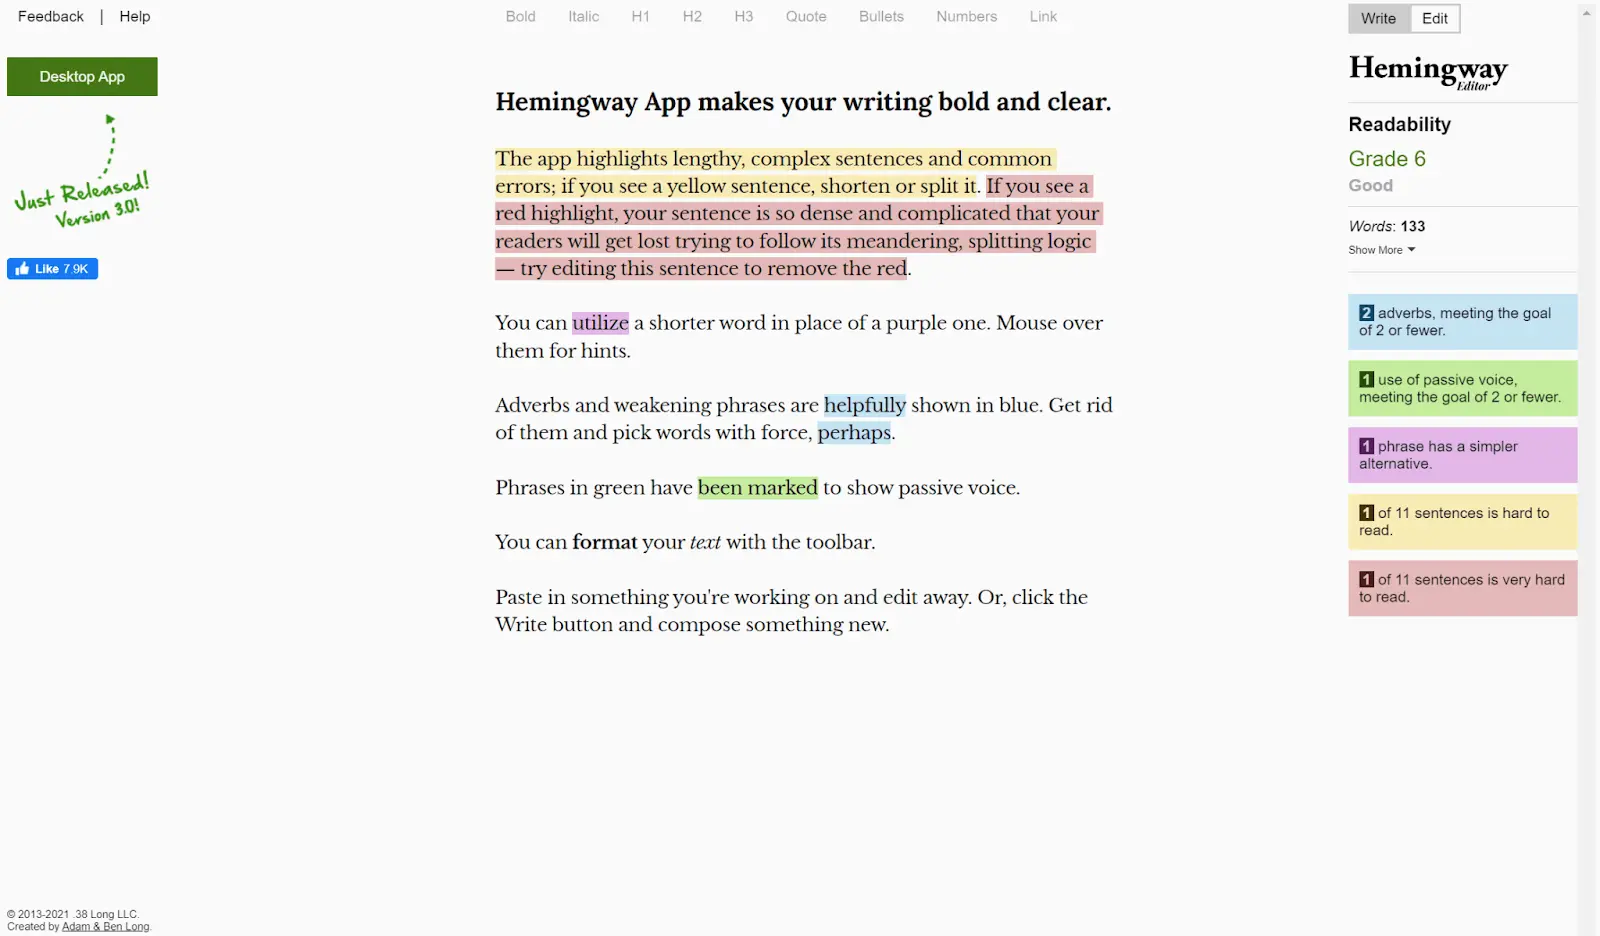 Use the Hemingway Editor for blog posts.
Once you've finished editing, go back to the start of the article and read the entire thing out loud. This will help you catch any lingering errors and smooth out any awkward phrases.
And that's it: your blog post is complete.
Use the Hemingway Editor for blog posts.
Once you've finished editing, go back to the start of the article and read the entire thing out loud. This will help you catch any lingering errors and smooth out any awkward phrases.
And that's it: your blog post is complete.
Recommended Reading: The Complete Proofreading and Editing Checklist to Publish Amazing Copy Every Time
Use CoSchedule Calendars To Organize Your Blog Post Process
CoSchedule’s calendar products make it easier to publish blog posts consistently, promote posts on social media, and drive traffic to your site – all with one tool. Use CoSchedule’s Marketing Suite or Marketing Calendar to streamline your blog post process. CoSchedule’s Marketing Calendar schedules, manages, and tracks your marketing efforts. CoSchedule Marketing Suite is a family of agile marketing products to coordinate your process, projects, and teams. You can use both solutions to plan your content, manage your blog, & promote it via social media - all from one place! Here’s how:1. Choose Your Next Great Blog Idea From Your Backlog
Idea Bin is a designated space to store your content marketing ideas. Add blog post ideas to the Idea Bin to store, prioritize, and flesh out future blog post ideas.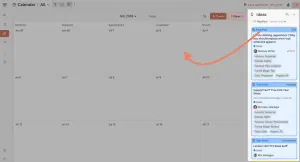 Drag and drop any new blog post from your Idea Bin to your content calendar on the day you want the blog post to publish.
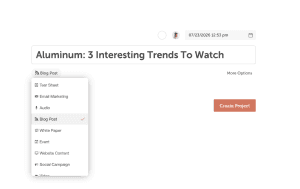
2. Create A Project For Your New Blog Post
Creating a new blog post idea? You can add a new Blog Post Project to your calendar on the day you want to publish the post.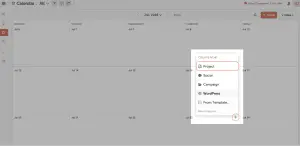 Choose the blog post project type. Then give it a working title.
Use WordPress? Try This Instead!
If you host your blog on WordPress, enable CoSchedule’s WordPress Integration. You can create new WordPress posts without leaving your CoSchedule Calendar.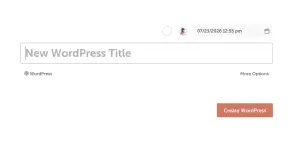 The integration automatically syncs posts added to your CoSchedule Calendar with your WordPress account.
3. Assign A Project Owner
Designate the project owner to oversee the process of the blog post.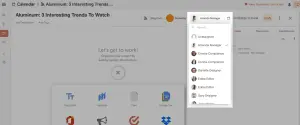 Project owners are notified about project progress and can approve tasks before publishing the blog post.
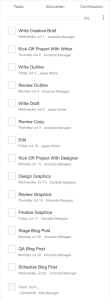
4. Complete Blog Posts On Time With A To-Do List
Make sure your blog post gets completed on time by adding a to-do list to your project. Include a task for each step of the process including completion dates. Then assign a team member to each task.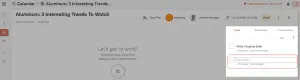 Sample task list for a blog post with project owners:
- Write a creative brief for the project (the project owner)
- Kick-off project with the writer (the project owner)
- Write blog post outline (writer)
- Review outline (the project owner)
- Write 1st draft of the blog post (writer)
- Review blog post writing (the project owner)
- Make edits (writer)
- Kick-off project with the designer (the project owner)
- Design blog post graphics (designer)
- Review blog post graphics (the project owner)
- Finalize blog post graphics (designer)
- Stage blog post (the project owner)
- QA blog post (the project owner)
- Schedule blog post (the project owner)
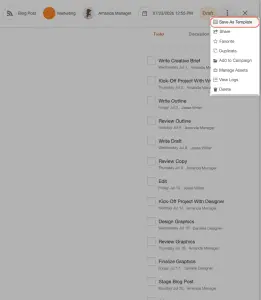
 Pro Tip: To save time on future blog posts, save the tasks as a reusable template to apply the entire workflow in seconds.
 Best of all, your deadlines are relative to the publish date for your blog post, so you can make sure writing, design, & staging are all done before the publish date every time.
5. Create Your Blog Post In One Place
Now it’s time to create your new blog post. Add all your blog post files as attachments to your project. This includes your Word Doc for drafting copy, files for blog post graphics, & more using Project Attachments. When you attach these resources to the project, anyone can jump in to find what they need to complete, publish, and promote the post on time.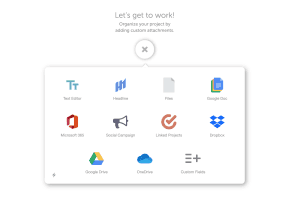 Pro Tip: Click on the gear icon of a current Word Doc or Text Editor Project Attachment to convert the document to a WordPress post.
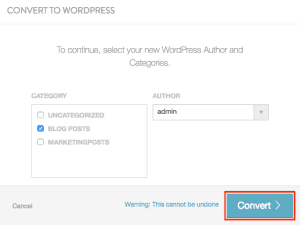
Recommended Reading: Convert Content Attachments to WordPress
6. Optimize Your Headline
Next, you’ll want to write an attention-grabbing headline with the Headline Studio integration.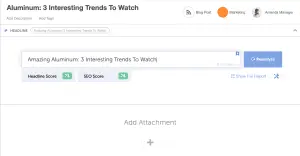 Use Headline Studio to draft, analyze, and improve your headline copy, so you can maximize click-through rates, optimize your headlines for SEO, & more.
7. Publish Your Blog Post
Publish your blog post by changing the project status to “Scheduled.”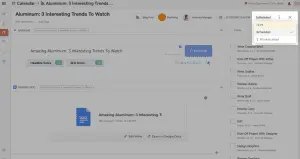 If you’re using the WordPress integration, this schedules the post in WordPress. CoSchedule will automatically publish your WordPress Blog on the specific date and time selected on the project.
If you are not using WordPress, you’ll change the status to Scheduled when your blog post is officially scheduled to publish. This notifies your team all of the steps are complete & the post is ready to go live on the date & time indicated on the Project.
If you’re using the WordPress integration, this schedules the post in WordPress. CoSchedule will automatically publish your WordPress Blog on the specific date and time selected on the project.
If you are not using WordPress, you’ll change the status to Scheduled when your blog post is officially scheduled to publish. This notifies your team all of the steps are complete & the post is ready to go live on the date & time indicated on the Project.
8. Drive Traffic To Your Blog Post On Social Media
Finally, promote your newly published blog post by adding a Social Campaign attachment to your Project. Social messages from your Social Campaign will start publishing as soon as your blog post is published and the Project is no longer in “Draft” status.
Use Social Campaigns to promote your new blog post on social media. This helps you drive more traffic to your new content by sharing it with your fans & followers across LinkedIn, Facebook, Instagram, Twitter, and Pinterest.
Social messages from your Social Campaign will start publishing as soon as your blog post is published and the Project is no longer in “Draft” status.
Use Social Campaigns to promote your new blog post on social media. This helps you drive more traffic to your new content by sharing it with your fans & followers across LinkedIn, Facebook, Instagram, Twitter, and Pinterest.
Schedule your demo call to see how Marketing Suite can benefit your team: Schedule TODAY!
This post was originally published on March 28, 2016. It was republished with new information on September 30, 2019, in January 2023, and in July 2023. Nathan Ellering contributed to this blog post.


