WordPress with CoSchedule Calendar Products
Connect your WordPress site(s) to your CoSchedule calendar by installing the CoSchedule WordPress plugin. This allows all of your WordPress posts (including Posts, Pages, and Custom Post Types) to automatically appear on your calendar. In addition, while you are editing in WordPress you will be able to add Attachments such as a Social Campaign to your posts and write your social messages right along with your blog post. If you like to create drafts in places like the Text Editor or Google Docs you can then convert them automatically to WordPress posts.
 2. Search for "CoSchedule", and once it is found click Install Now. Once the plugin is installed, click Activate Plugin.
 3. Sign in with your current CoSchedule information, or if you don't have an account yet - sign up here by following the prompts.
 Back To Top
 Back To Top
 Scroll to the bottom of the WordPress > Site Name page and click Disconnect.
 To finalize the disconnect of your WordPress site from CoSchedule, a confirmation window will open up. Type in "DELETE" and click Confirm. Your WordPress site is now disconnected from CoSchedule!
Back To Top
To finalize the disconnect of your WordPress site from CoSchedule, a confirmation window will open up. Type in "DELETE" and click Confirm. Your WordPress site is now disconnected from CoSchedule!
Back To Top
- WordPress Integration Details
- Install the CoSchedule WordPress Plugin
- Refresh Your WordPress Connection
- Disconnect Your WordPress Site from CoSchedule
Note: For WordPress.com sites, you must have a Business plan or higher to use the CoSchedule plugin.
WordPress Integration Details
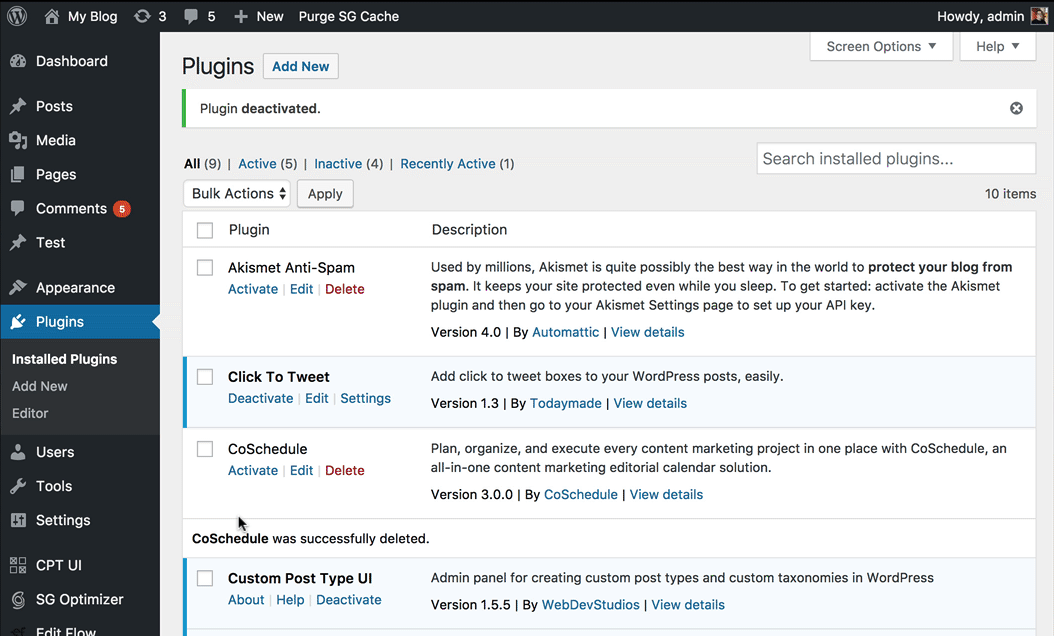
When you first connect your WordPress site to CoSchedule, your calendar will be populated with the published and draft posts you currently have in WordPress. If you have an unscheduled draft, it will appear in your Ideas Bin. You can then choose to create new WordPress posts either inside of CoSchedule or in WordPress and your calendar will automatically sync with your WordPress website. Once your site has been connected, your calendar will automatically sync:- The latest created 500 drafts
- The latest created 500 published posts
- The latest created 500 scheduled posts
Install the CoSchedule WordPress Plugin
Watch this video or follow the written instructions below to learn how to install the CoSchedule WordPress plugin. Once complete, your WordPress site will be connected to your calendar!Note: If you have a Multisite network, you will need to install the plugin at the multisite WordPress network admin level. Once the plugin is installed, go to the site level and click Activate Plugin.
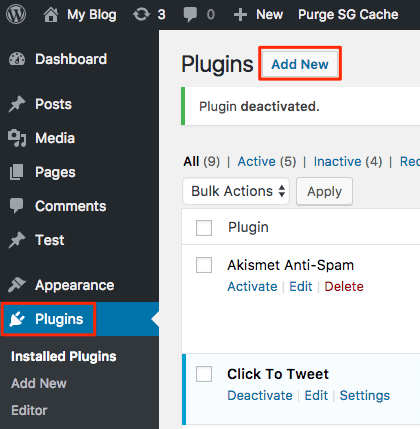
1. Go to your WordPress Plugins menu, and click Add New.
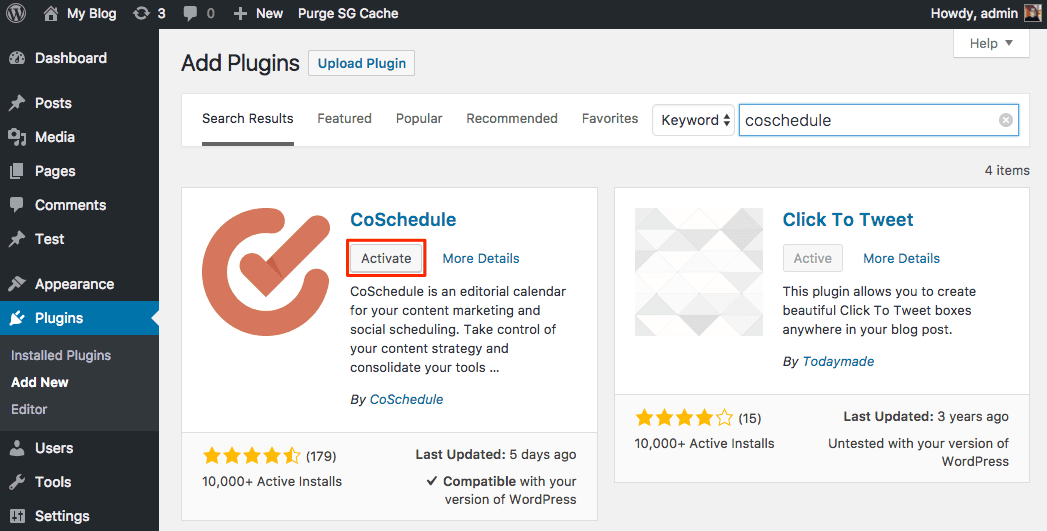
2. Search for "CoSchedule", and once it is found click Install Now. Once the plugin is installed, click Activate Plugin.
3. Sign in with your current CoSchedule information, or if you don't have an account yet - sign up here by following the prompts.
Back To Top
Refresh Your WordPress Connection
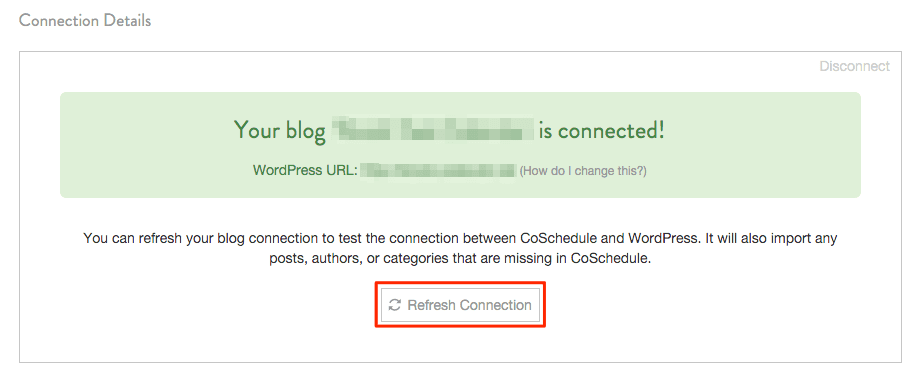
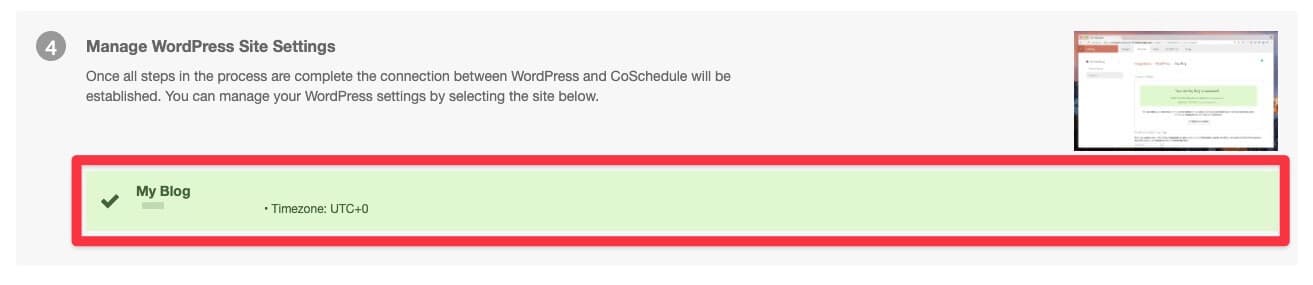
On occasion, you may need to refresh the connection between CoSchedule and your WordPress site. From CoSchedule, navigate to Settings > Integrations > WordPress > Manage WordPress Site Settings > select site name. Inside the WordPress site's settings, click Refresh Connection. It may take a few moments as CoSchedule syncs all of your posts and settings from WordPress. If your CoSchedule account is not connecting to your WordPress site, try deactivating and reactivating your CoSchedule plugin to refresh your site connection.
Back To Top
Disconnect Your WordPress Site from CoSchedule
Warning: Disconnecting your WordPress site from CoSchedule will delete scheduled WordPress posts from your CoSchedule calendar, social messages associated with WordPress projects, and social sharing analytics for WordPress posts inside of CoSchedule. However, it will not delete any posts from your WordPress site.
To disconnect the WordPress connection, go to Settings > Integrations > WordPress > Site Name that you want to disconnect.
Scroll to the bottom of the WordPress > Site Name page and click Disconnect.
To finalize the disconnect of your WordPress site from CoSchedule, a confirmation window will open up. Type in "DELETE" and click Confirm. Your WordPress site is now disconnected from CoSchedule!
Back To Top