

Get Started With Your CoSchedule Calendar
In This Lesson
By the end of this chapter, your calendar will be connected to your social accounts and ready for your first post.
1.1 Get Your Calendar Ready
CoSchedule is social media management software built on a calendar. You plan, publish, reply to and measure your social posts from one month view.
Most social tools give you a queue: a list of what's posting next. CoSchedule gives you a calendar. Every post sits on a date, so you can see what's going out, spot an empty week before it happens, and move things around by dragging them.
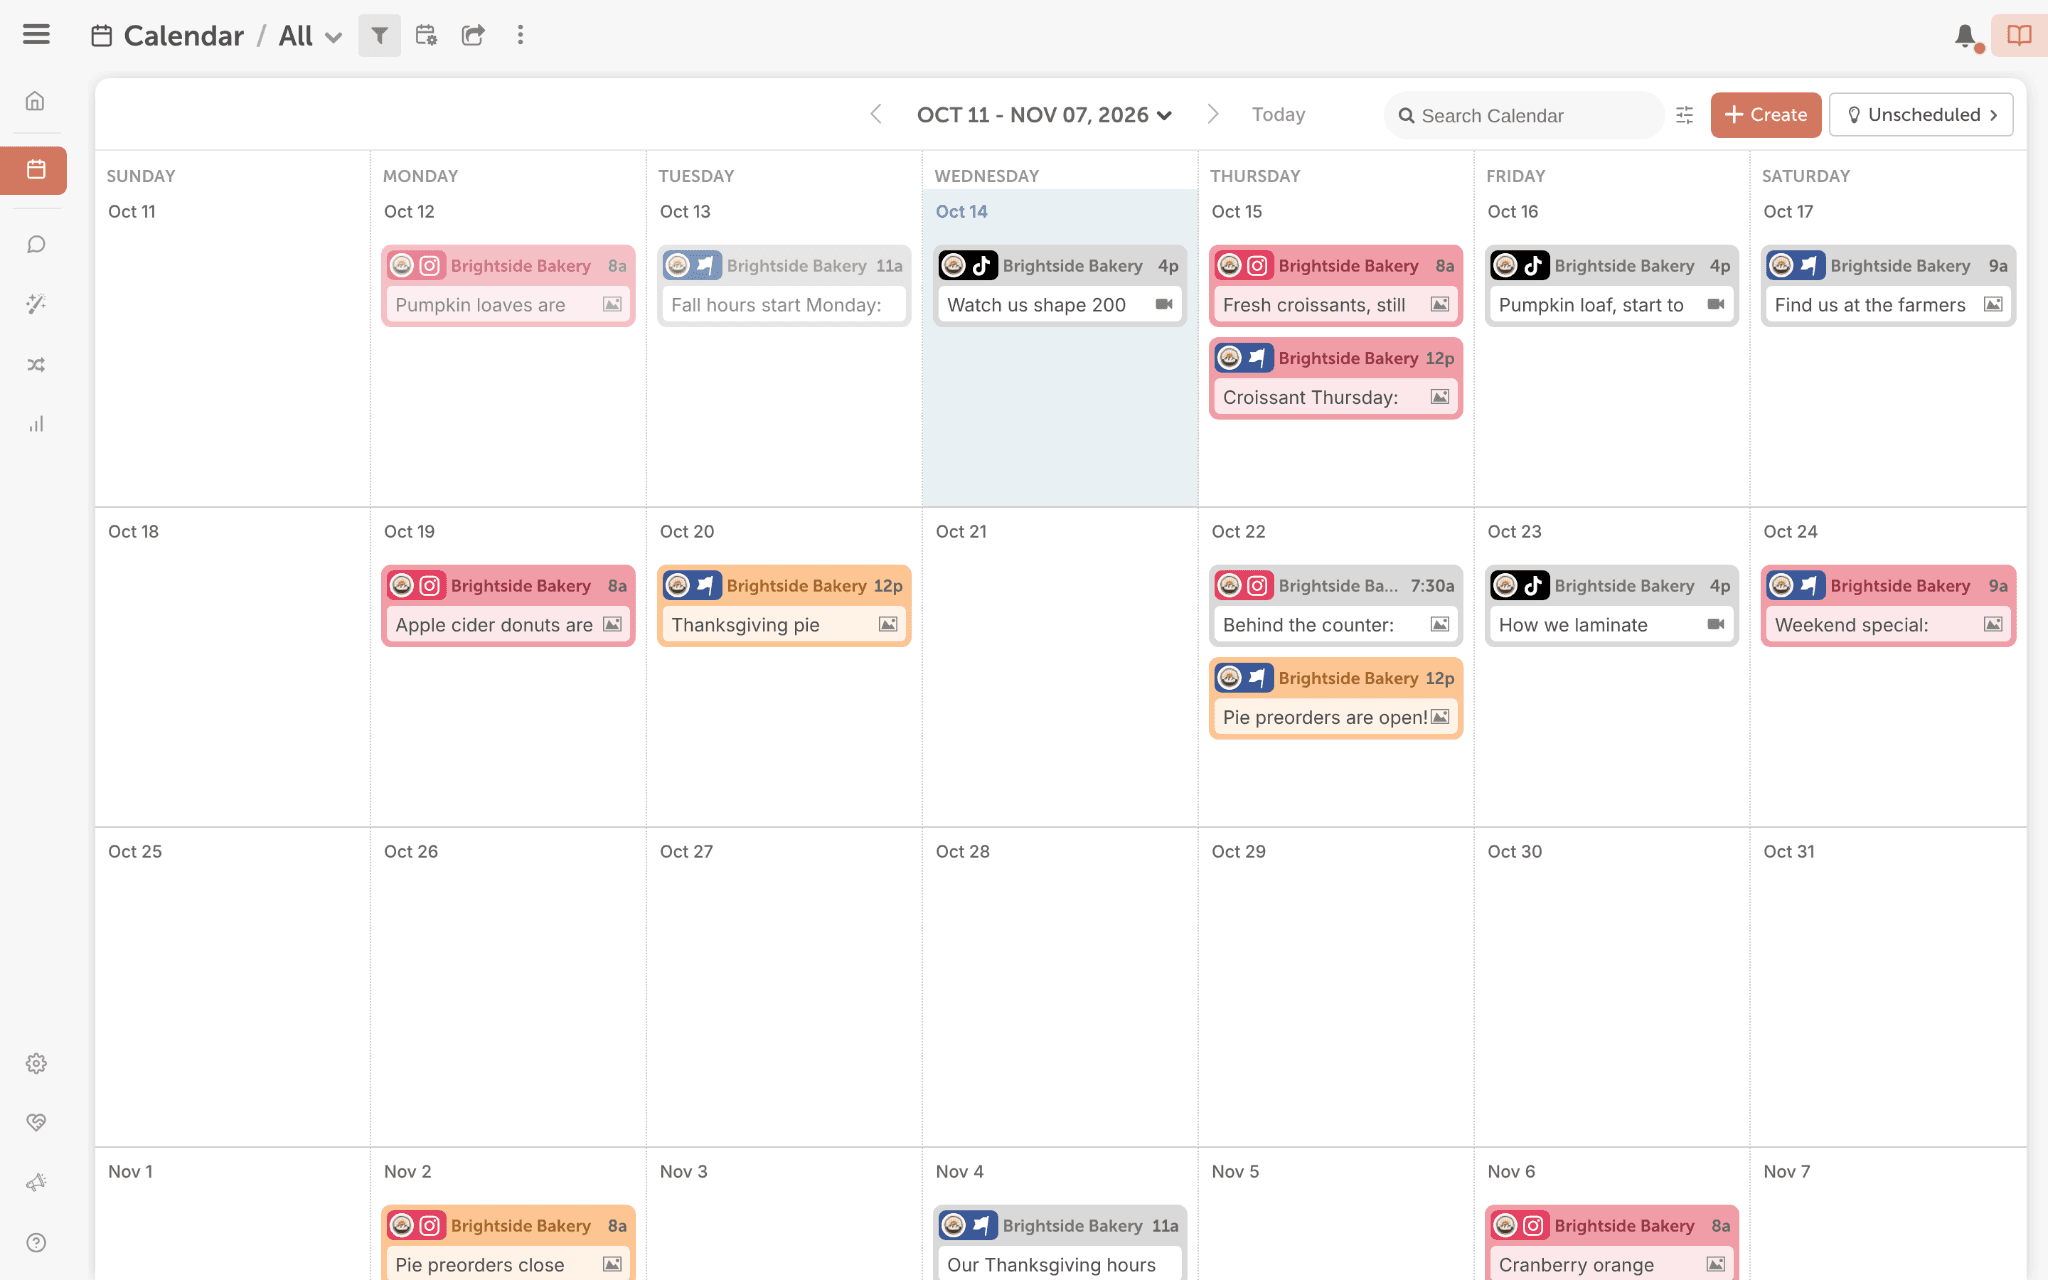
How to use this guide: Chapters 1 and 2 get you publishing. Come back for Chapters 3, 4 and 5 once your posts are going out. A few features depend on your plan. We'll mark them as you go.
Up next: connect your social profiles so your calendar can start publishing.
1.2 Connect Your Social Profiles
Your calendar can't publish anything until it's connected to your social accounts. It takes a few minutes per profile, and you only do it once.
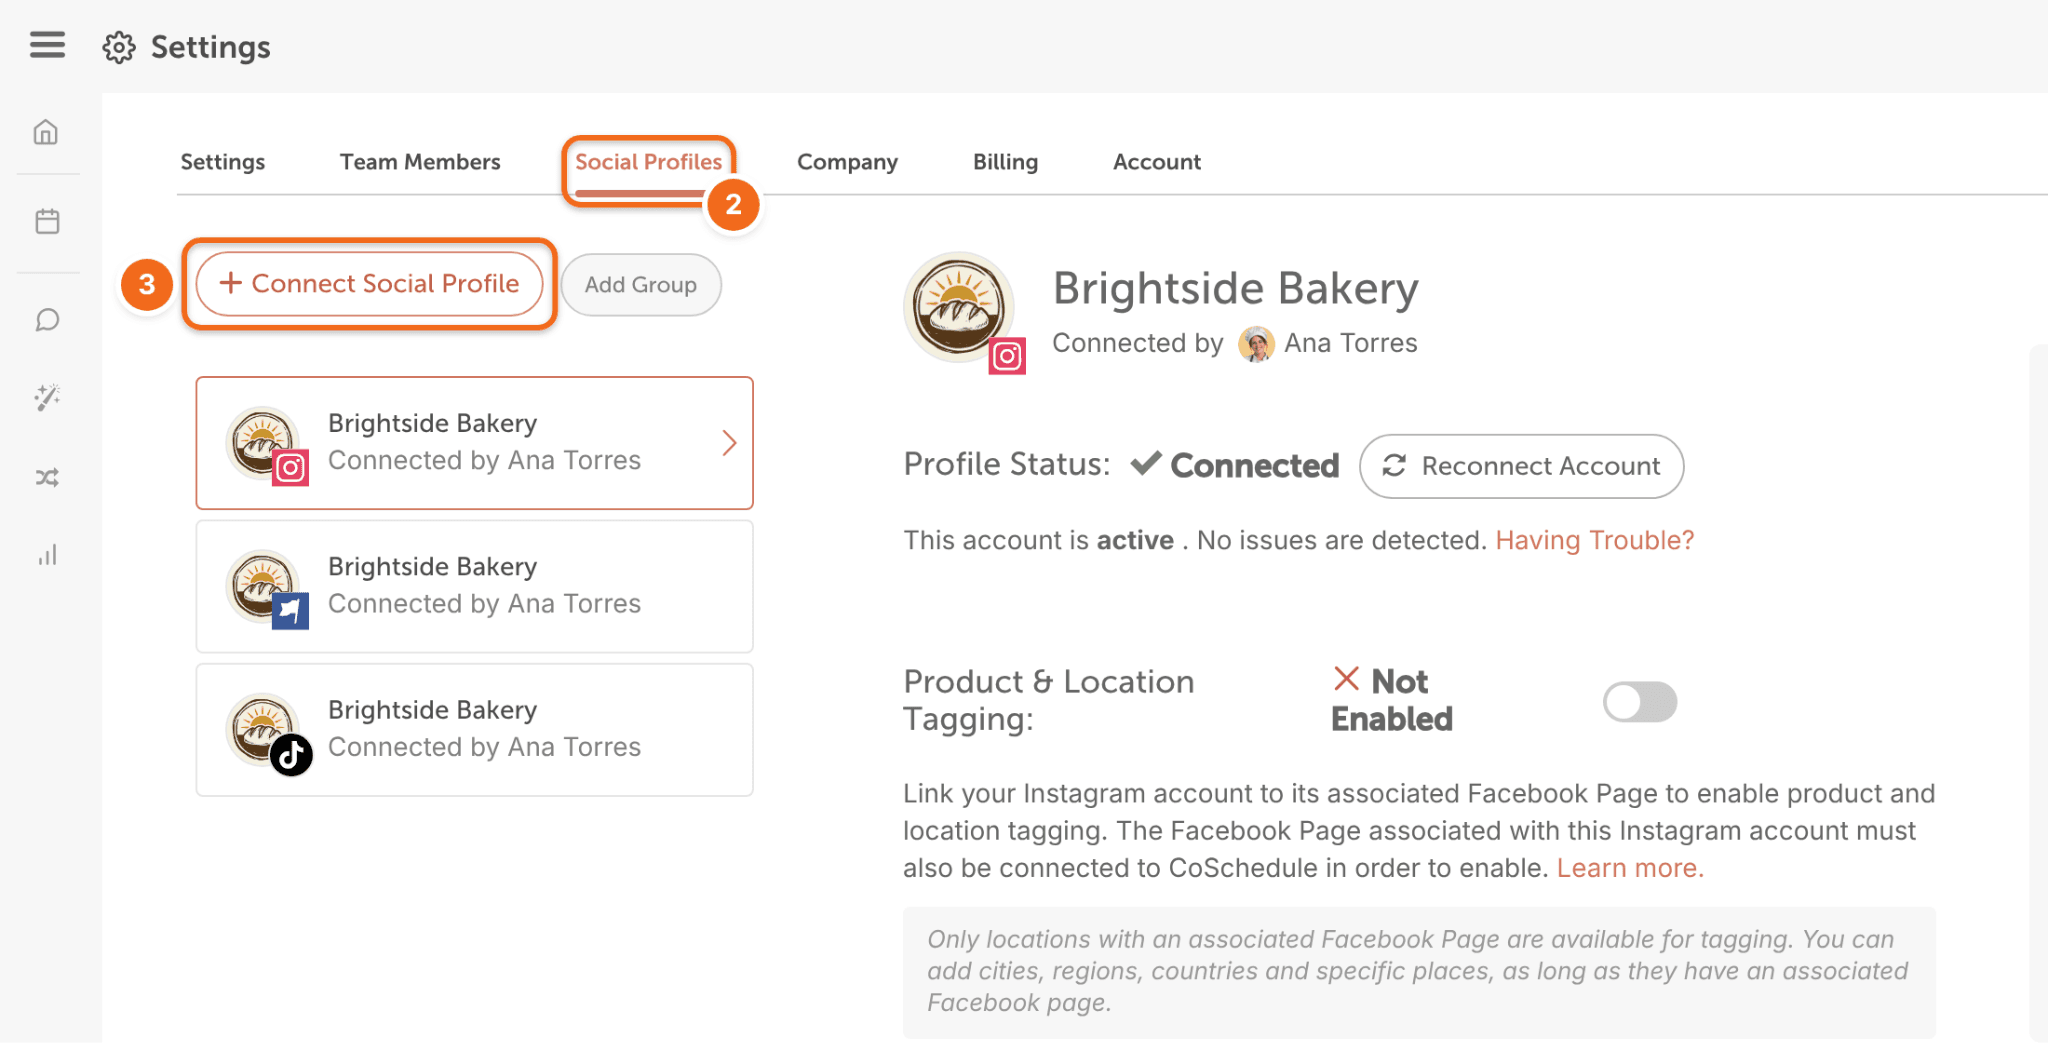
- In CoSchedule, open Settings.
- Click Social Profiles.
- Click + Connect Social Profile.
- Choose the network, then follow the prompts to sign in and give CoSchedule permission to post.
Before you start: Instagram needs a Business or Creator account, Facebook Pages need your personal profile to be an admin, and LinkedIn company pages need you to be a Super Admin.
Need help with one network? See Social Account Types You Can Connect to CoSchedule Calendars.
You're all set when every profile you plan to post shows under Social Profiles.
Next step: schedule your first post in Chapter 2.