

Plan & Schedule Social Content
In This Lesson
- 2.1 Create & Schedule Individual Social Messages
- 2.2 Schedule Content in Bulk With Social Campaigns
- 2.3 Build Efficient Campaigns With AI Campaign Assistant
- 2.4 Save Time With Social Templates
- 2.5 Keep Content Moving With ReQueue
- 2.6 Save Time With Bulk Upload
Start with one scheduled post, then pick up the tools that save time as you post more.
2.1 Create & Schedule Individual Social Messages
A Social Message is CoSchedule's single social post. It's the fastest way to get your first post on the calendar.
- On your calendar, click + Create, or click + on the day you want to post.
- Choose Social, then Social Message.
- Choose your social profiles.
- Write your post in Your status update, and click Media to add an image or video.
- Pick a day. Leave the time on Best Time, and CoSchedule picks a good time that day.
- Leave the status on Scheduled, and click Save.
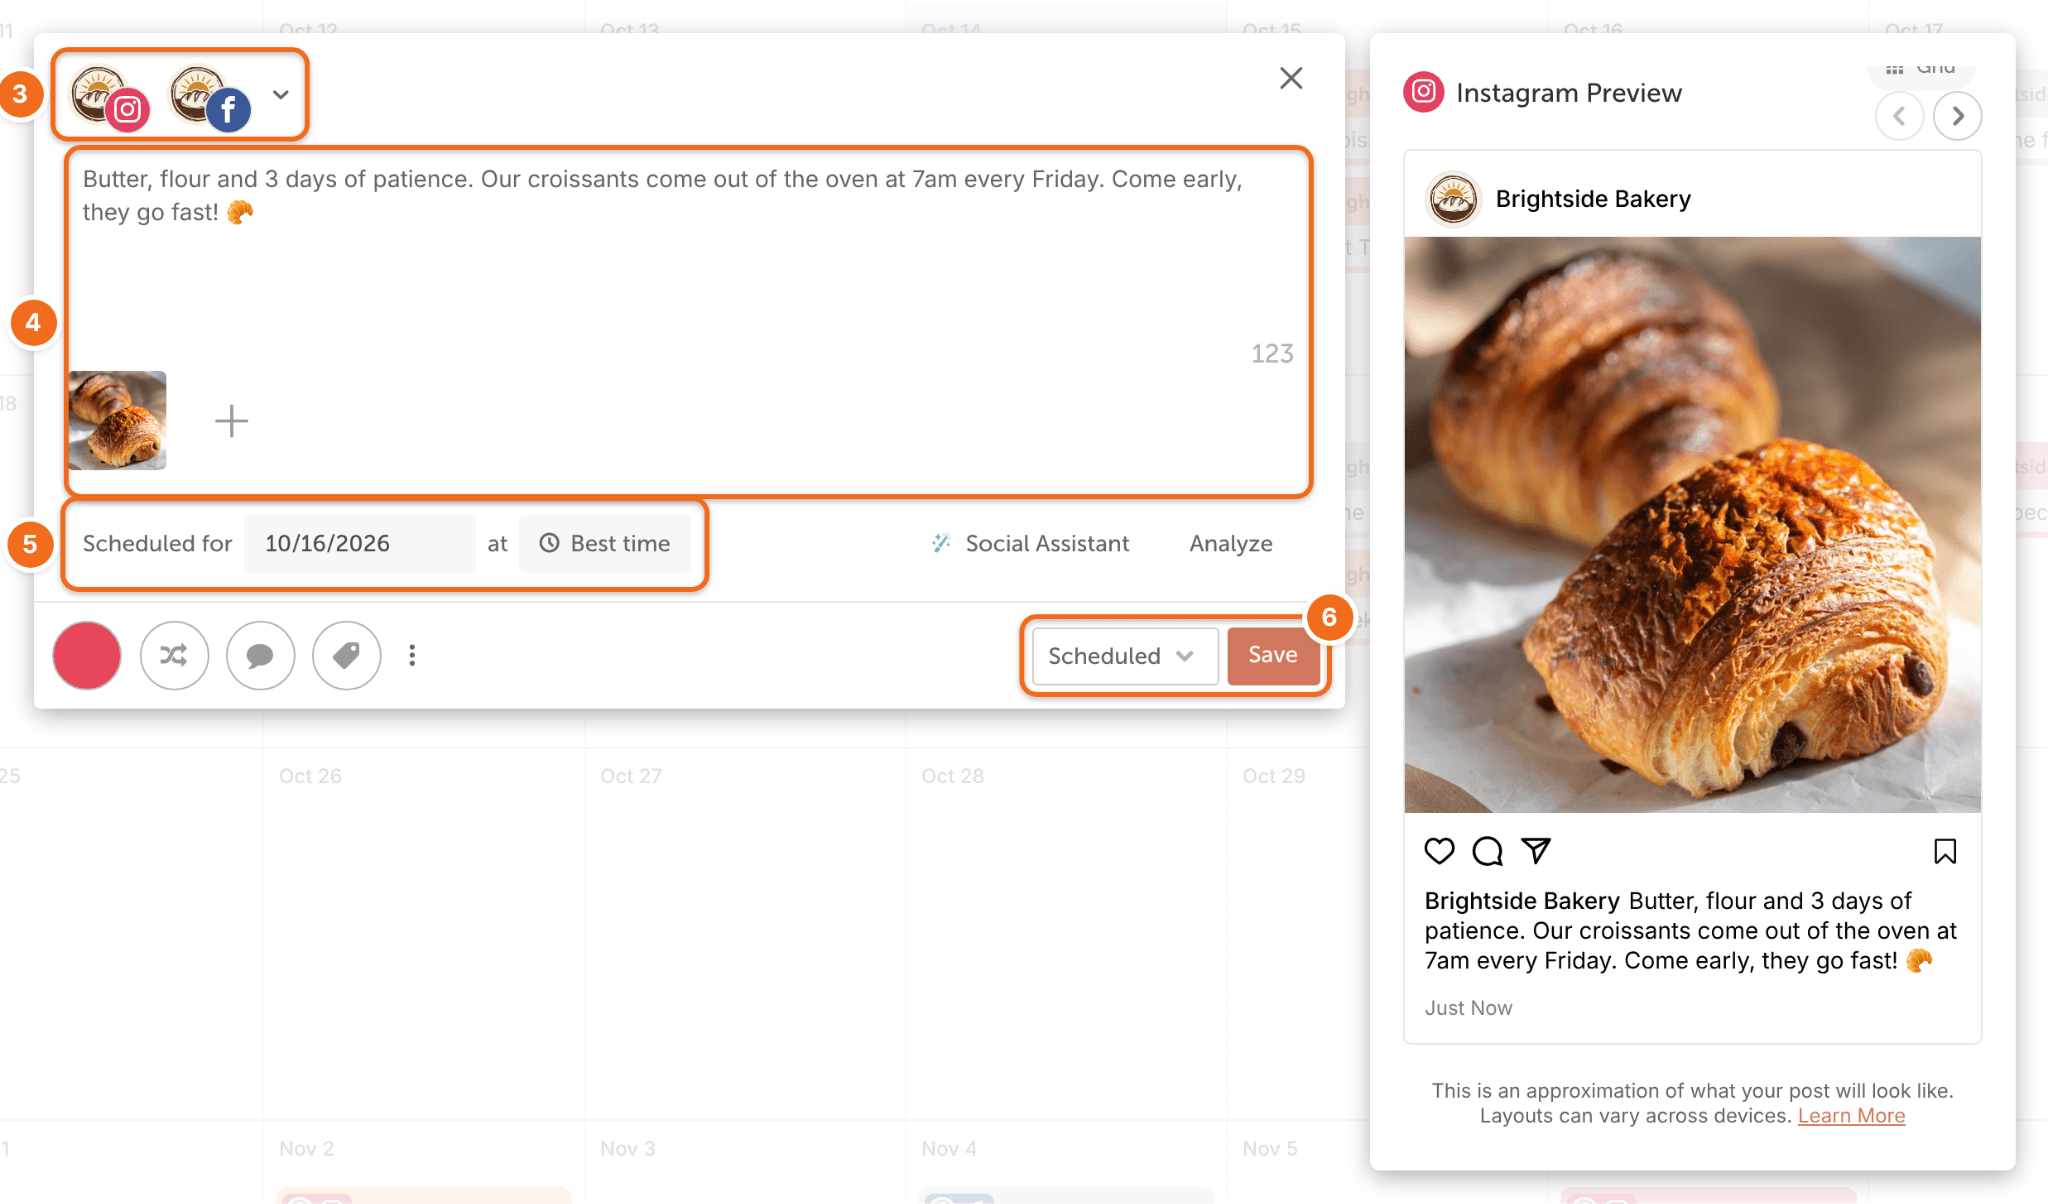
Snag: only posts set to Scheduled go out. Draft holds a post back.
When to pick your own time: Best Time works well for everyday posts. Set your own time when a post has to go out at a set moment, like a sale that starts at noon.
Check the preview. Before you save, look at the preview on the right side of the composer. It shows how your post will look on each network, so you can catch a cut-off caption or an odd crop.
Tailor it for each network. You can adjust the copy for each network, like a shorter version for X, before or after you save.
Reschedule by dragging. To move a post, drag it to a new day on the calendar. It stays scheduled.
Need help writing? Click Social Assistant in the composer, and CoSchedule AI drafts the copy. Read it over and make it sound like you before you schedule it.
For the full steps, see How to Create a Social Message.
You're all set when your first post is on the calendar, set to Scheduled.
2.2 Schedule Content in Bulk With Social Campaigns
A Social Campaign is CoSchedule's group of related social posts: every post promoting one launch, event or piece of content, planned together.
When to use it: any time you'll post about the same thing more than once, like a launch, a webinar or a new blog post.
- On your calendar, click + Create.
- Choose Social, then Social Campaign.
- Name the campaign, set its date (usually your launch or event date), and click Create Project.
- Click + next to a date to add a post. Place each post a few days before or after the campaign date, so the whole schedule moves if the date changes.
- When you're ready, set the campaign to Scheduled in the upper right.
Snag: the campaign controls its posts. If it stays in Draft, none of them go out.
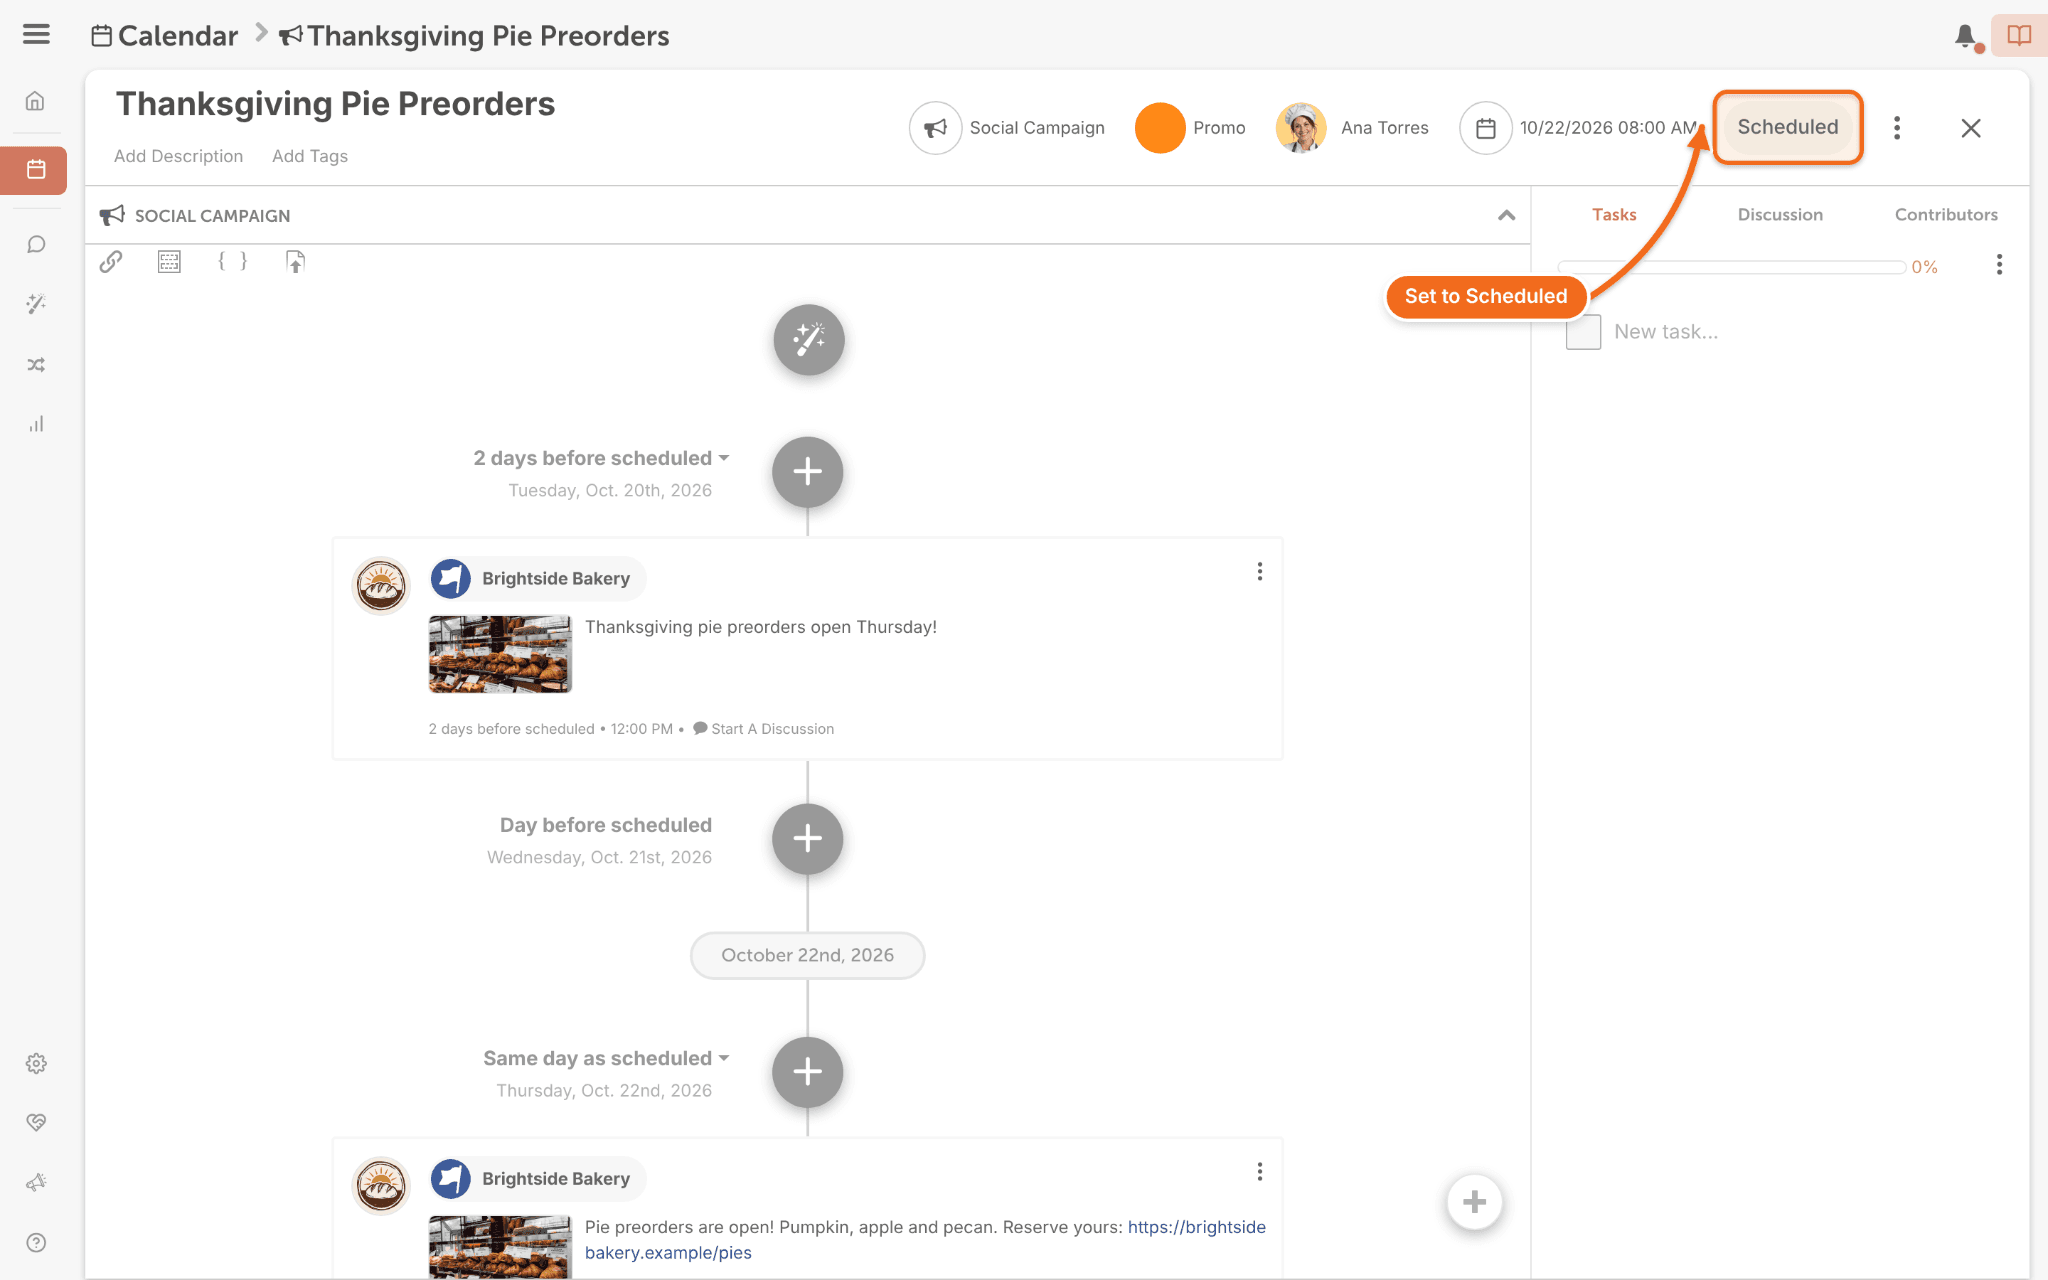
For the full steps, see Create a Social Campaign.
You're all set when you have a campaign with a few posts, set to Scheduled.
2.3 Build Efficient Campaigns With AI Campaign Assistant
AI Campaign Assistant, CoSchedule's AI campaign builder, drafts a whole campaign for you: the schedule, the copy and, if you want, the images.
When to use it: you know what you're promoting but don't want to write every post yourself.
- Open a Social Campaign and click the AI Campaign Assistant icon at the top.
- Describe what you're promoting, and add any links you want it to use.
- Choose your profiles, images and dates, then follow the prompts to create the posts.
- Read every post. Fix anything that's off, then click Apply.
- Set the campaign to Scheduled.
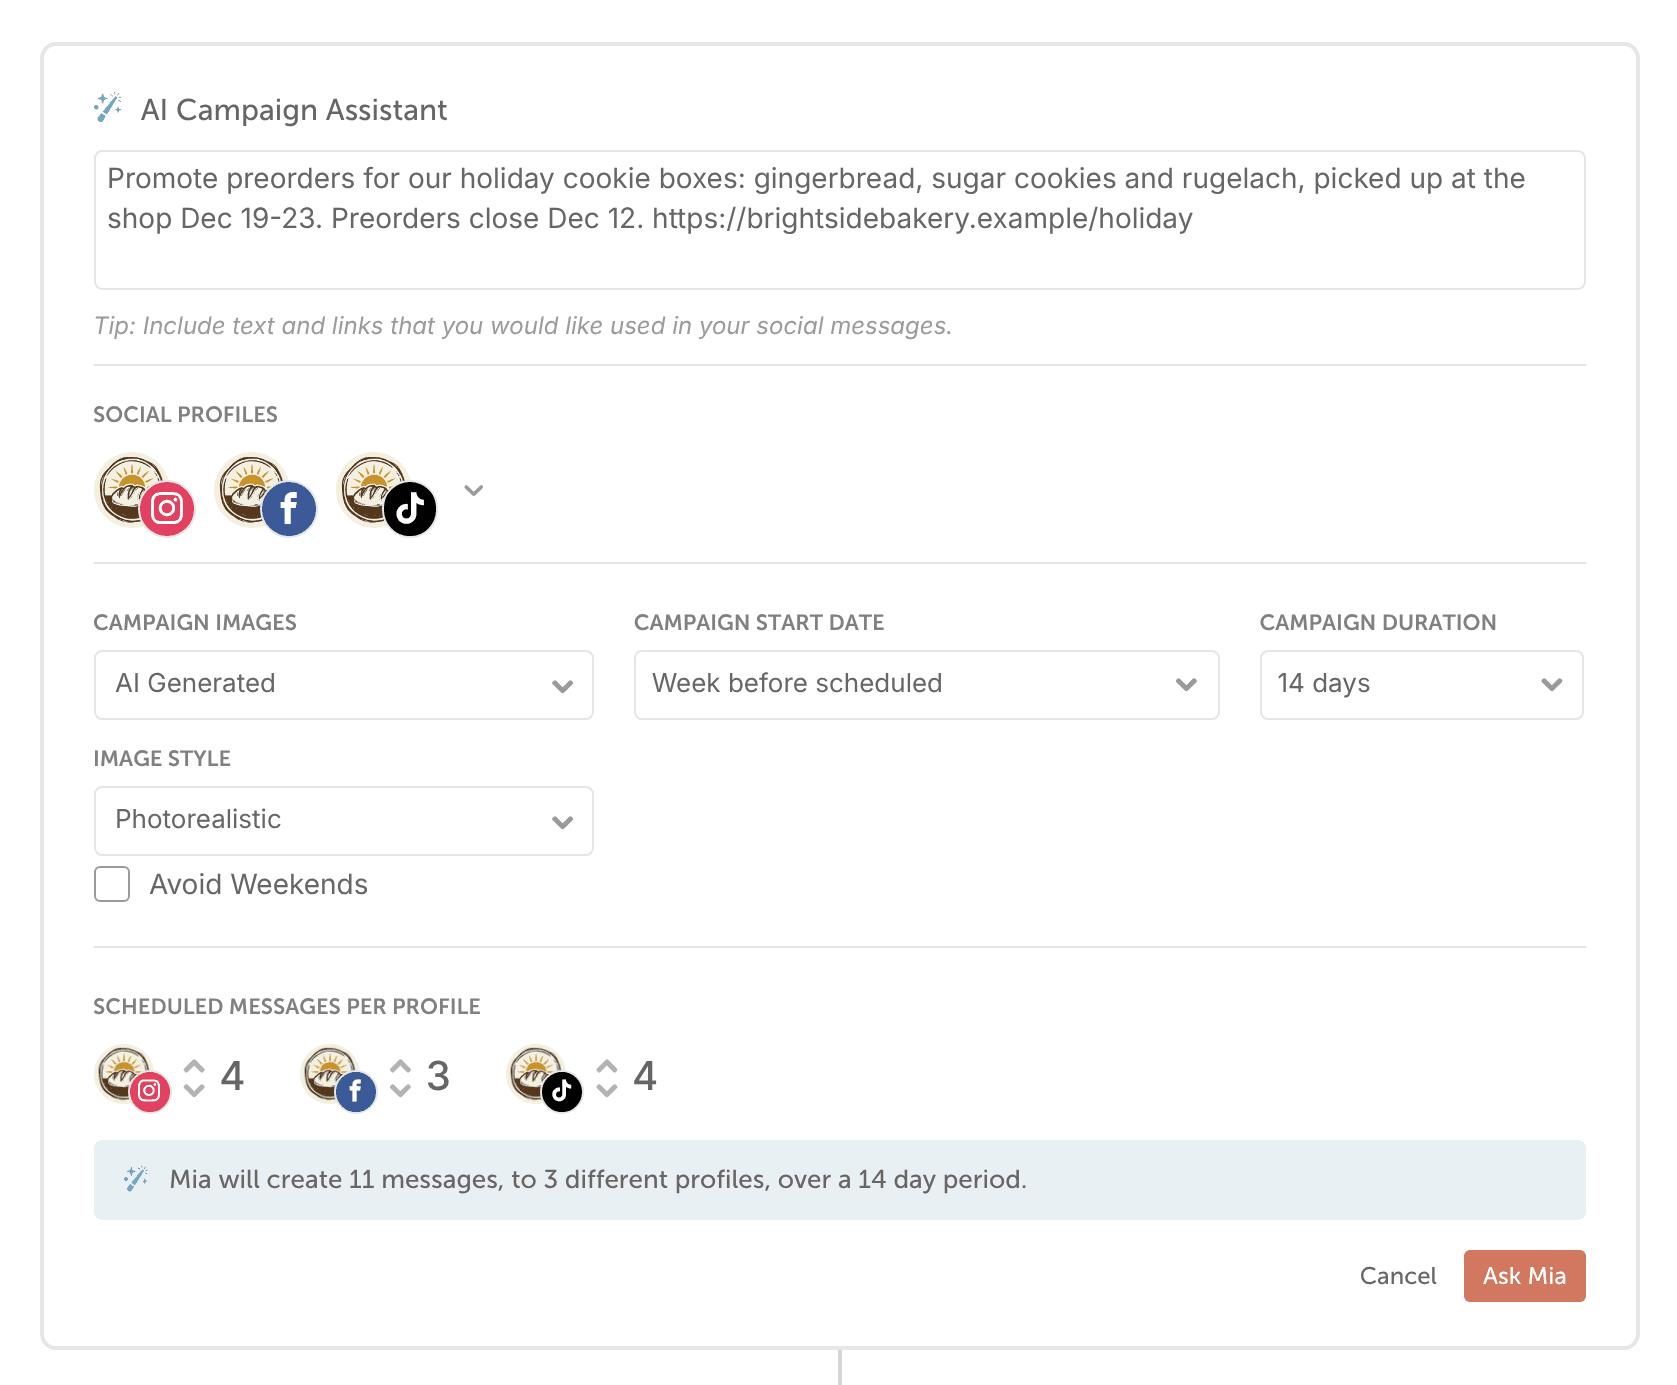
You're all set when you've reviewed an AI-drafted campaign and scheduled it.
2.4 Save Time With Social Templates
Social Templates are CoSchedule's reusable posting schedules. Build the plan once, then reuse it for every campaign like it.
Example: every time you publish a blog post, you share it on LinkedIn and Facebook the same day, on Instagram three days later, and again a week later. Save that as a "New Blog Post" template, and next time the whole schedule fills in for you.
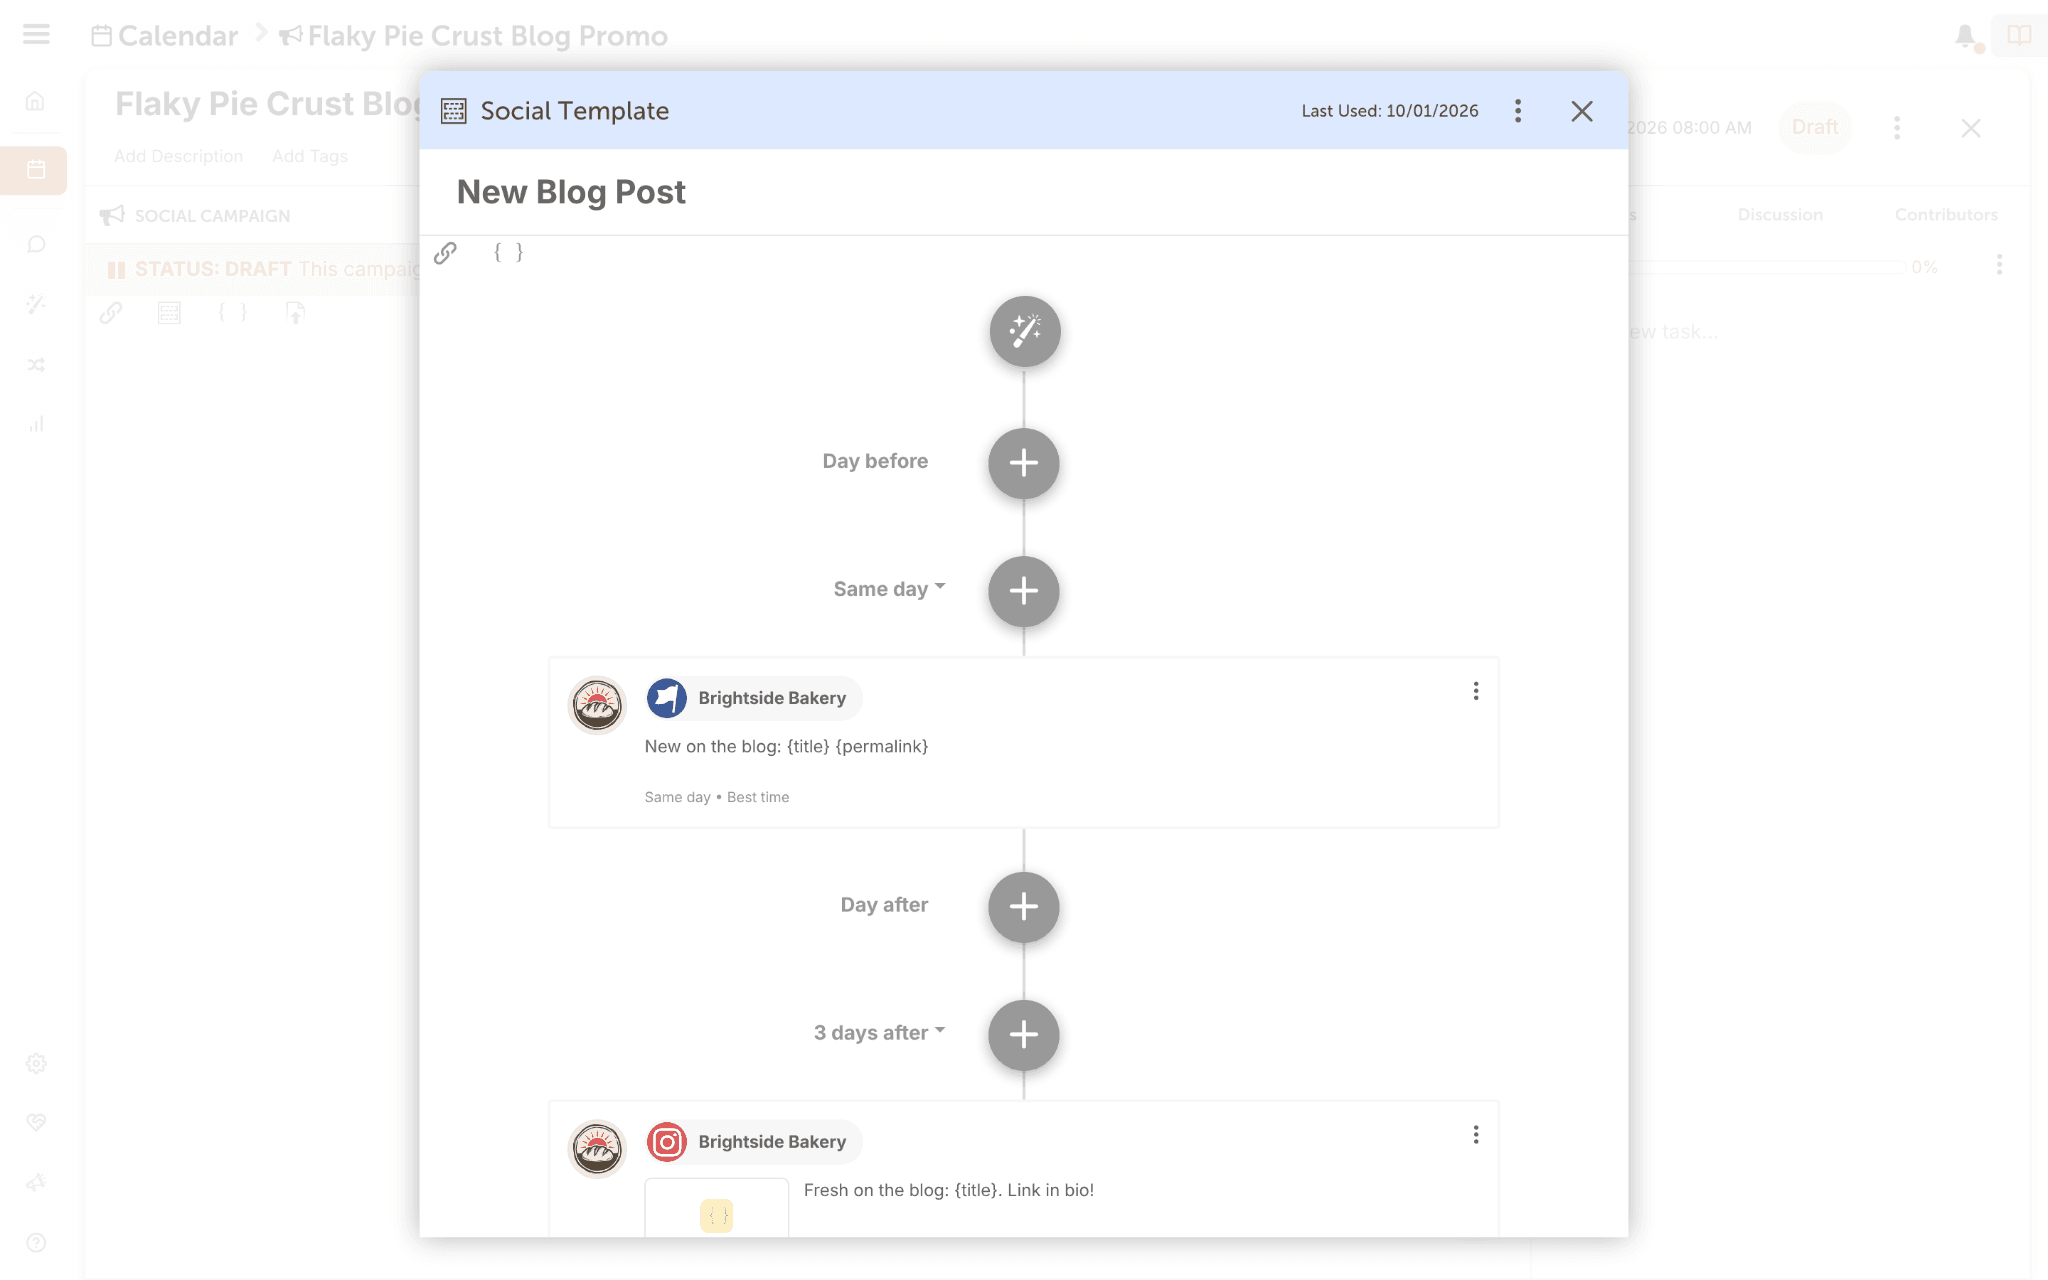
Create a template: in a campaign, click Templates, then Create Template, then + Create New. Already have a campaign you like? Choose Save Existing instead.
Use it: open a new campaign, click Templates, choose yours, and click Apply. Add the link to what you're promoting, and the posts fill in.
For the full steps, see How to Use Social Templates.
You're all set when you've saved one template for something you promote regularly.
2.5 Keep Content Moving With ReQueue
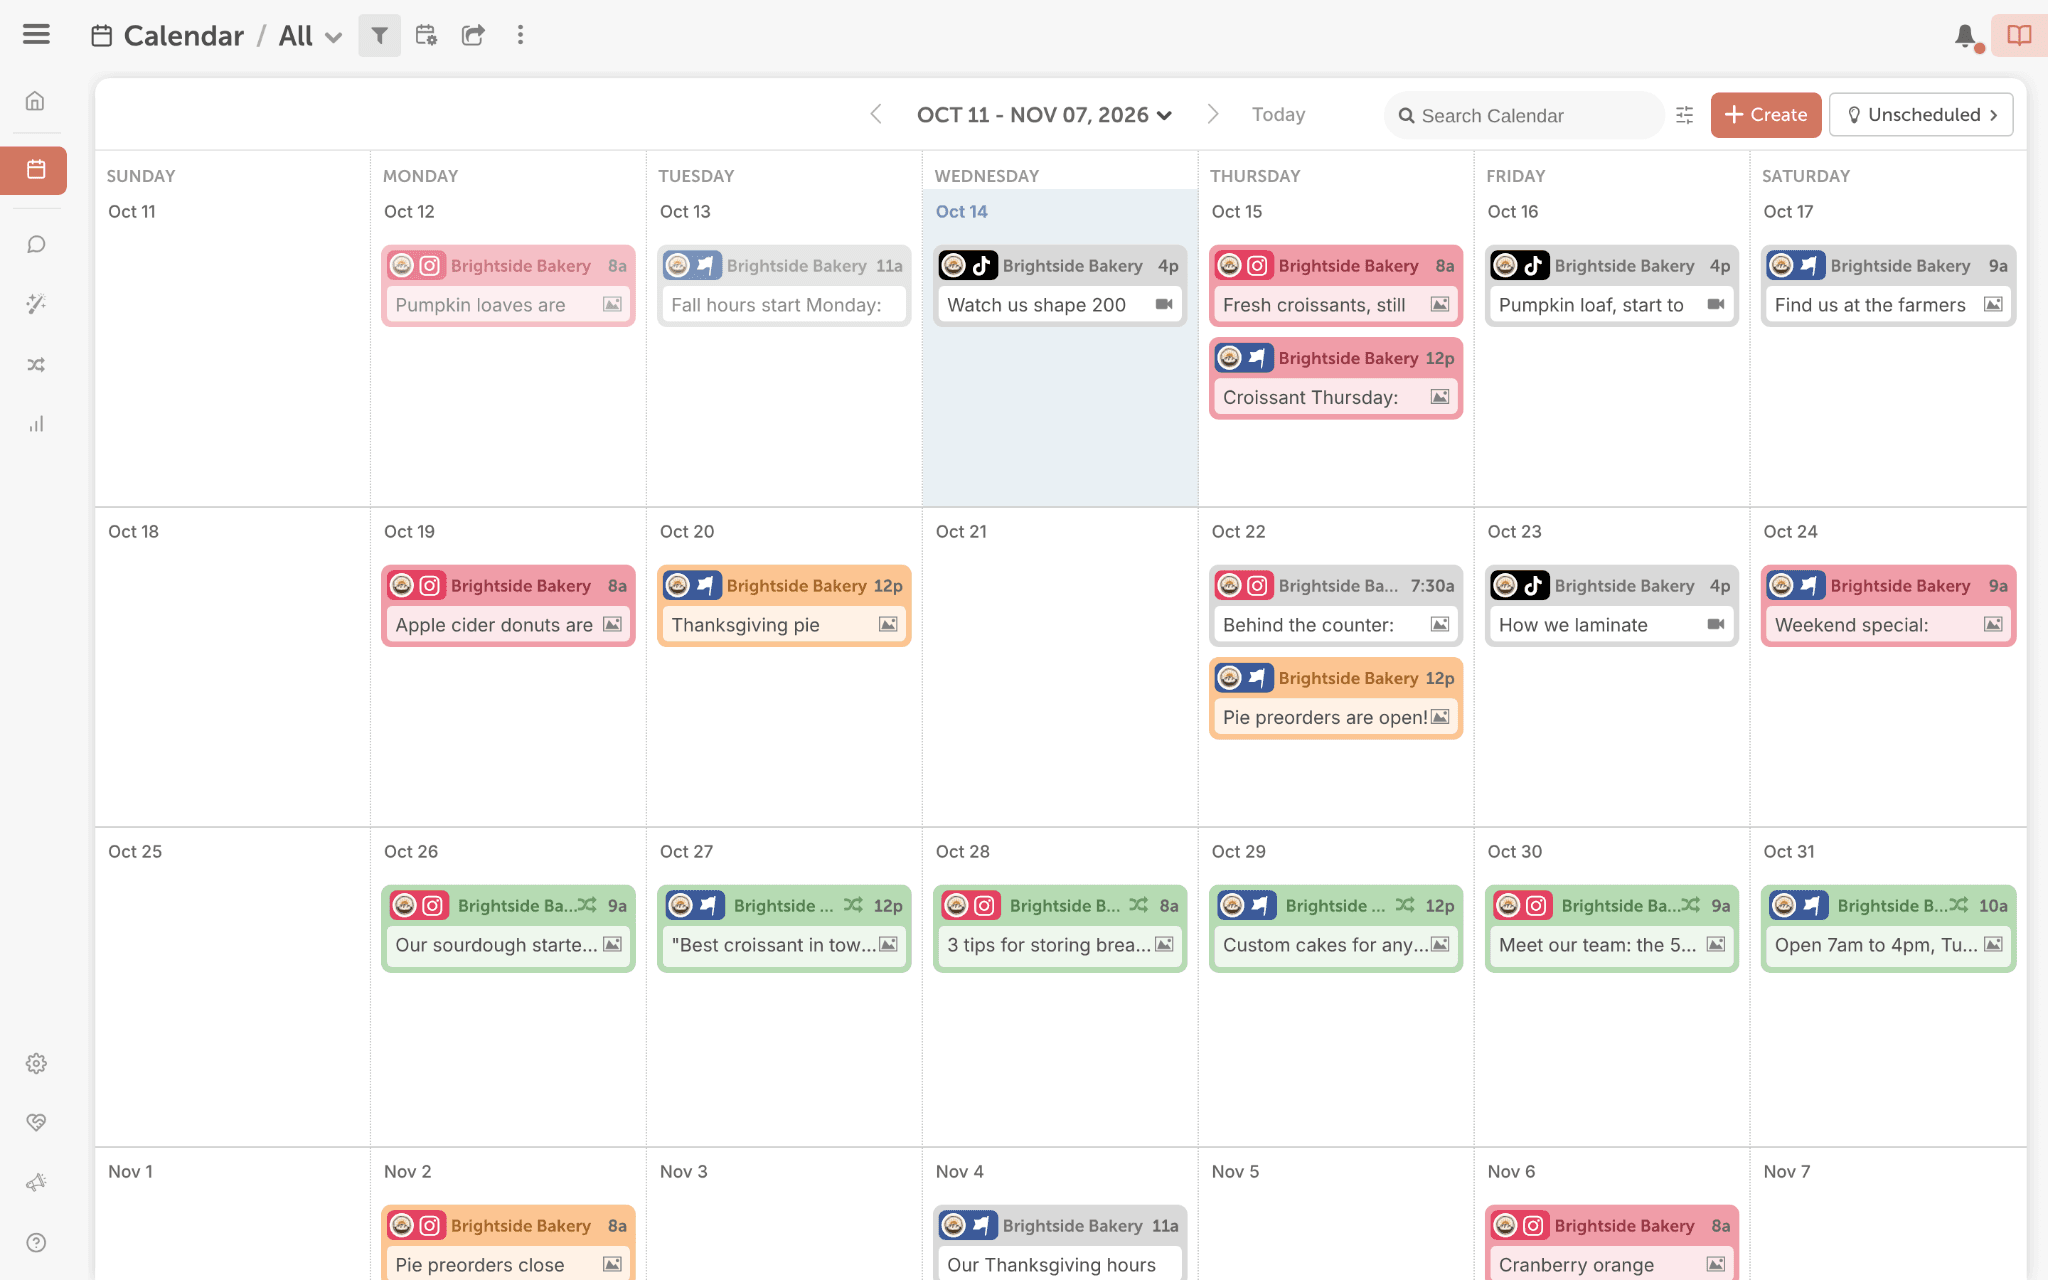
ReQueue is CoSchedule's evergreen post recycling. You choose the posts worth sharing again, and ReQueue reshares them to fill the open spots on your calendar.
What works well: posts that stay useful for months, like your best blog posts, tips and testimonials. Skip anything with a date on it.
How it works: you put those posts into ReQueue groups. ReQueue finds the gaps in your calendar and fills them from your groups, favoring the posts that perform best within each group.
Get started:
- If ReQueue isn't on yet, open Settings, click Power Ups, and click Enable ReQueue.
- Open ReQueue and click New Group.
- Add a few evergreen posts to the group.
For the full steps, see How to Manage ReQueue.
You're all set when you have one ReQueue group with a handful of evergreen posts in it.
2.6 Save Time With Bulk Upload
Bulk Social Upload, CoSchedule's CSV bulk scheduler, adds a batch of posts from a spreadsheet at once.
When to use it: you've planned a month of posts in a spreadsheet.
- Fill in the sample template from Upload Social Messages from a CSV File (Spreadsheet) with each post's text, link, date and time.
- On your calendar, click + Create, then More Options, then Bulk Social Upload, then Social Messages.
- Upload your file and choose your profiles.
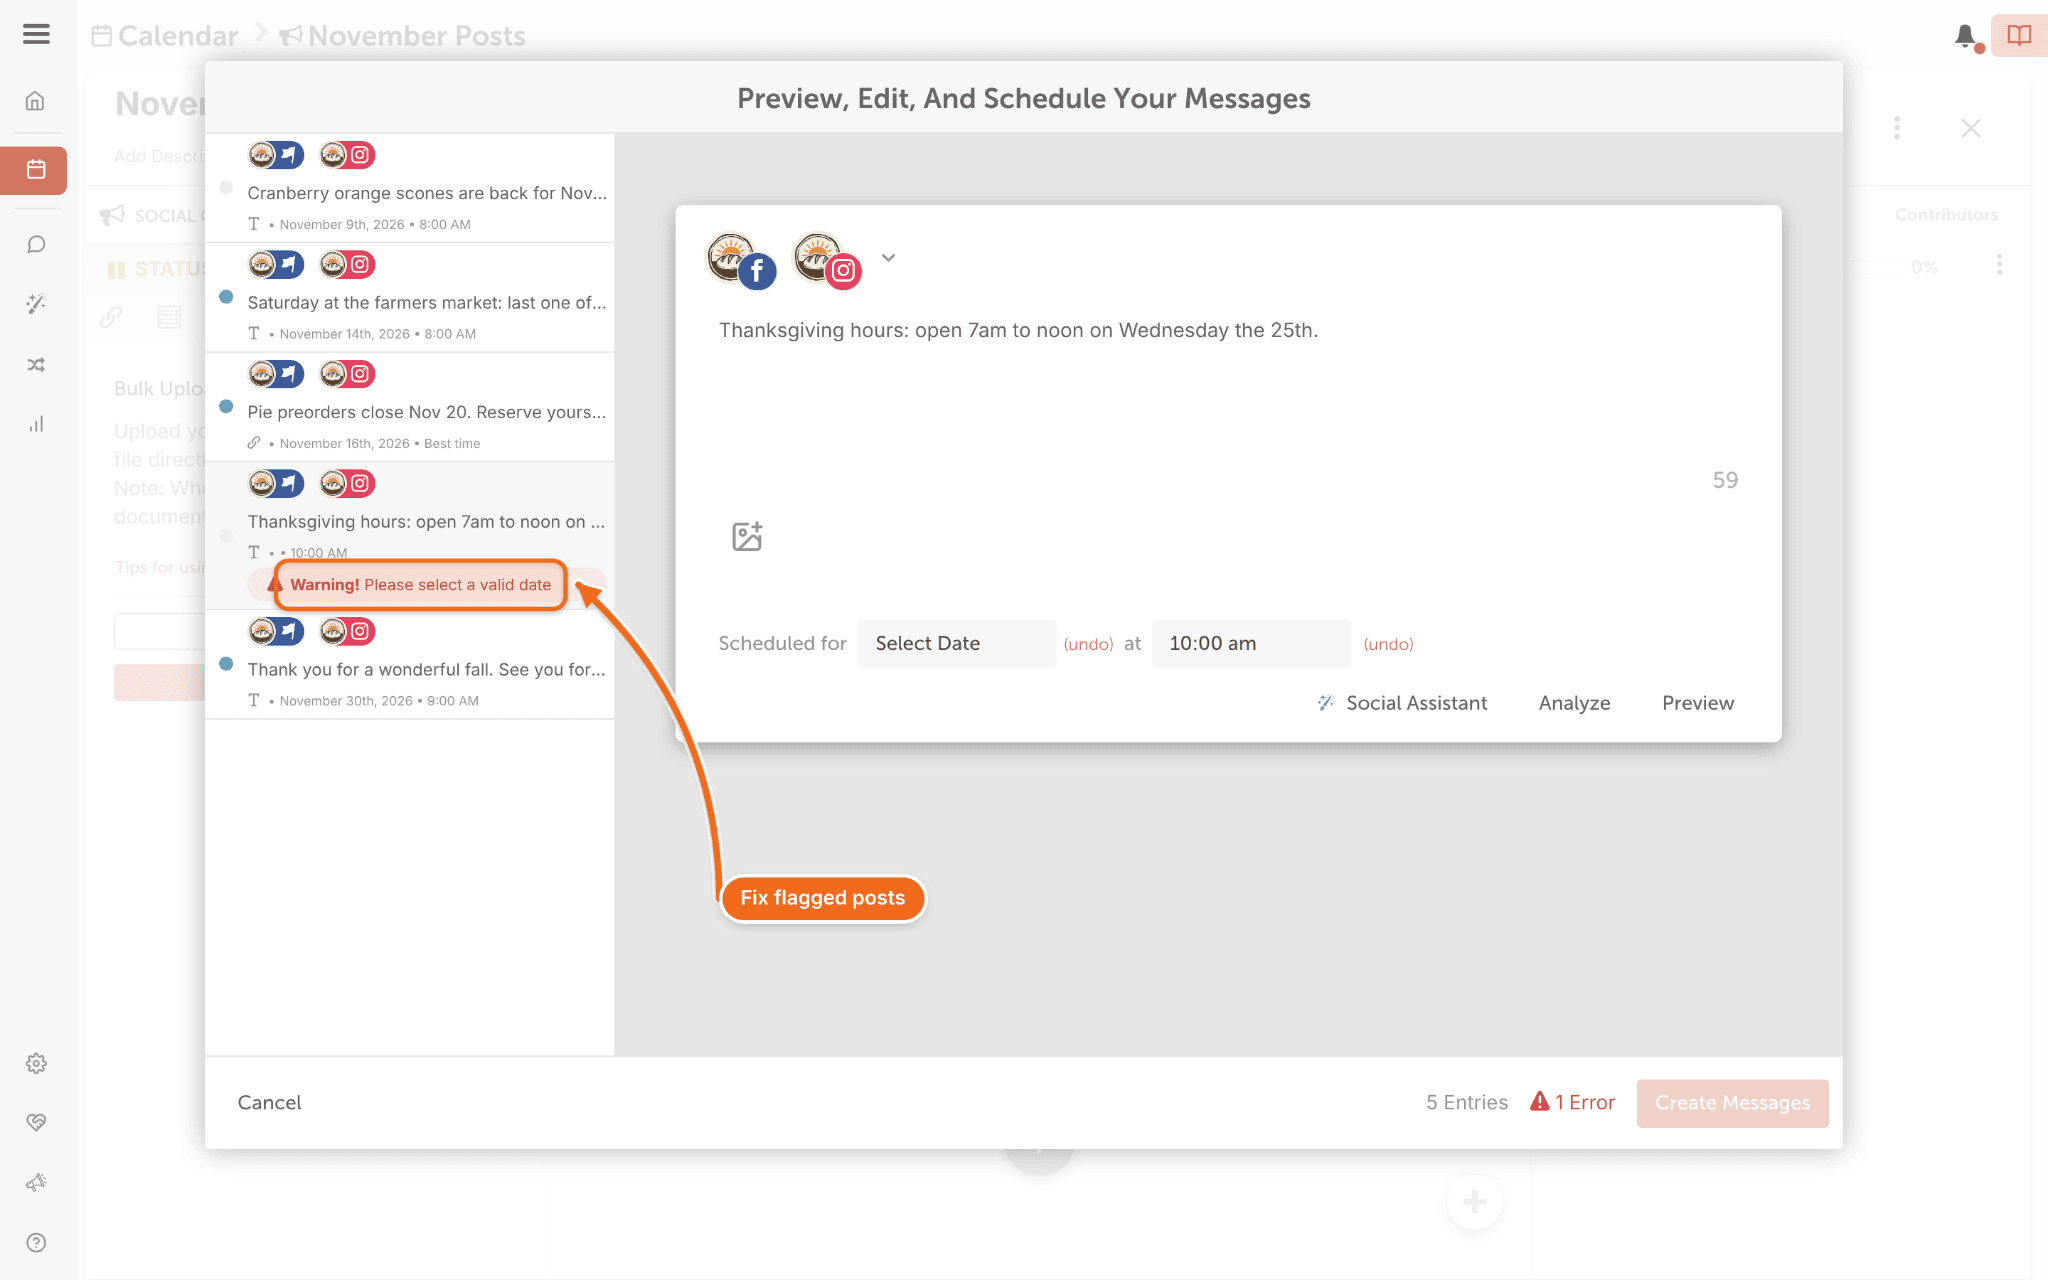
- Add images, and fix anything that's flagged.
- Click Create Messages, and make sure the campaign is set to Scheduled.
You're all set when your uploaded posts are reviewed and scheduled.
Next step: put the content your posts promote on the same calendar in Chapter 3.