

Help With Social Media
In This Lesson
- Schedule a Social Post
- Plan a Group of Posts With Social Campaigns
- Reply to Comments and Messages With Social Inbox
- Reshare Your Best Posts With ReQueue
- See What's Working
Your social posts sit on the same calendar as the rest of your team's work. This chapter covers the basics of scheduling posts, replying to your audience and seeing what's working.
Schedule a Social Post
- On your calendar, click + Create, then Social, then Social Message.
- Choose your social profiles.
- Write your post, and add an image or video.
- Pick a day, and click Save.
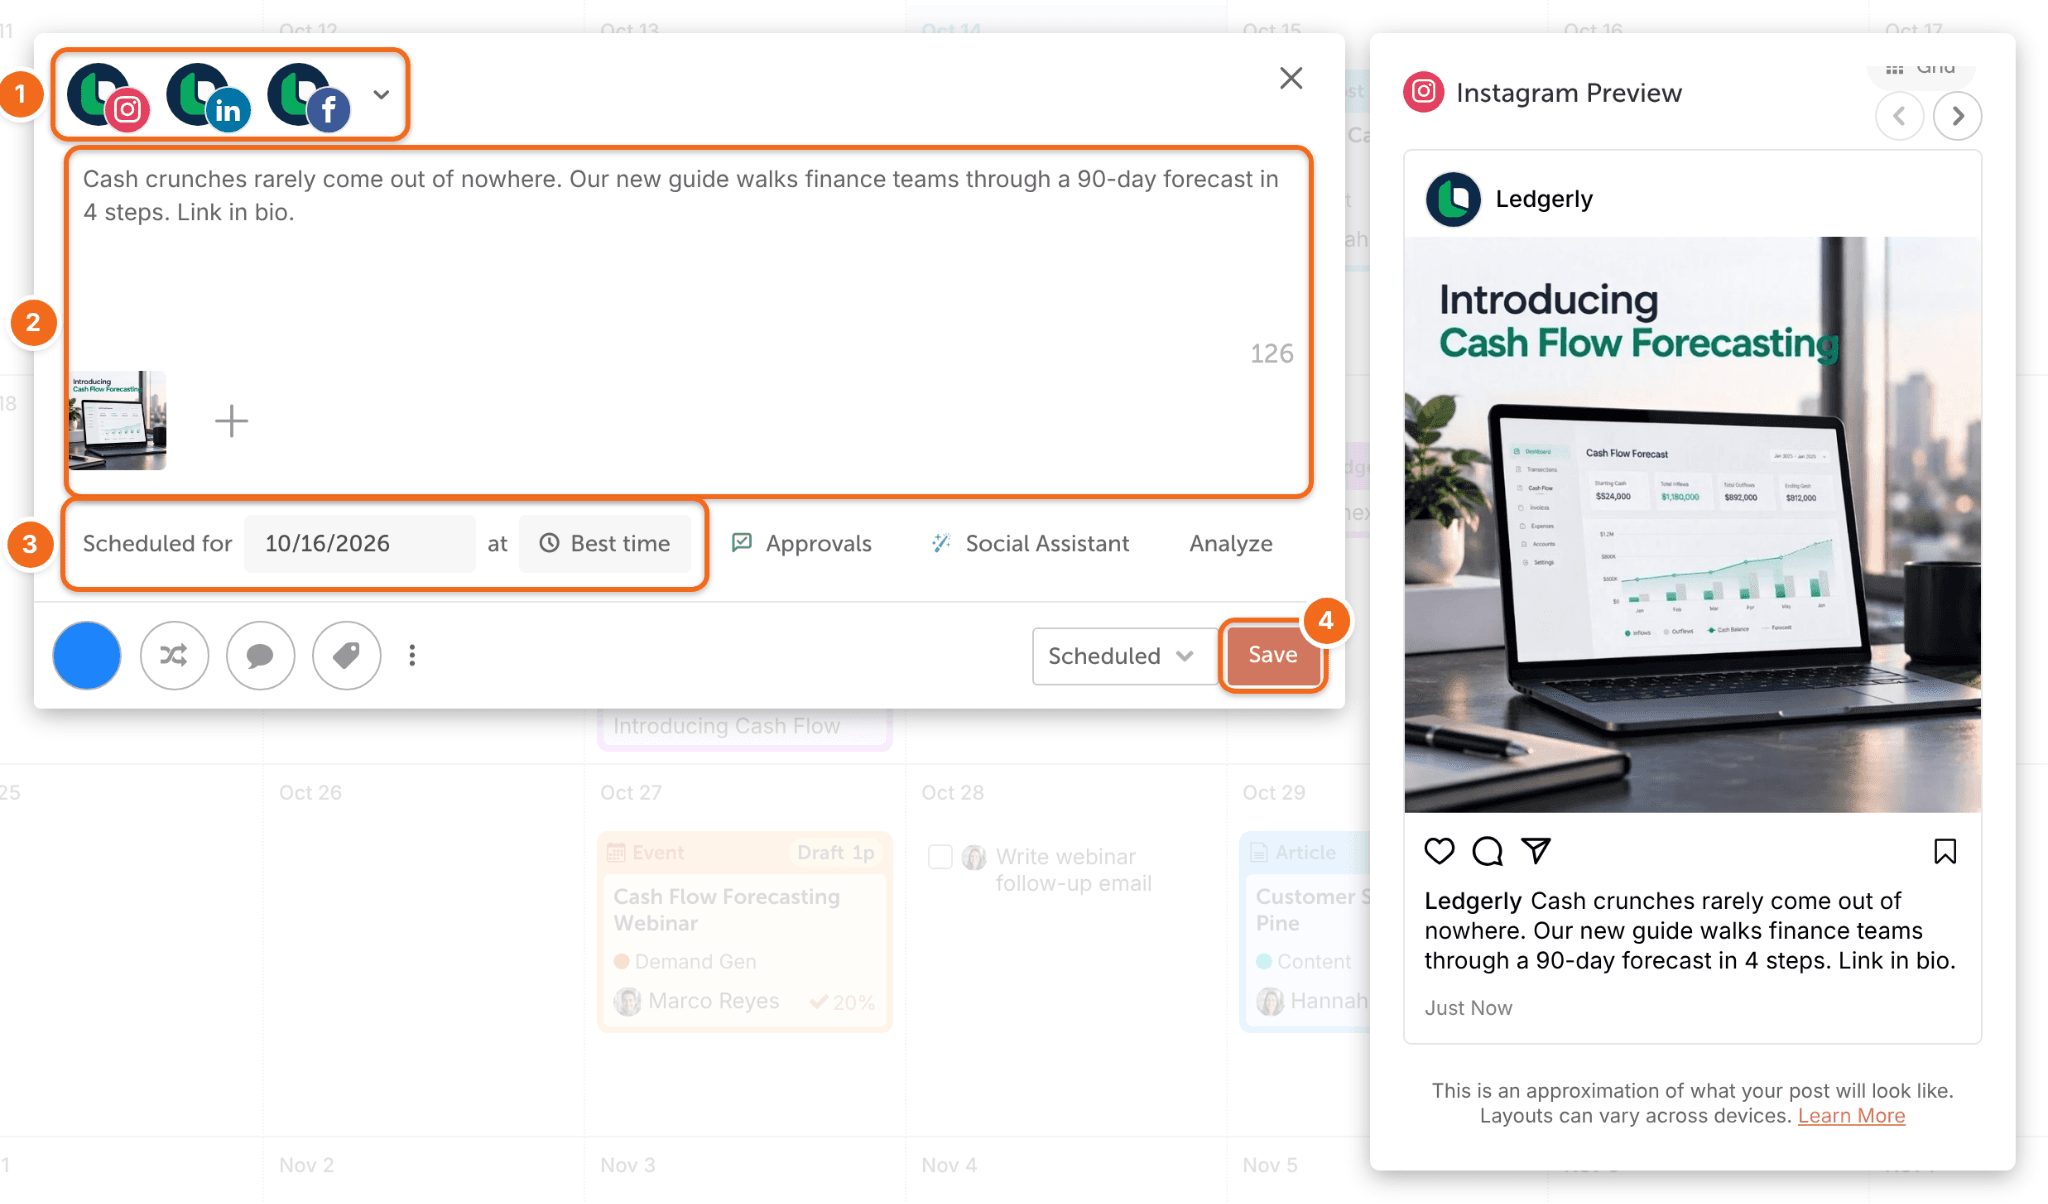
Snag: only posts set to Scheduled go out. Draft or Pending Review holds a post back.
Posting to one profile? Open the view menu at the top of your calendar and choose that profile to see only its posts. Create a social message from there, and that profile is already selected for you.
For more, see Create a social message.
You're all set when your first post is on the calendar, set to Scheduled.
Plan a Group of Posts With Social Campaigns
A Social Campaign groups every post about one thing, like a webinar or a new blog post, so you can plan them together.
- Click + Create, then Social Campaign.
- Name it, adjust the date and time, and click Create Project.
- Add your posts before and after that date.
- Set the campaign to Scheduled.
For more, see Create a social campaign.
Reply to Comments and Messages With Social Inbox
Social Inbox collects comments, direct messages and mentions from your social profiles in one place. Click Social Inbox in the left-side menu, open a conversation and reply.
For more, see Turn on and navigate Social Inbox.
Reshare Your Best Posts With ReQueue
ReQueue reshares the evergreen posts your team picks to fill open spots on your calendar. Ask your admin which posts your team uses it for.
See What's Working
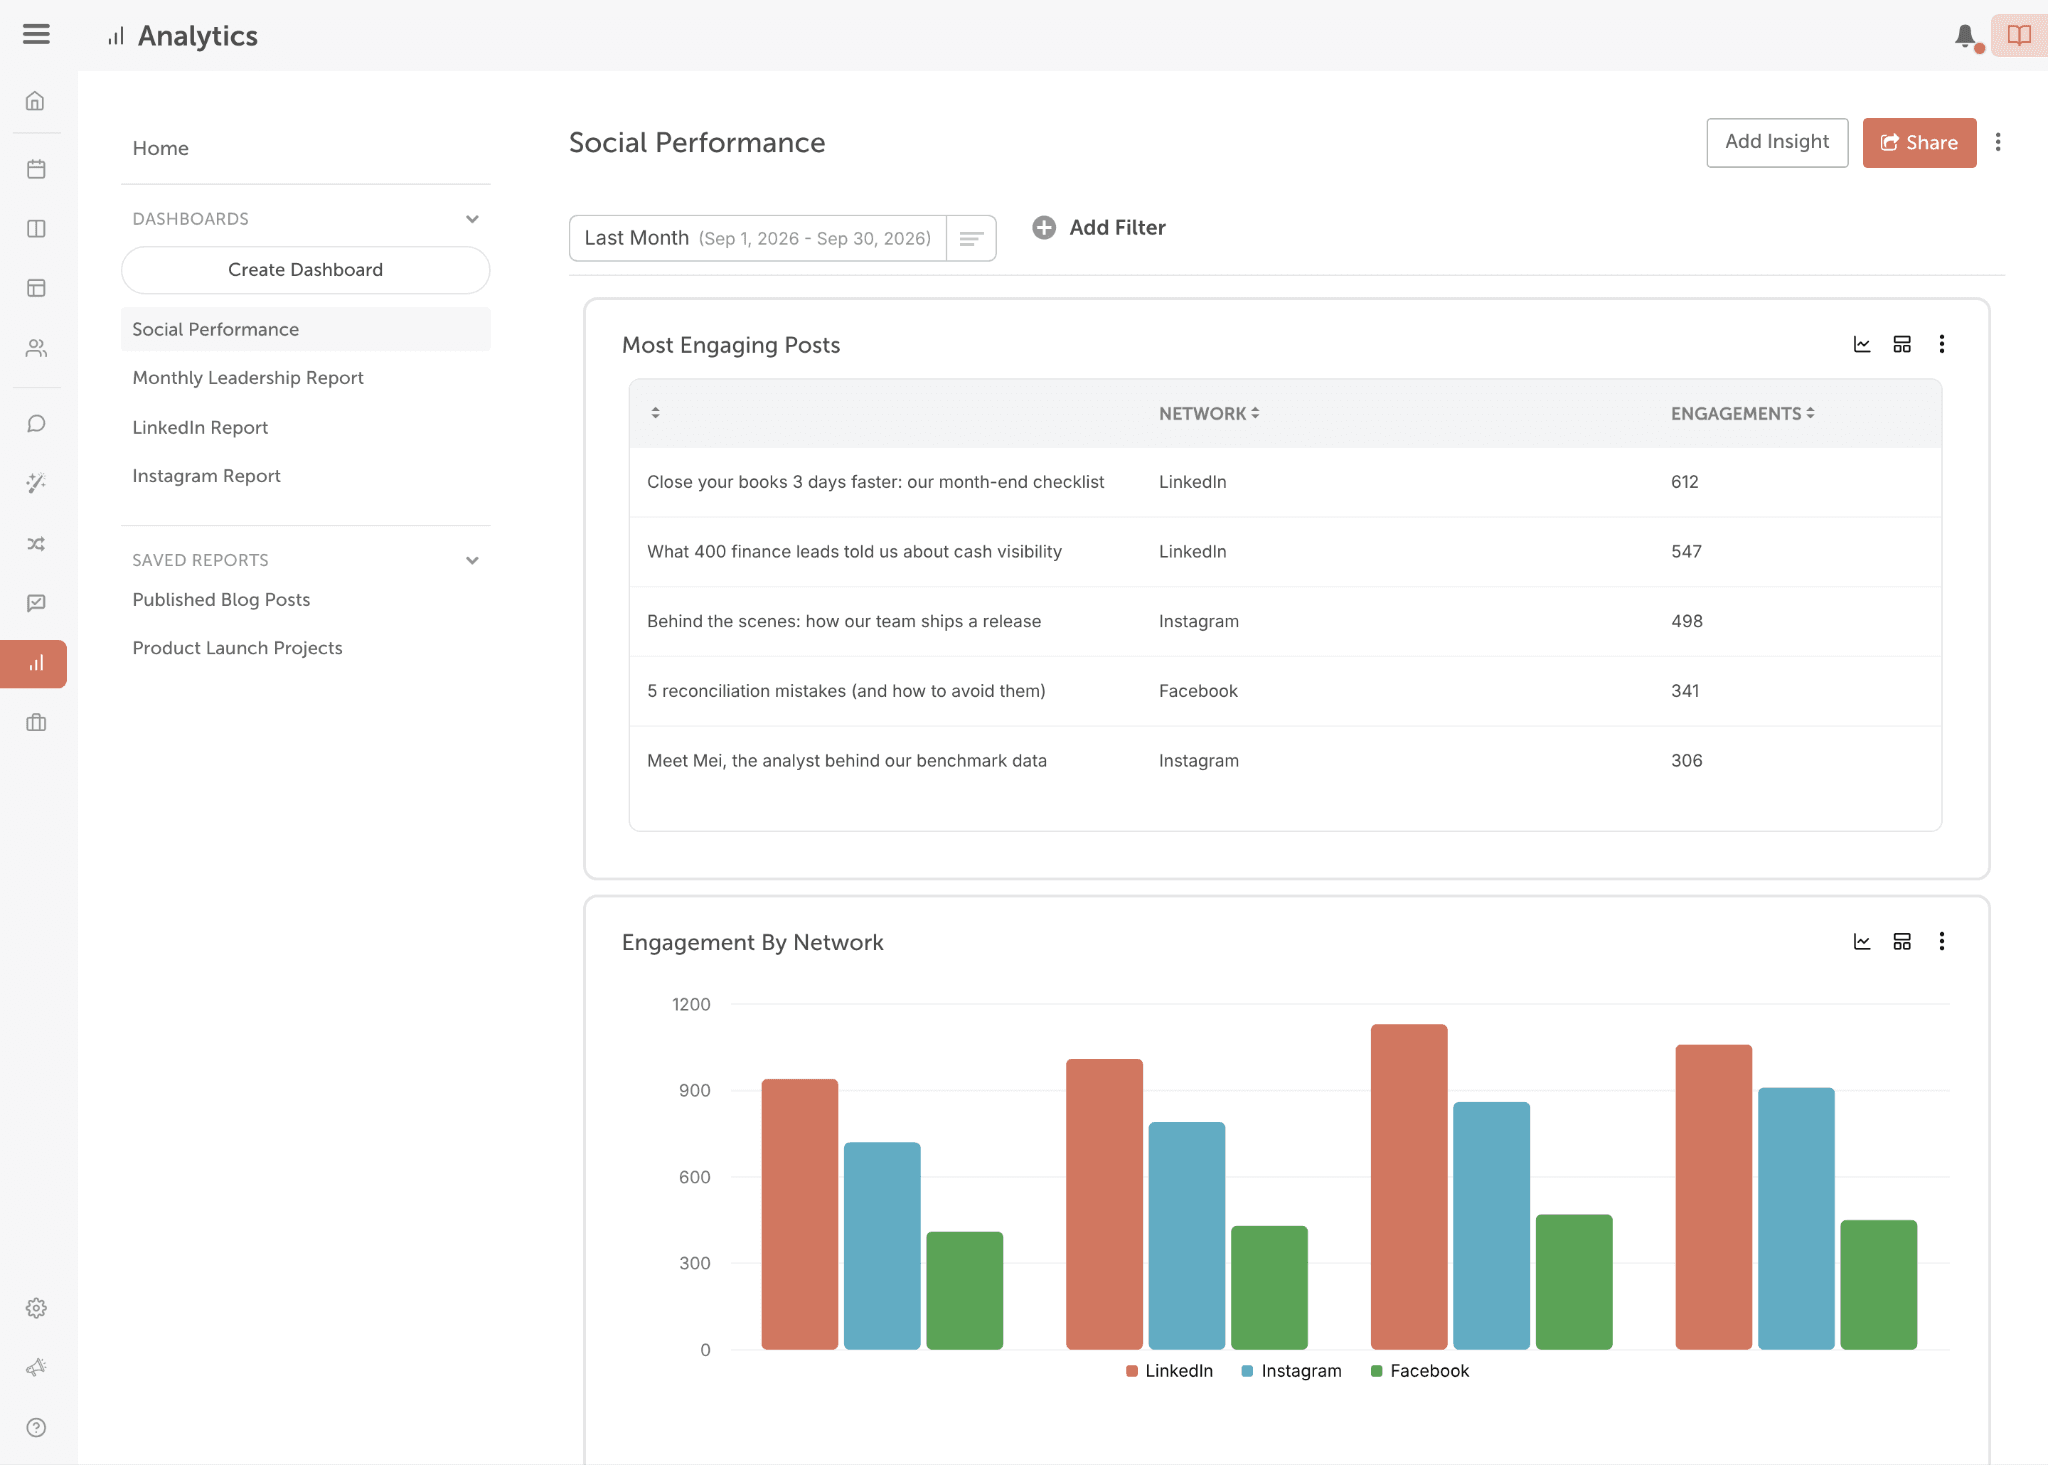
To see how a post did, open it on the calendar after it's published. For full reports, click Analytics in the left-side menu.
Next step: build a few simple habits in Chapter 6.