
Write a social message once, choose the social profiles it goes to, and set when it publishes. Available on Starter, Professional and Suite. On the free plan, you can connect 1 social profile and have up to 15 messages scheduled at a time.
Create a social message
- From the calendar, click + Create, or click the + on the day you want the message to publish.
- Select Social, then choose Social Message.
- Select the social profiles the message goes to. To remove a profile, click its thumbnail.
- Type your message in Your status update. The character count shows in the bottom right corner.
- To add images or videos, click the image icon (Add media to message). What you can attach depends on the network.
- Leave the status set to Scheduled. To hold the message without publishing it, set the status to Draft or Pending Review instead.
- Choose the date and time the message publishes.
- Click Save.
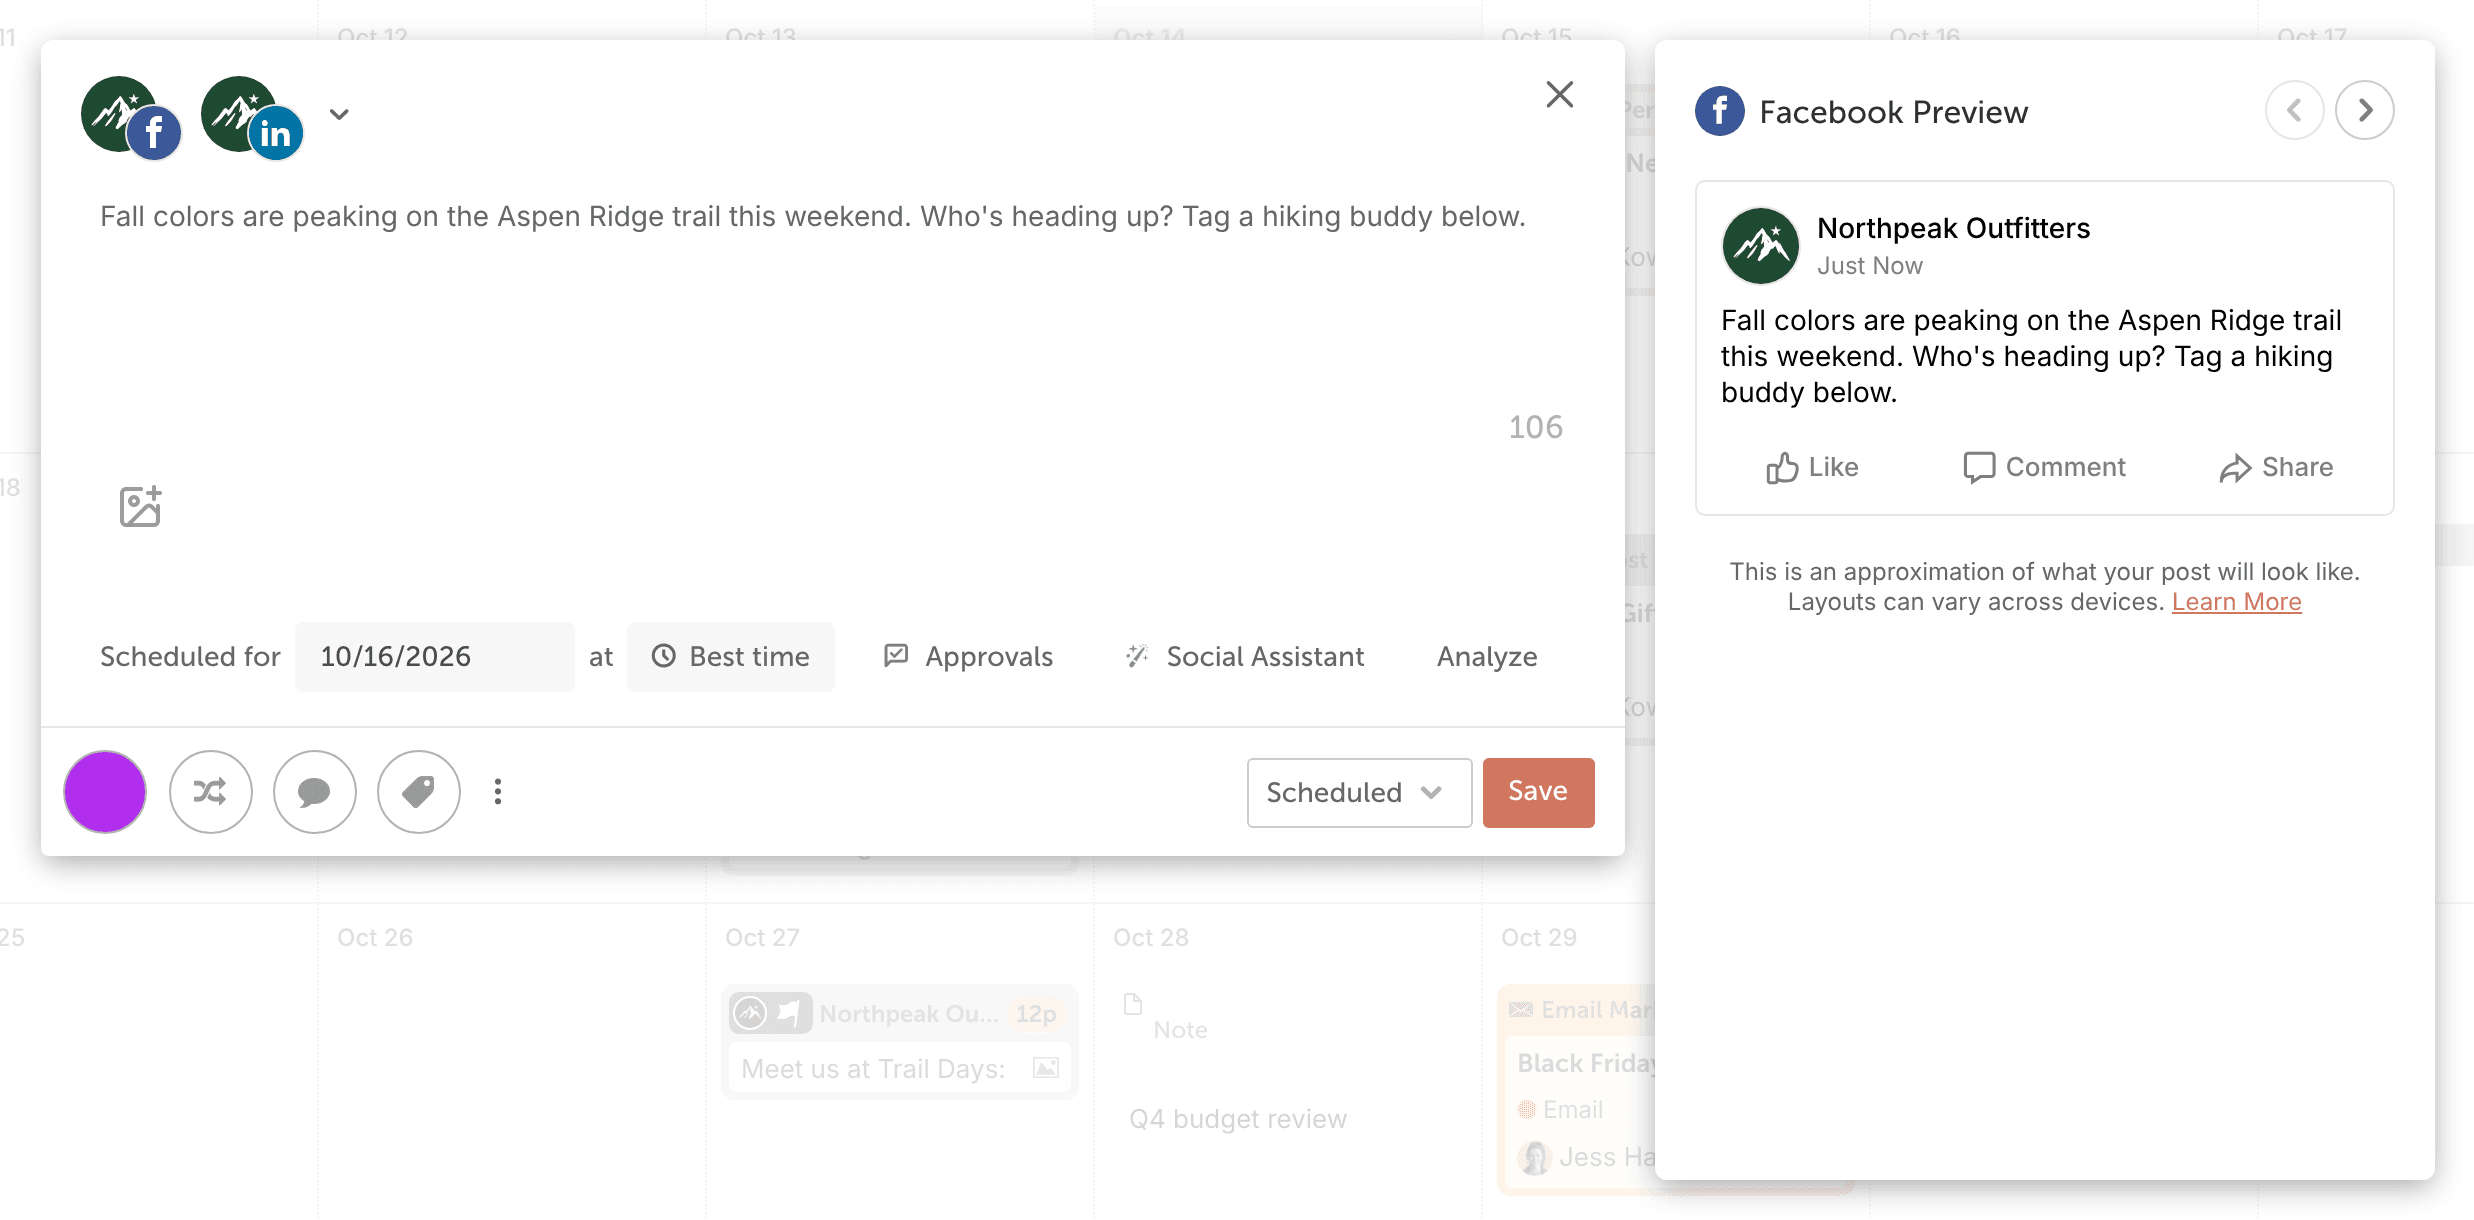
Only messages set to Scheduled publish. If you select several profiles, CoSchedule splits the message into a separate message for each profile when you save, so you can edit each one on its own.
To create a series of related messages instead, choose Social Campaign in step 2. See Create a social campaign.
Scheduled messages publish on their own. Instagram posts publish directly unless you choose to publish with mobile push notifications.
Add more to your message
- Links: paste a URL into the message and CoSchedule adds a link preview. If the preview doesn't appear, press Enter. Click the X on the preview to remove it.
- Mentions: type @ to mention a user or Page on networks that support it. See Mention a user or Page in a social message.
- Alt text: describe your images for screen readers. See Add alt text to images.
- First comment: schedule a comment that posts right after the message. See Schedule a first comment.
- AI help: click Social Assistant (wand icon) in the composer to draft the text with AI Social Assistant.
Add emojis
The composer has no emoji picker. Use your device's emoji panel, or paste emojis into the message.
- On a Mac, see Apple's guide to using emoji and symbols on Mac.
- On Windows 10 or 11, see Microsoft's Windows keyboard tips and tricks.
- On a phone, use the emoji key on your keyboard.
Edit or delete a social message
Edit a social message
To edit a message that hasn't published yet:
- Click the message on the calendar.
- Make your changes.
- Click Save.
Edit a message after it publishes
A published message can't be edited. It opens as a read-only preview, and Save is replaced by View Post (or Profile Page for private TikTok posts and Instagram Stories). Nothing you change in CoSchedule changes the post on the network.
You can still change these in CoSchedule:
- The color label. It saves right away. It can't be changed on a message attached to a project.
- Tags, on plans that include tags. They can't be changed on a message attached to a project.
- Discussions on the message.
- ReQueue: choose Add to ReQueue, and the button changes to Close + Save.
Delete a social message
To delete a message that hasn't published yet:
- Hover over the message on the calendar.
- Click the ellipsis menu on the message.
- Select Delete.
Deleting a message that has already published doesn't remove the post from the social network. You lose the message in CoSchedule, its future analytics and its discussions. If you delete a sent ReQueue message, it stays in its ReQueue groups.
Publish to each network
Each network has its own options and rules:
- Publish to Bluesky
- Publish to a Facebook Page
- Publish Google Business Profile updates
- Publish posts to Instagram
- Publish to LinkedIn
- Publish to Mastodon
- Publish to Pinterest
- Publish to Threads
- Publish to TikTok
- Publish to X (Twitter)
- Publish YouTube Shorts