
Connect your WordPress site to your calendar with the CoSchedule WordPress plugin. Your WordPress posts then show up on your calendar and stay in sync both ways. The WordPress integration is available on every plan, including the free plan.
Before you connect
- Create your CoSchedule calendar and finish setting it up first.
- Each WordPress site can be connected to one CoSchedule calendar only. To move a site to another calendar, disconnect it from the first one.
- If your team signs in to CoSchedule with single sign-on (SSO), sign in with SSO when the plugin asks.
- On WordPress.com, your plan has to allow plugins. WordPress.com explains which plans do.
Don't connect staging or development copies of your site, and deactivate the CoSchedule plugin on any copy. A connected copy creates duplicate projects on your calendar.
Install the plugin and connect
You install the plugin from your WordPress admin, the same way as any other plugin. If you haven't done that before, WordPress explains how to install plugins.
- In your WordPress admin, add a new plugin.
- Search for "CoSchedule".
- Install the plugin.
- Activate the plugin.
- When the CoSchedule sign-in opens, sign in with your CoSchedule account.
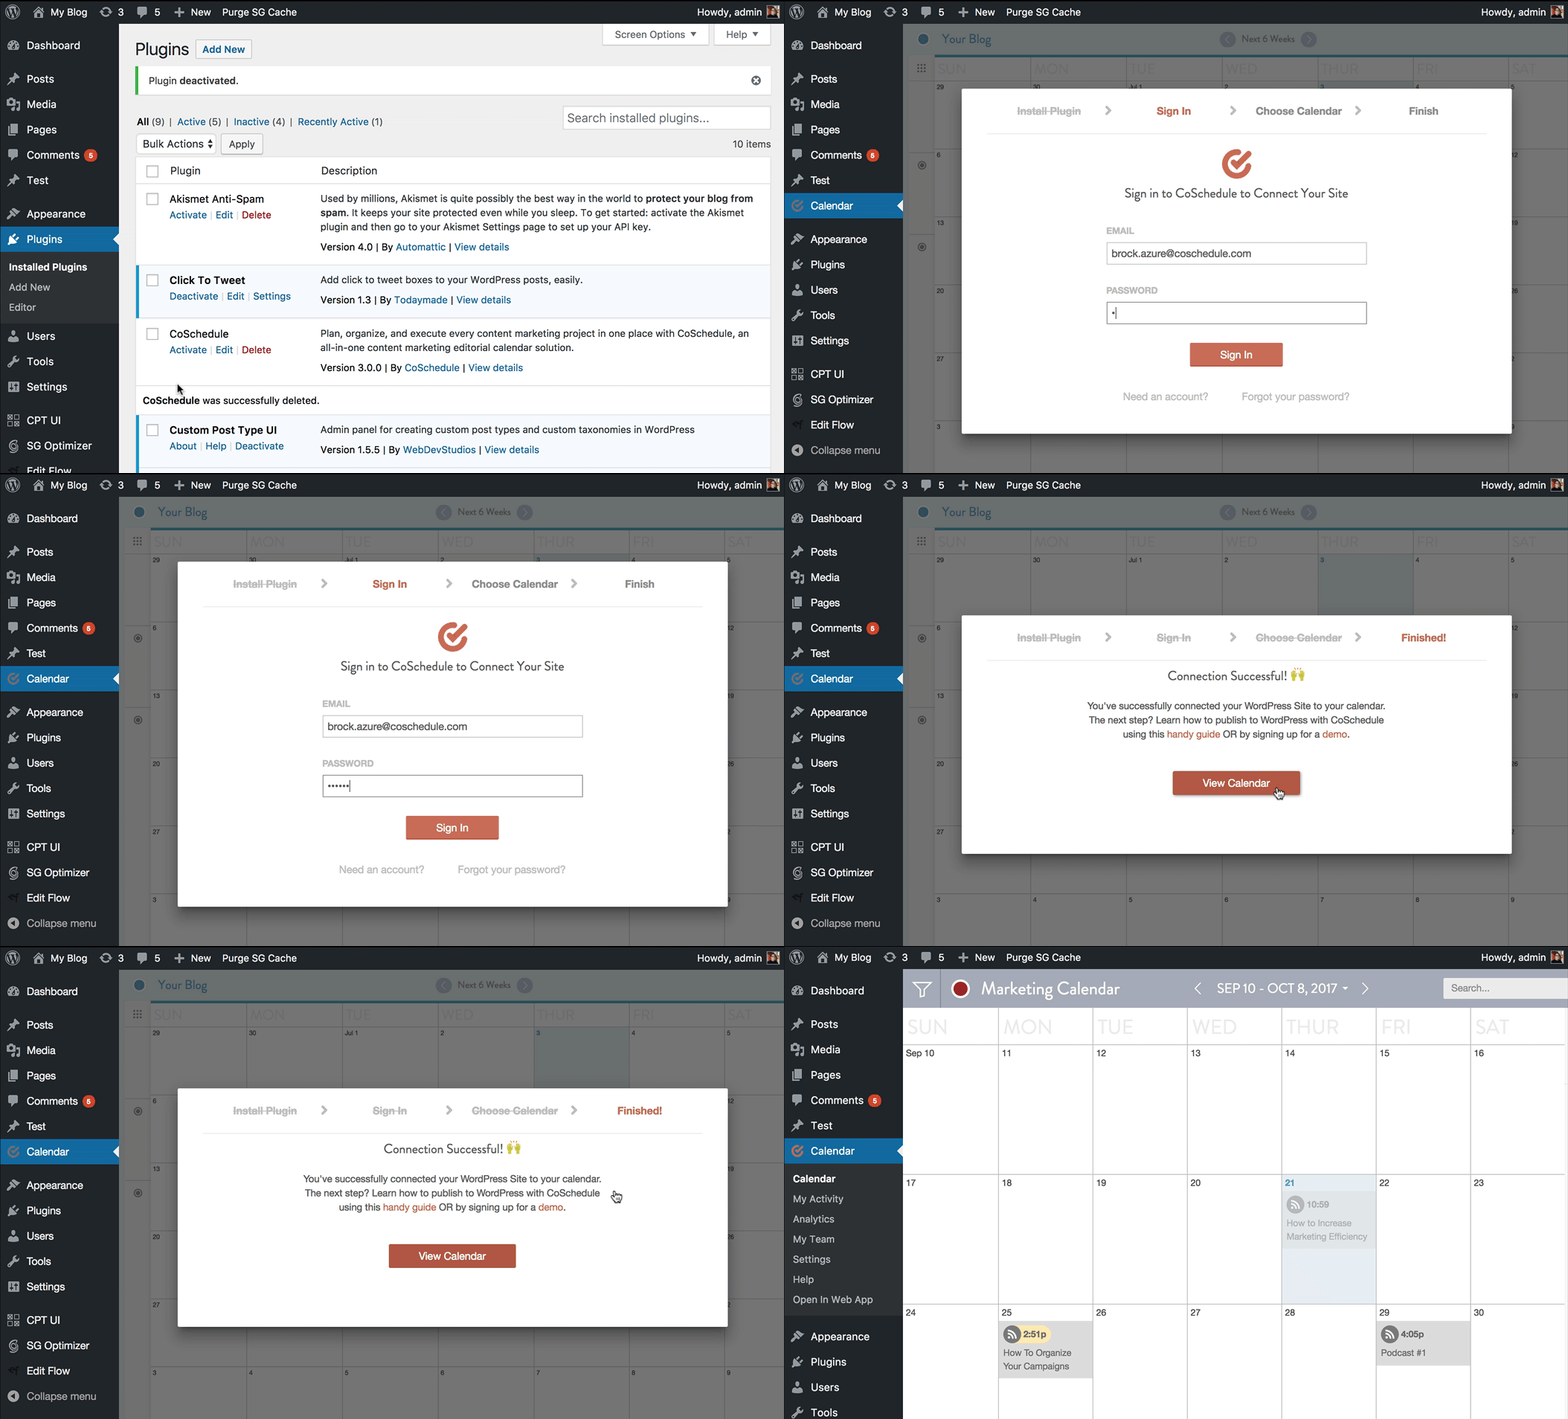
You can also download the plugin from the CoSchedule plugin page on WordPress.org.
Your published and draft posts start showing up on your calendar. Drafts without a date go to the Unscheduled Bin.
On a WordPress Multisite network, install the plugin from the network admin, then activate it on each site you want to connect.
What syncs
- The latest 500 drafts, 500 published posts and 500 scheduled posts on each site. If a post is missing from your calendar, open it in your WordPress admin and it syncs.
- Each post's title, publish date and time, and status, in both directions.
- New posts, whether you create them in CoSchedule or in WordPress.
Your WordPress content stays in WordPress. CoSchedule updates it only when you tell it to. Your team's work in CoSchedule, such as tasks, is stored on CoSchedule's servers and isn't sent to your WordPress site.
Connect more than one site
You can connect several WordPress sites to one calendar.
- Go to Settings > Integrations > WordPress.
- Click Add a WordPress Site and follow the prompts.
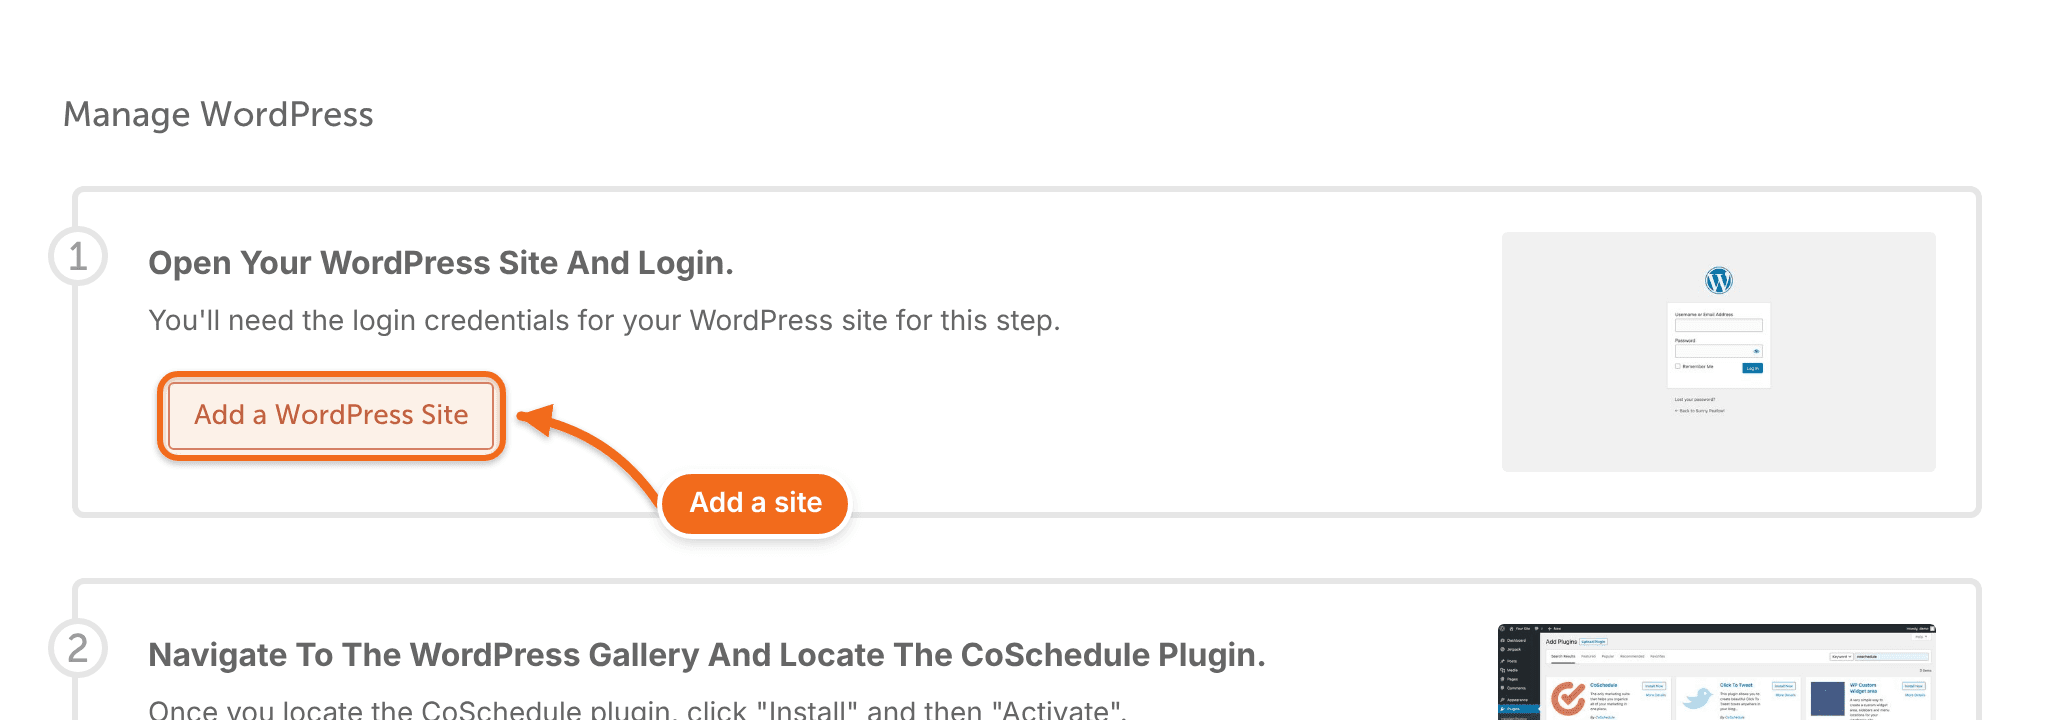
On some older plans, a calendar can connect only one WordPress site.
Posts from every site show in your calendar's timezone. When you create a WordPress post on your calendar, you choose which site it goes to. To see one site at a time, save a calendar view for each site. See Save and manage calendar views.
Refresh the connection
Refreshing tests the connection and pulls in any posts, authors or categories that are missing from CoSchedule.
- Go to Settings > Integrations > WordPress.
- Click Manage Site for the site.
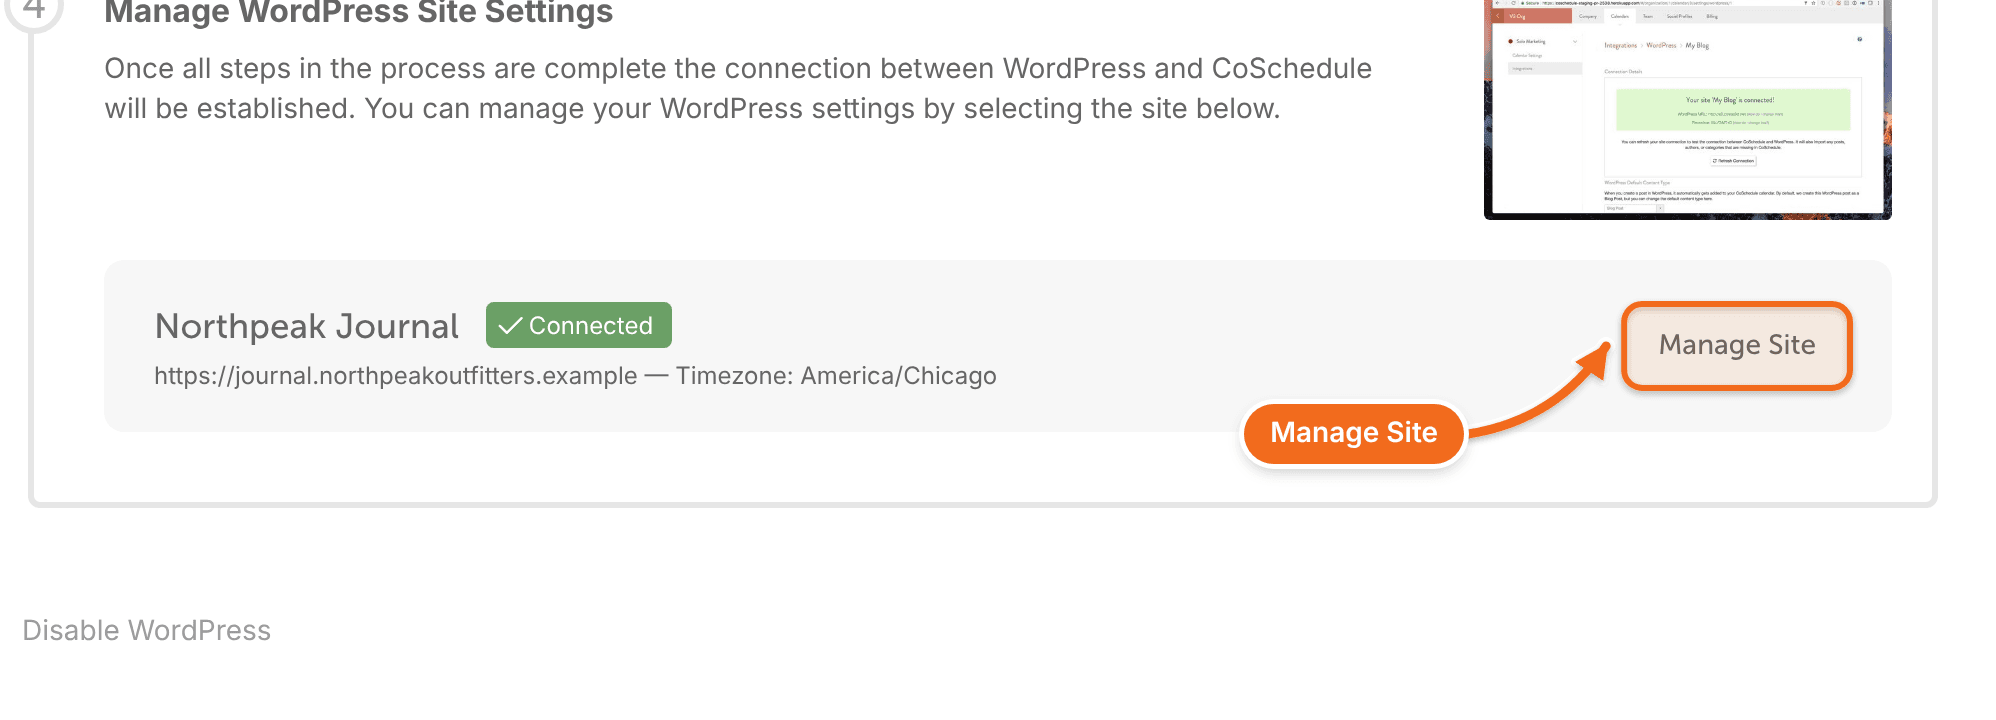
- Click Refresh Connection.
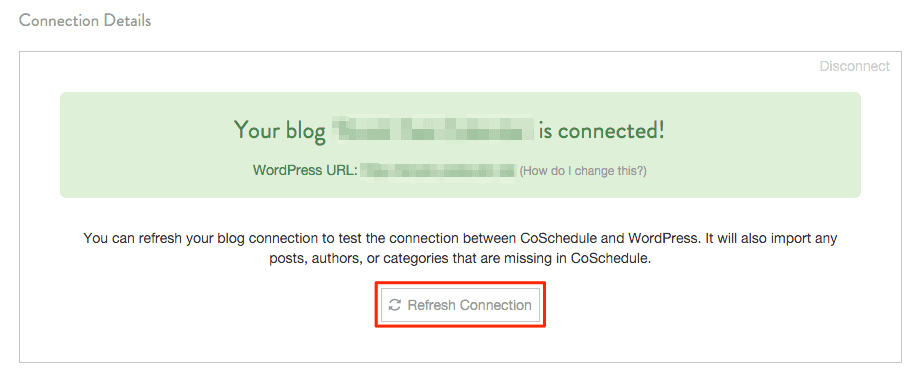
It can take a few moments while CoSchedule syncs your posts and settings. If the site still won't connect, see Fix "Could not reach WordPress admin" and firewall problems.
Change your domain or host
Moving your site to a new domain or host, or from staging to live, can break the connection. To keep it working:
- Before you move or clone the site, deactivate the CoSchedule plugin on any staging or development copy.
- After the move, go to Settings > Integrations > WordPress.
- Click Manage Site for the site.
- Click Refresh Connection.
- Check the WordPress URL under Connection Details.
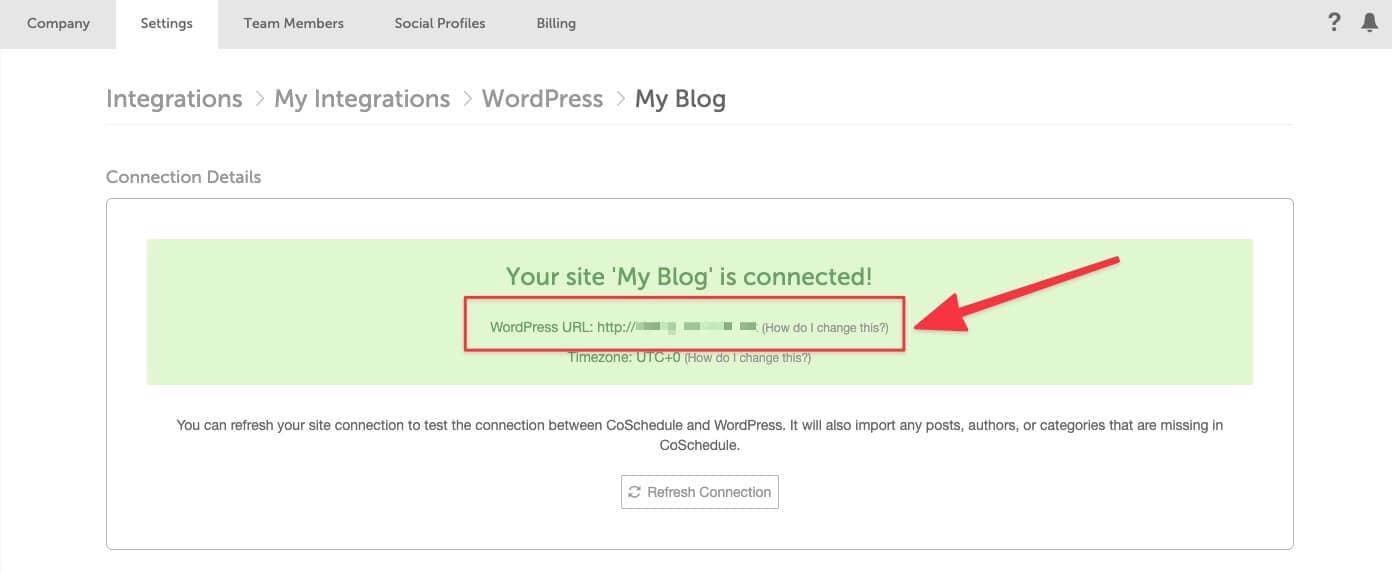
If the URL still shows the old address, reconnect the site by deactivating and reactivating the CoSchedule plugin on the new site and signing in again. See Update or reinstall the CoSchedule WordPress plugin.
If you need the site's CoSchedule history carried over to a new domain, contact support before you move.
Disconnect a site
Disconnecting removes the site's scheduled WordPress posts from your calendar, along with the social messages attached to its WordPress projects and their social analytics in CoSchedule. Nothing is deleted from your WordPress site.
- Go to Settings > Integrations > WordPress.
- Click Manage Site for the site.
- Scroll to the bottom and click Disconnect.

- Type DELETE.
- Click Confirm.
If the connection fails
What happens | What to do |
|---|---|
An error says you may have connected this site to a different calendar. | The site is still connected to another calendar, often through a staging copy. Disconnect it from that calendar, then connect again. |
Your email or password isn't accepted. | If your team uses single sign-on, sign in with SSO. Otherwise, see Reset your password or fix login problems. |
An error says the calendar isn't valid. | Make sure you've created your calendar and finished setting it up, then try again. |
A warning says your plugin is out of date. | Update the plugin. See Update or reinstall the CoSchedule WordPress plugin. |
The site connects, then disconnects. | A firewall or security service is probably blocking CoSchedule. See Fix "Could not reach WordPress admin" and firewall problems. |