Can I Use CoSchedule with Squarespace, Joomla, or Drupal?
Yes, working with any website inside of CoSchedule is very easy! Scroll down to see how CoSchedule customers with any website organize their content in the CoSchedule calendar.


 There you have it! CoSchedule works with any website to schedule, promote, and publish your content.
Create a project
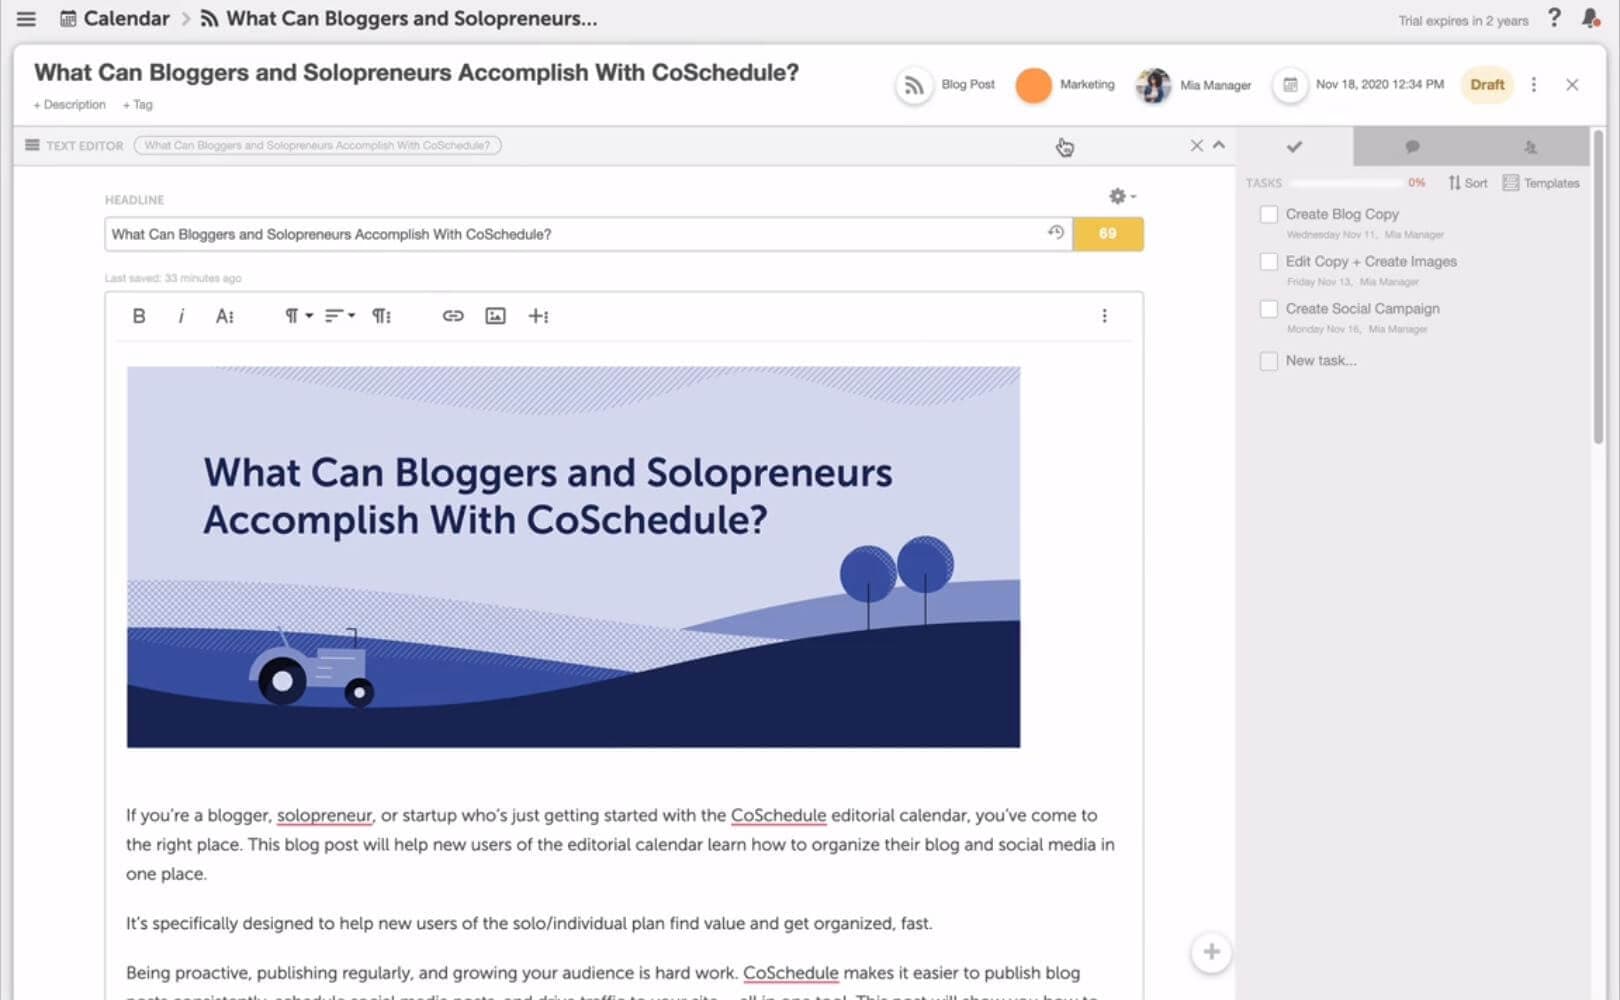
To create new content, hover over the date you'd like to publish on and click the plus sign. Select Blog Post. Let's take a look at a project we already have set up. At the top of the page, you'll see labeling options. On the right, you can add tasks to create a workflow. In the main pane, you can see all your attachment options. In this case, we're using the text editor for a blog post. Click the score next to the headline to open the headline analyzer. This will give you instant feedback on your headline quality to increase your clicks!
Import to your Content Management System
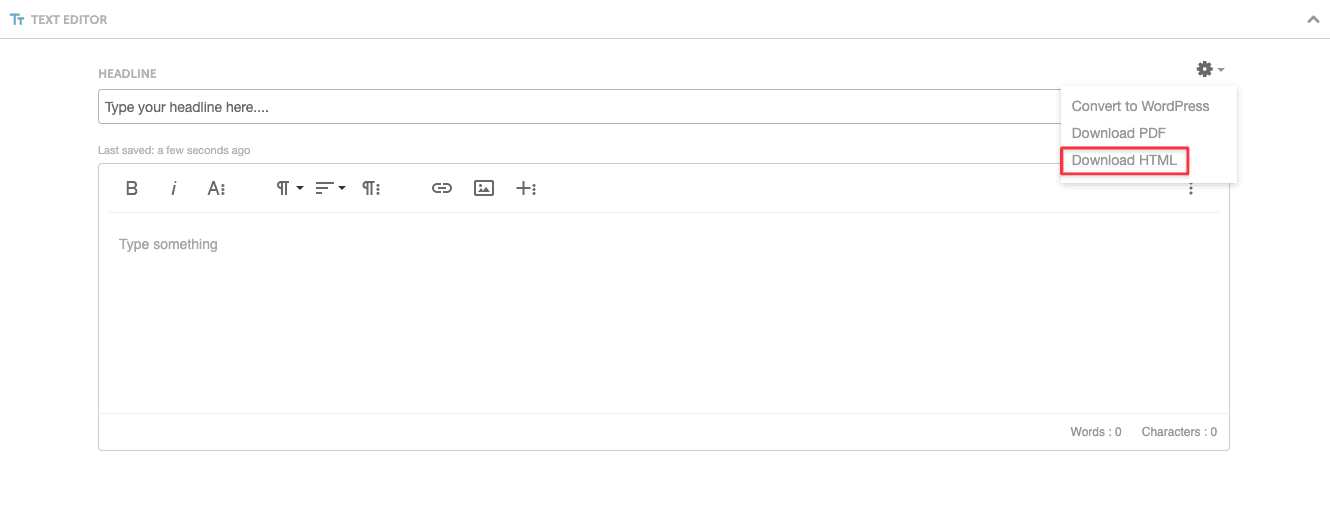
To import your content to a CMS like Squarespace, Joomla, or Drupal, click the gear icon in the upper right and click Download HTML. You can now easily import the file into any CMS!
Promote your post on social media
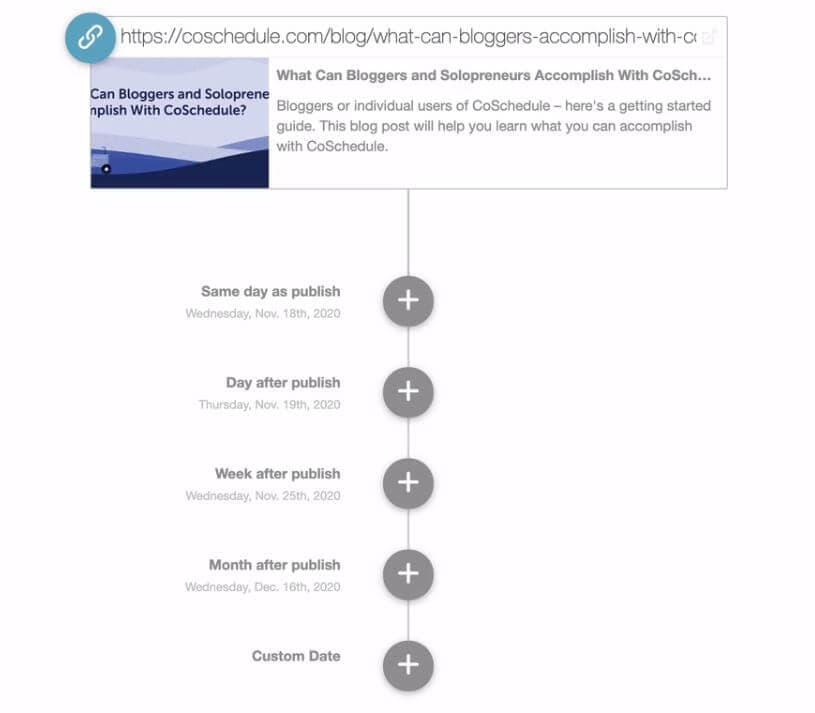
CoSchedule makes it easy to promote your post as well. You can connect a social campaign to any URL without even leaving the page. Simply choose your desired publication schedule and social media platform, then compose and save your social message.
Easily edit or reschedule
Each social message will be linked to the original article, making it easy to edit or reschedule all your posts from one place. Back on the calendar, you'll be able to see your blog post, all associated social media messages, as well as any tasks associated with the project. Reschedule any piece of the project by simply dragging and dropping it on a new date. There you have it! CoSchedule works with any website to schedule, promote, and publish your content.