
Add people to your calendar, change what they can do, or remove them from Settings. Available on every plan, but inviting people needs Professional or Suite: Starter includes only the Owner. Professional includes 2 users and can add a third. Approvers don't use a user seat.
Invite a team member
- From your calendar, open Settings.
- Click the Team Members tab.
- Click Invite Team Member.
- Enter the person's email address and choose their role.
- Click Invite Team Member.
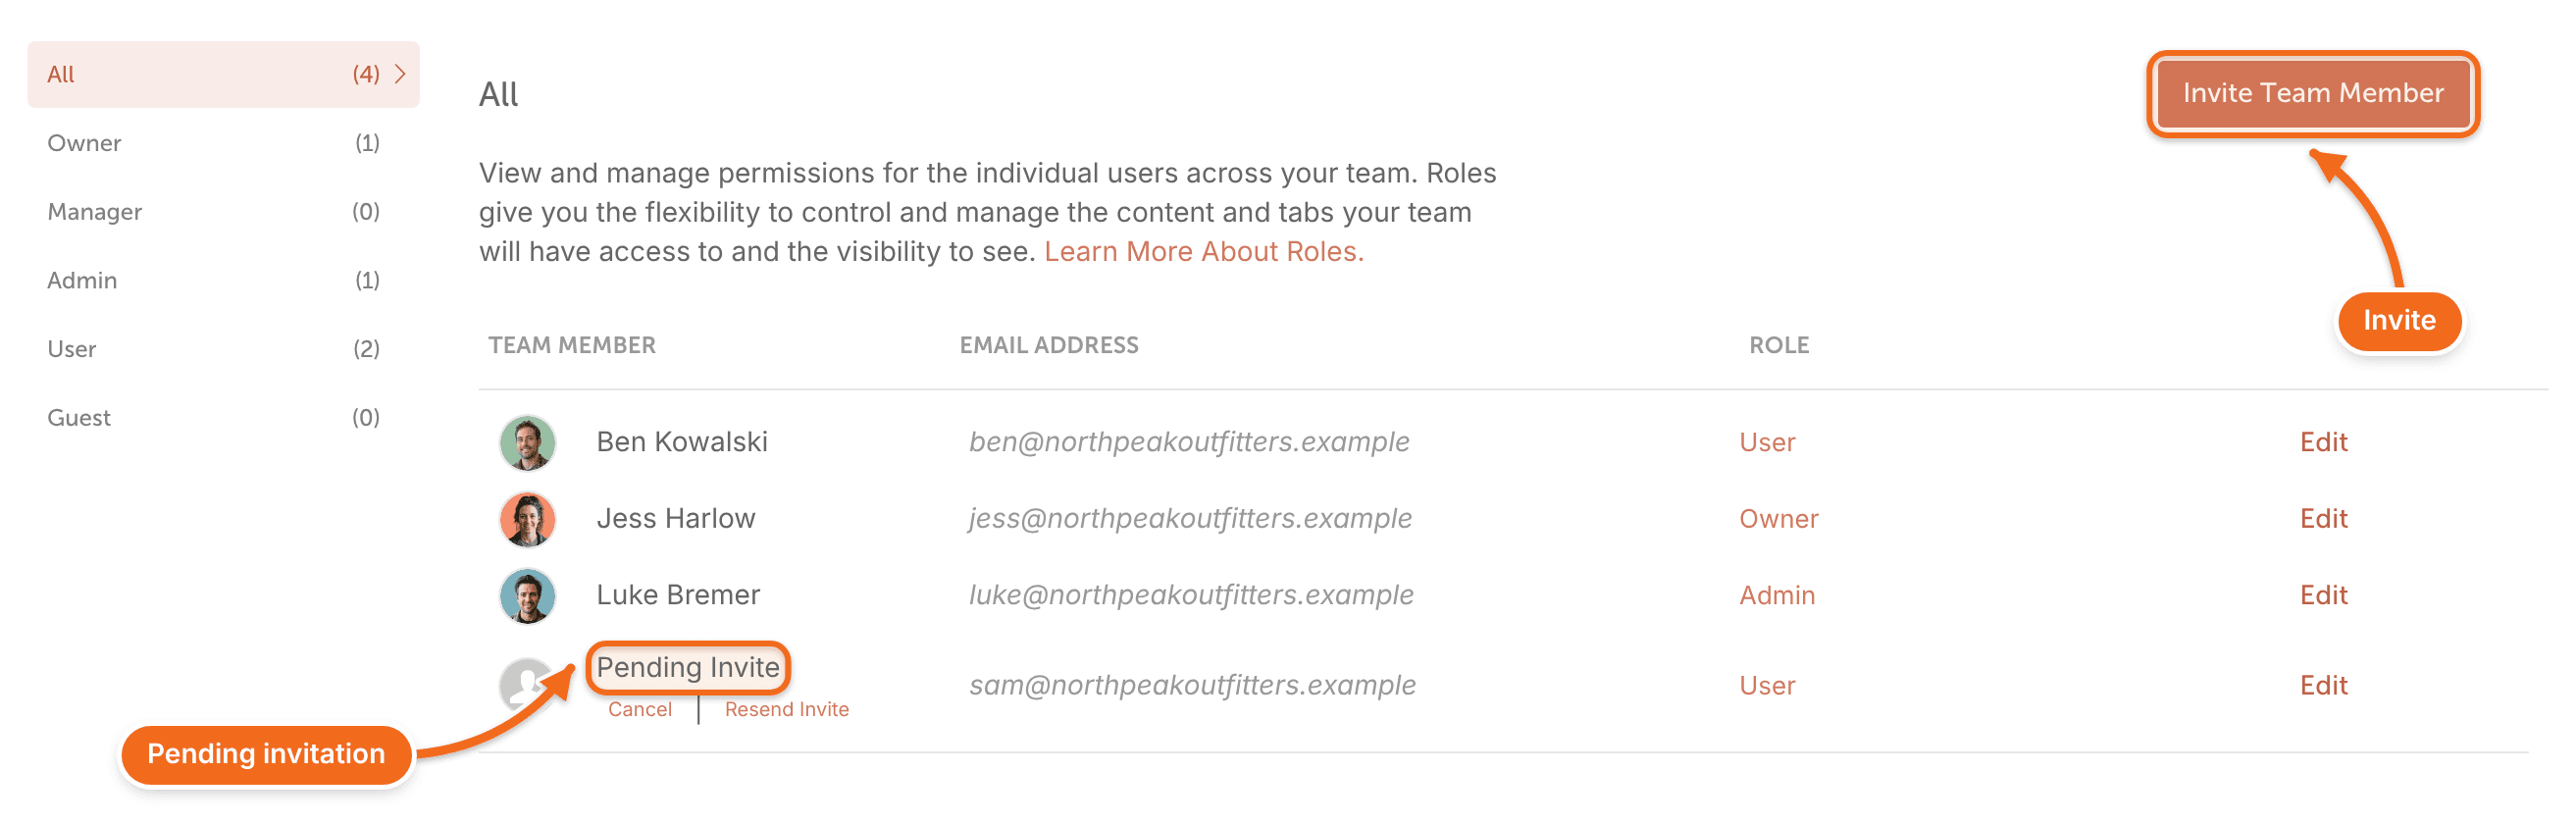
Until the person accepts, they show on the Team Members tab as Pending. Not sure which role to pick? See Team member roles.
If every seat on your plan is in use, remove a team member, add a seat or change your plan before you invite someone new.
On Professional, the Owner or a Manager can add a seat, up to 3 users: open Settings, click Billing, click the three-dot menu next to the subscription and select Edit Plan. To add more people than that, or to add anyone on Starter, change your plan. See Upgrade, downgrade or change your billing cycle. On Suite, seat changes go through your account team. See Manage a Suite or contract plan.
If your company uses single sign-on, new team members sign in through SSO. See Set up single sign-on (SSO).
If an invitation doesn't arrive or has expired
- The invitation goes to one email address. The person has to accept and log in with that address. If they want to use a different one, invite that address instead.
- Invitations expire after 3 days. To send a new one, open the Team Members tab and click Resend Invite next to the person. You can also open their profile and click Resend Invite there.
- If the person already has a CoSchedule account, they're added to your calendar automatically. They can switch to your company with the switcher in the upper left.
- If they see a payment or trial screen after accepting, they've landed in a new free calendar of their own. Click Resend Invite, and they can delete the extra calendar. See Delete your CoSchedule account.
To withdraw an invitation, click Cancel next to the person on the Team Members tab, or Cancel Invite in their profile. Only people who can remove team members see these options.
Change a team member's role
- From your calendar, open Settings.
- Click the Team Members tab.
- Find the team member and click Edit.
- Click their current role and choose a new role from the dropdown.
Only the Owner can make someone a Manager. To hand over the Owner role, see Change the owner of your calendar.
Remove a team member
Only the Owner or a Manager can remove team members. An Admin can't remove anyone, including a Manager.
- From your calendar, open Settings.
- Click the Team Members tab.
- Find the team member and click Edit.
- Scroll down to the Danger Zone section.
- Click Delete Team Member from Company.
Removing a team member deletes every comment they made in projects. Tasks assigned to them become unassigned.
Removing someone doesn't change your bill. On Professional, lower your seat count in Edit Plan after you remove a team member or cancel their invitation.
Replace someone who left
- Remove the person who left, as above. This frees their seat.
- Invite the new person.
- Assign the new person the tasks that became unassigned.
The projects the person worked on stay on your calendar. If the person who left was the Owner, see Change the owner of your calendar.
A team member who just has a new email address doesn't need to be replaced. They change it in their own profile; no one else can change it for them. See Change your name, email, password or timezone.