
Bulk Social Upload adds up to 365 social messages to a social campaign at once from a CSV file. You preview and edit each message, add images, and choose the social profiles before the messages are created. Available on Starter, Professional and Suite.
Prepare your CSV file
- Download the sample template.
- Fill in one message per row, up to 365 rows.
- Save the file as a CSV.
The uploader reads four columns:
Column | What goes in it |
|---|---|
Text | The message text. Social helpers work when you upload to an existing campaign. |
Link | A URL. Optional: leave it blank for a text-only message. |
Date | The publish date as YYYY-MM-DD. Other formats won't fill in the date. |
Time | The publish time as 24-hour HH:MM, or the word best to use Best Time Scheduling. |
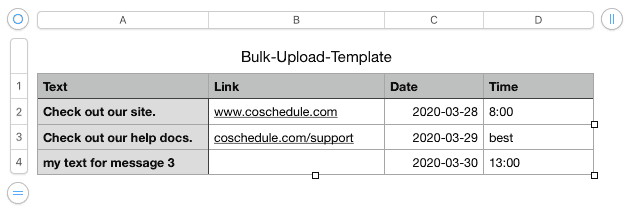
- The CSV has no network or profile column. You choose social profiles after you upload.
- You can't add images in the CSV, by URL or by file name. Add them while you edit the uploaded messages.
- Avoid duplicate messages. They can fail when they publish.
Google Sheets works well for this file. Excel can save years as two digits when it exports a CSV, and the Date column needs four-digit years.
Upload from the calendar
- Click the + on any date, then select More Options.
- Click Bulk Social Upload.
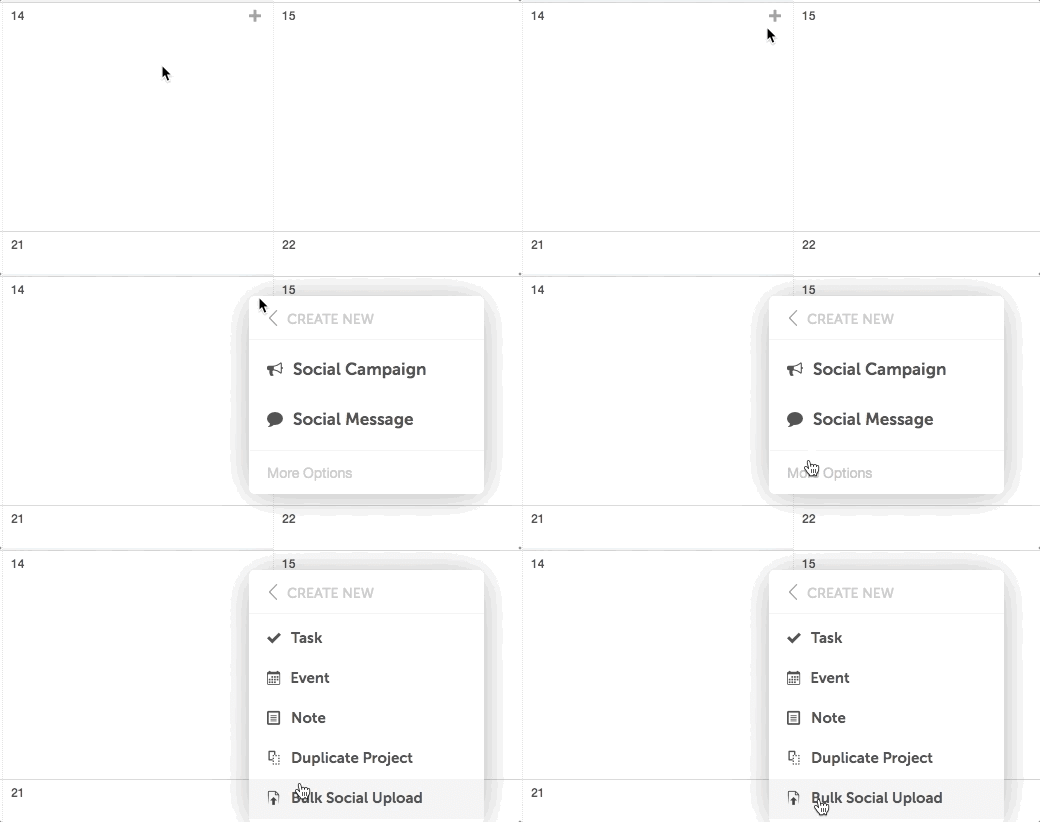
- Select Social Messages. The Upload Social Message window opens.
- Choose Create New to make a new social campaign, or Add to Existing to add the messages to a campaign you already have.
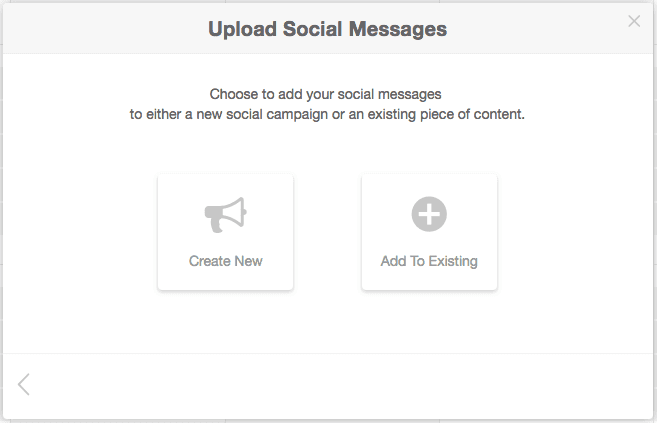
- Upload your CSV file and follow the prompts.
Upload into an existing social campaign
- Open the social campaign.
- On the left side of the campaign, click the bulk upload icon.

- Click Upload CSV File. The pane also keeps a log of every bulk upload in the campaign.
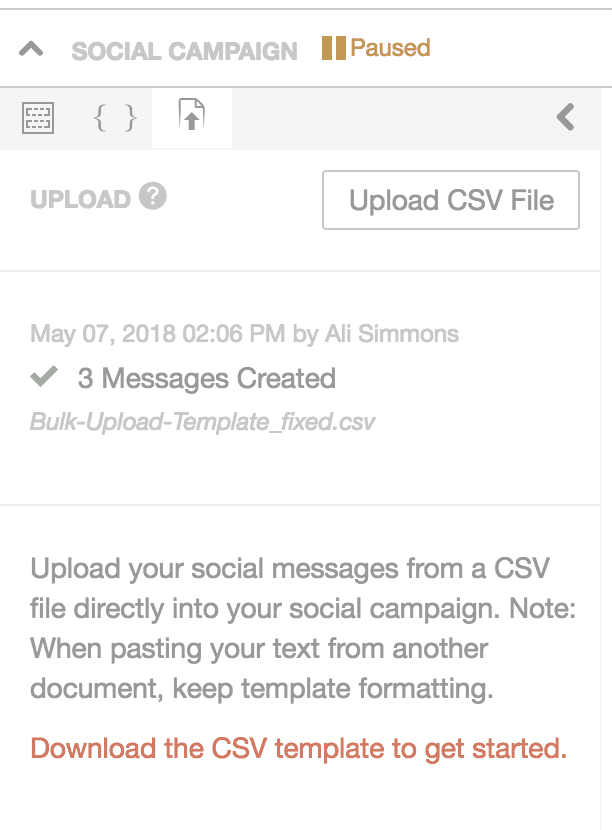
- Select the social profiles for your messages.
- Click Preview Messages.
Edit and create the messages
- Select a message on the left to edit it on the right, the same way you edit any social message. Add images or video with the image icon (Add media to message).
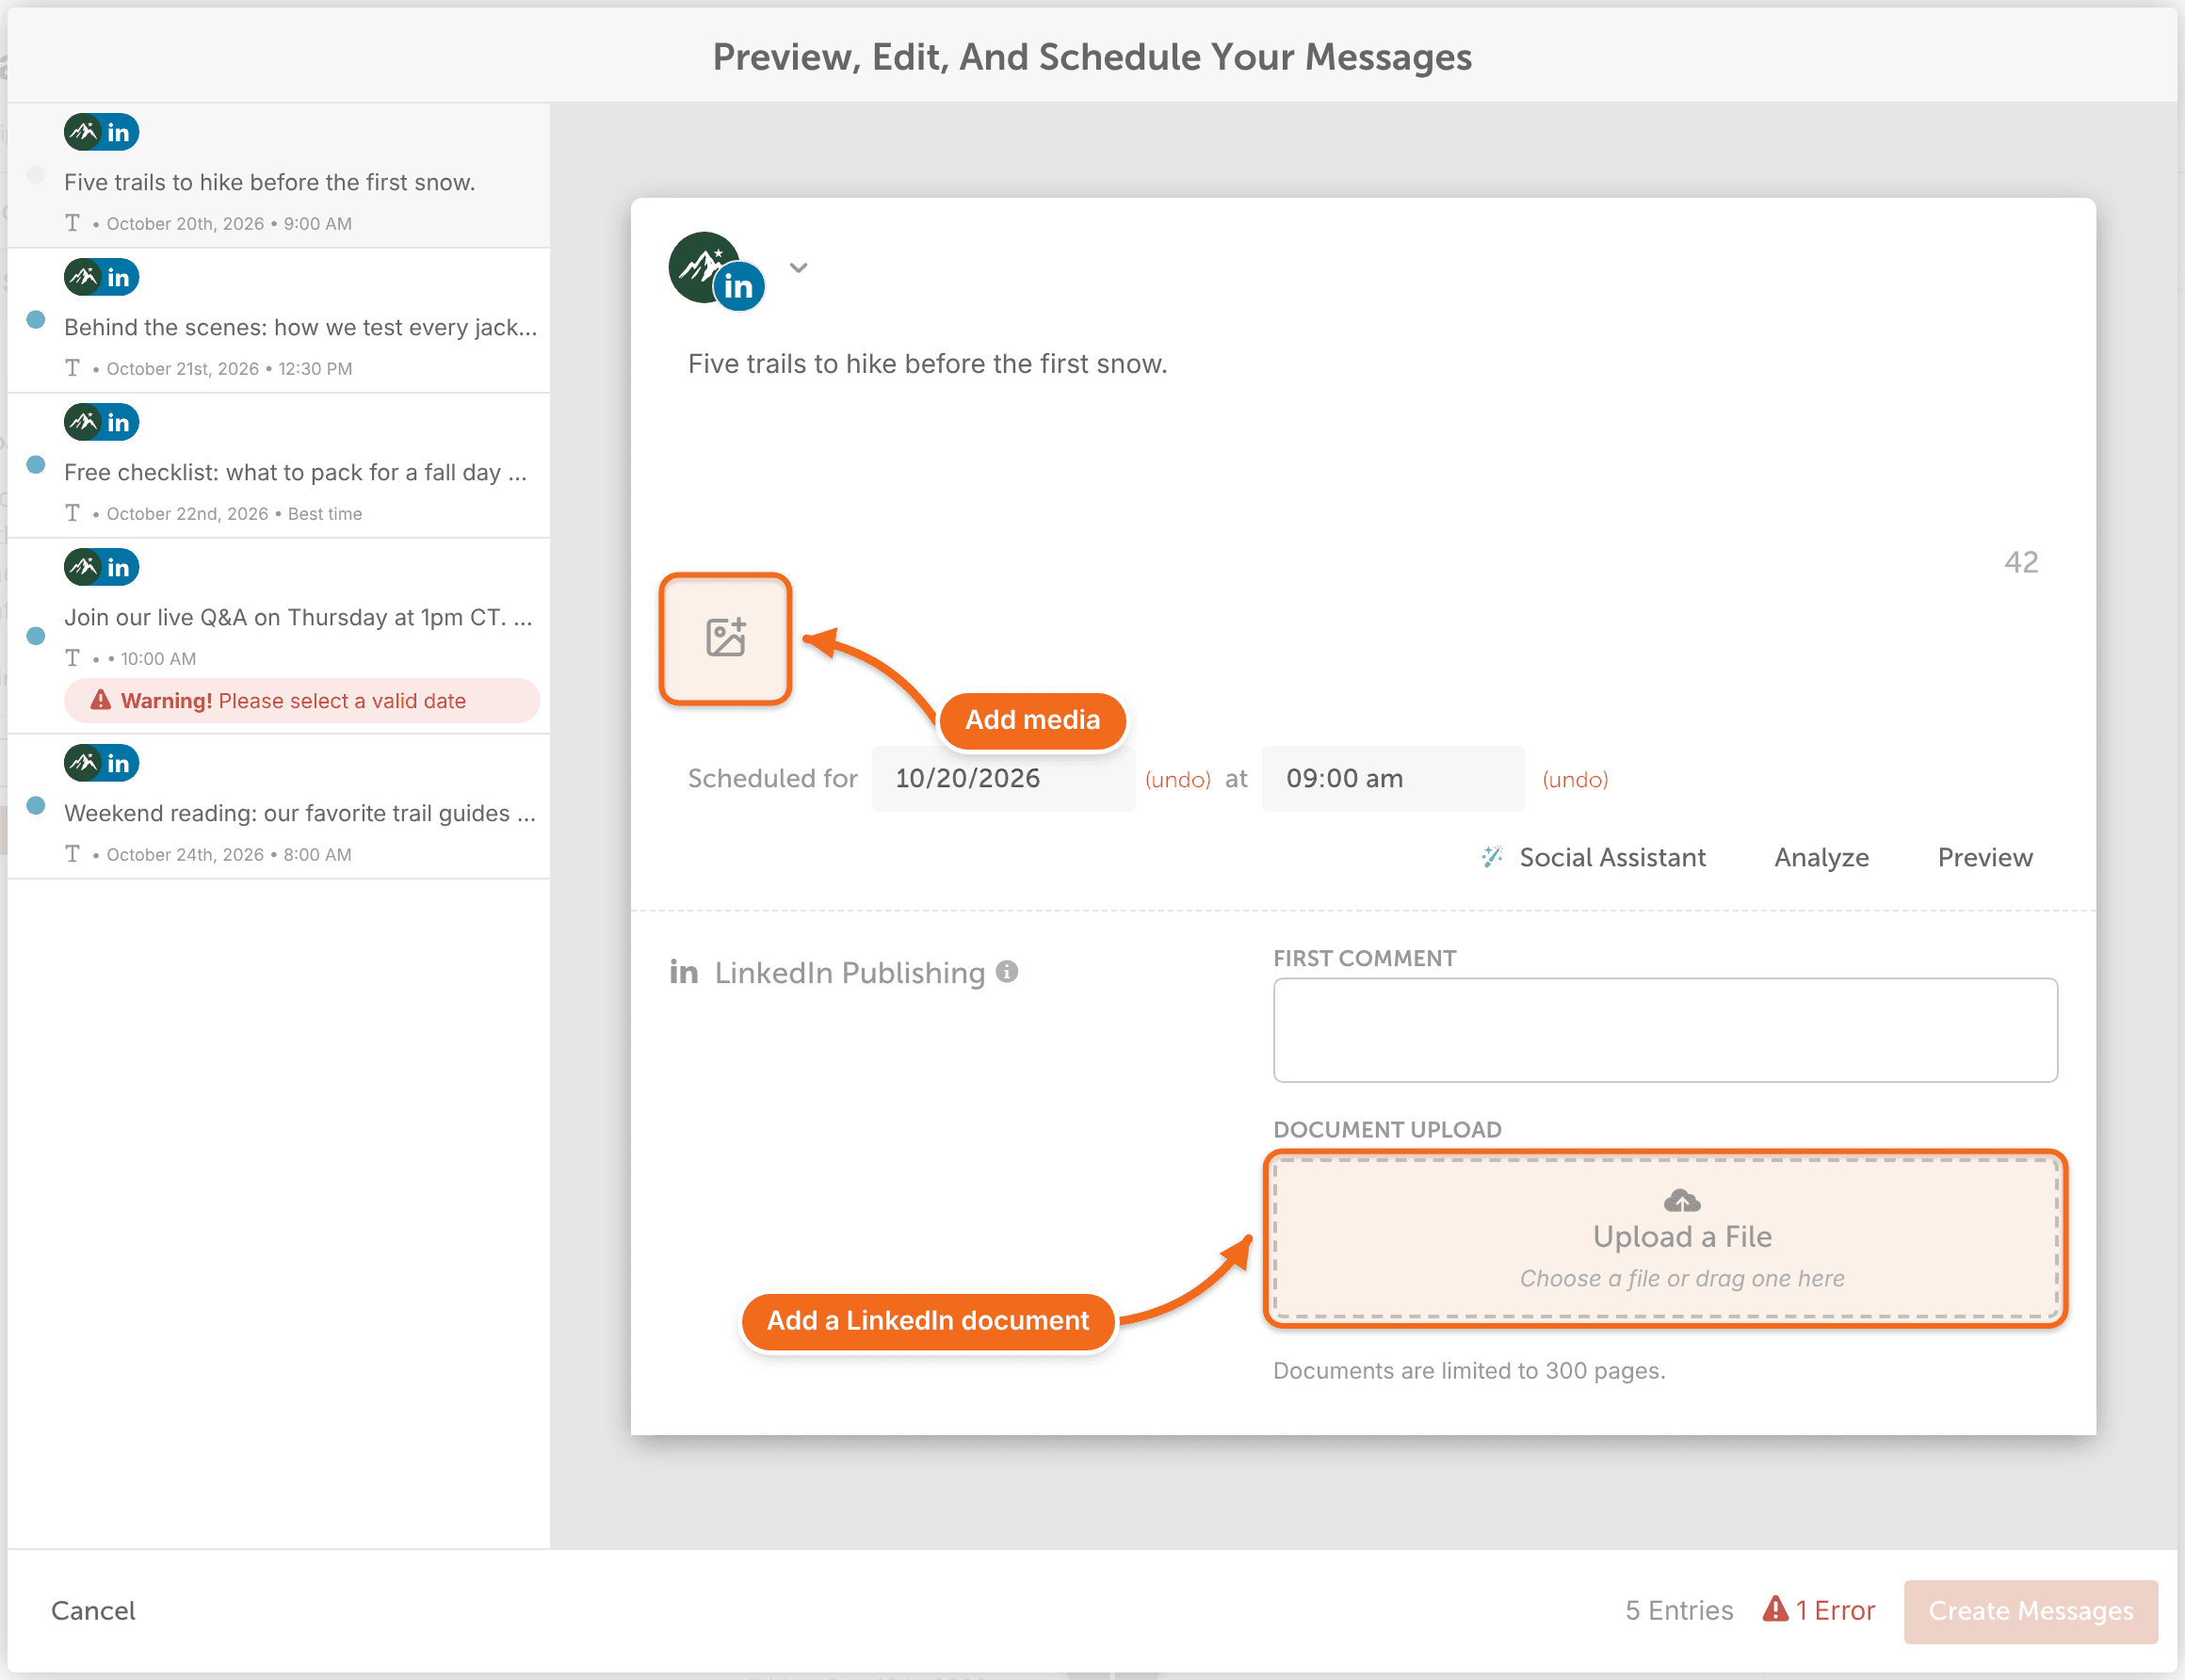
- Fix any message that shows a red banner. You can't create messages until every error is fixed.
- To remove a message, click its delete icon.

- Click Create Messages.
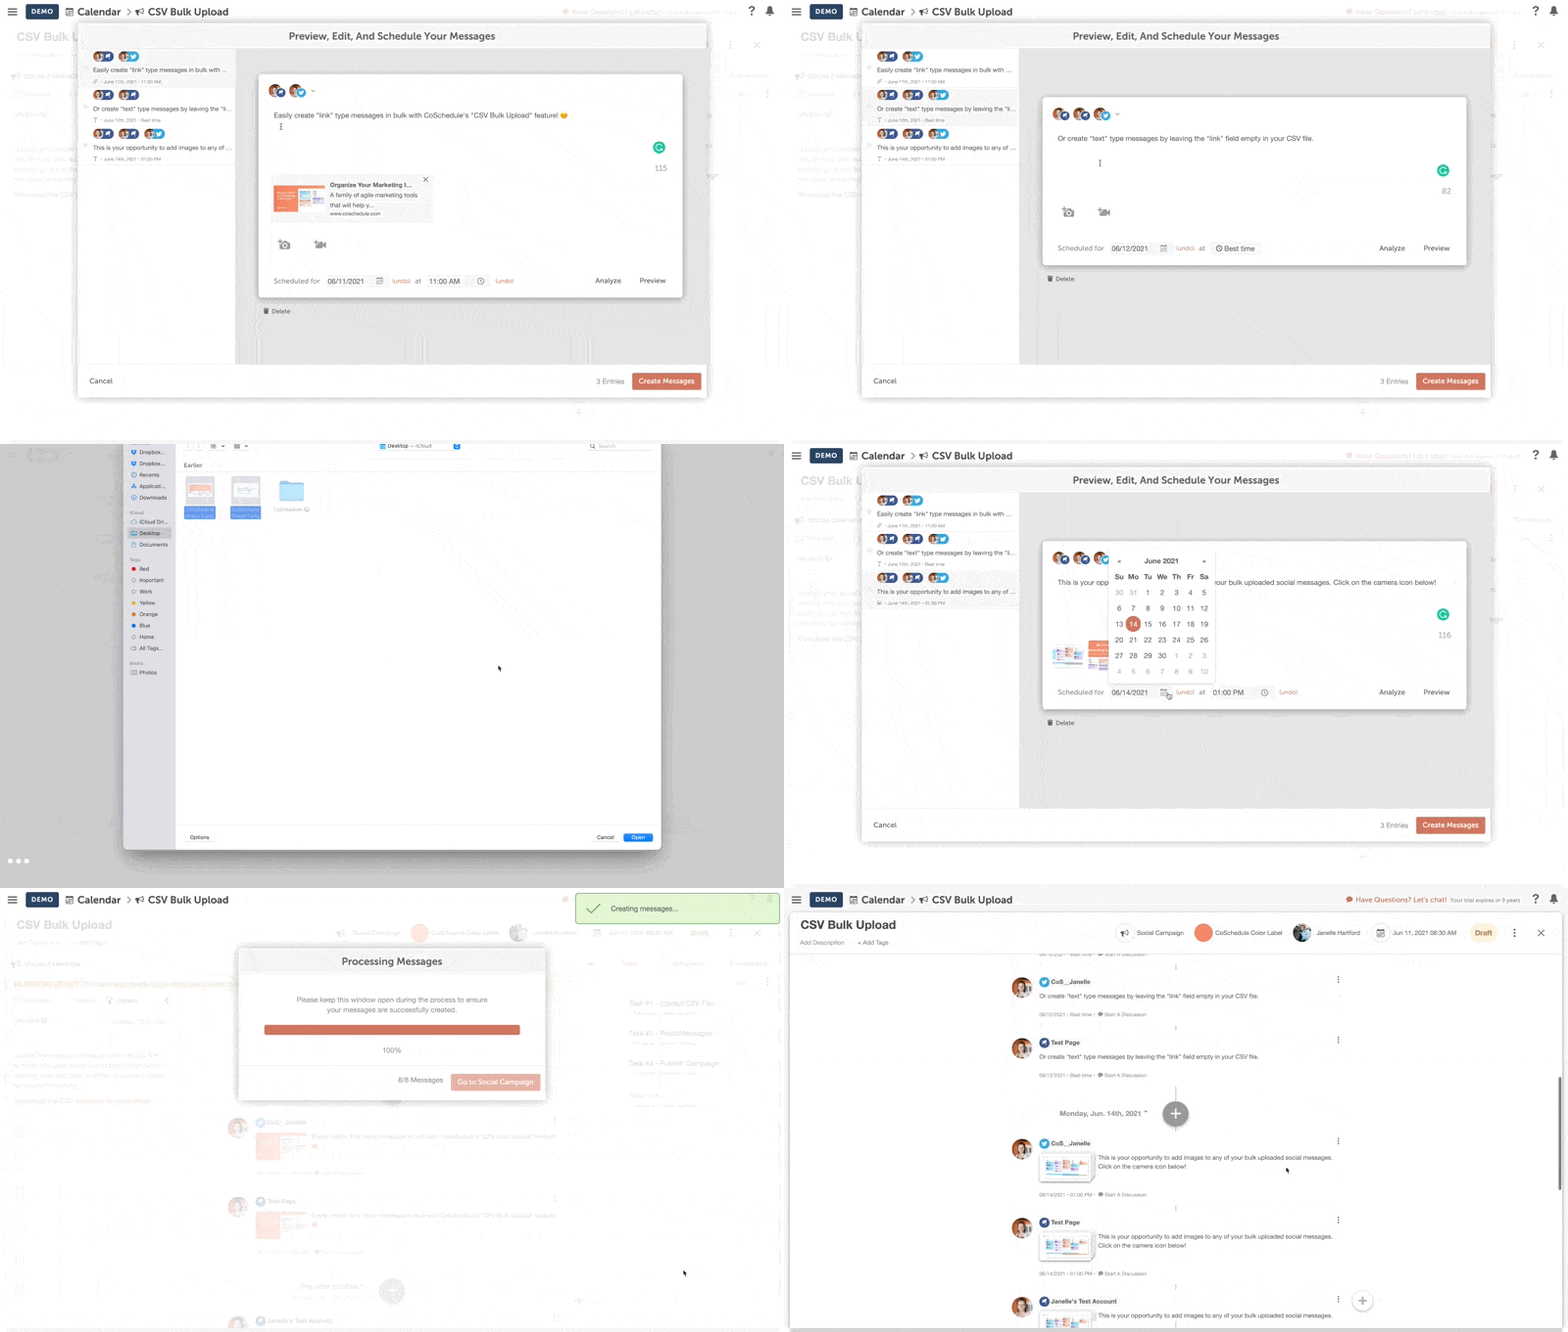
- When processing finishes, click Go to Social Campaign.
Use the image icon (Add media to message), not the LinkedIn document button, to add images and video. For YouTube Shorts, give each message its own title and tags before you click Create Messages.