
Edit the images in your social messages right in CoSchedule, without opening another tool: crop, rotate, resize, apply filters, adjust brightness and color, or add text and emoji. Available on Starter, Professional and Suite.
Edit an image
- Open your calendar and click +Create, choose Social, then select Social Message.
- Choose the social profiles you're posting to.
- Click the image icon (Add media to message) and add your image.
- On the image's thumbnail, click the pencil icon. The Edit Image window opens.
- Make your changes on the Crop, Adjust, Overlays and Resize tabs. To back out a change, click Undo or Redo, or click Revert to original to start over.
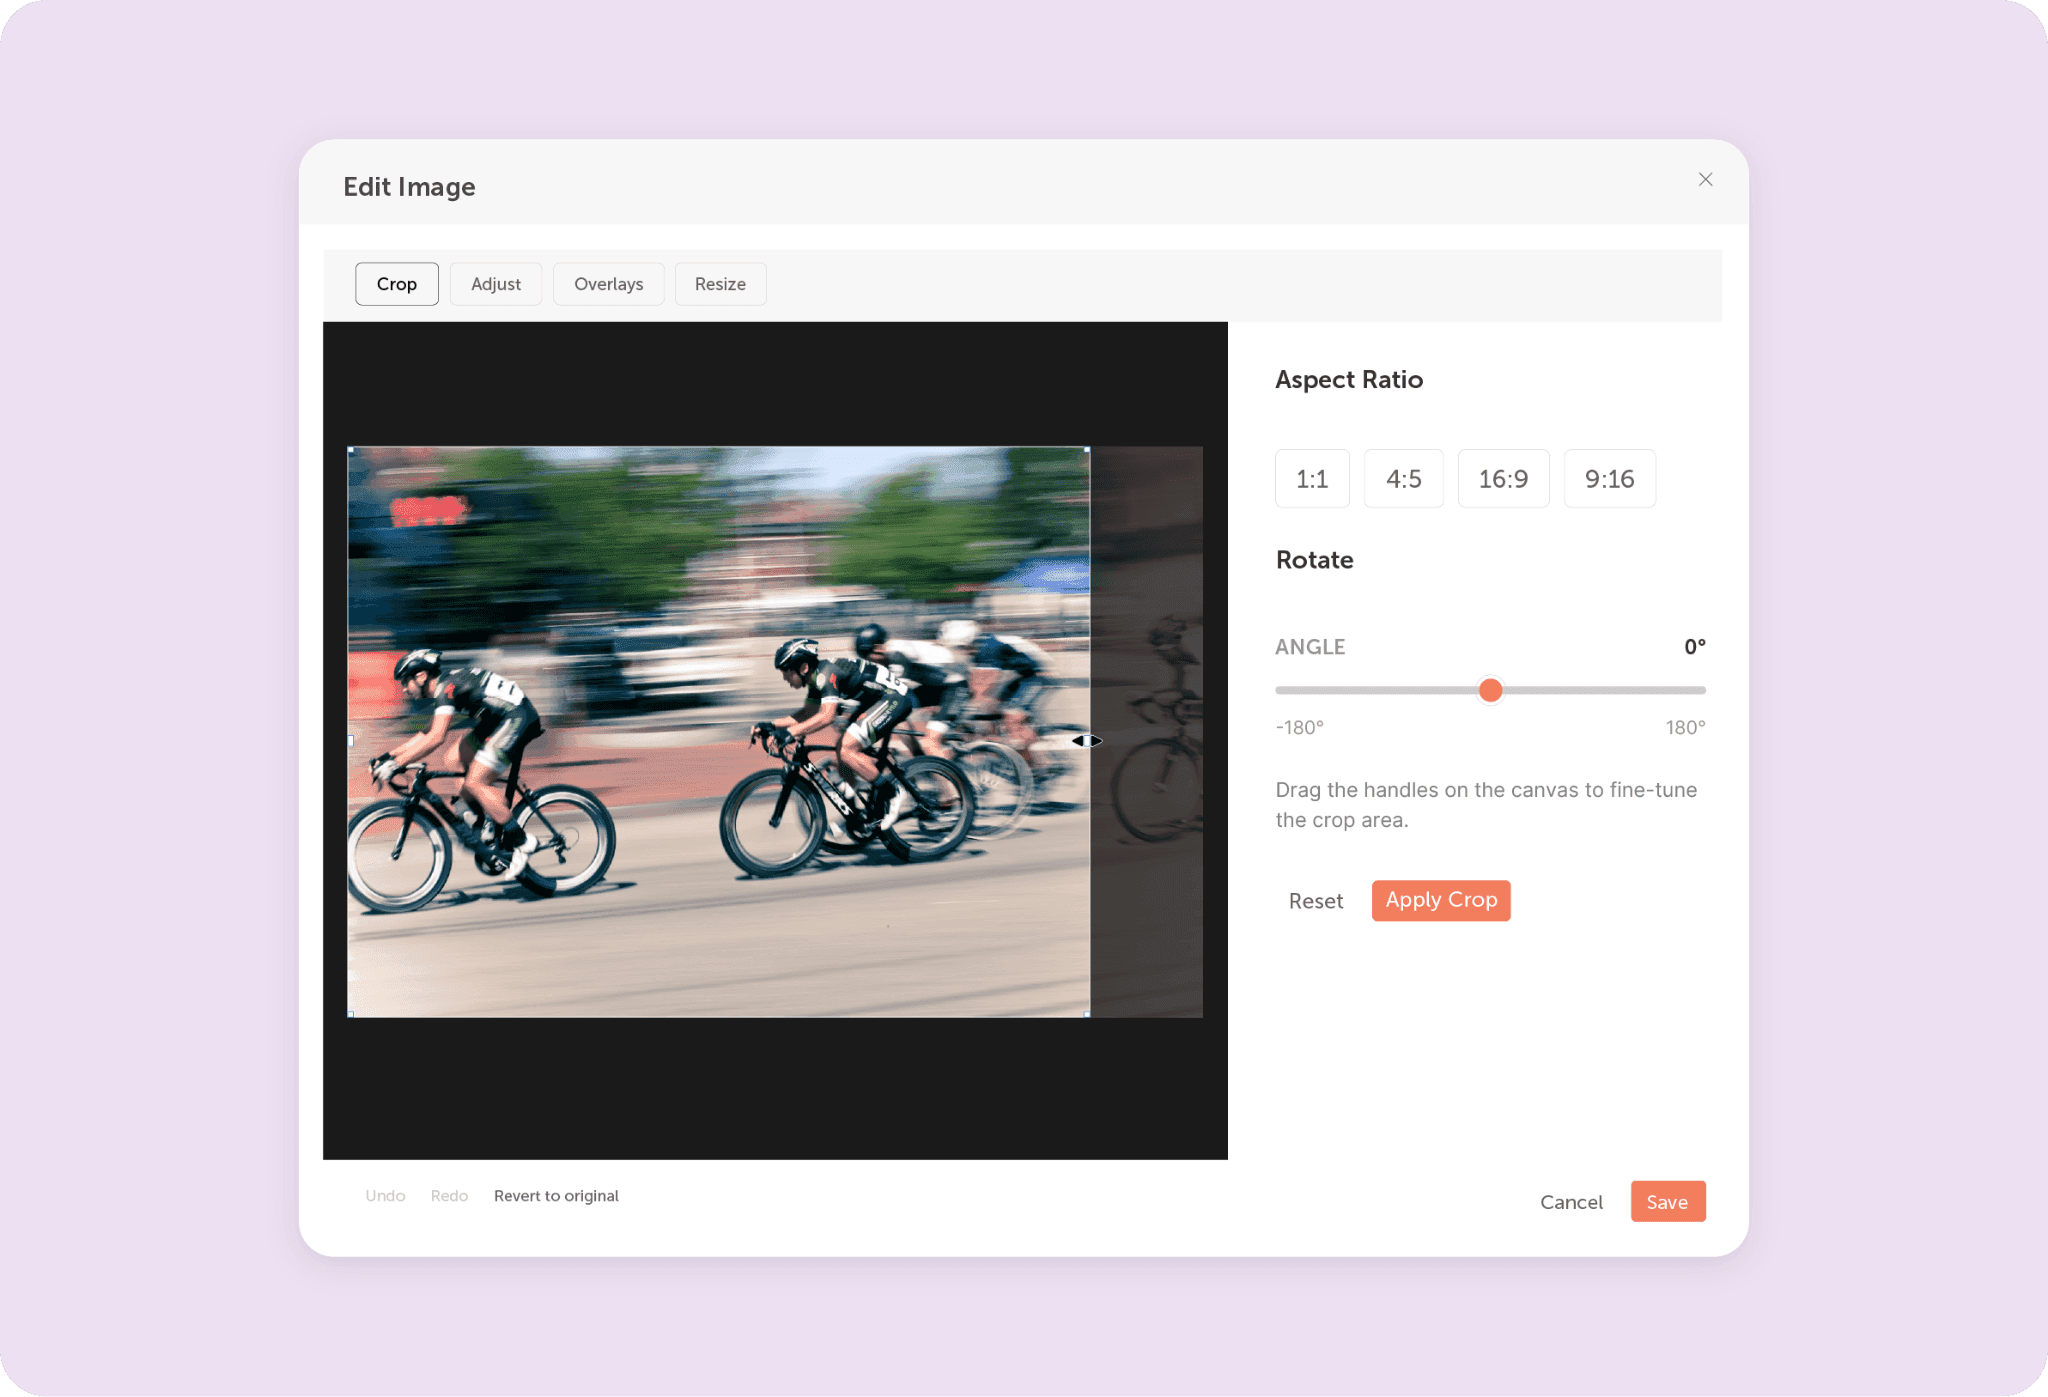
- Click Save.
- Finish your message, select the date and time, then click Save.
The pencil icon doesn't show on mobile.
What each tab does
- Crop: choose an Aspect Ratio (1:1, 4:5, 16:9 or 9:16) and click Apply Crop, or click Reset to undo the crop. Under Rotate, drag the Angle slider, from -180° to 180°.
- Adjust: choose one of the Filters (None, Vivid, Matte, Cool, Warm, Drama, Fade or B&W), and change Brightness, Contrast, Saturation and Hue under Adjustments.
- Overlays: on the Emoji tab, click + Add Emoji. On the Text tab, fill in Text, Color and Size, then click Add Text.
- Resize: set the Output Size.
Saving adds your edit to the message as a new image, placed last in the order of attachments. The original image isn't changed and stays in Assets.
Check the sizes each network accepts before you crop or resize, so the edited image publishes the way you expect.