
Social approvals hold a social message until a teammate or client signs off on it. Social approvals are available on Professional and Suite, not on Starter or as an add-on.
On Starter, get sign-off by @mentioning teammates in the social message's discussion instead.
Turn on social approvals
- Open your calendar and click Settings.
- Click Power Ups.
- On the Social Approvals tile, click Enable Social Approvals.
Choose who can approve
- Open your calendar and click Settings.
- Click the Team Members tab.
- Find the team member and click Edit.
- Under Social Approvals, check Allow user to make social approvals to let them approve. Uncheck it to take that permission away.
In the same section, you can make one team member the default social approver. CoSchedule adds the default approver to every social message that requires approval, and you can still remove them or add other approvers on each message. A calendar has one default approver, so if you choose a different one, CoSchedule asks you to confirm the change. There's no separate default approver for each social profile.
If the default approver is someone you've just invited, CoSchedule adds them to messages only after they accept the invitation.
Give someone the Approver role
If someone only needs to approve social messages, such as a client, give them the Approver role. To invite someone or change their role, see Invite, change or remove team members.
- Approvers don't use a user seat and cost nothing extra.
- When an Approver logs in, they see only the Approvals dashboard. The left sidebar doesn't show Home or Calendar to Approvers.
- Approvals aren't available in the CoSchedule mobile app. Approvers approve in a web browser.
- To let an Approver see your calendar too, share a read-only view of it with them. See Share a read-only view of your calendar.
Require approval on a social message
- While you create a social message, click Approvals to open the Approvals section of the composer.
- Under Approvers, click Add Approver and select one or more team members. The list shows only team members who are allowed to approve.
- If you add more than one approver, only one of them needs to approve by default. To require approval from every approver, turn on Require Approval From All.
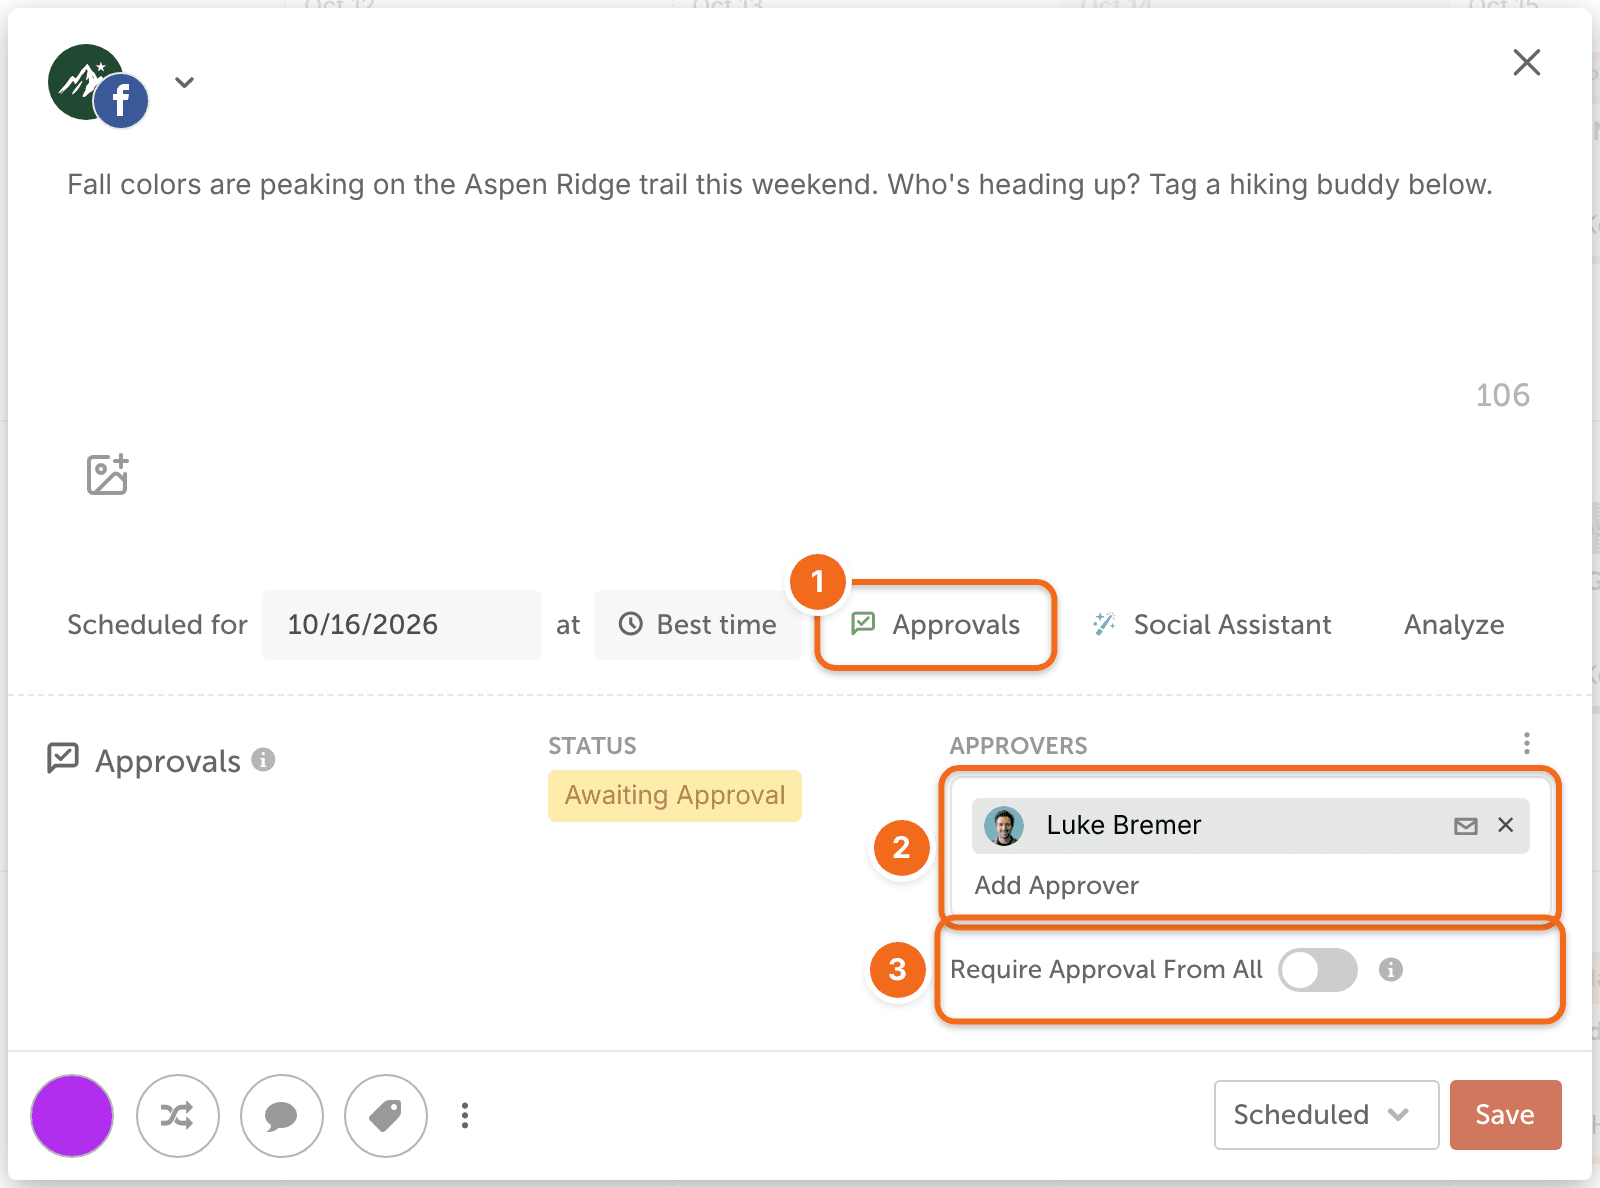
The approvers you added are listed under Approvers, and Status shows whether the message is still waiting for approval. To send an approver a reminder, click the mail icon next to their name. To withdraw the request, click the X next to their name.
In a client calendar, only the approvers assigned to that client calendar appear in the approver list.
On the calendar, a message waiting for approval shows a yellow approval icon. Approving a message doesn't change its status. It keeps the status it had.
Get the message approved before its scheduled time. If it's still waiting for approval then, CoSchedule tries to send it up to 7 times. Each of the first six attempts shows "Your message failed to send because it is pending approval from 1 or more team members. We will attempt to send the message a few more times." If no one approves it in that time, the last attempt fails with "Your message failed to send because it requires approval from 1 or more team members. Please have them approve the message and reschedule." A failed message doesn't retry by itself, so once it's approved, reschedule it.
Approve social messages
- From the calendar, click Approvals in the left-side menu to open the Social Approvals page.
- Click My Approvals to see messages waiting for your approval, or All Approvals to see messages waiting for anyone on your team.
- In the upper right corner, select the approval status you want to see: messages still pending, or messages already approved.
- Open a message to preview it. You can discuss it with your team there, and play a video with the play icon.
- Click Approve.
When a message has several approvers and Require Approval From All is off, one approval is enough. The message then leaves every approver's pending list.
Remove an approval
You can remove an approval until the message is published.
- On the Social Approvals page, click All Approvals and select approved messages in the upper right corner.
- Find the message and click Remove Approval.
Turn off approval emails
- From your calendar, open Settings.
- Click the Account tab.
- Uncheck the Approvals notifications you don't want.
The Approvals rows show only when social approvals are turned on. See Manage notifications and unsubscribe from emails.