
CoSchedule can add UTM tags to every link it publishes, so Google Analytics, or any analytics tool that reads UTM tags, can show which visits came from your social messages. The Google Analytics integration, which adds these tags, is available on every plan, including the free plan.
The Google Analytics integration doesn't connect to your Google Analytics account, and you don't sign in to Google. It adds UTM tags to the links CoSchedule publishes, and your analytics tool reads them from there.
Turn on UTM tags
- From your calendar, open Settings.
- Click Integrations.
- Click Google Analytics.
- Click Enable.
From then on, CoSchedule adds UTM tags to every link it publishes.
The UTM tags CoSchedule adds
- utm_campaign: always coschedule, so you can group all the traffic from your CoSchedule messages.
- utm_source: the social network the message published to.
- utm_medium: the name of the social profile, or social by default.
- utm_content: the title of the project the message belongs to, if it belongs to one. For a message on a WordPress post, that's the post's title.
A published link looks like this, with real values in place of the capitals:
https://example.com/blog-post?utm_campaign=coschedule&utm_source=NETWORK&utm_medium=PROFILE-NAME&utm_content=PROJECT-TITLE
See CoSchedule traffic in Google Analytics
In Google Analytics, visits from links that CoSchedule published show the campaign name coschedule. For how to find campaign traffic, see Google's help on the Traffic acquisition report and on collecting campaign data with custom URLs.
Add custom UTM parameters
The Custom Analytics integration lets you add your own parameters to the links in a message, for example to tie your social messages to an existing campaign in Google Analytics. It works with or without the Google Analytics integration.
Custom Analytics is available on Suite.
Turn on Custom Analytics
- From your calendar, open Settings.
- Click Integrations.
- Click Custom Analytics.
- Click Enable.
Add parameters to a message
The option appears once Custom Analytics is turned on. It isn't offered on messages that have already been sent.
- Open the social message.
- Click the ellipsis menu, then click Custom Analytics. A section headed Custom Analytics opens.
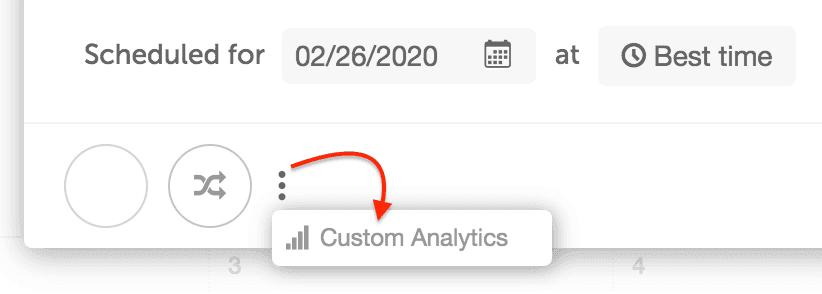
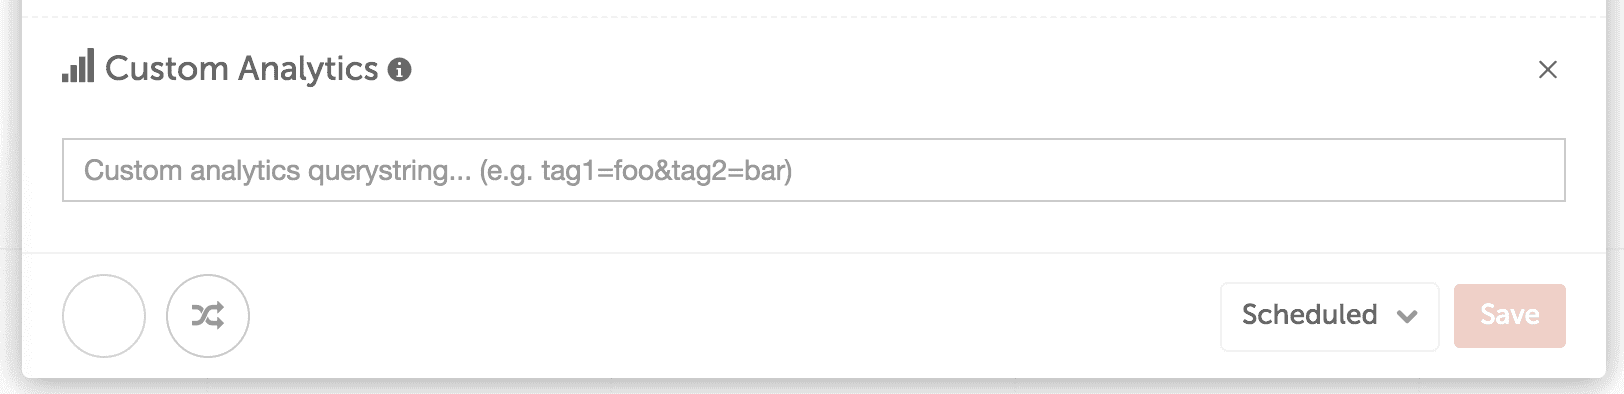
- In the field whose placeholder reads "Custom analytics querystring... (e.g. tag1=foo&tag2=bar)", enter your parameters as a query string, for example utm_campaign=spring-launch&utm_term=webinar. Any valid query string works, not only UTM tags.
- Click Save in the message.
- CoSchedule adds the parameters to the end of every URL in the message.
- To clear the parameters, click the X in the Custom Analytics section (its tooltip reads "Remove Custom Analytics").
- If the Google Analytics integration is on too, a custom parameter replaces the default tag with the same name. In the example above, utm_campaign=spring-launch replaces utm_campaign=coschedule.
- If Bitly is connected, the link and its parameters become one Bitly short link on networks where Bitly shortens links. See Shorten links with Bitly.
Turn off UTM tags
- From your calendar, open Settings.
- Click Integrations.
- Click Google Analytics.
- Click Disable.
Links published after that have no default UTM tags. Messages that ReQueue has already copied keep the tags they have.