
A project template saves a project's content and settings so you can start new projects from it. Templates can also repeat on a schedule, for work like a weekly webinar or a monthly newsletter. Available on Suite.
Editing a template changes only the projects you create from it afterward. Projects you've already created don't change.
Owners, Managers and Admins create and edit templates. Users can create projects from them. Guests and Approvers can't use templates.
Save a project as a template
- On the calendar, click the project you want to turn into a template.
- Click the ellipsis icon.
- Select Save as Template.
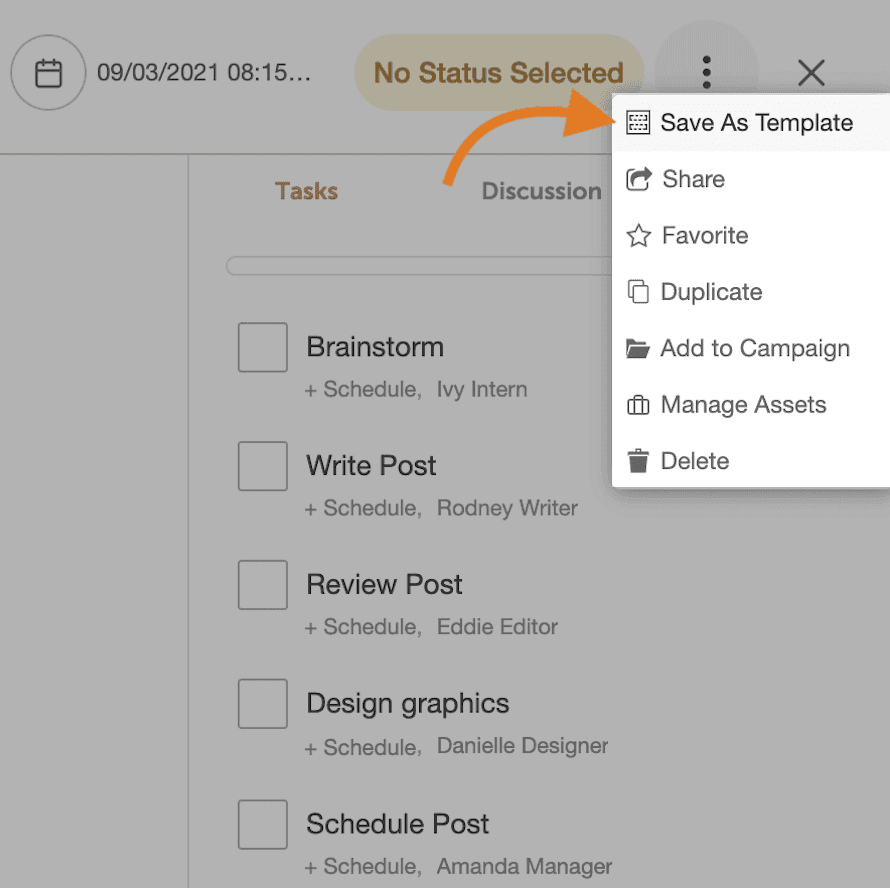
A blue Project Template header shows you're working in a template. The template keeps everything from the project, except:
- Discussions aren't copied.
- Scheduled items keep their time, and their dates become relative to the project's date. For example, if the project is scheduled for September 5 and has a social message at 8:00 AM on September 7, a project made from the template has that message at 8:00 AM two days after its own date. Tasks work the same way.
Create a project from a template
- From the calendar, click +Create.
- Select From Template.
- In the Choose A Template panel, select the template.
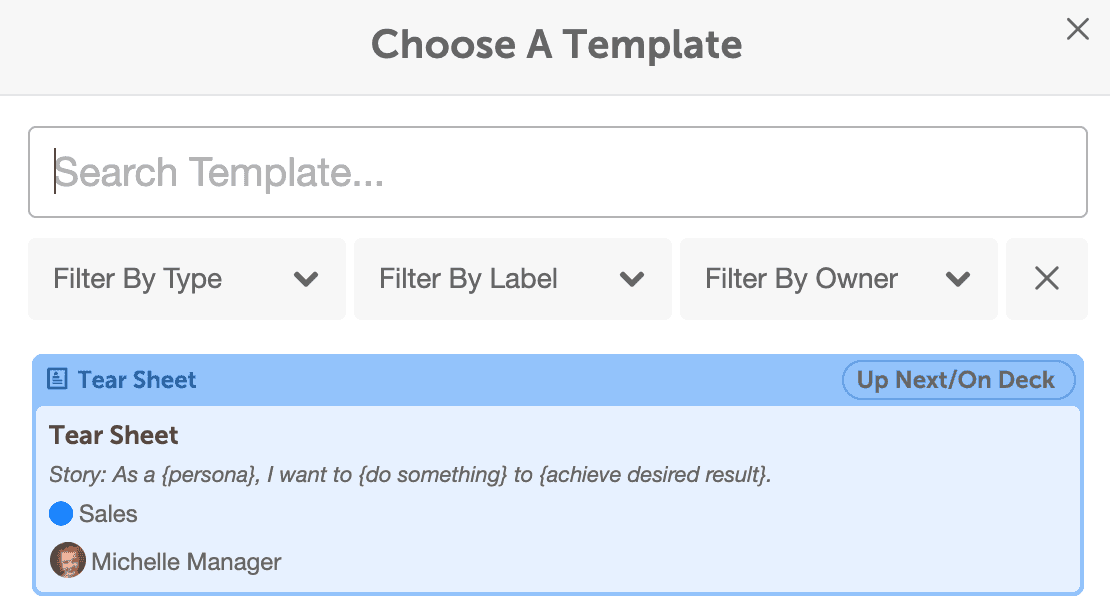
CoSchedule creates a new project from the template. Edit and schedule it as usual. Your changes don't affect the template.
If the new project has no date yet, its tasks are scheduled relative to today's date.
Set a recurring schedule
- From your calendar, open Settings.
- Select Templates.
- Click Project.
- Click the template.
- Click Repeat in the upper right. The Recurring Schedule window opens.
- Choose how often the project repeats, and when the schedule begins and ends.
- Choose how far ahead projects are created on your calendar.
- Click Save.
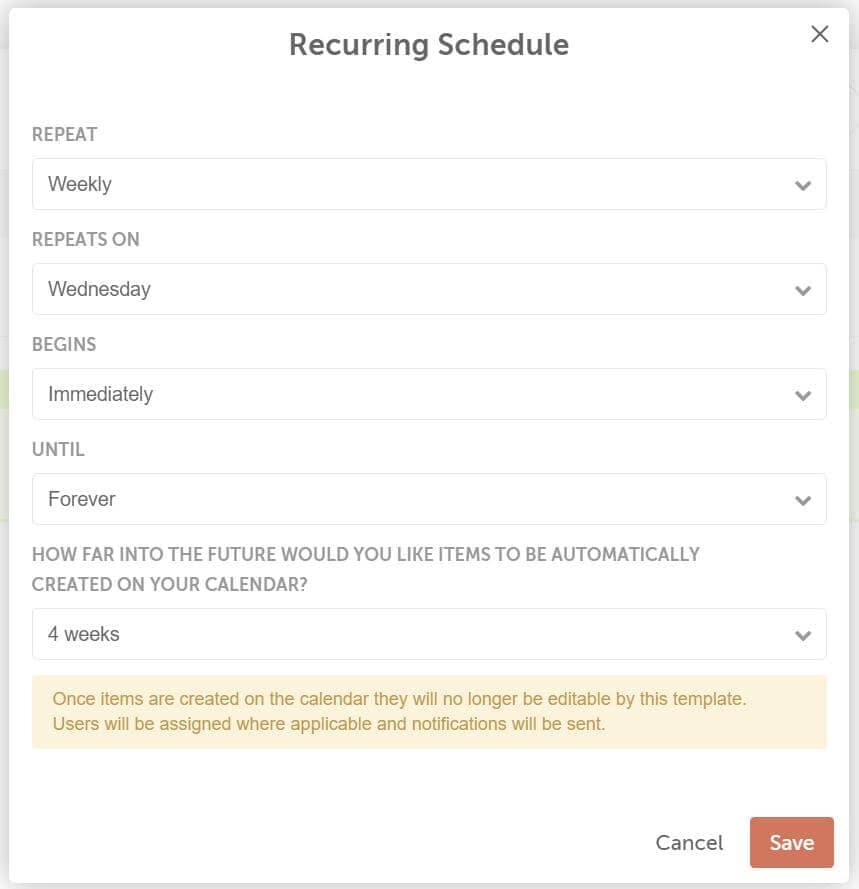
CoSchedule adds the upcoming projects in the series to your calendar, based on how far ahead you chose to show them. Editing one recurring project doesn't change the others.
To stop the template from repeating, click Remove Recurring Schedule in the Recurring Schedule window.
To get a project about every two weeks, set up two templates that each repeat monthly, starting two weeks apart.
On Starter and Professional, you can create recurring projects with Zapier instead. See Connect other tools with Zapier.
Manage future recurring projects
- From your calendar, open Settings.
- Select Templates.
- Click Project.
- In the Usage column, click the template's future link, such as 3 future. Edit Scheduled Projects opens.
- Open or delete any future project on its own, or click Bulk Delete all future projects.
To stop the template from repeating, click Remove Recurring Schedule on the same screen.
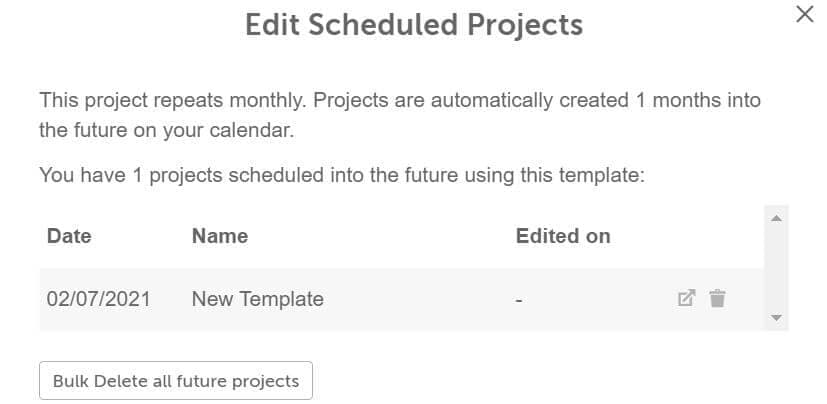
Recurring projects you've edited aren't deleted. They're marked [Recovered] on your calendar.
Edit a template
- From your calendar, open Settings.
- Select Templates.
- Click Project.
- Select the template you want to edit.
- Make your changes. They save automatically.
Delete a template
- From your calendar, open Settings.
- Select Templates.
- Click Project.
- Open the menu on the template's row.
- Choose Delete.
Common questions
Why isn't my template in the Choose A Template panel?
A template doesn't appear when:
- It belongs to another calendar.
- It's part of a marketing campaign template.
- Its color label is restricted for your role.
- A filter or search is hiding it. Check Filter By Type, the label and team member filters, and the Search Template... box.
Marketing campaign templates are also hidden when you open the panel from Ideas or from inside a campaign.
Do a project type's custom fields apply to existing projects?
No. A project type's default custom fields are added only when a new project is created. Existing projects aren't updated. If you archive a field, it stays on the projects that already have it.