
With CoSchedule Calendar products, you can consistently execute your newsletter strategy for the next quarter, year, & beyond.
Get Creative with Your Newsletter—Use Our Free Newsletter Name Generator!
Why Use CoSchedule Calendar Products To Schedule Email Newsletters?
- Never Miss A Send Date: Pre-plan an entire year’s worth of newsletters ensuring all emails are sent on time.
- Streamline The Creation Process: Eliminate confusion or wasted time. Outline a reusable, standardized workflow in your CoSchedule Calendar to ensure everything is ready & scheduled before the send date.
- Avoid Overlapping Campaigns: Visualize your newsletter schedule alongside the rest of your email marketing to prevent scheduling conflicts or over-sending.
Here’s how to use your CoSchedule Calendar to execute your newsletter strategy.
Step 1: Create A Dedicated Email Calendar
Add your email project type, newsletter project type, & email integrations to this view to see a live calendar of your planned and scheduled emails.

Creating this view gives you total visibility of your email sends.
Step 2: Add Your Newsletters To Your Email Calendar.
Do you send a monthly newsletter for customers? A weekly newsletter for subscribers? Add them to your Calendar.
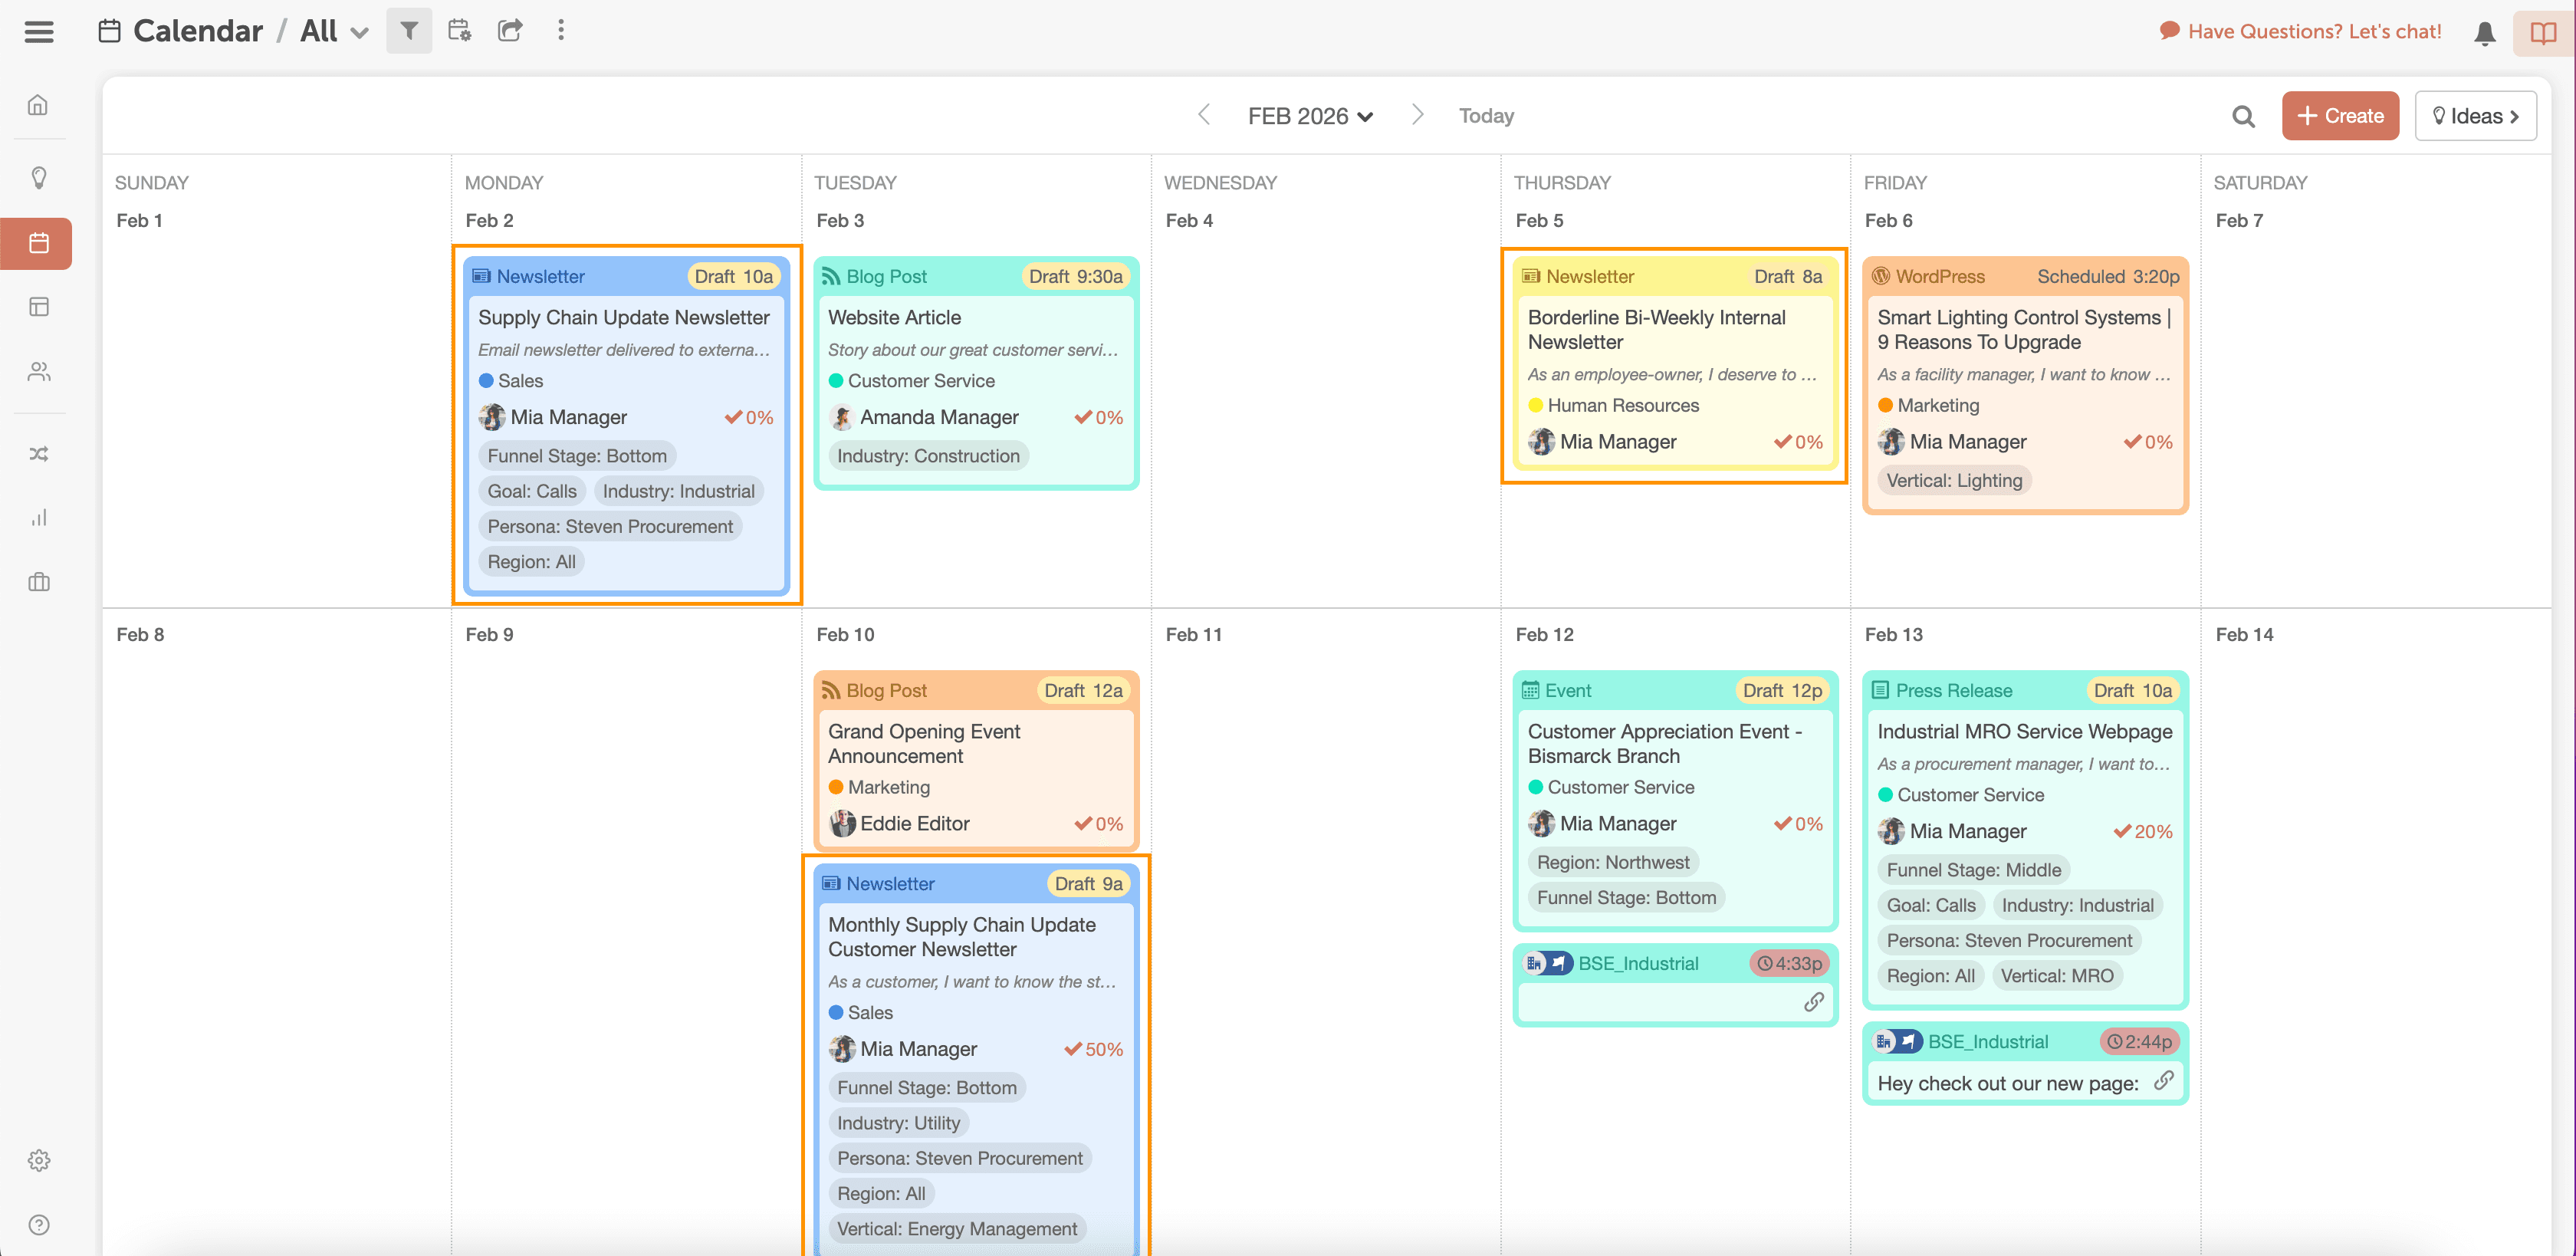
Use the “Newsletter” project type for all of your newsletters.
Or you can use the Mailchimp, ActiveCampaign, or Constant Contact project types if you have one of the email integrations enabled on your Calendar. This creates your newsletter on your Calendar & in your email marketing solution.
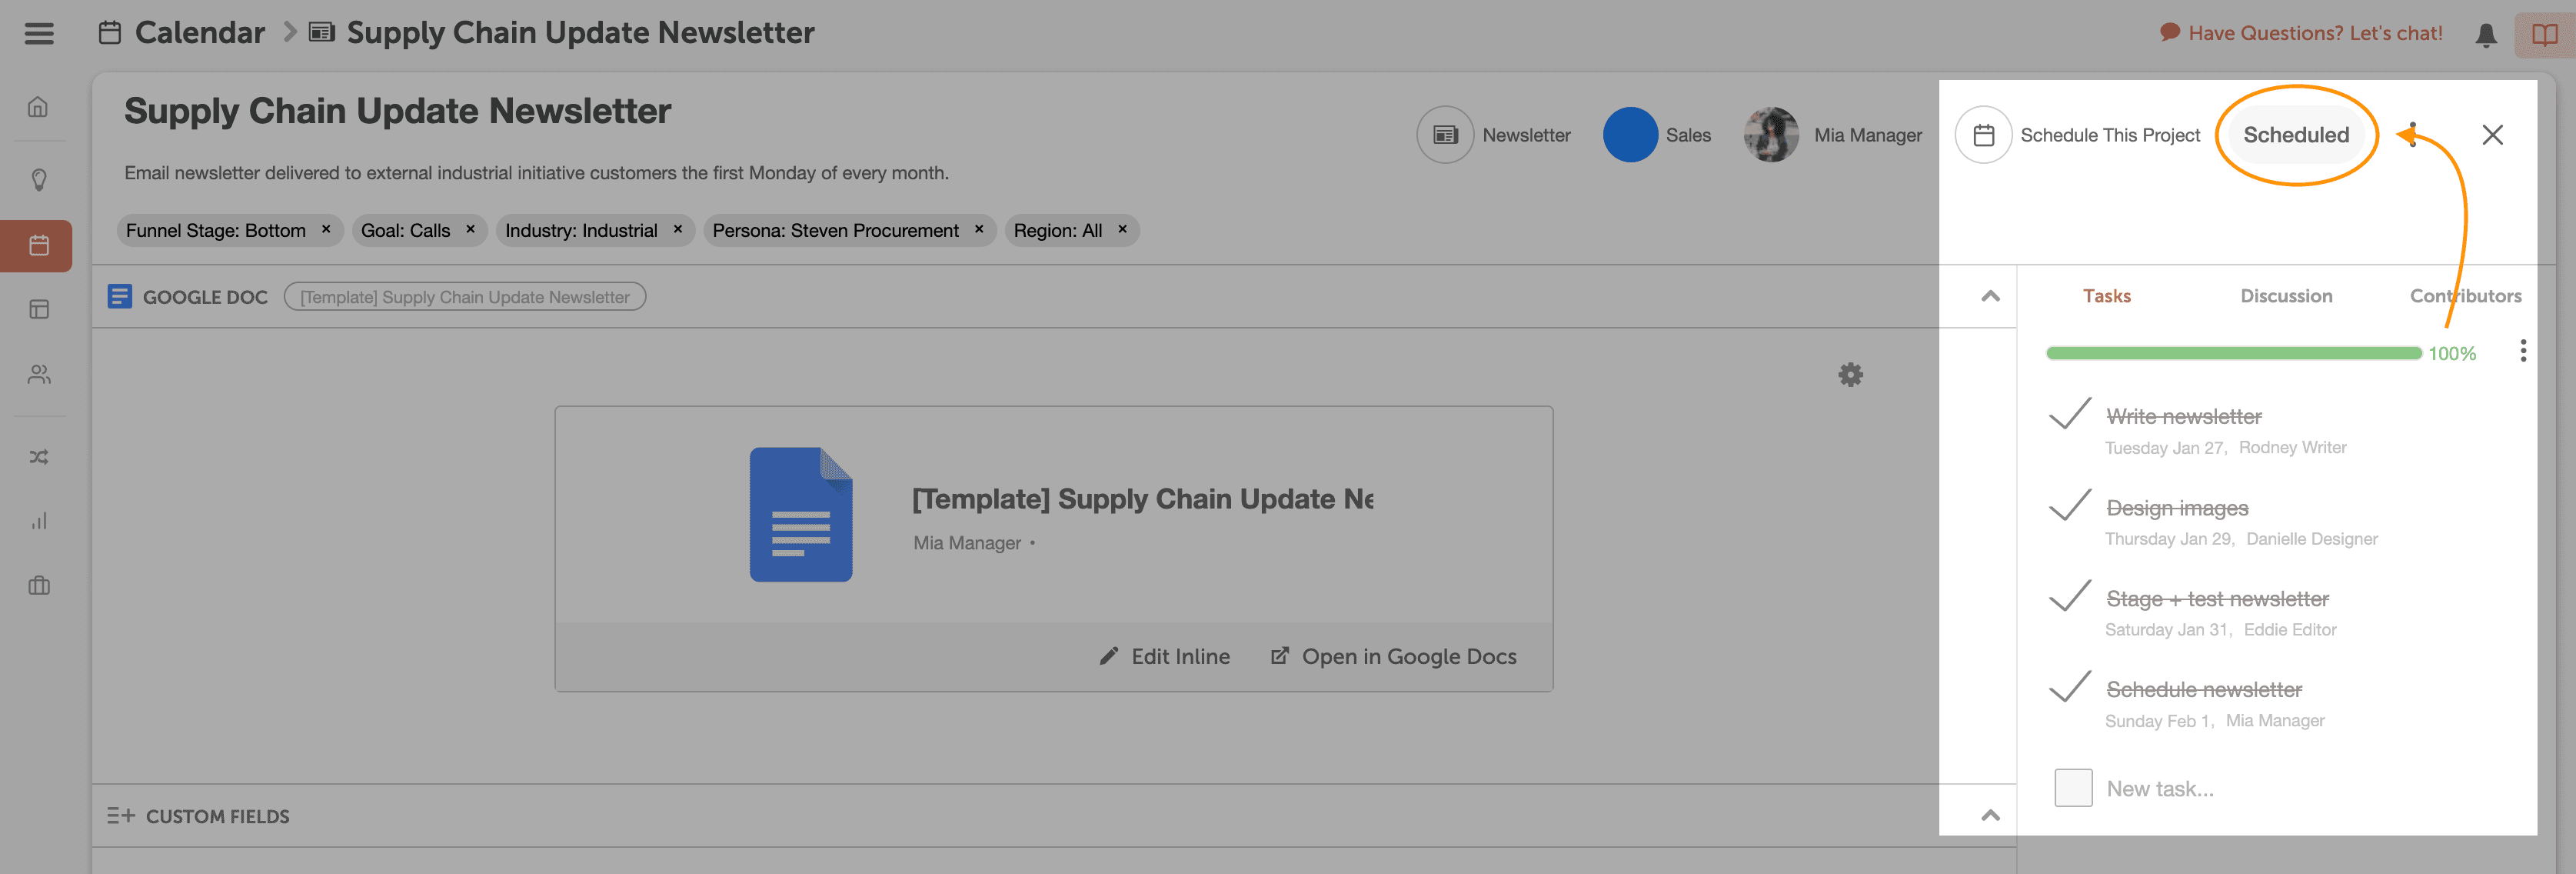
Step 3: Create a Reusable Task Template for Newsletter Projects.
You may have multiple people working on newsletters. You can make sure everyone knows what needs to be done and when by creating a reusable task template for newsletter projects.
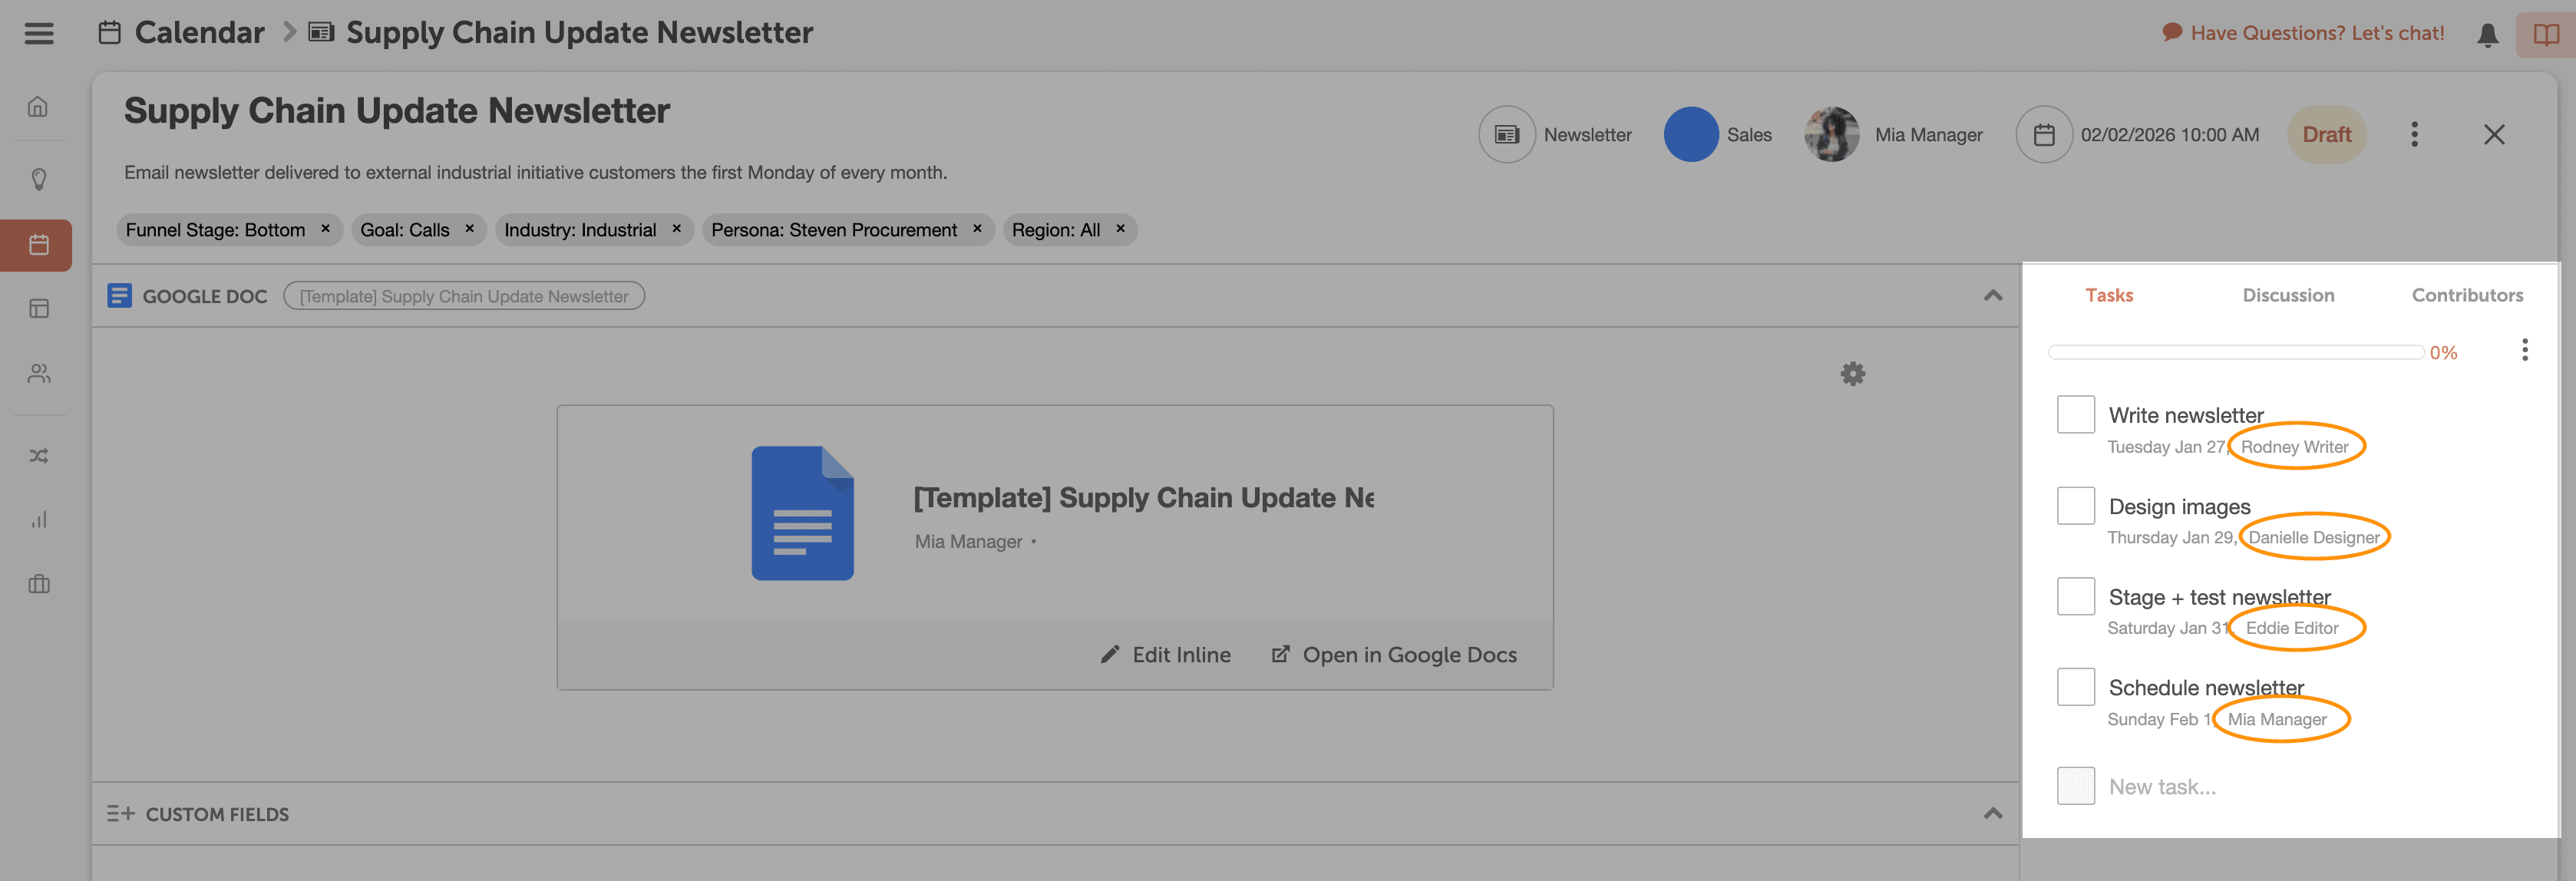
From copywriting to design and scheduling, create a reusable task template that outlines the tasks your team needs to complete to take a newsletter from idea to scheduled.
This keeps everyone on track to finish the newsletter before send date and ensures consistent quality.
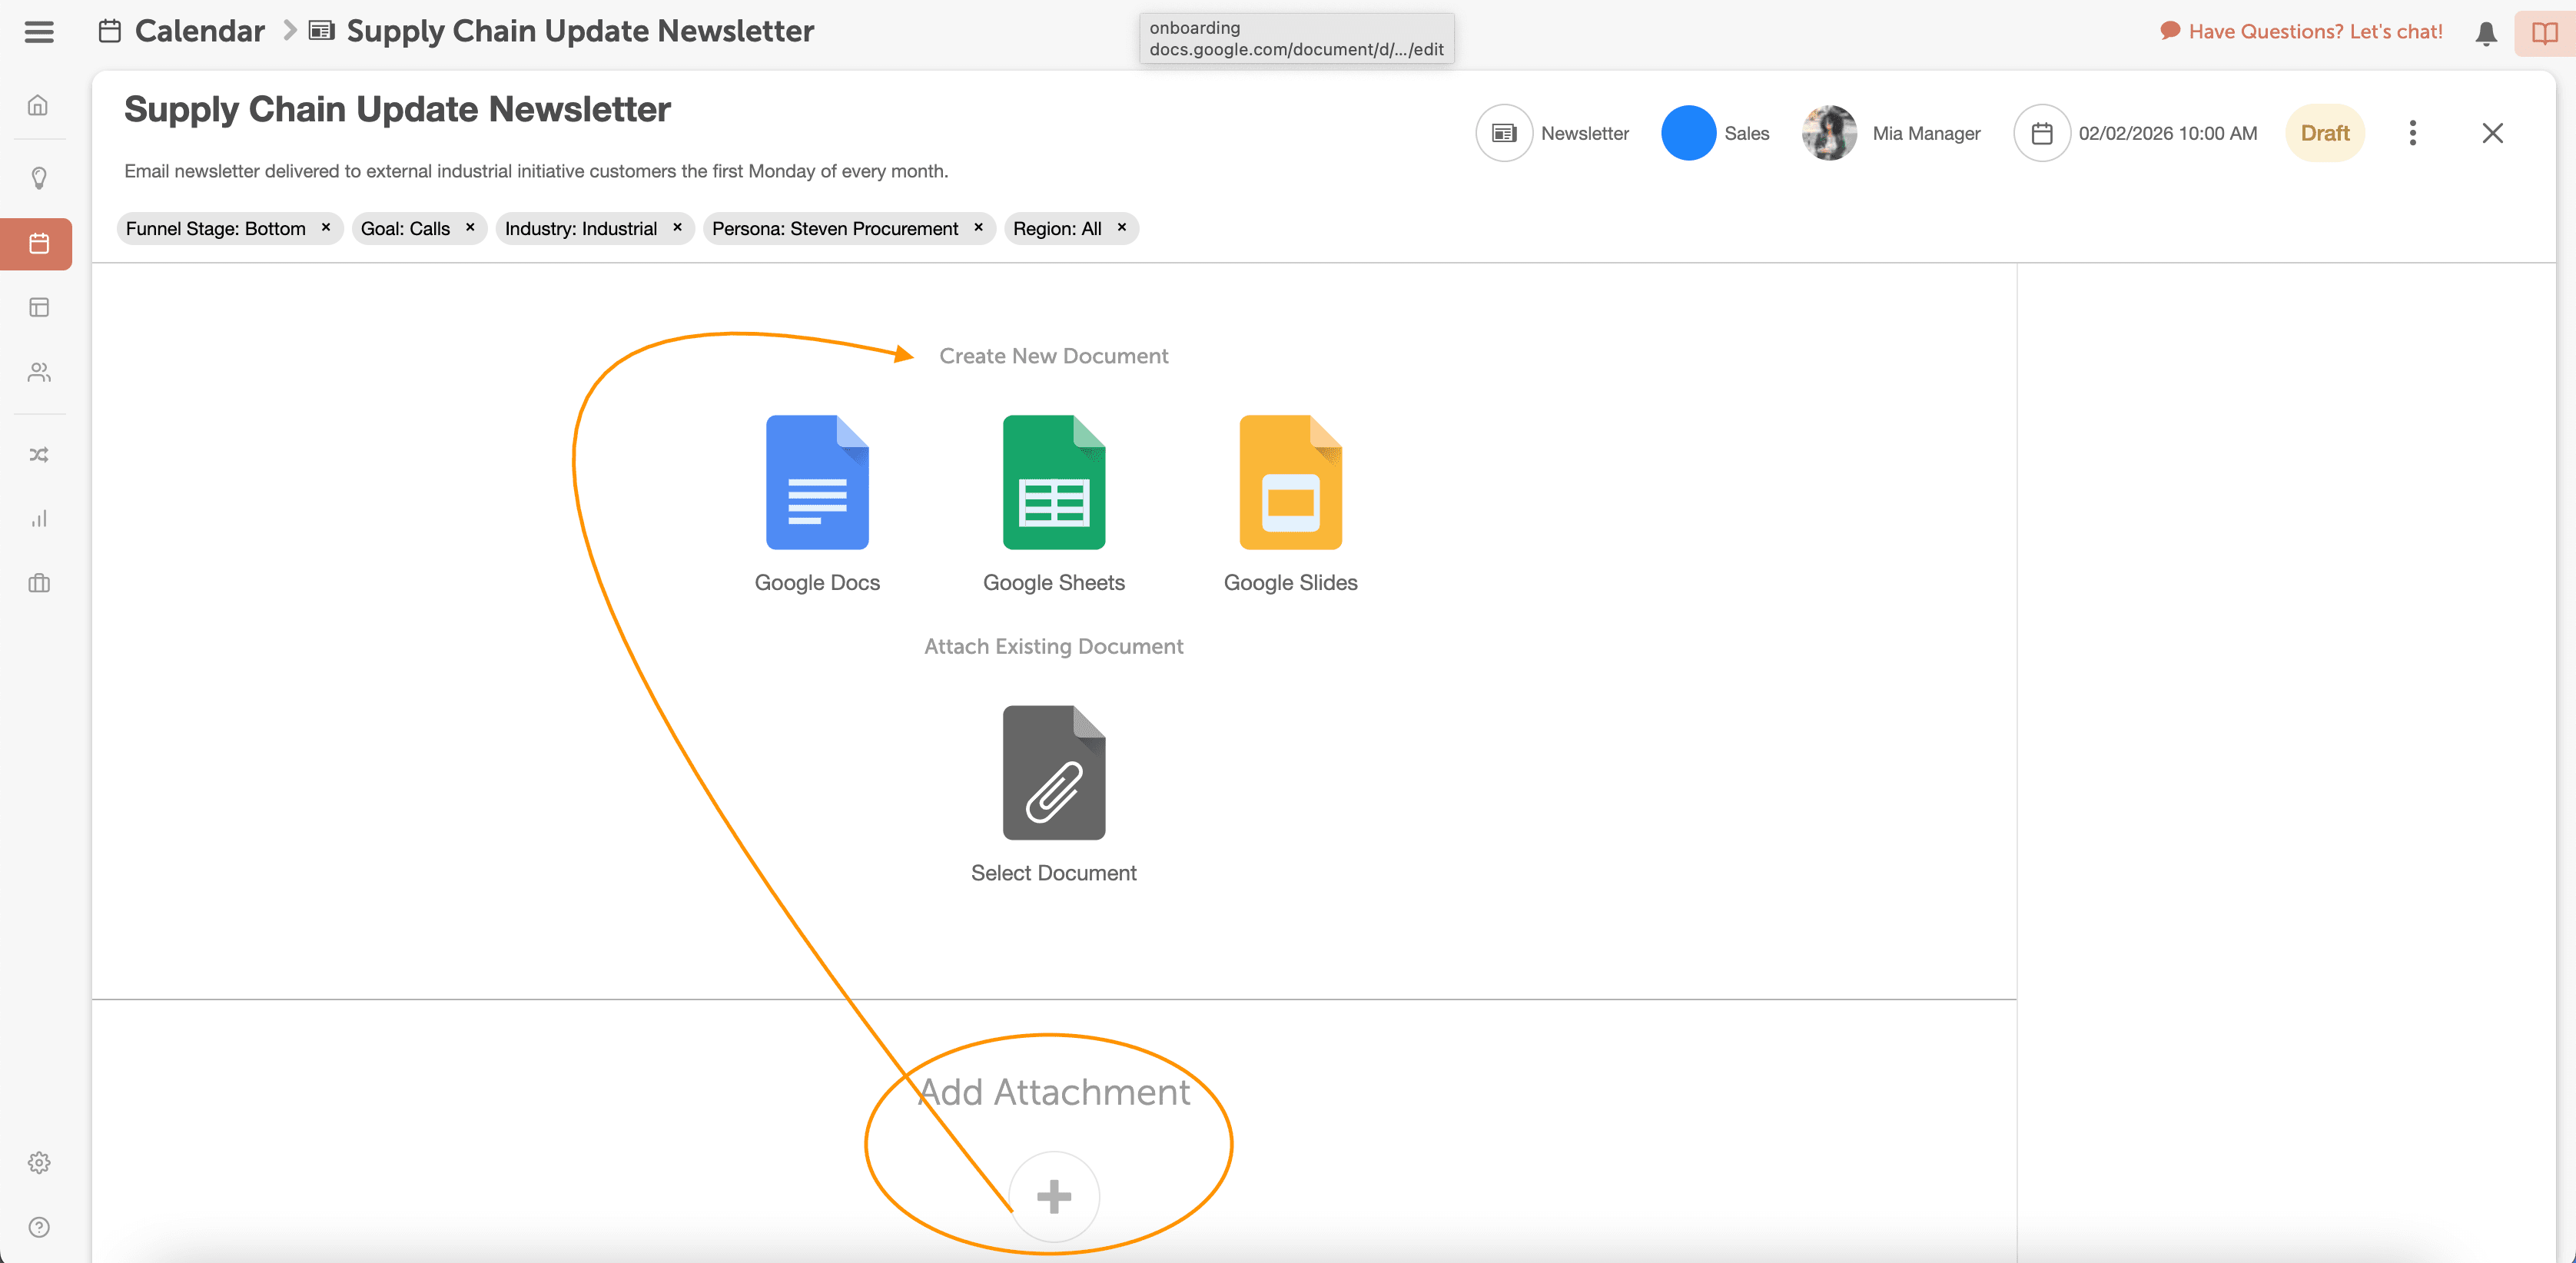
Step 4: Draft Your Newsletter Copy.
Use your CoSchedule Calendar’s built-in Text Editor or attach a Google Doc or Word Doc for collaborative writing.
Discuss and provide feedback directly within the project, keeping everything organized and relevant.
You can also ask Mia to help generate content for your newsletter.
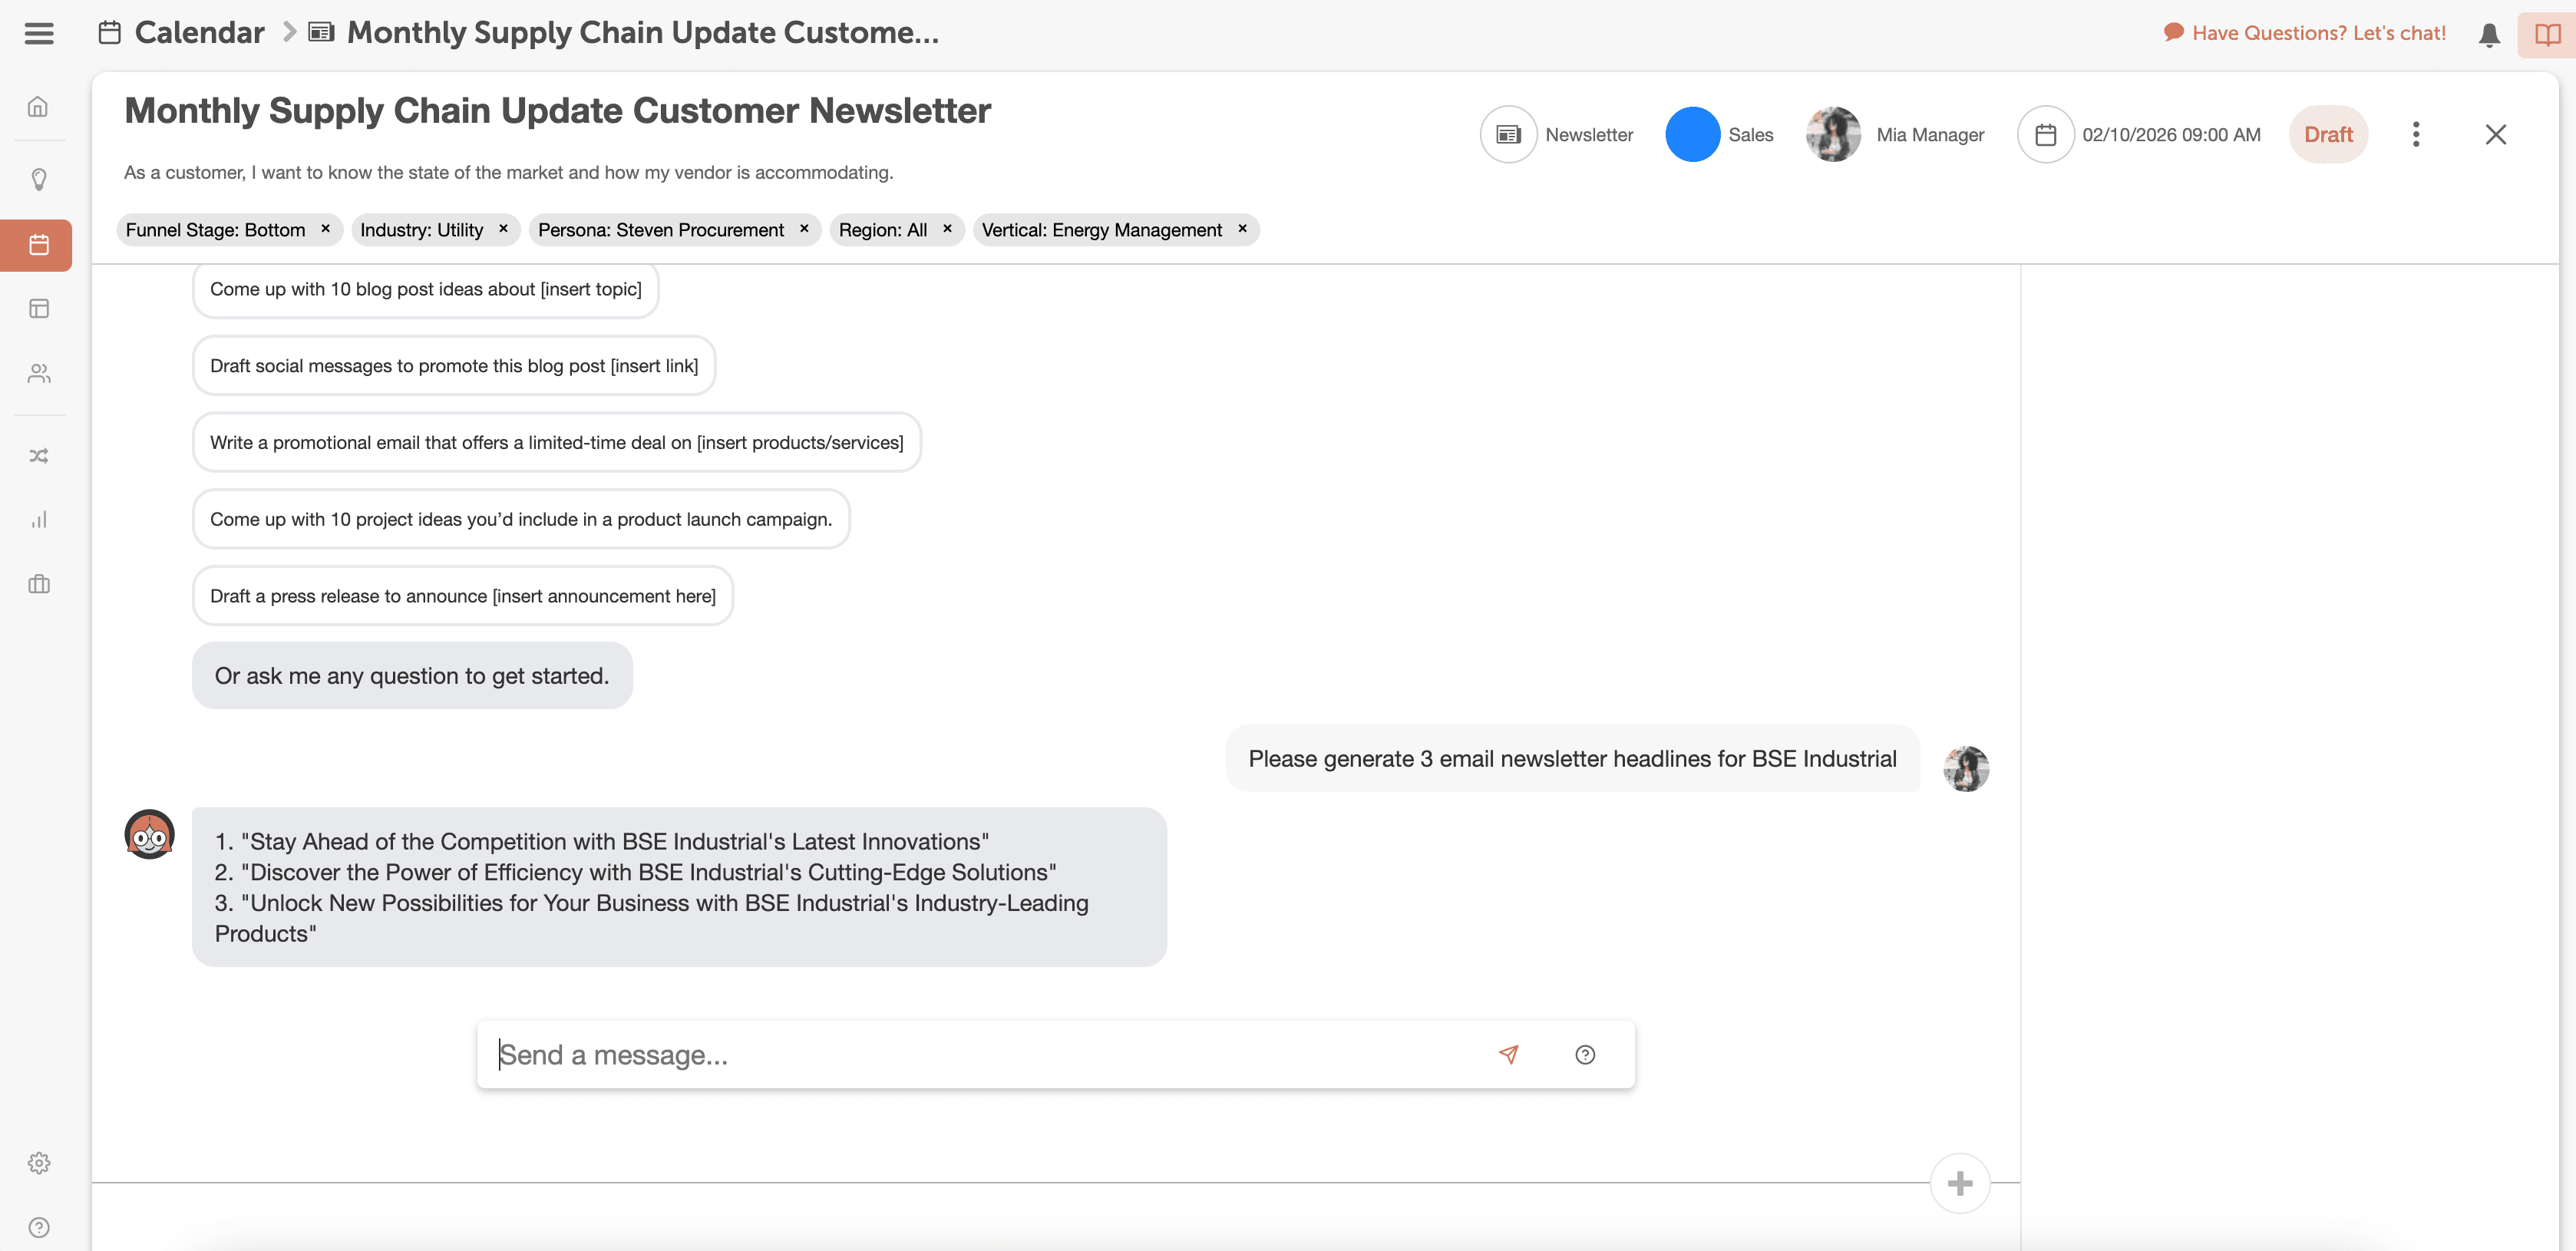
Mia can help you come up with subject line ideas, preview text ideas, copy for your newsletter, & more.
Step 5: Optimize Subject Lines for Higher Click-Through Rates.
Leverage your CoSchedule Calendar’s Email Subject Line Tester to fine-tune your subject line for click-throughs.
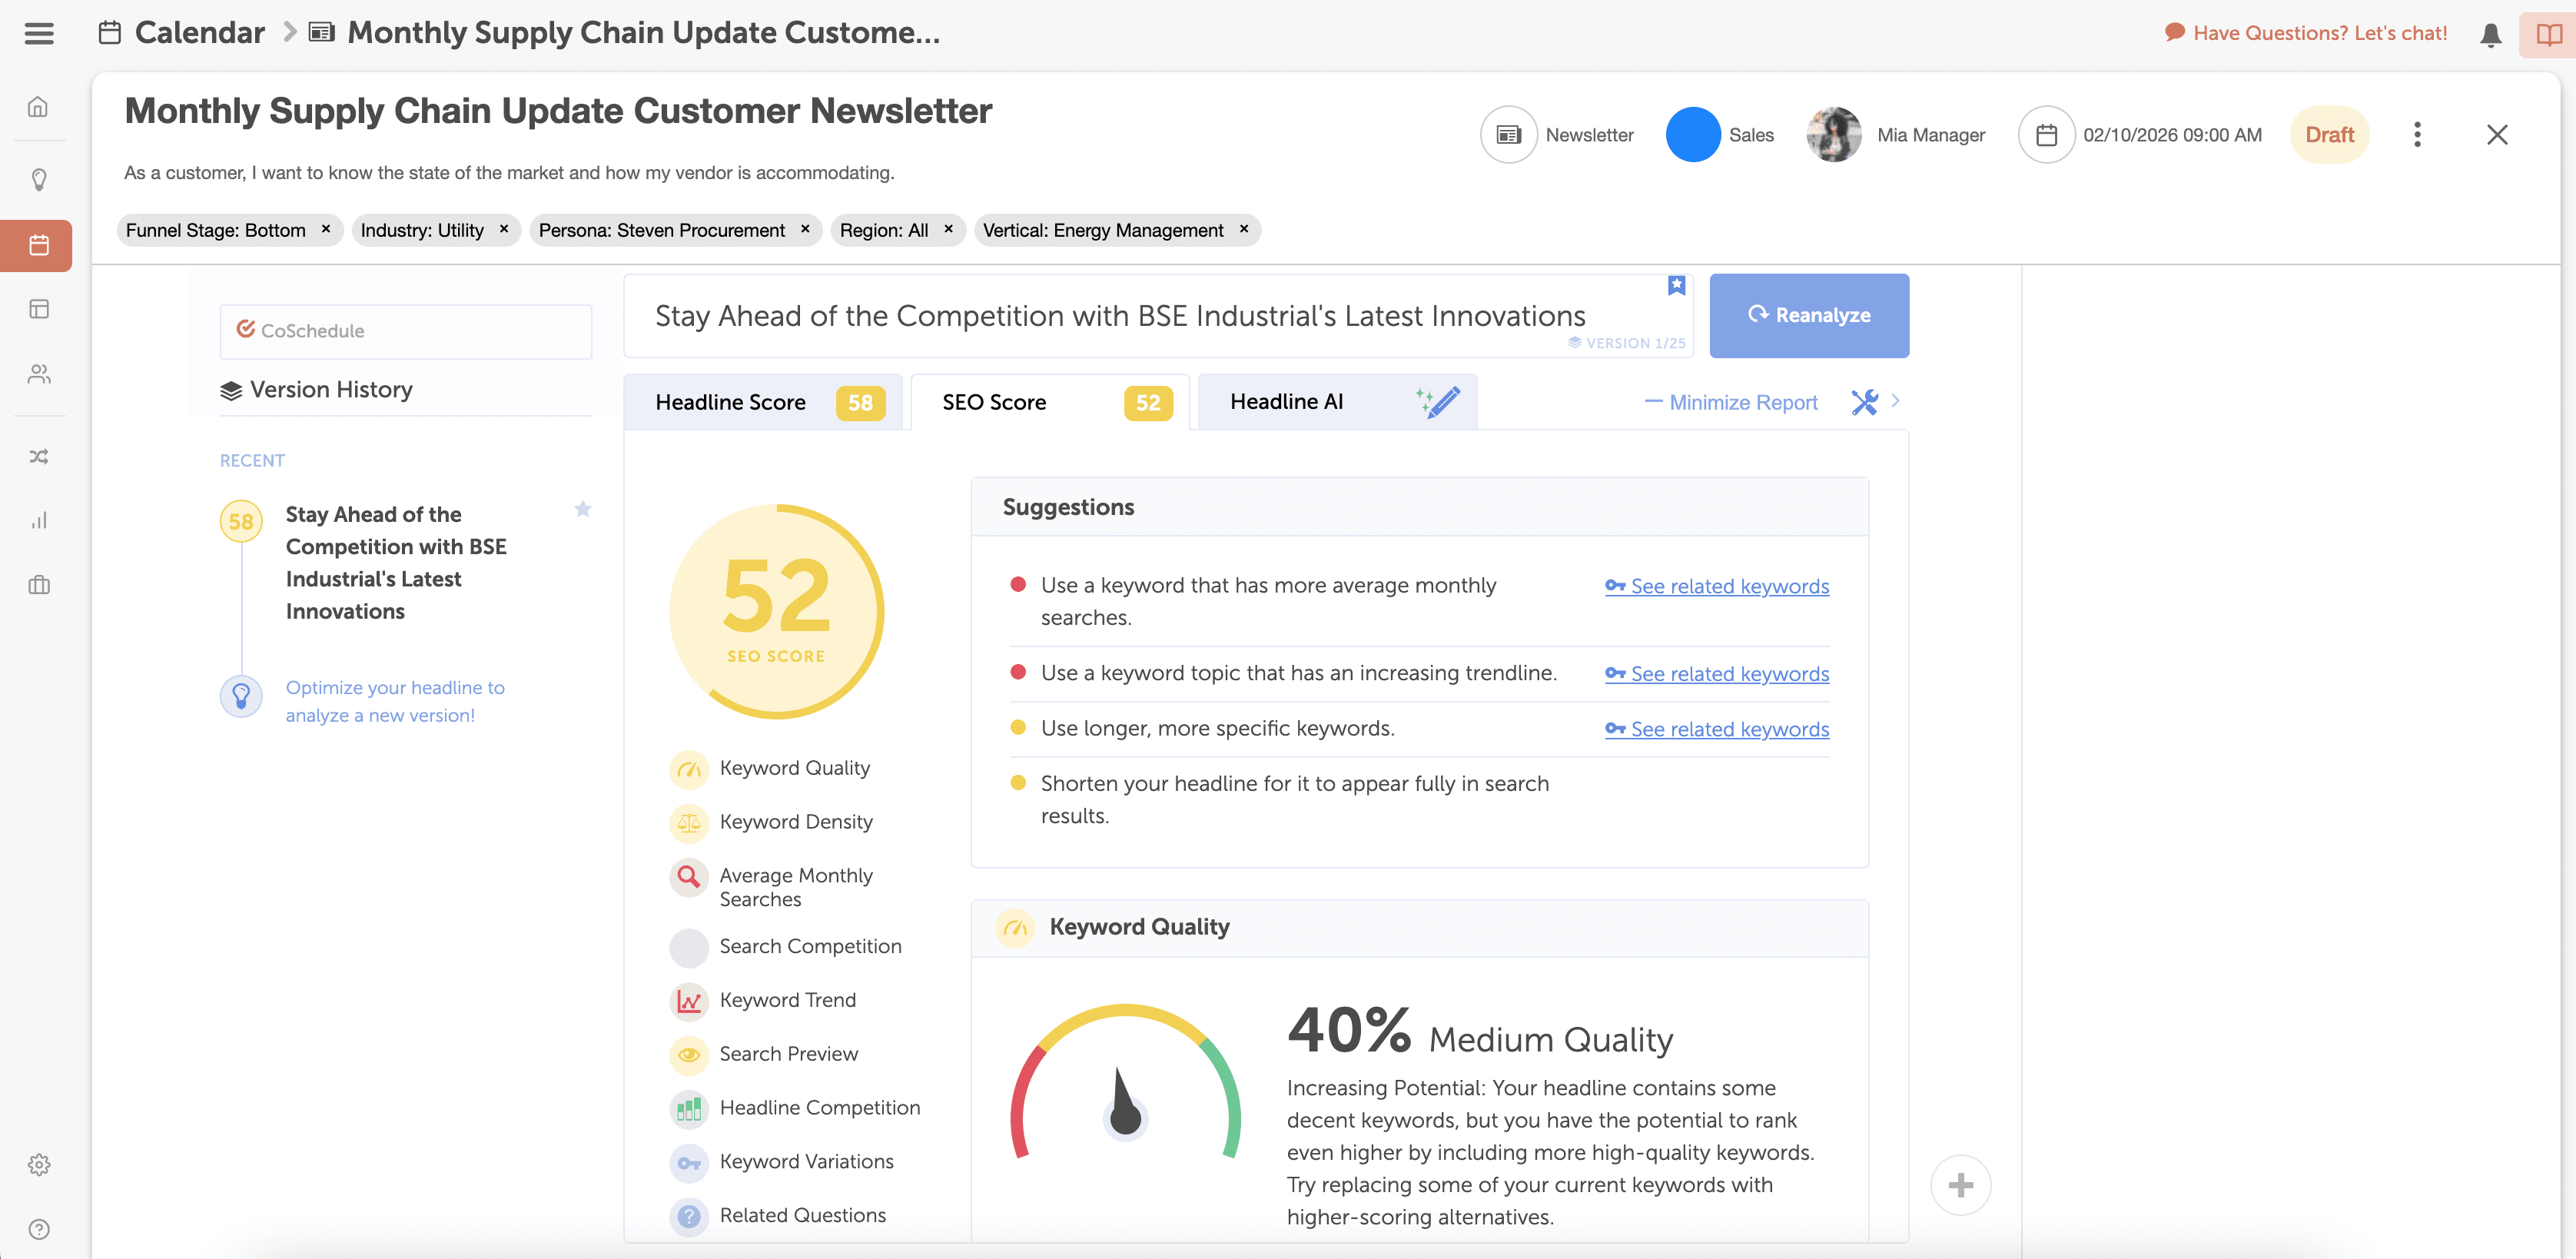
Make any changes to perfect your subject line before you schedule your newsletter.
Step 6: Final Newsletter Confirmation & Team Communication.
Conduct a thorough quality assurance check and communicate with your team.
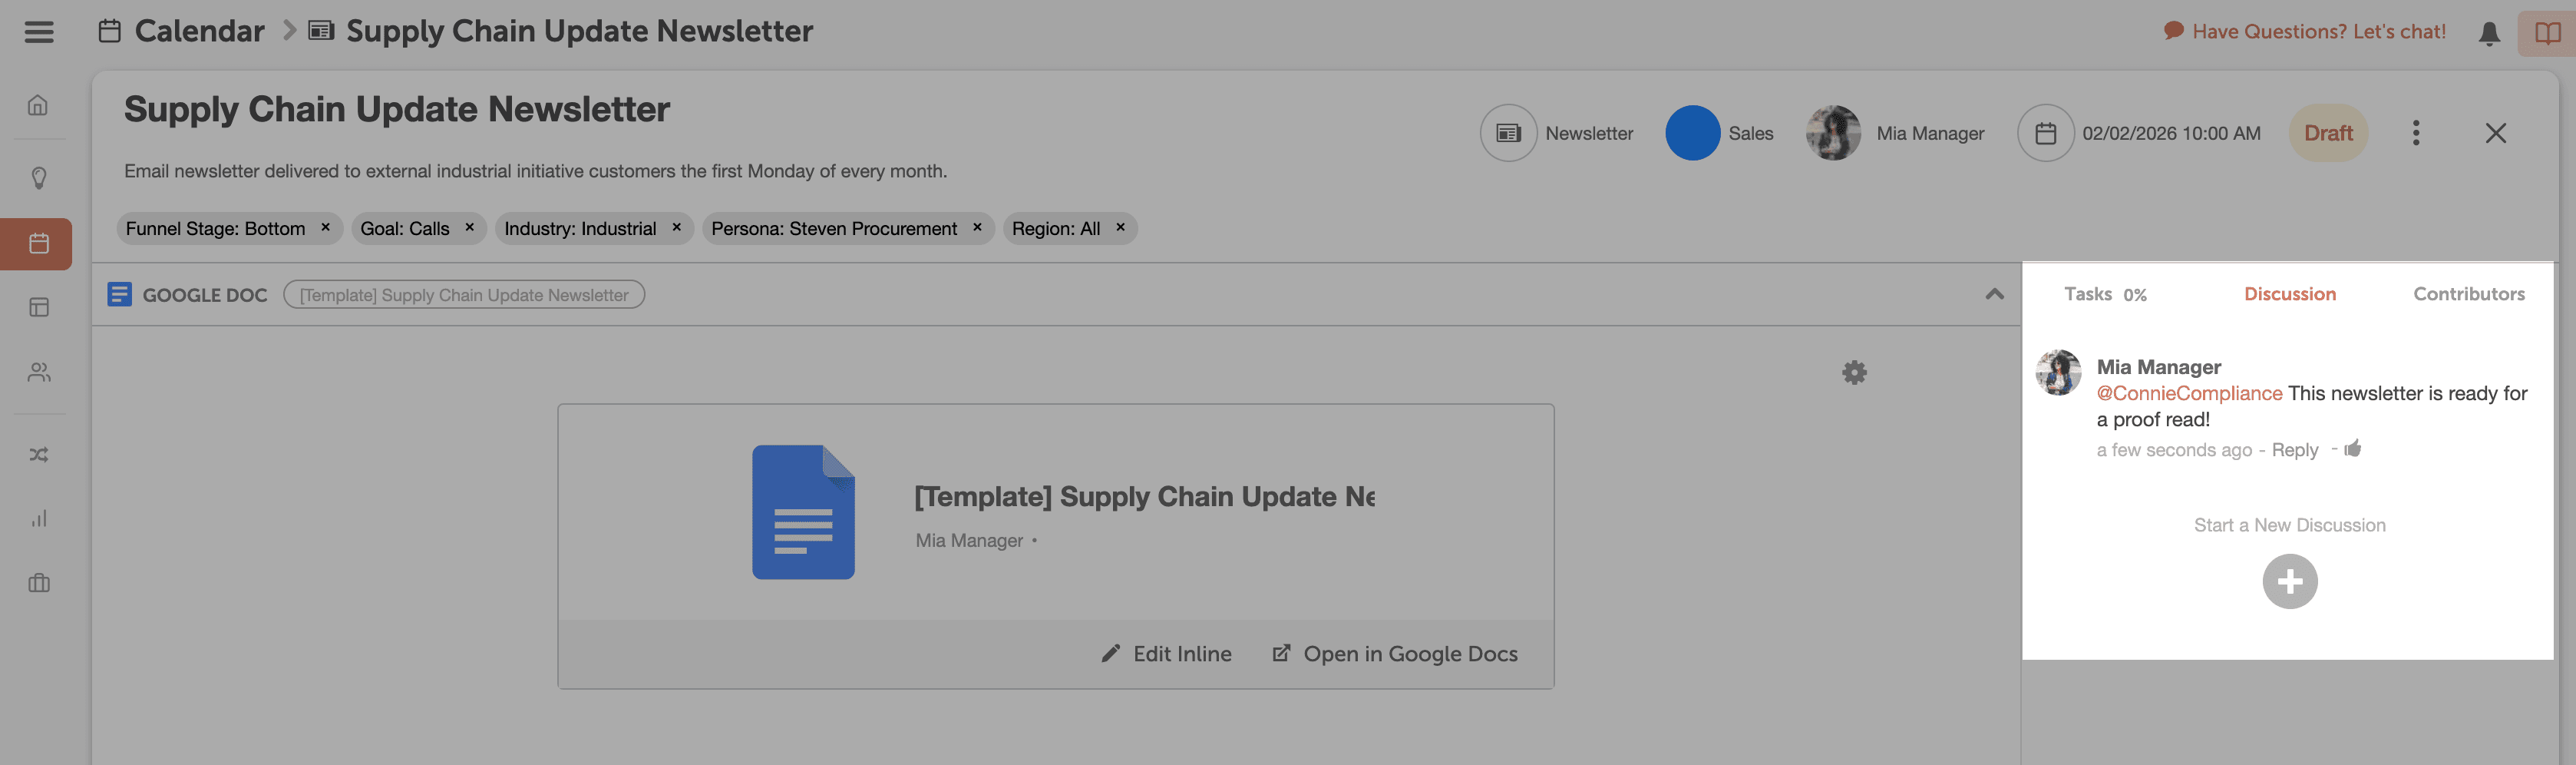
CoSchedule Calendar products keep everyone connected, facilitating efficient collaboration throughout the process.
Step 7: Schedule and Send With Confidence.
CoSchedule Calendar products simplifies scheduling, making it a breeze to send out your newsletters at the perfect time.
No more last-minute rushes or technical difficulties.
Elevate your newsletters, save time, and achieve outstanding results.
Get started today and experience the power of your CoSchedule Calendar.
